




The National Testing Agency (NTA) conducted the CUET PG 2026 Physics (SCQP24) examination on March 24, 2026, during Shift 3 from 04:00 PM to 05:30 PM.
Students who appeared for the exam reported that the overall difficulty level of the paper was moderate. CUET PG 2026 Physics Question Paper with Solutions PDF is available here for download. The marking scheme is +4 for correct answers and -1 for wrong answers, totaling 300 marks.
CUET PG 2026 Physics Question Paper with Solutions PDF
| CUET PG 2026 Physics Question Paper | Download PDF | Check Solutions |
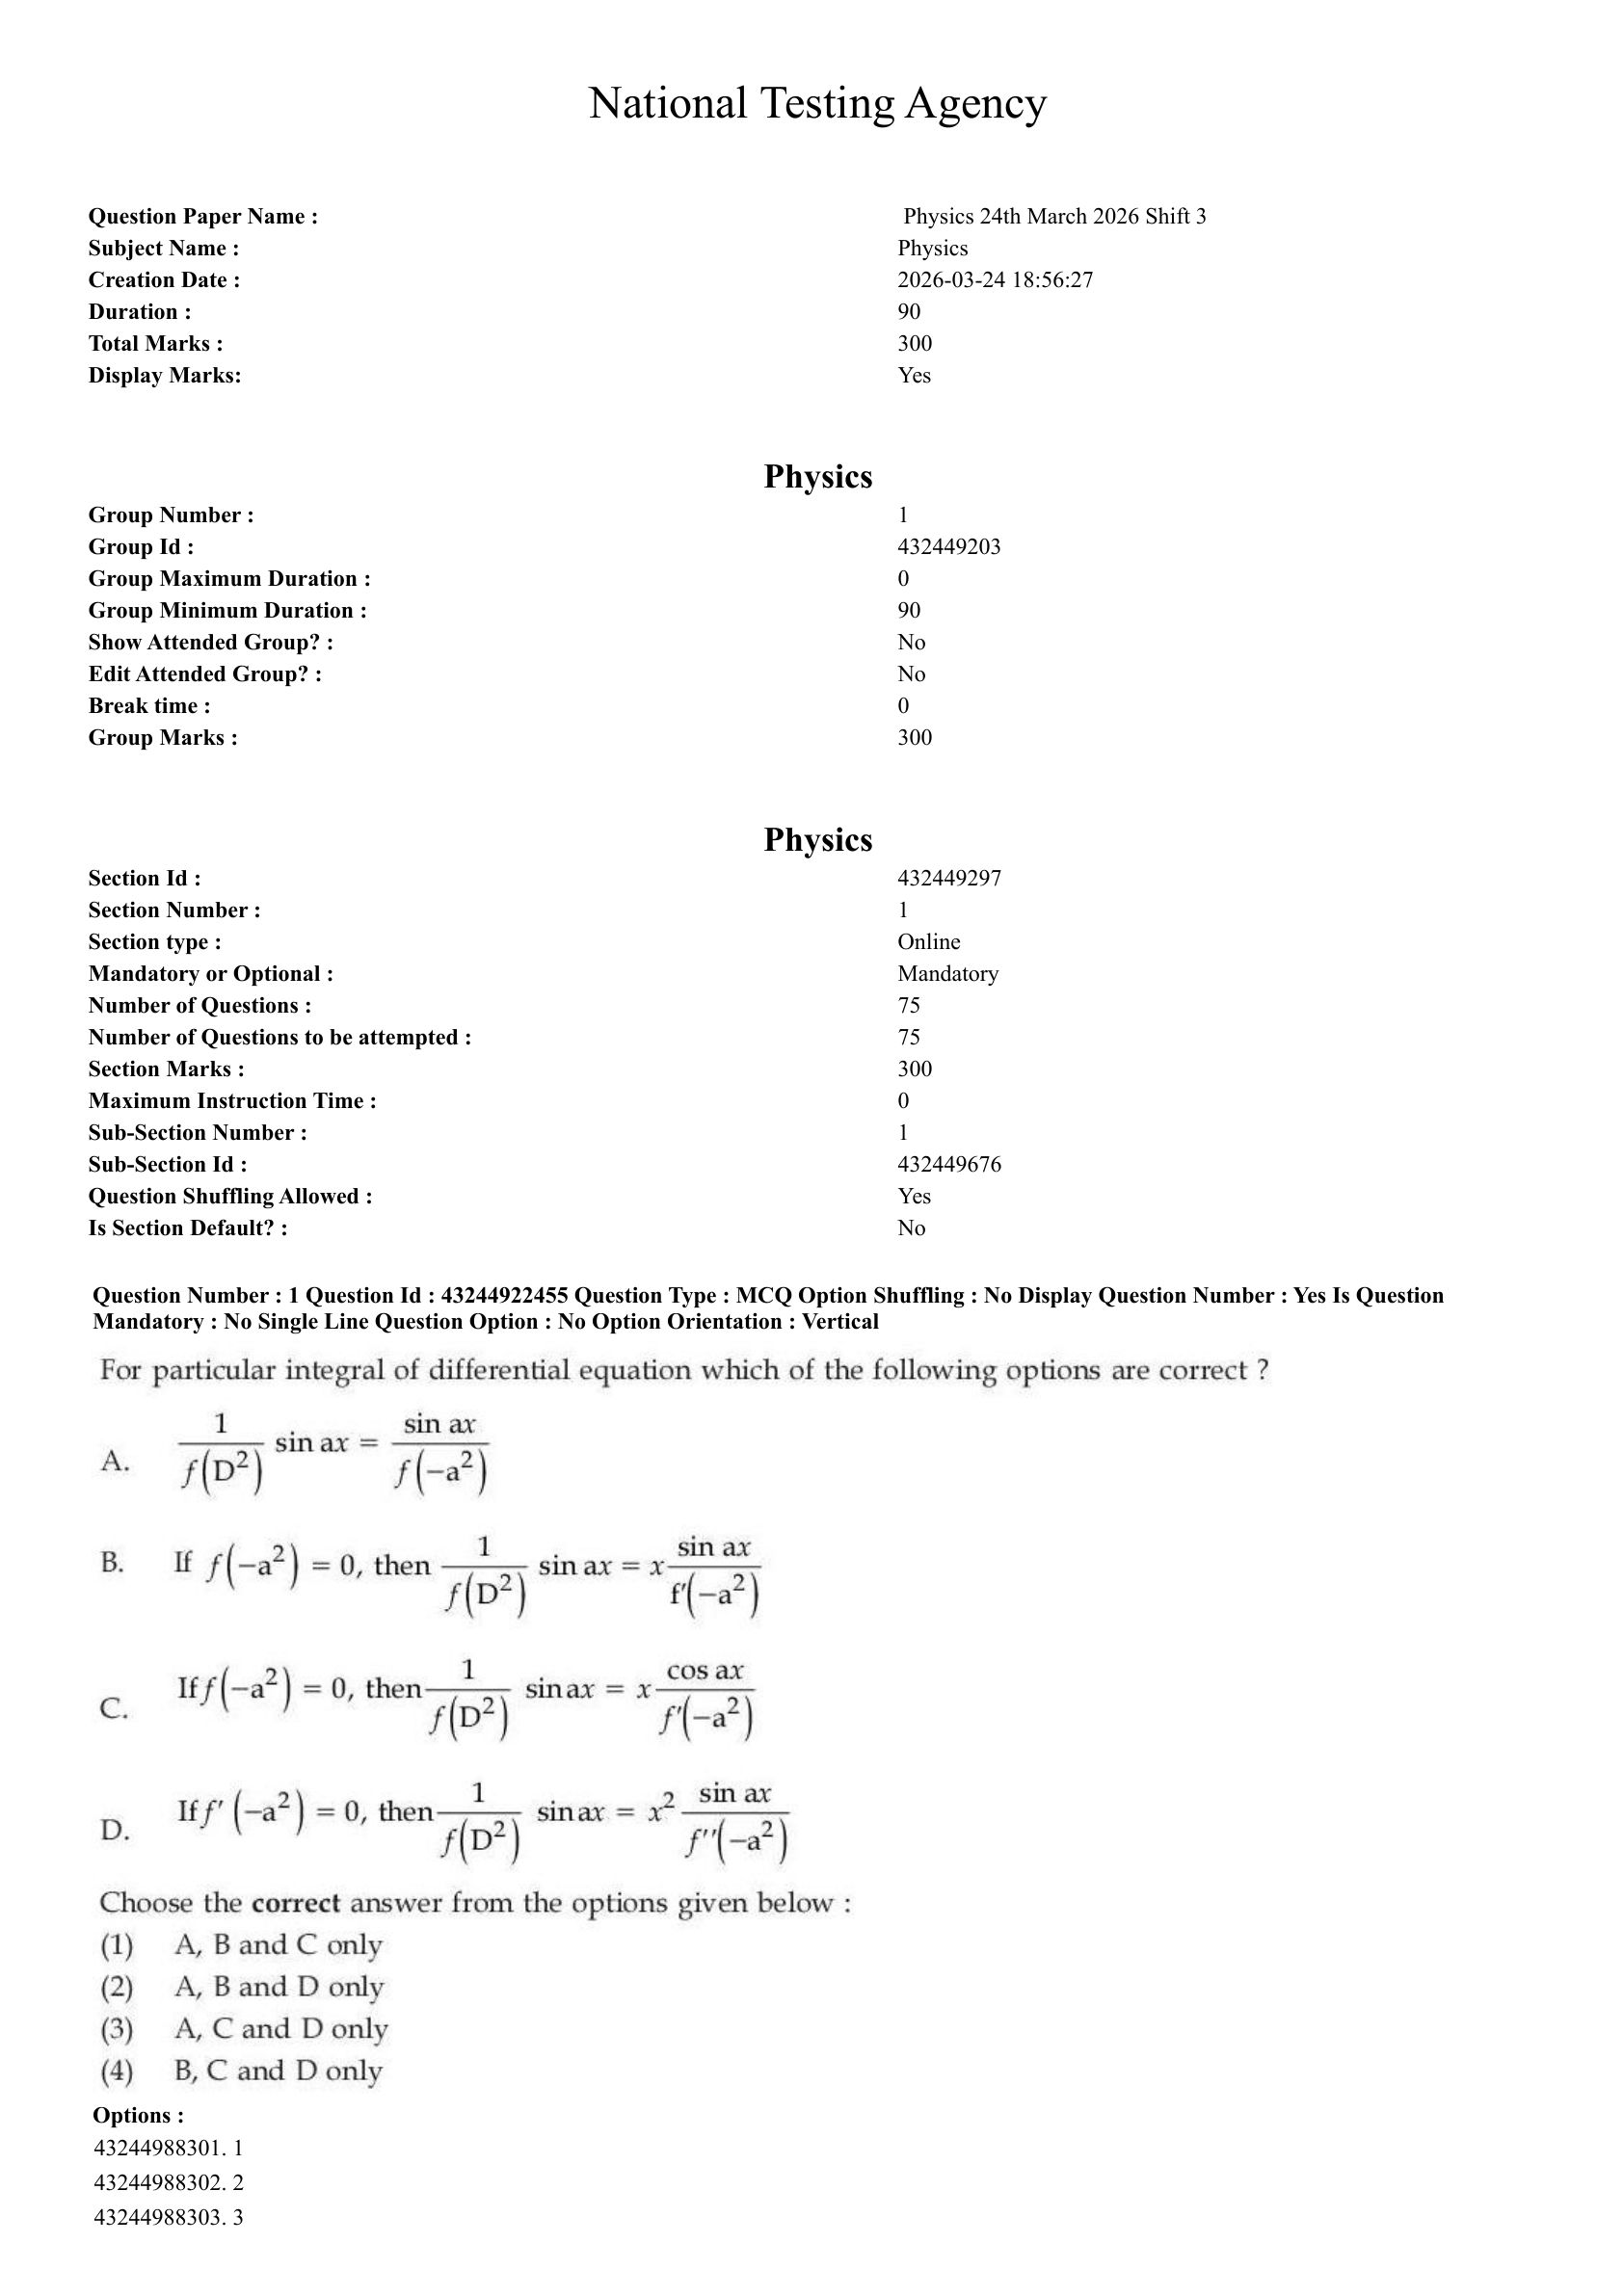
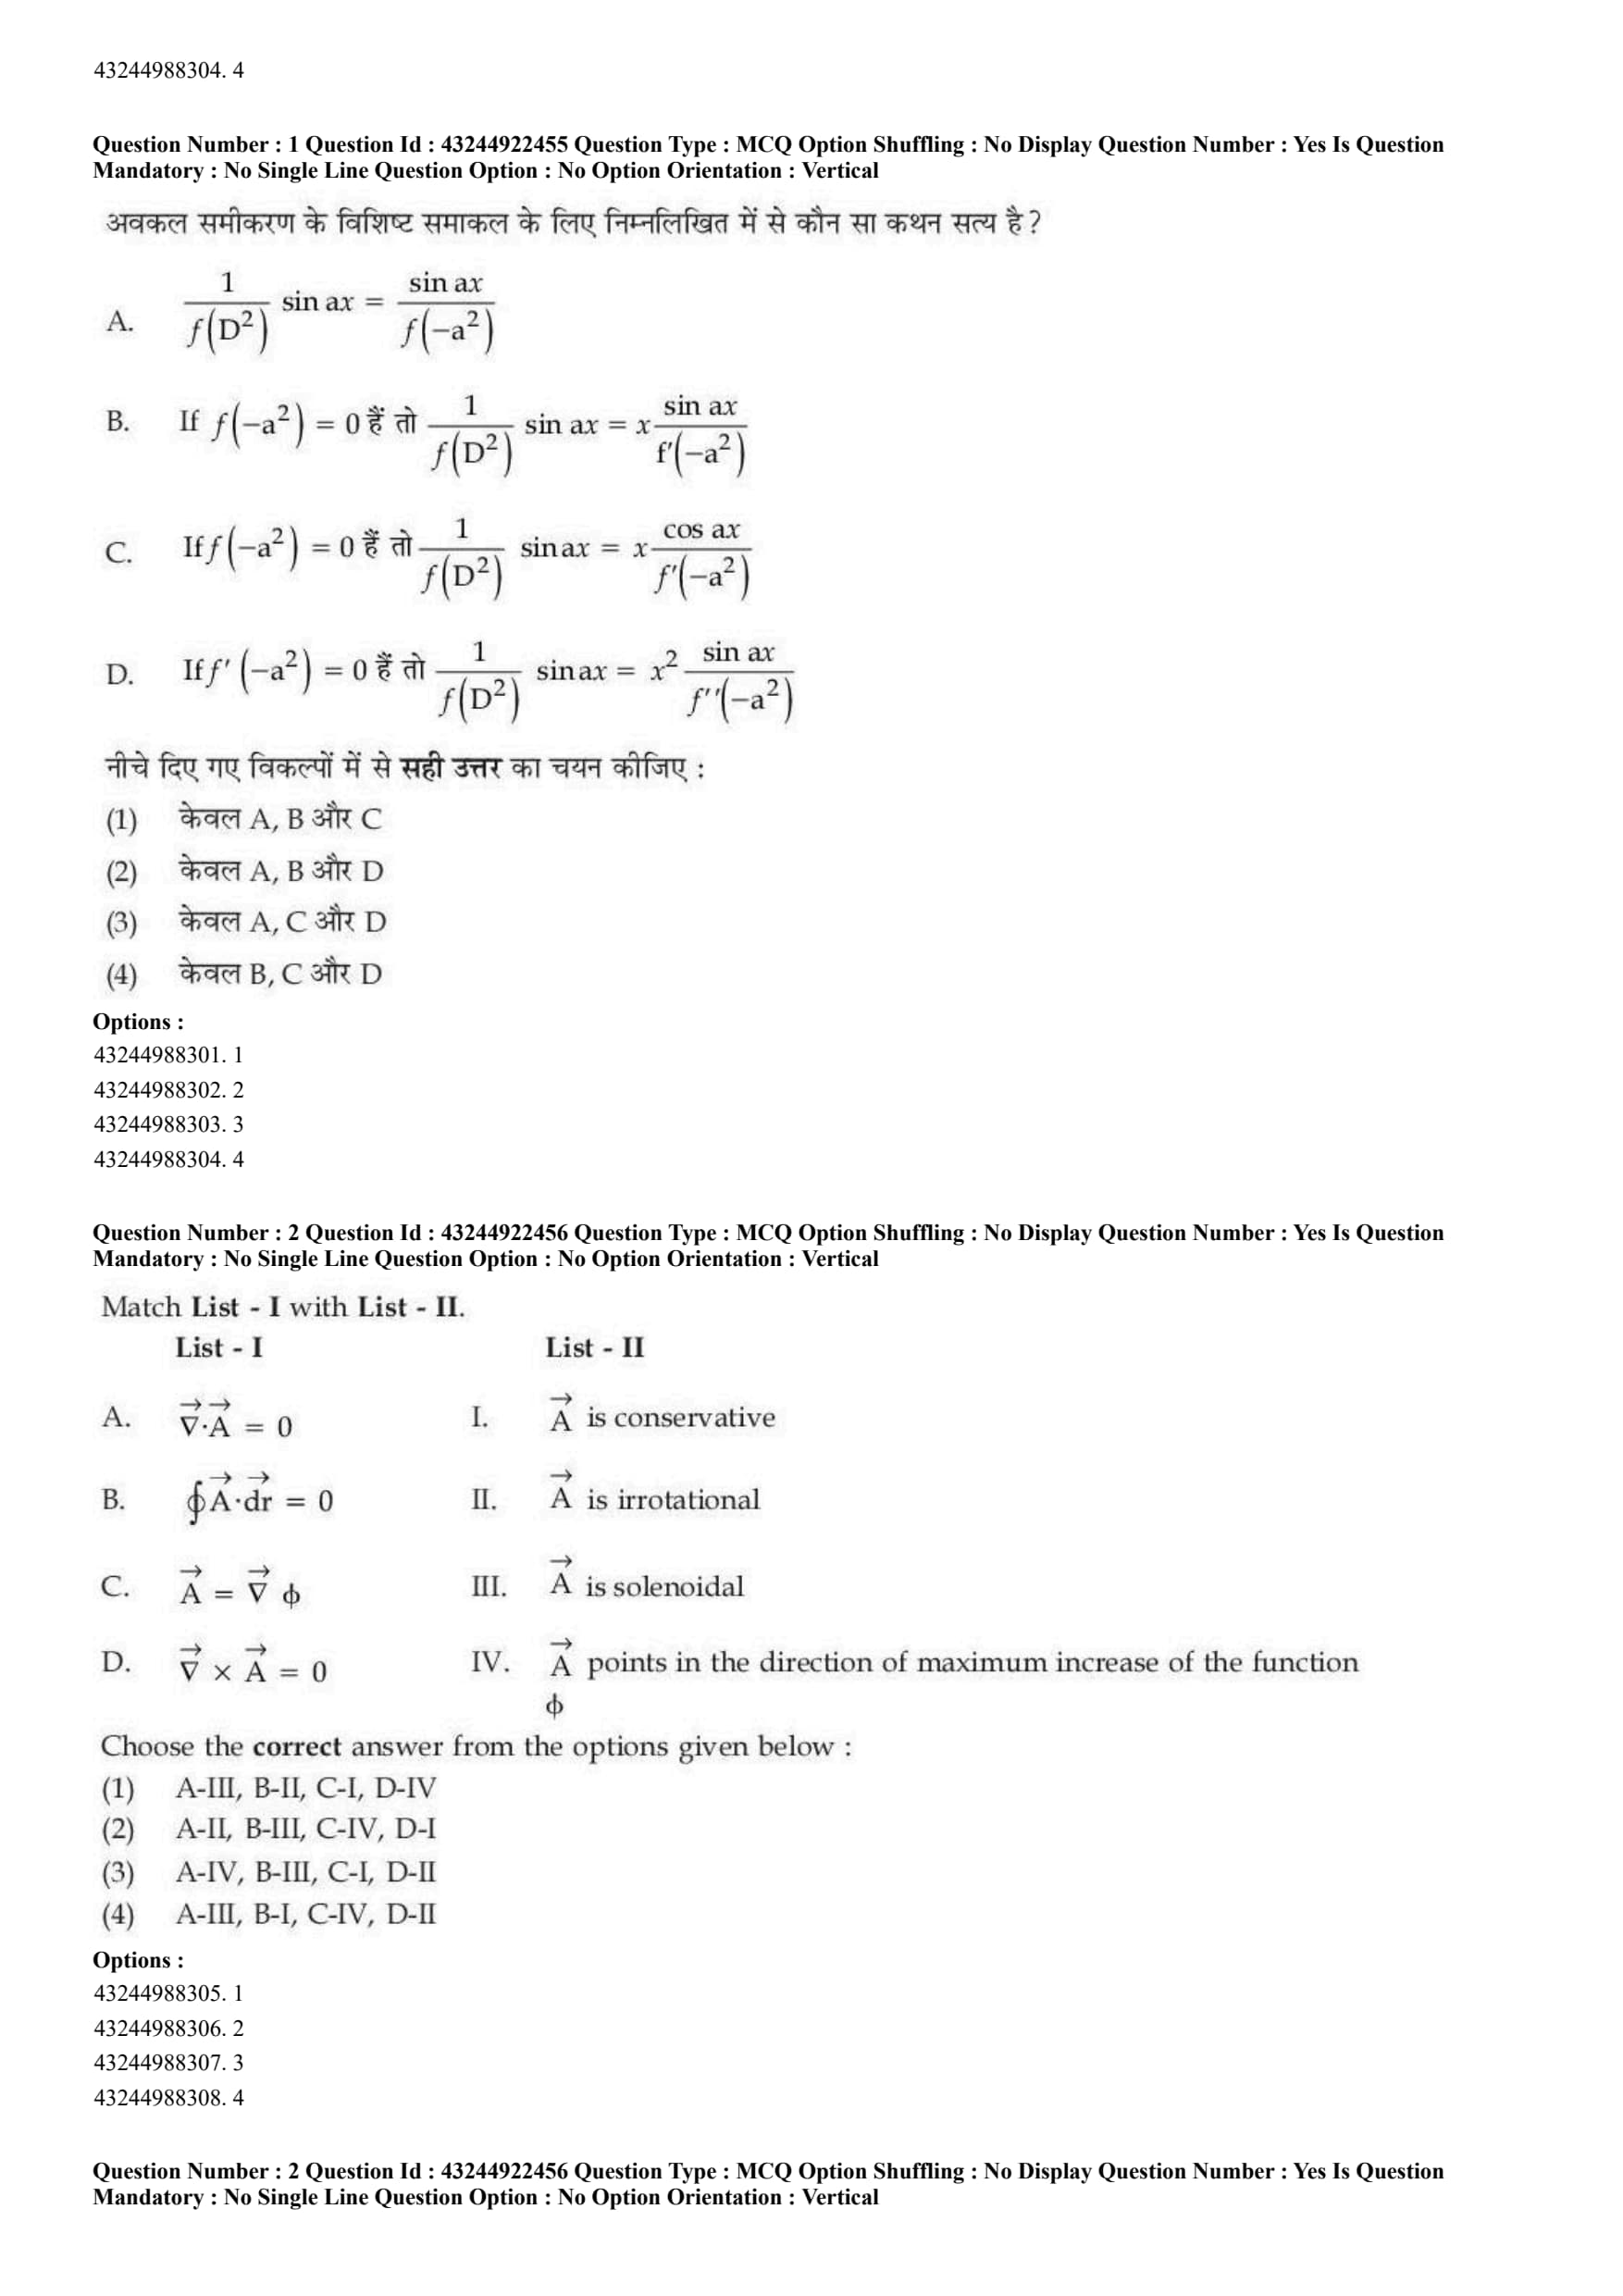








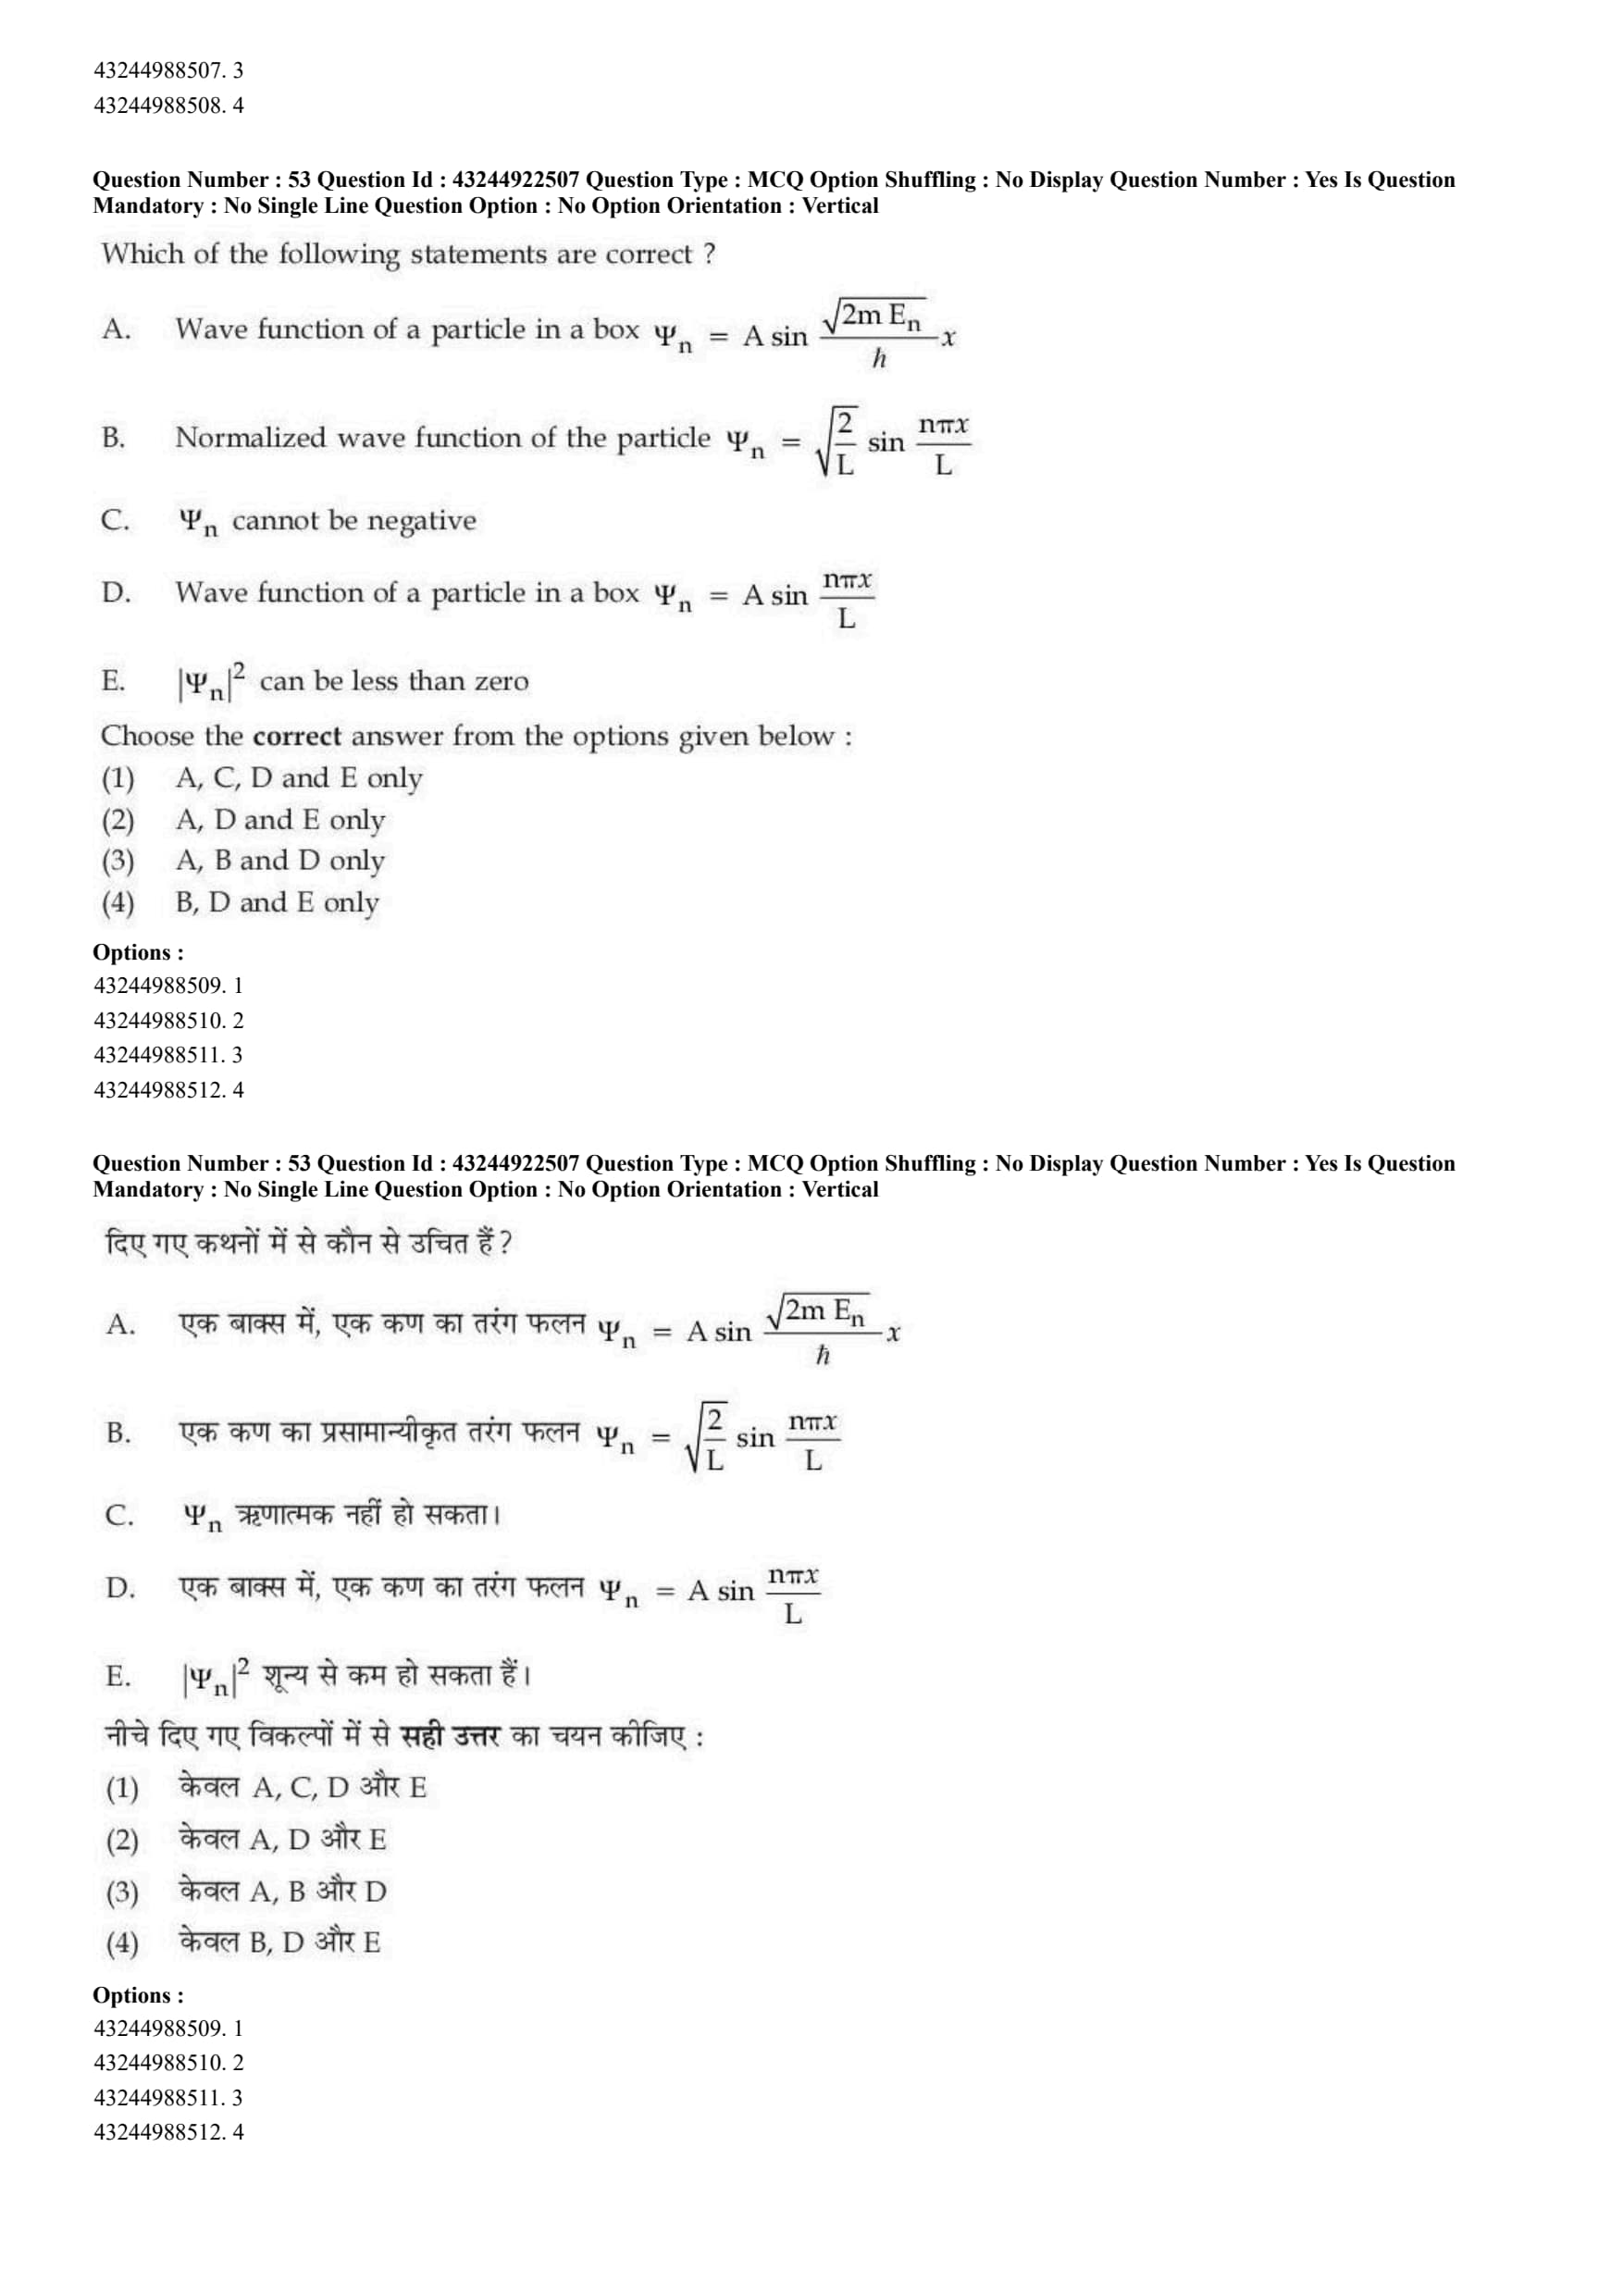
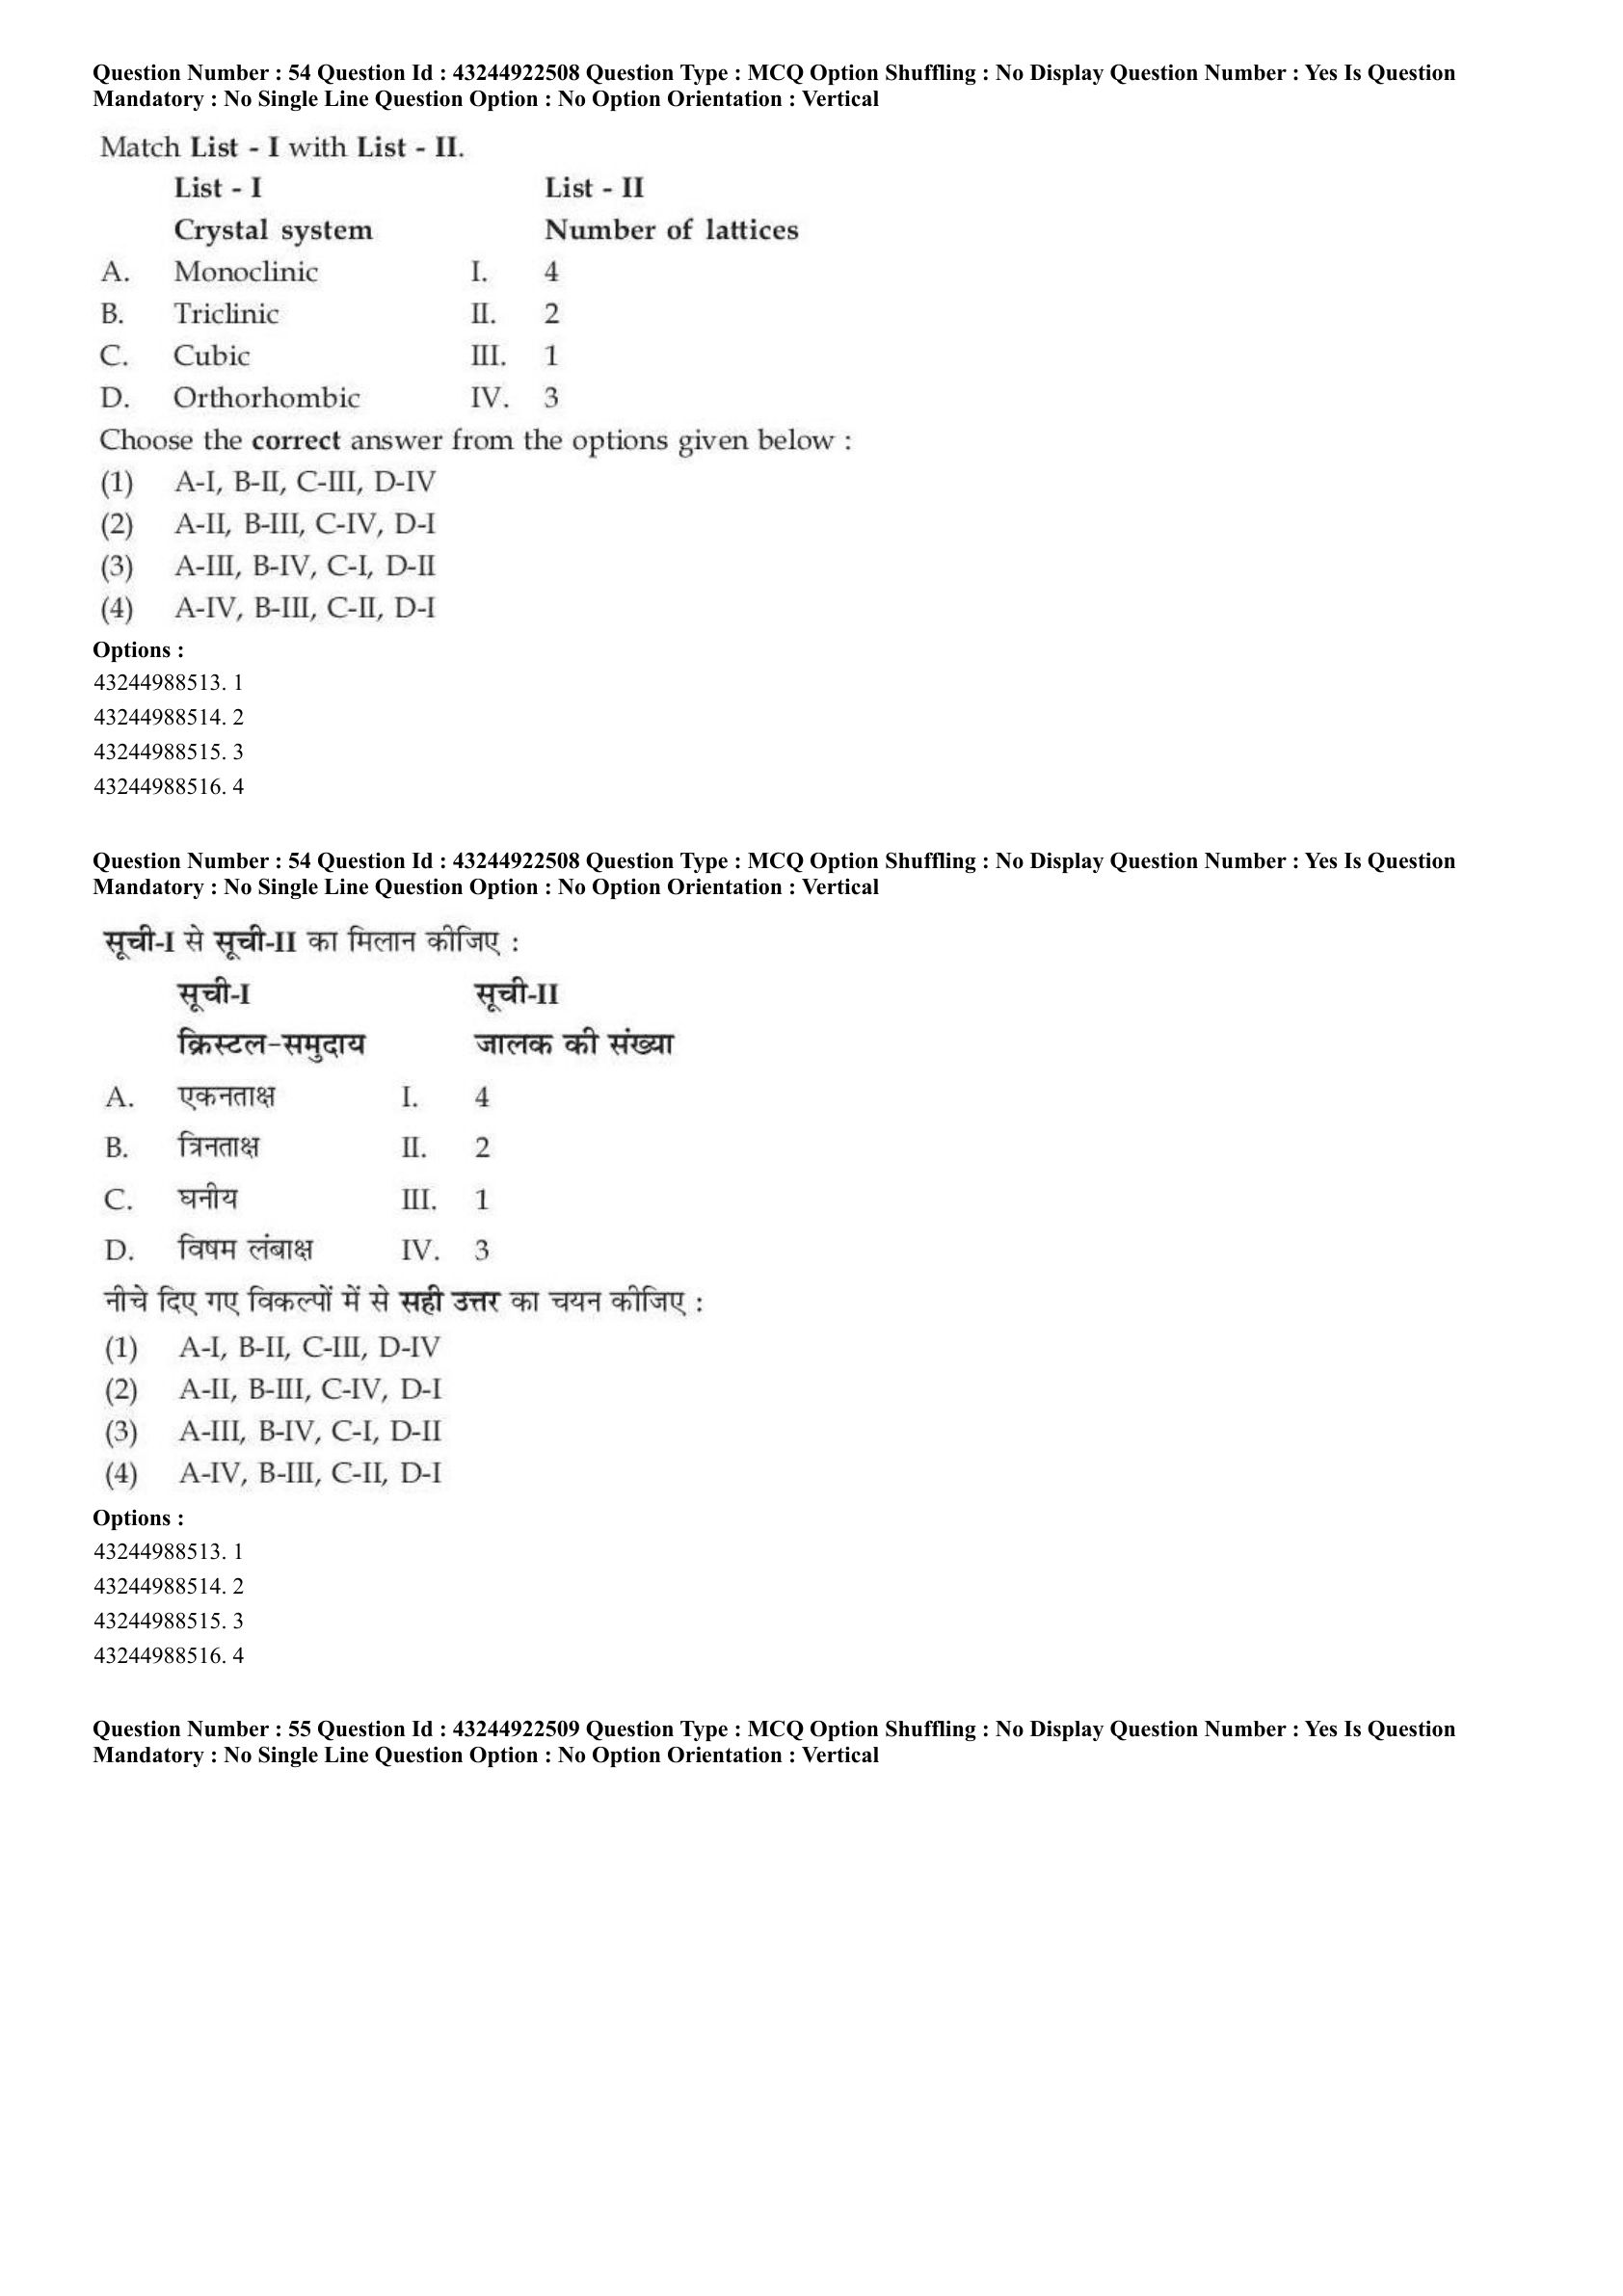
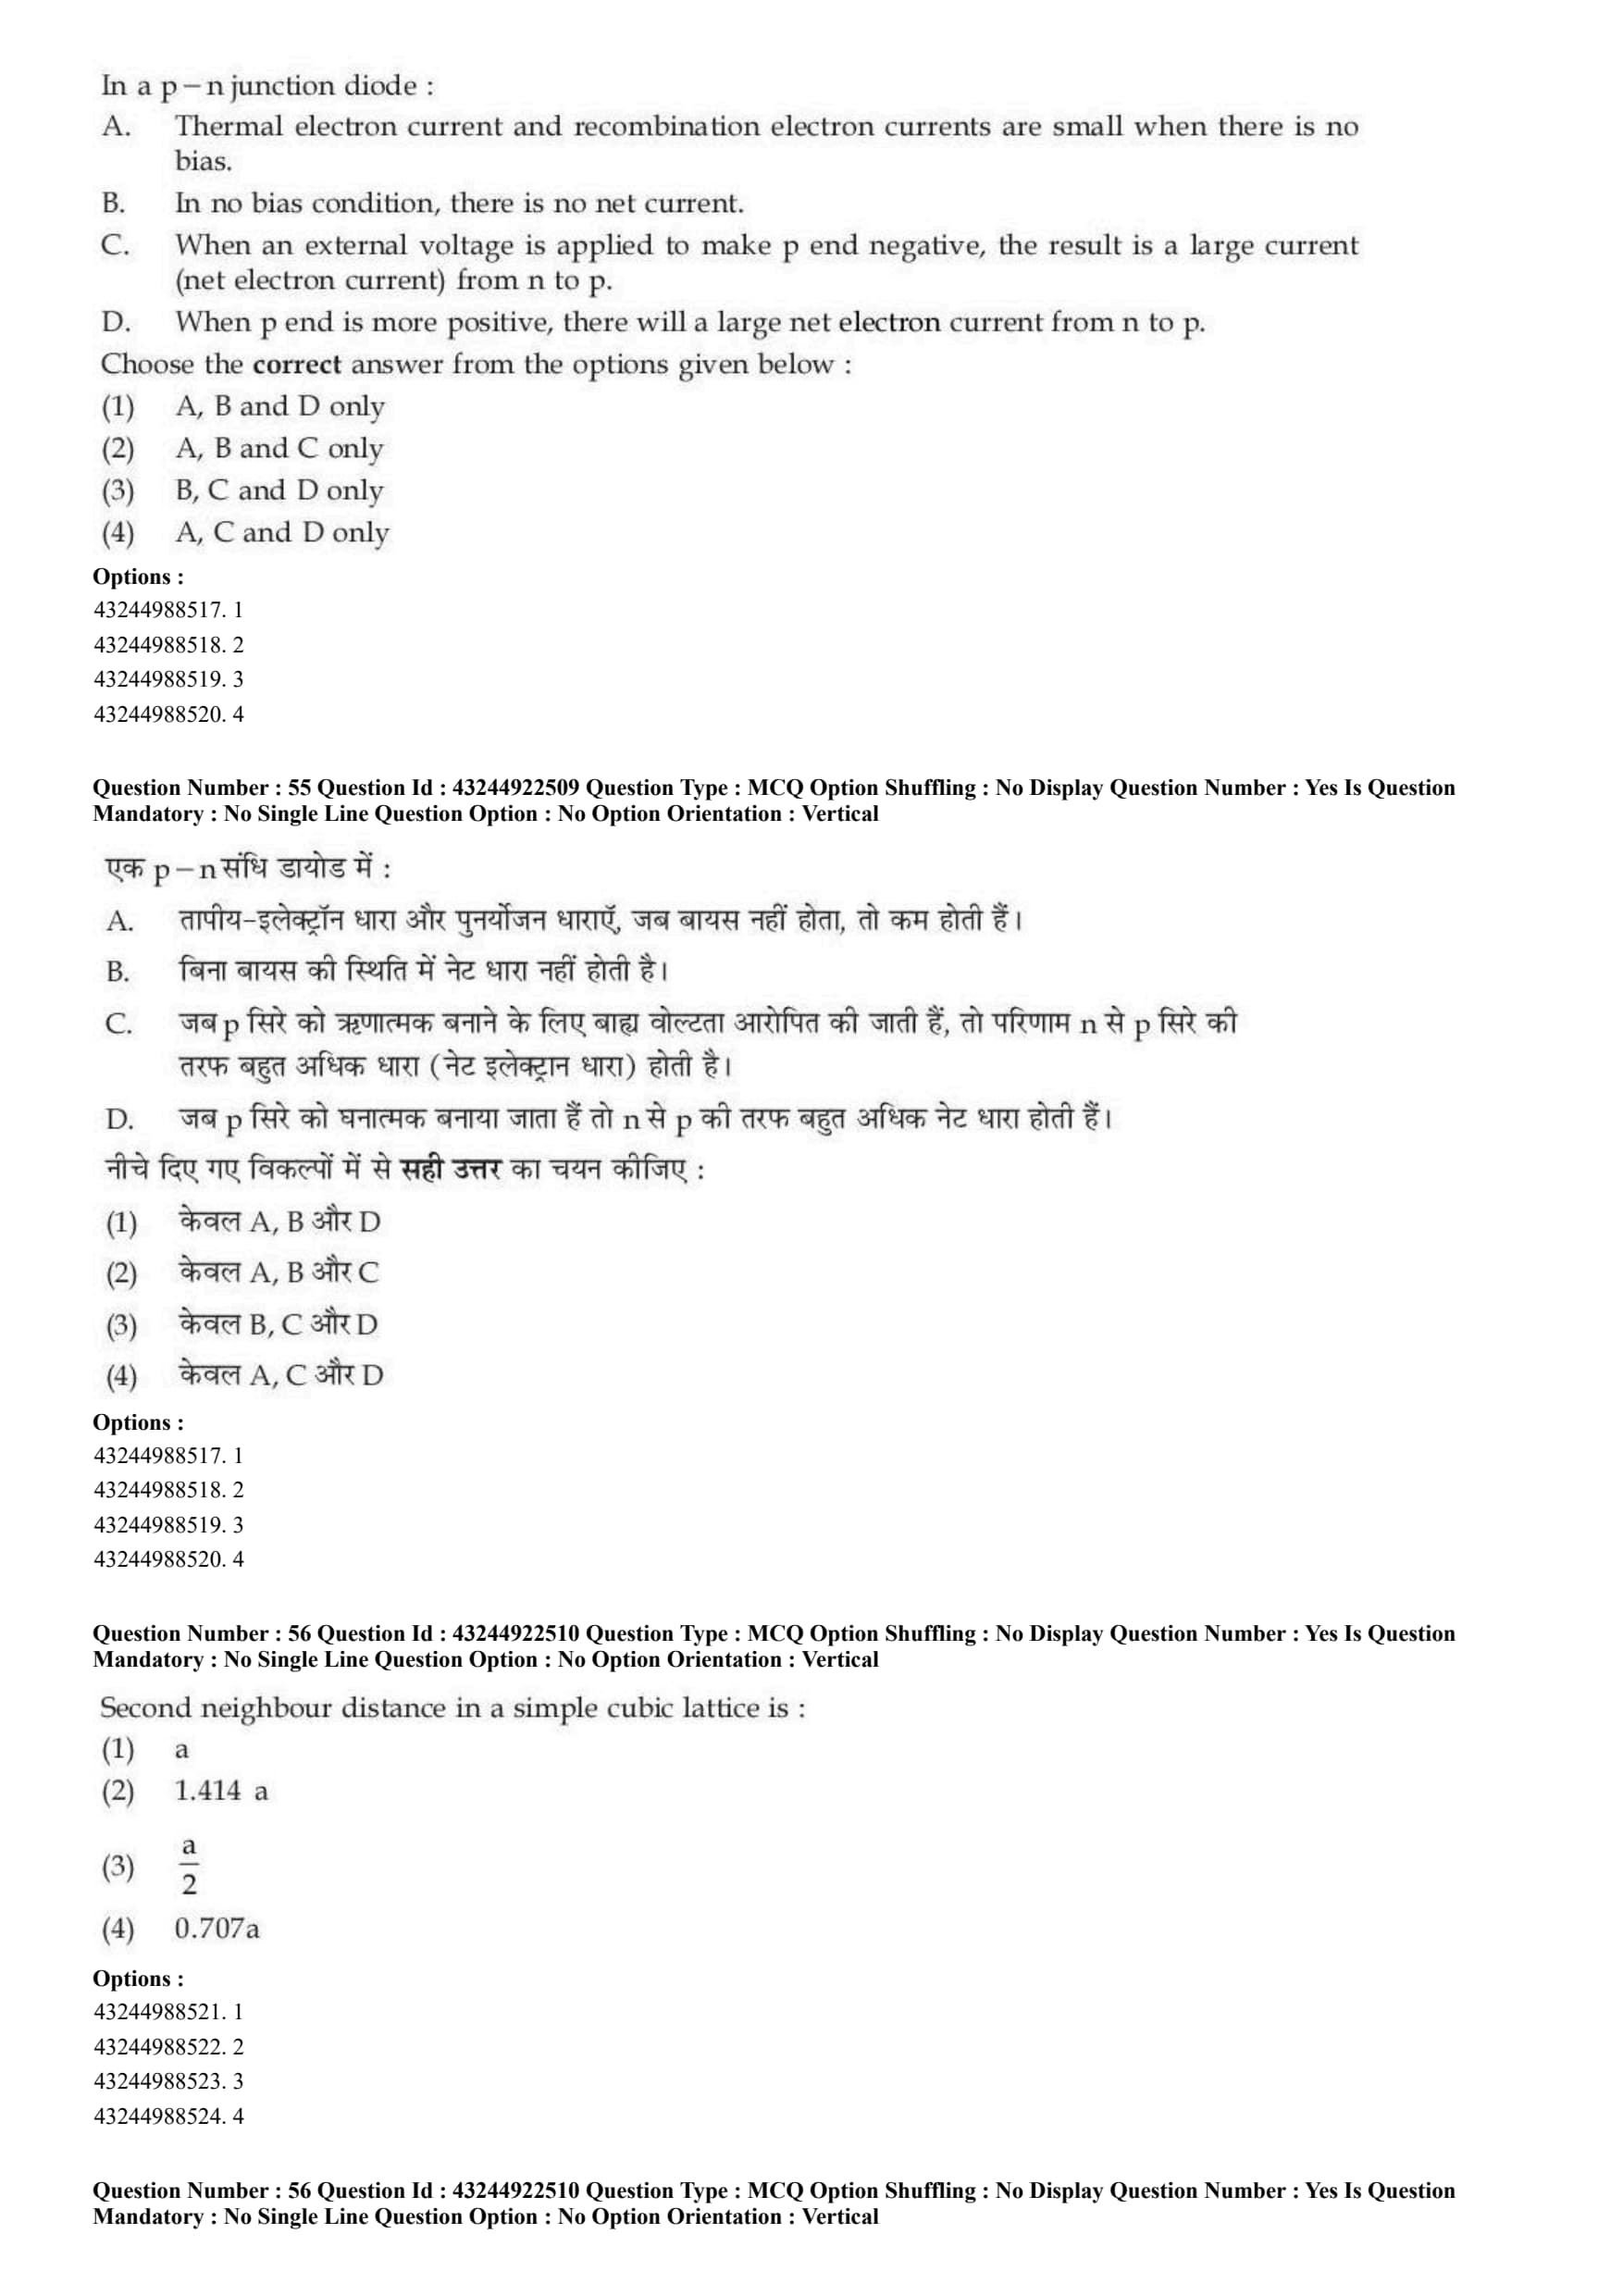
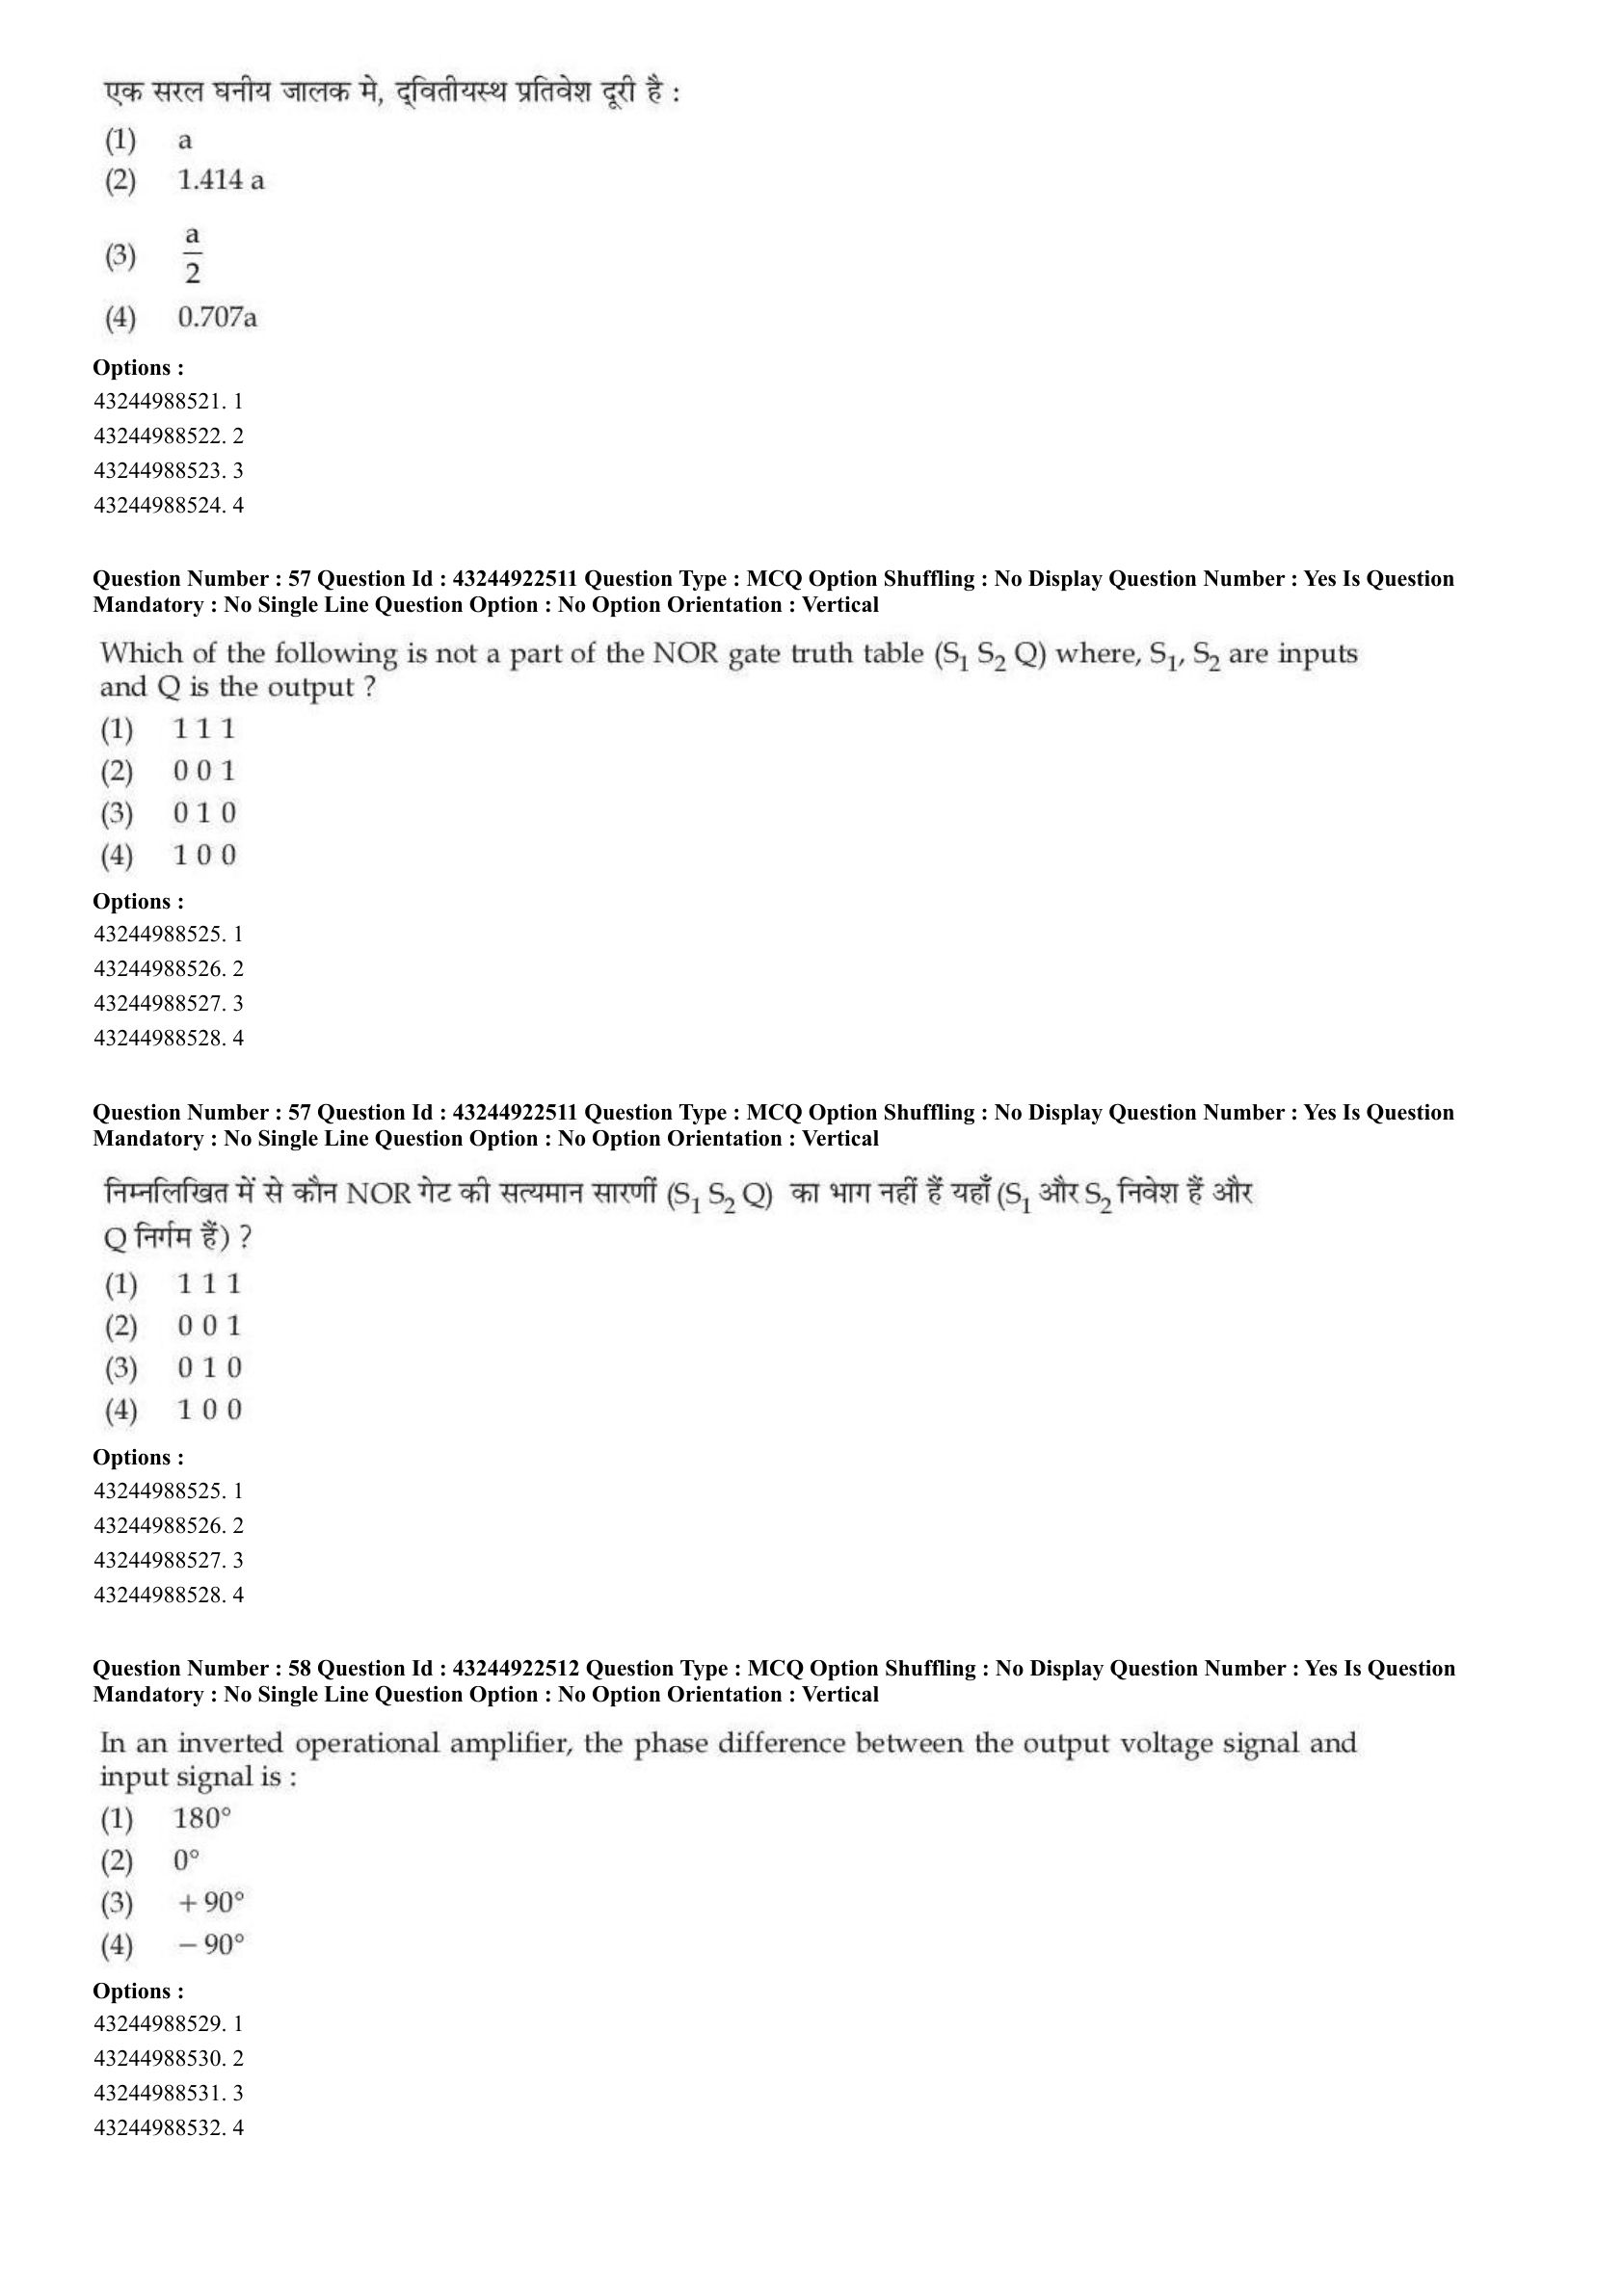

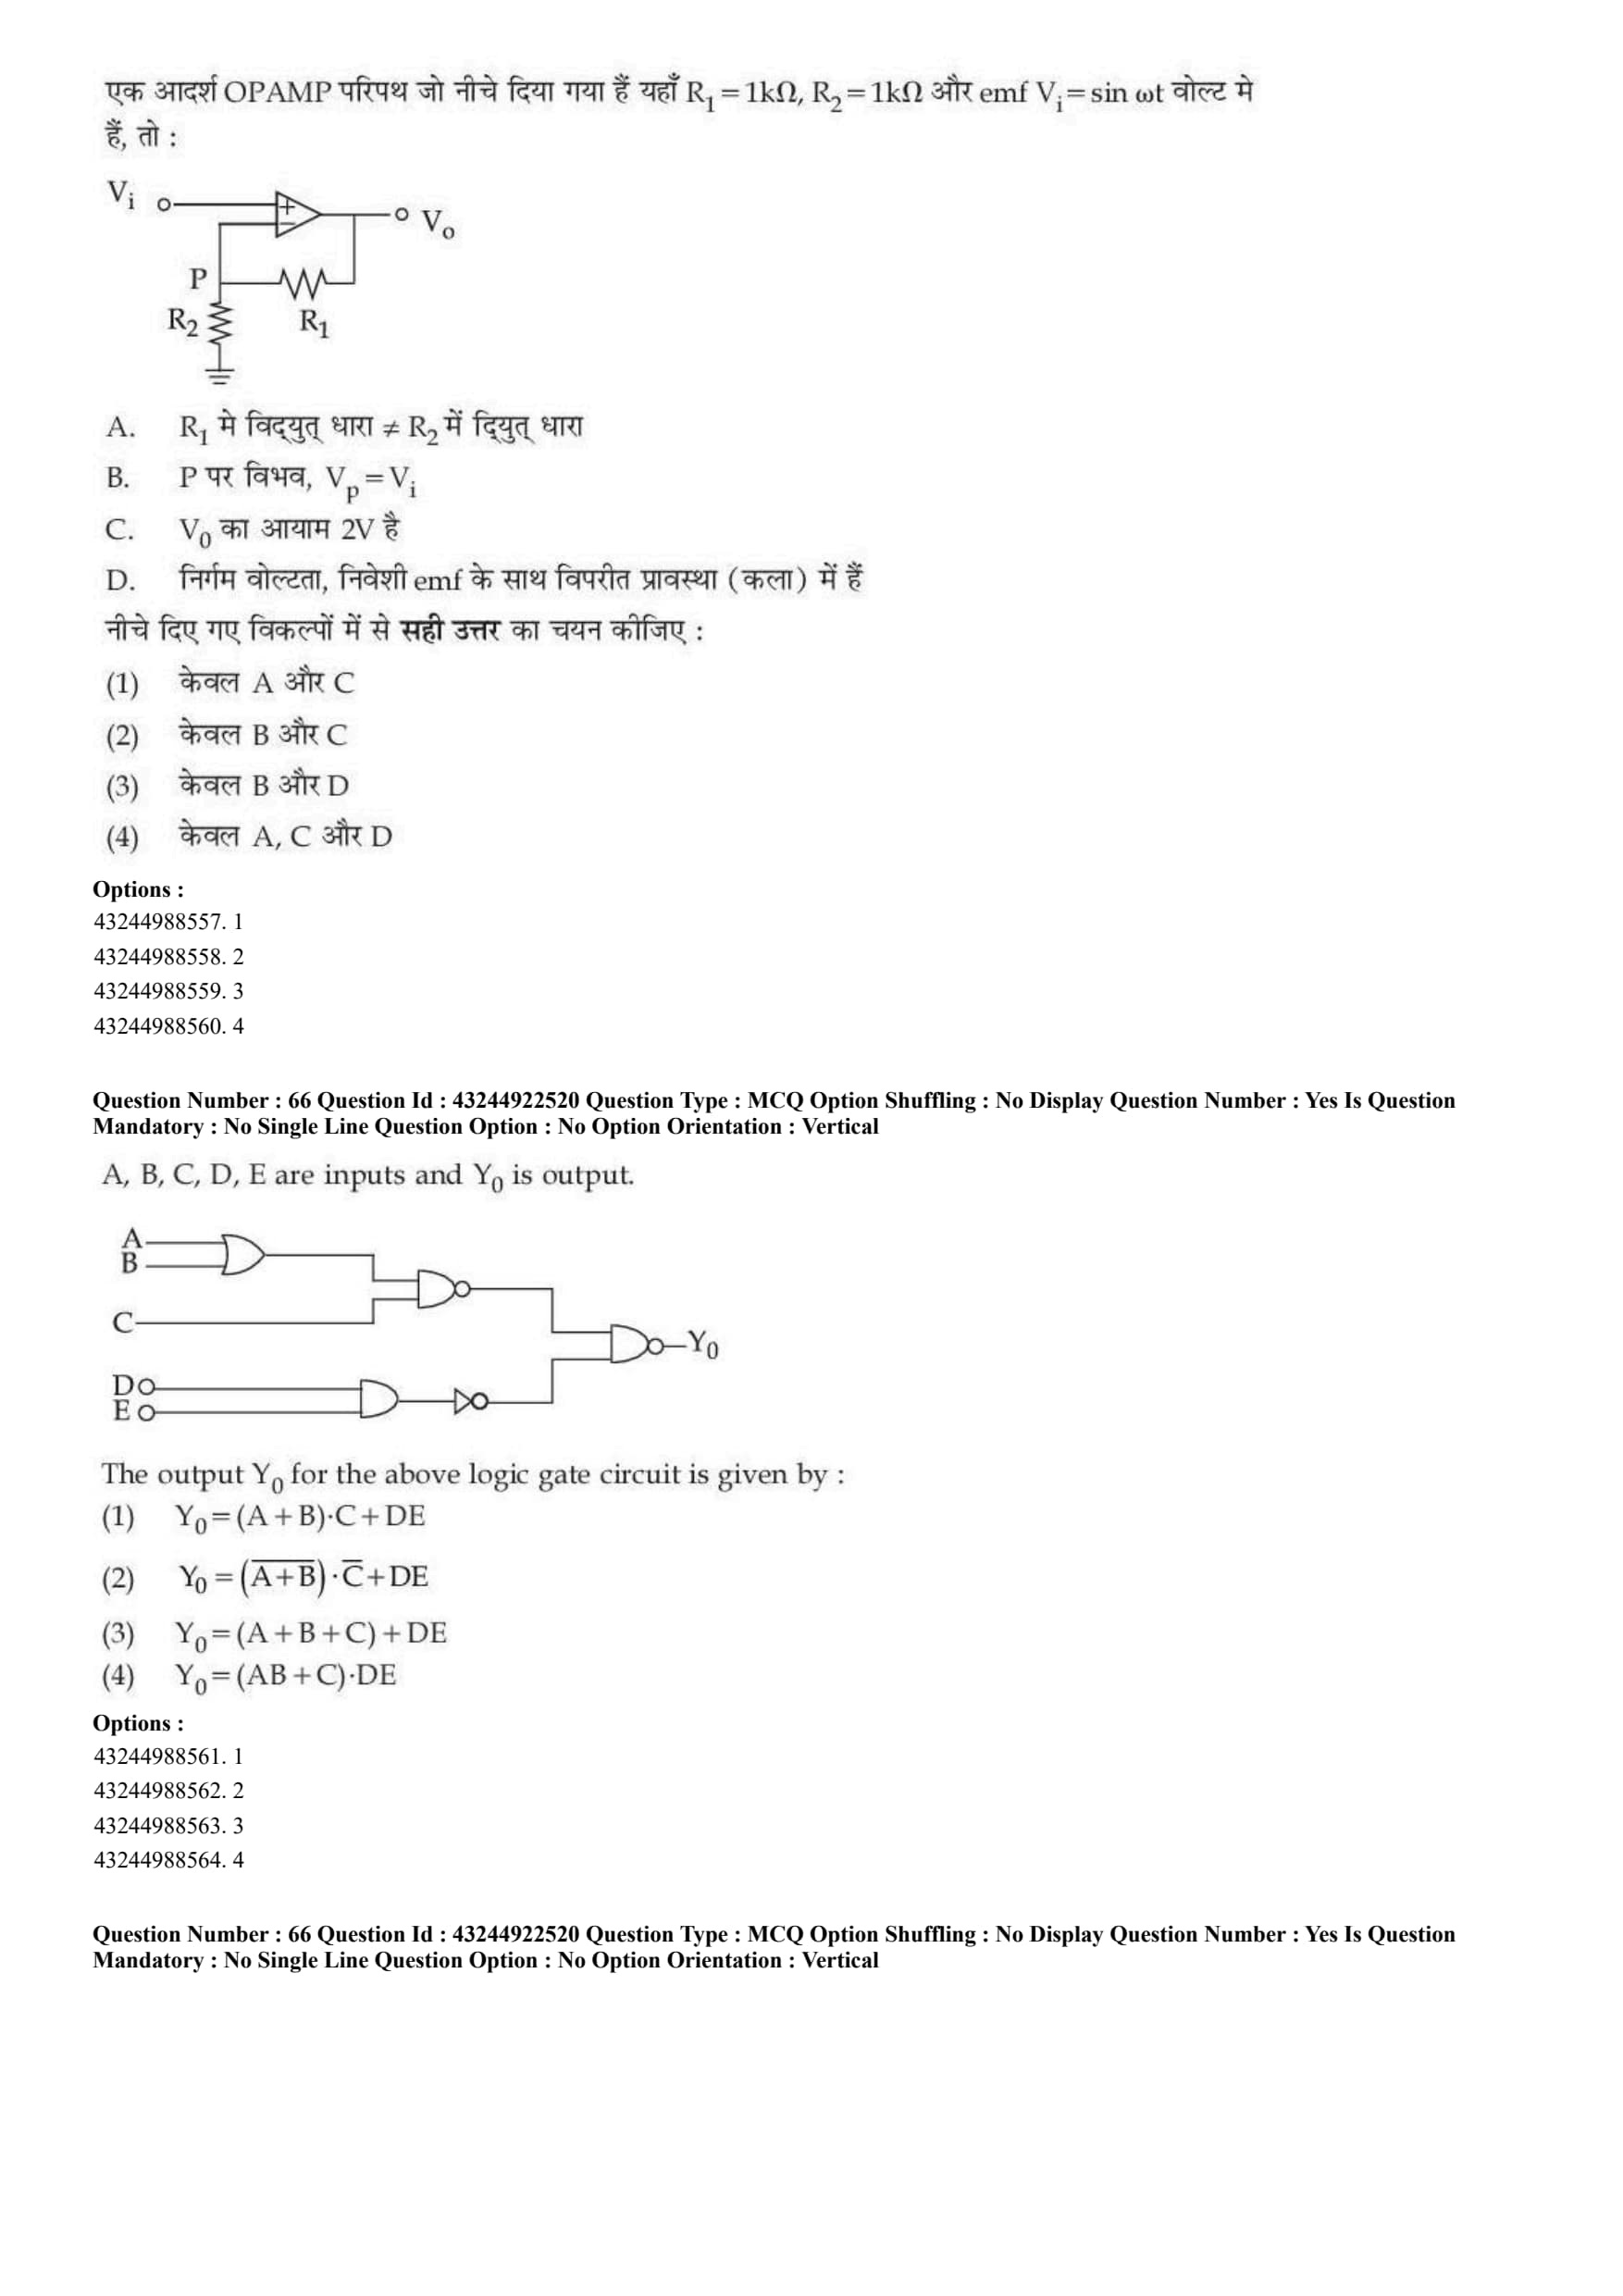

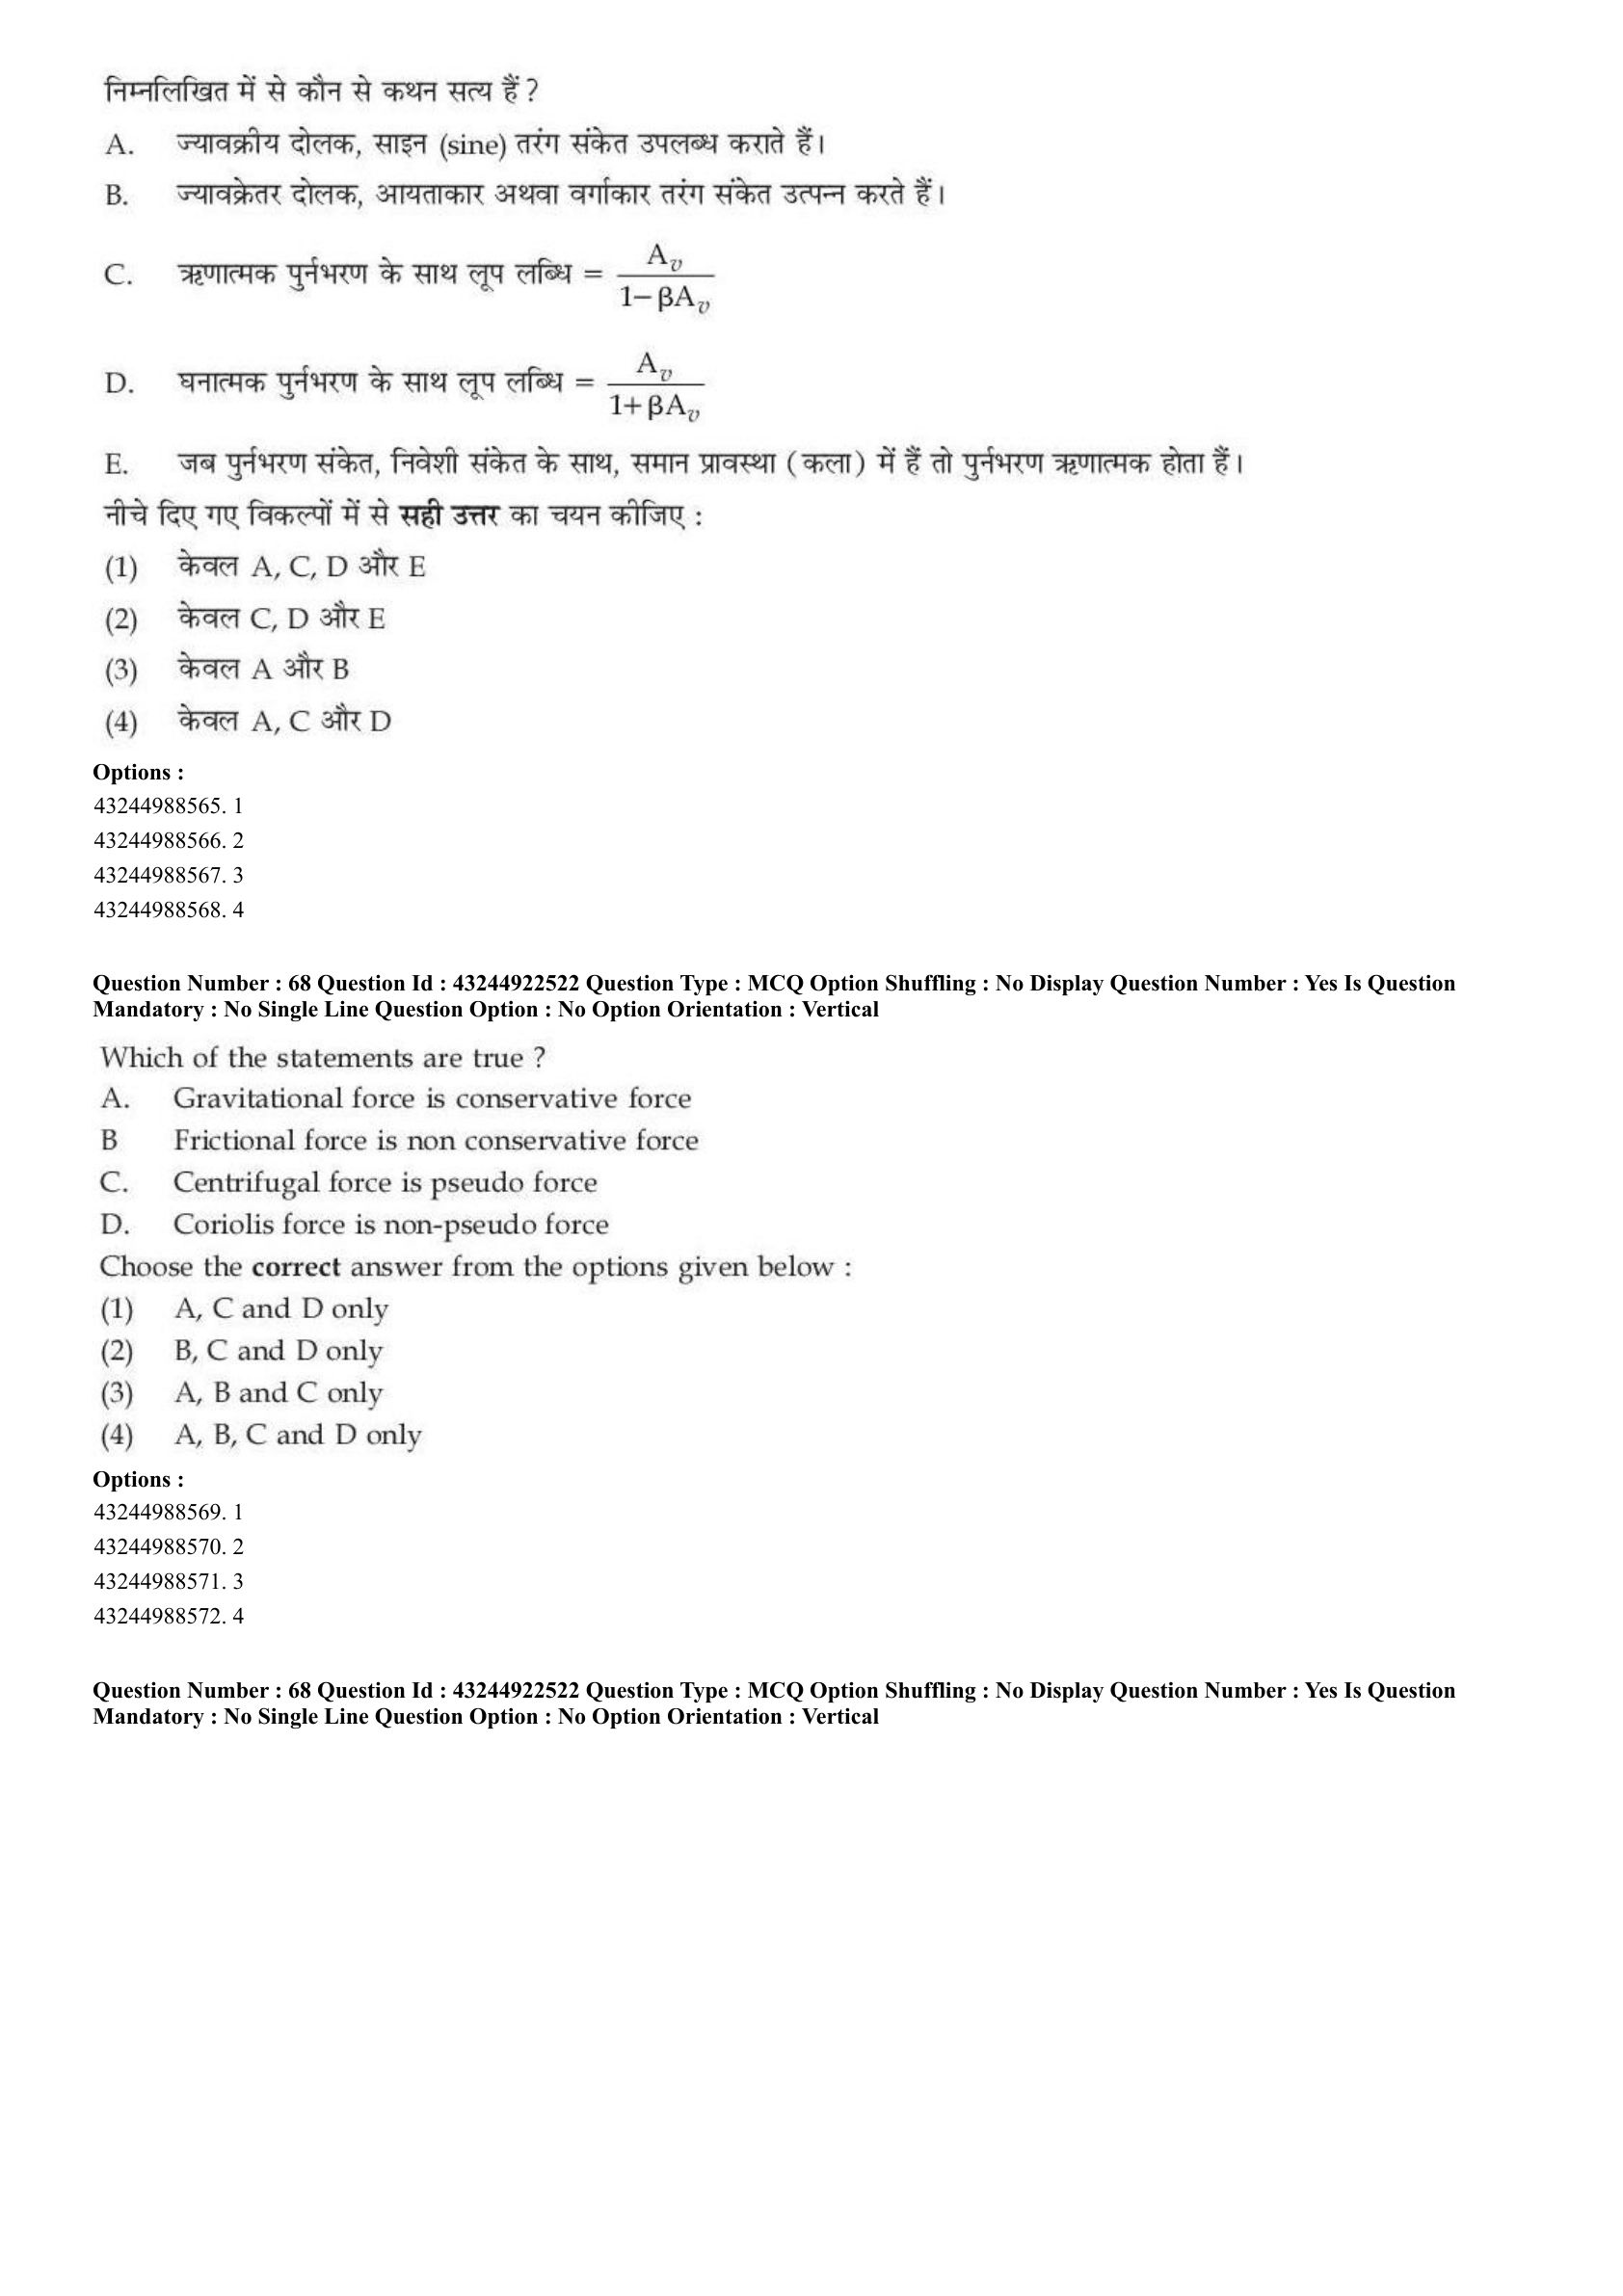
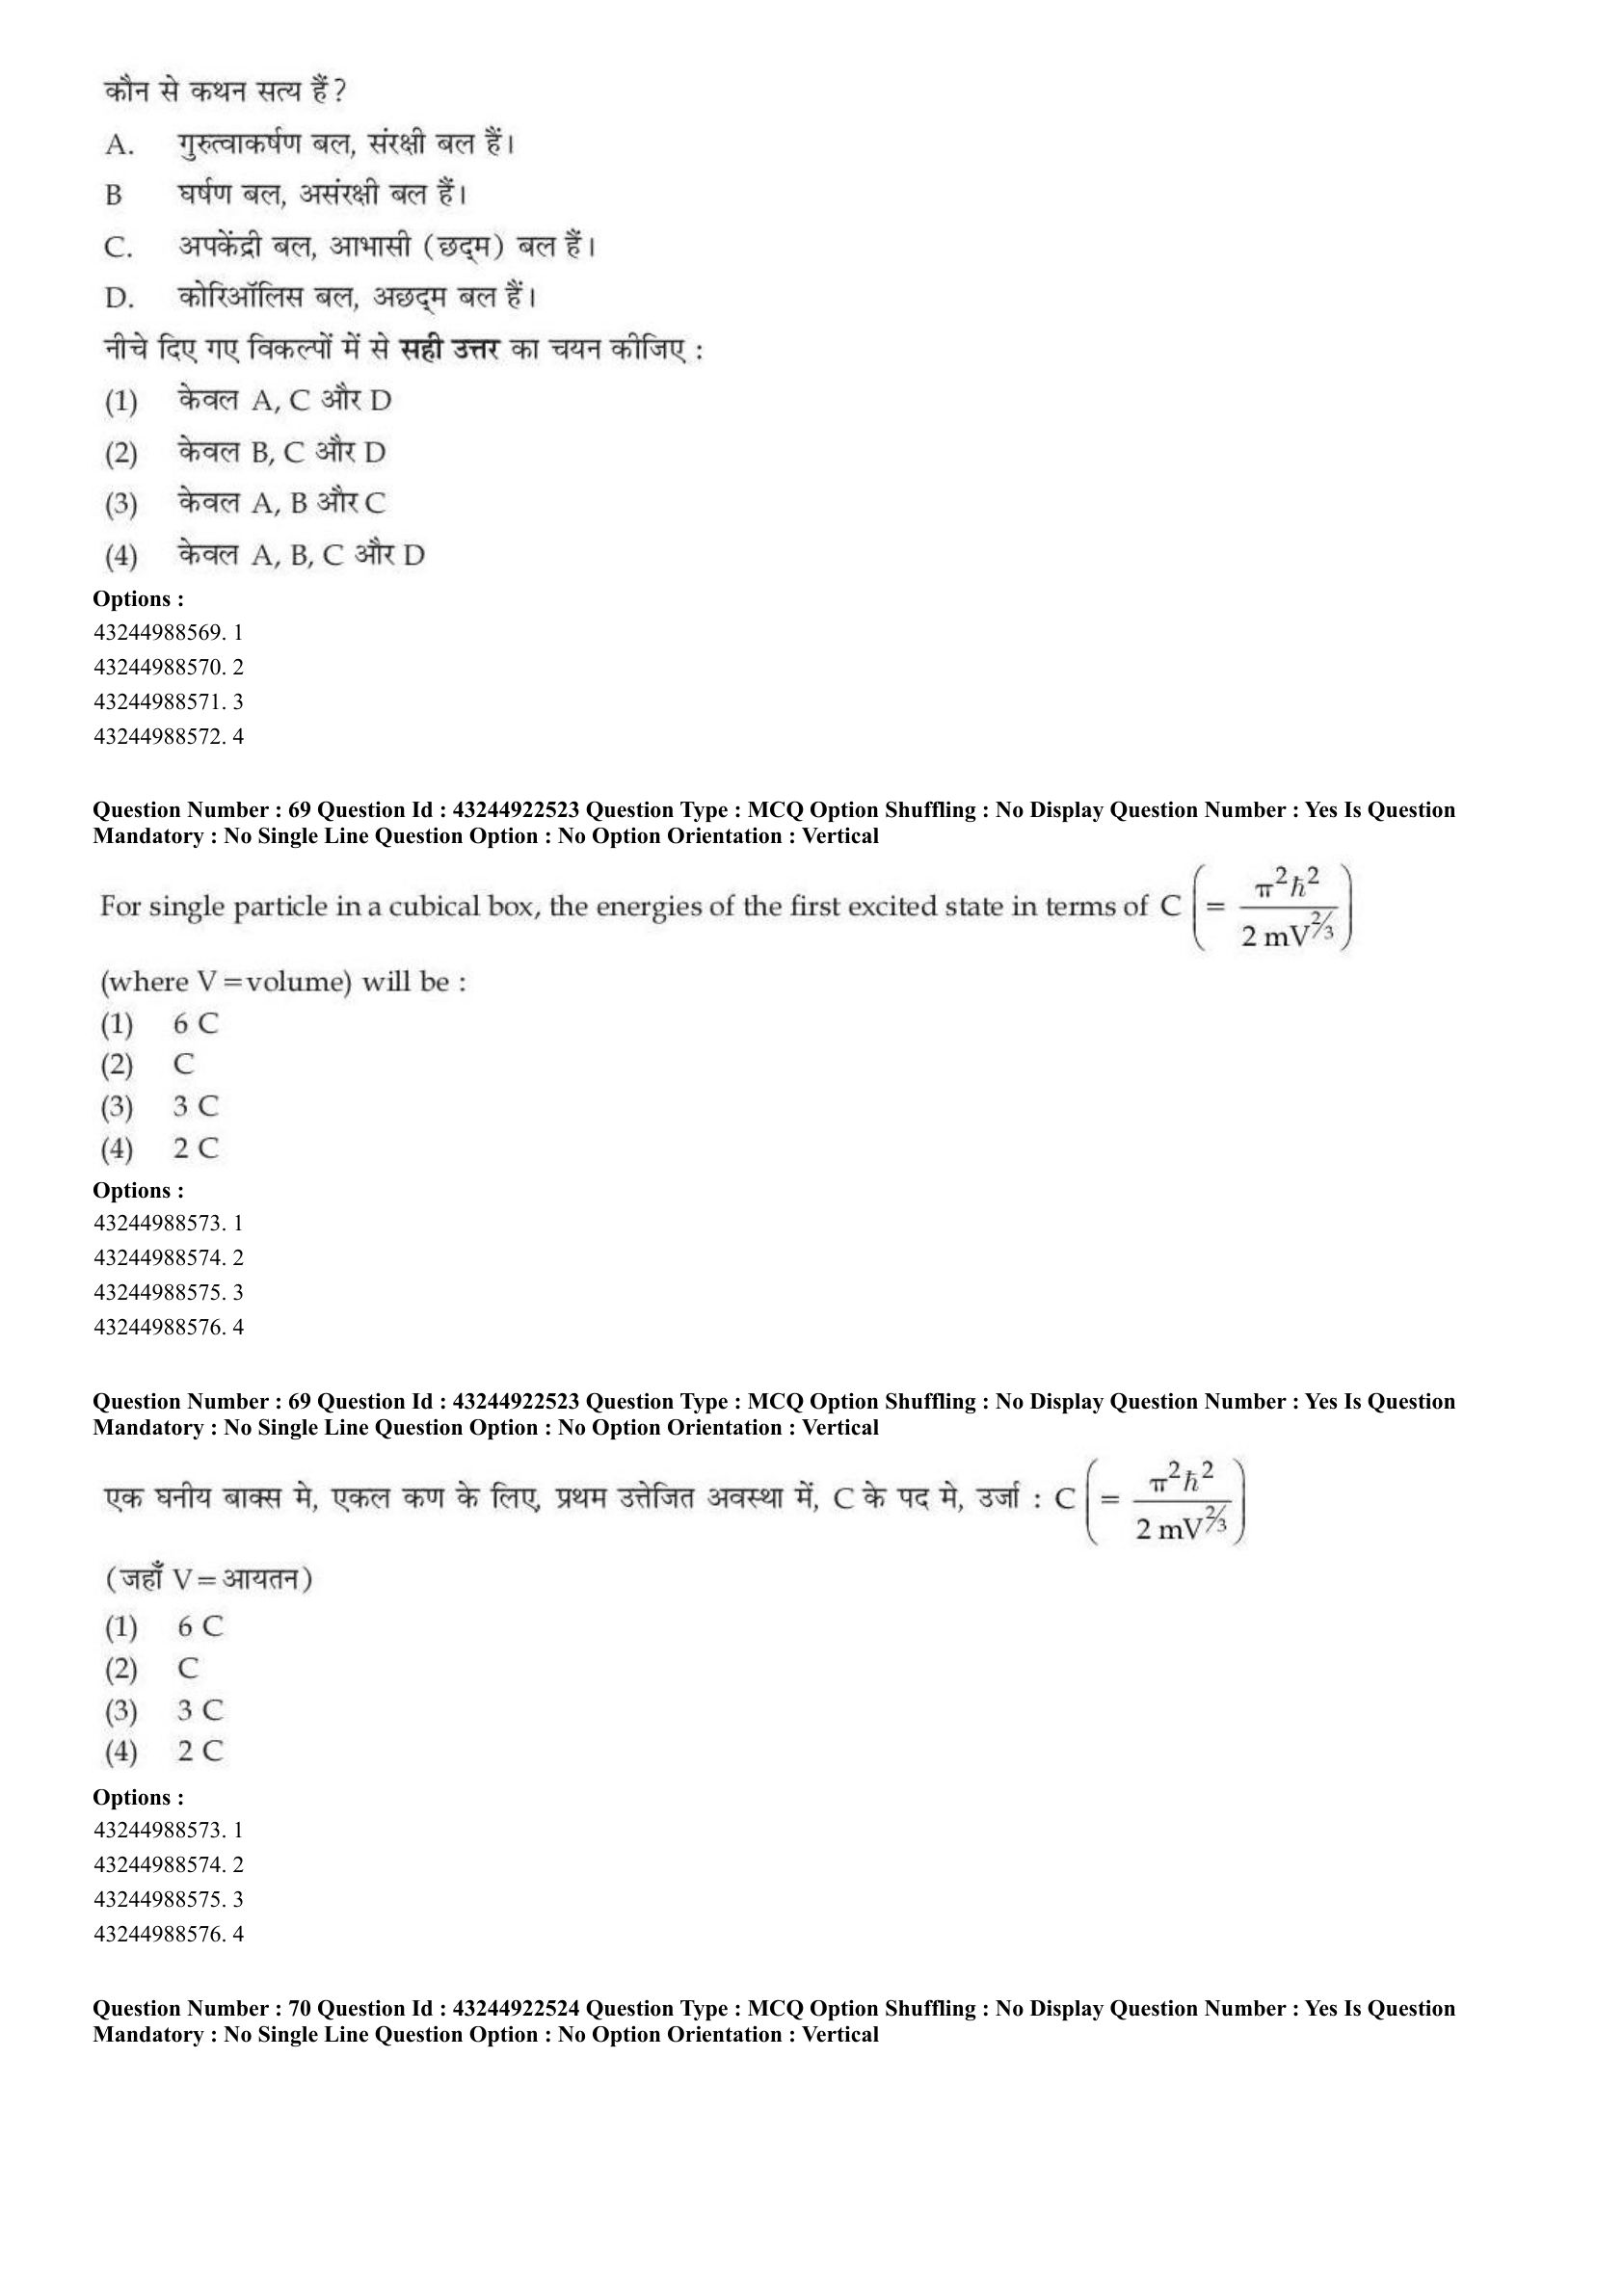
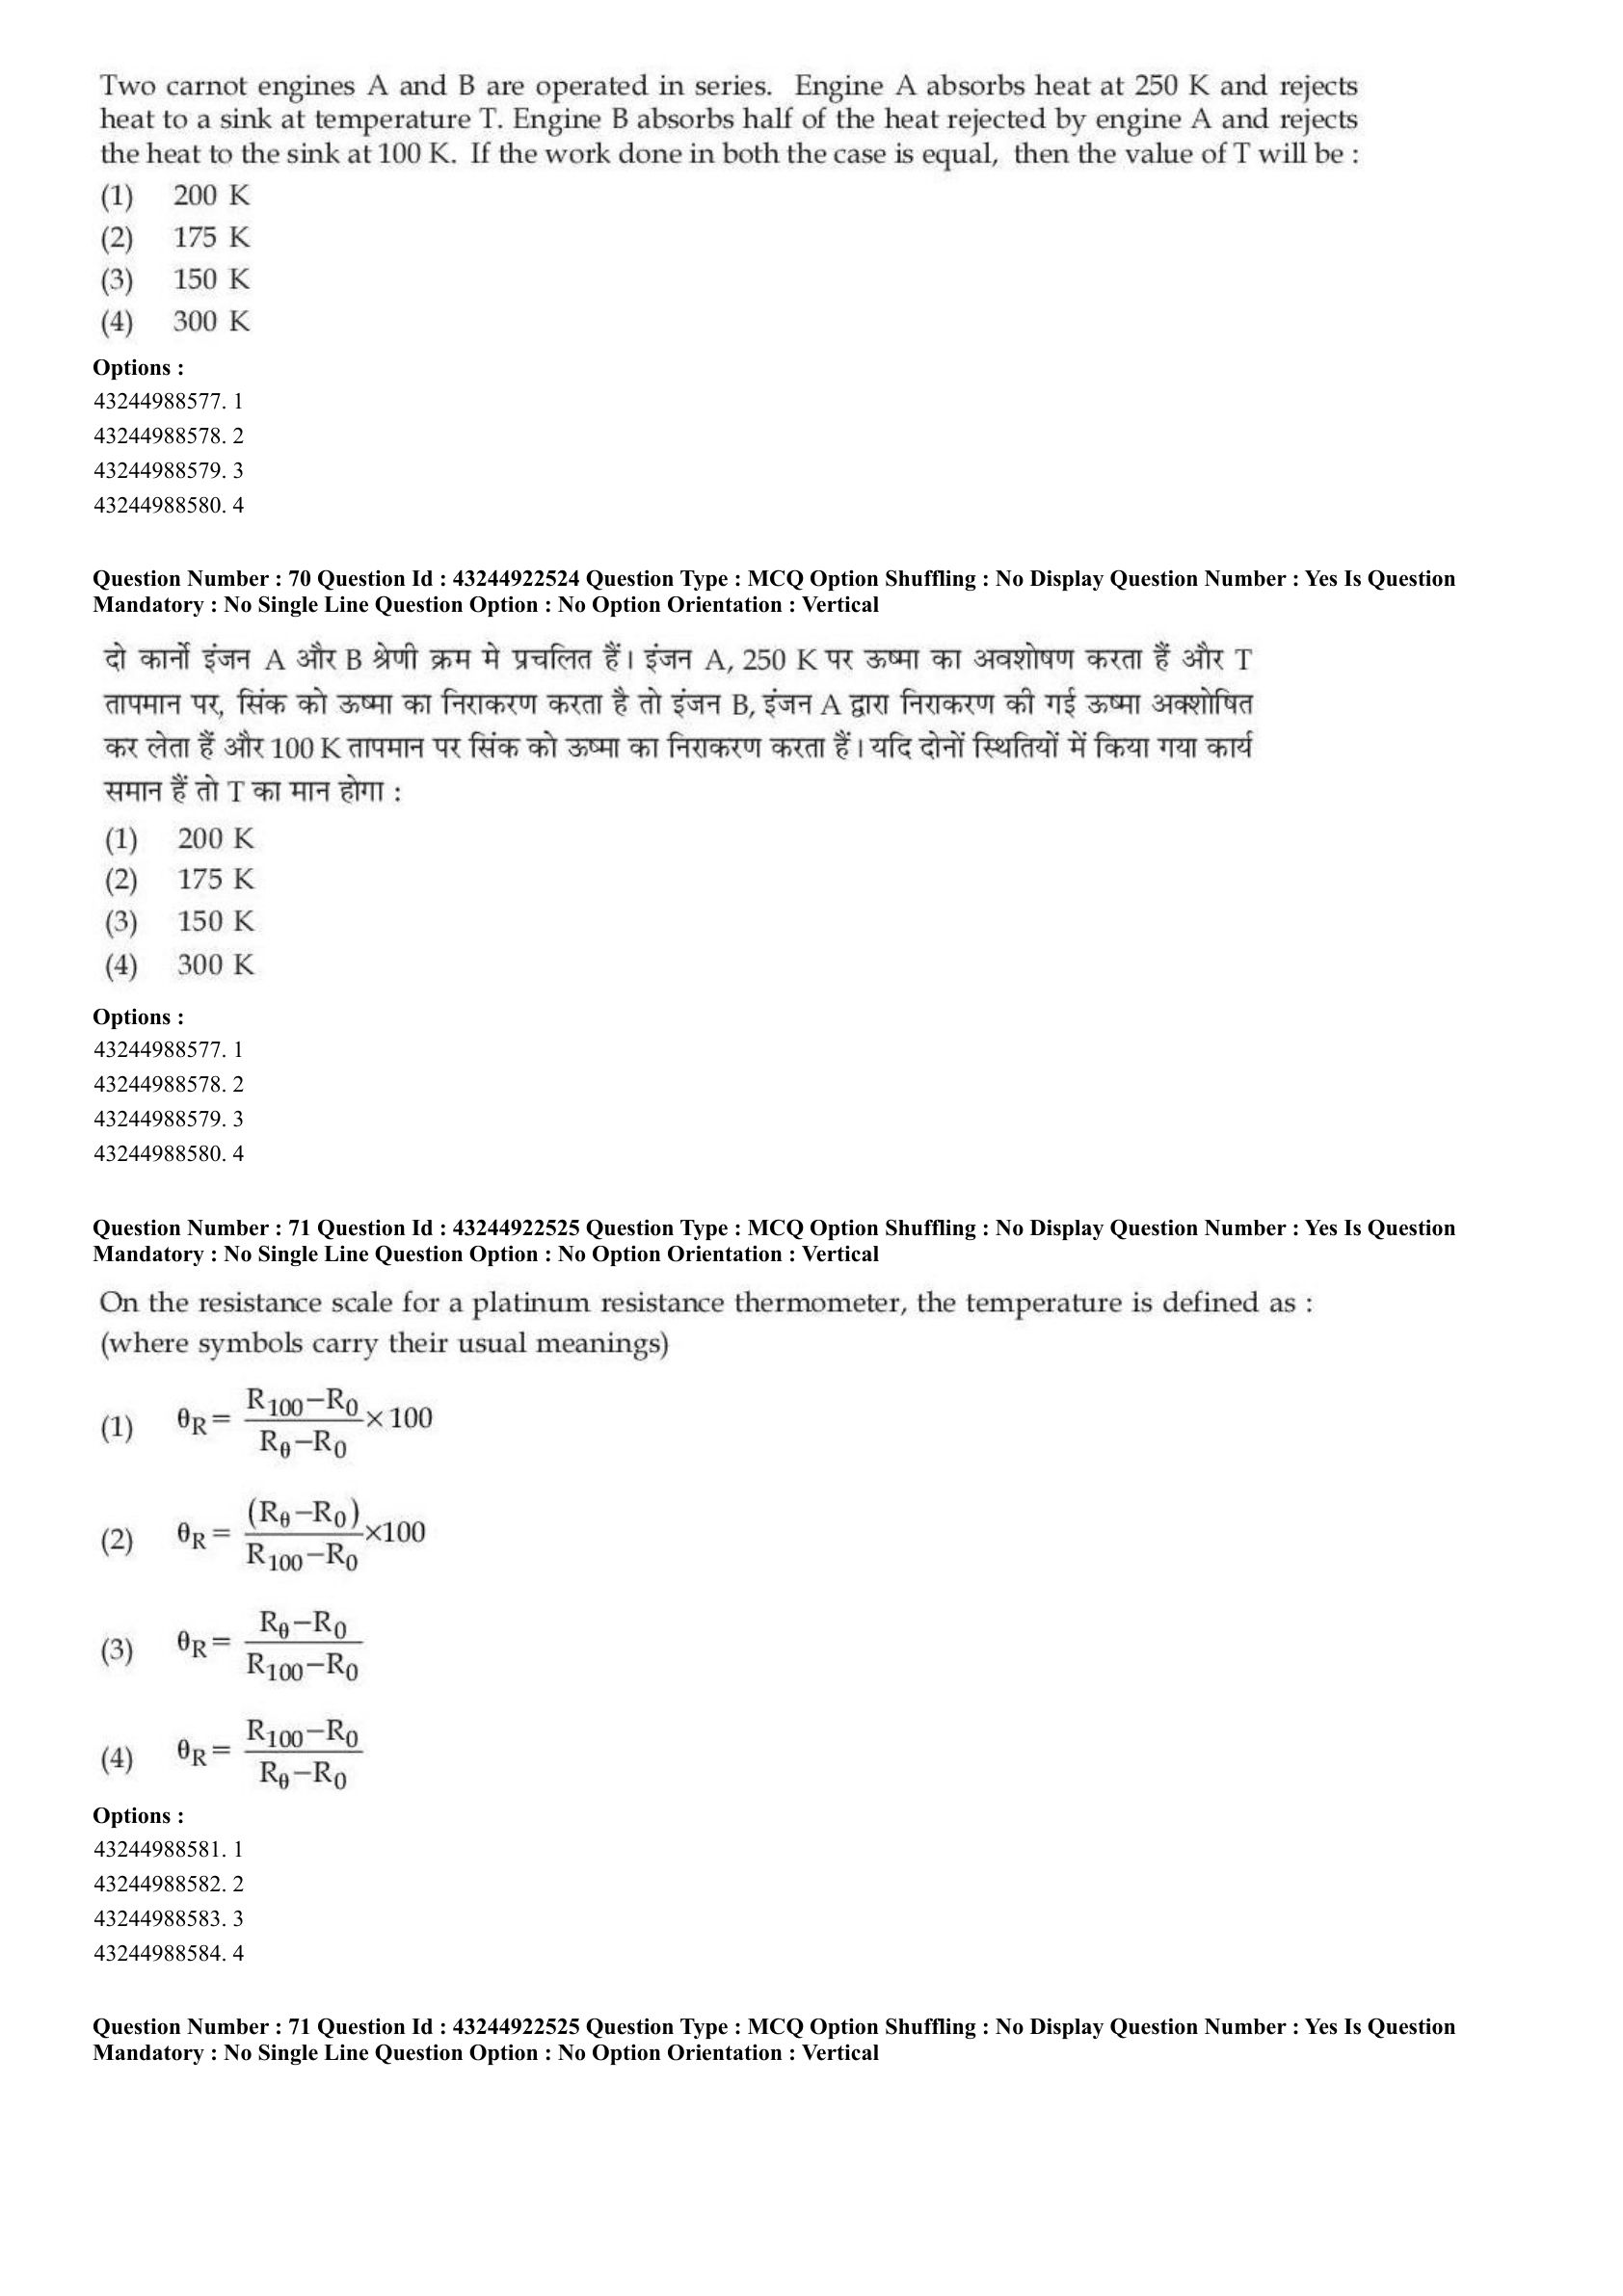

For particular integral of differential equation which of the following options are correct?
A. \(\frac{1}{f(D^2)} \sin ax = \frac{\sin ax}{f(-a^2)}\)
B. If \(f(-a^2) = 0\), then \(\frac{1}{f(D^2)} \sin ax = x \frac{\sin ax}{f'(-a^2)}\)
C. If \(f(-a^2) = 0\), then \(\frac{1}{f(D^2)} \sin ax = x \frac{\cos ax}{f'(-a^2)}\)
D. If \(f'(-a^2) = 0\), then \(\frac{1}{f(D^2)} \sin ax = x^2 \frac{\sin ax}{f''(-a^2)}\)
Choose the correct answer from the options given below:
View Solution
Step 1: Concept:
This question asks for the standard rules to find the Particular Integral (PI) of linear differential equations with constant coefficients when the right-hand side is a sine function.
Step 2: Key Formula or Approach:
For a differential equation \(f(D^2)y = \sin ax\), the general rule for Particular Integral is \(PI = \frac{1}{f(D^2)} \sin ax\).
We substitute \(D^2 = -a^2\). If \(f(-a^2) \neq 0\), the PI is directly evaluated.
If \(f(-a^2) = 0\), it is a case of resonance, and we multiply by \(x\) and integrate with respect to \(x\) (which changes sine to cosine).
Step 3: Step-by-step Explanation:
Statement A: If \(f(-a^2) \neq 0\), then substituting \(D^2 = -a^2\) gives \(\frac{1}{f(-a^2)} \sin ax\). This is standard and correct.
Statement B & C: When \(f(-a^2) = 0\), the standard operating rule gives \(PI = x \frac{1}{2D f'(-a^2)} \sin ax\).
Since \(\frac{1}{D}\) represents integration, integrating \(\sin ax\) yields \(-\frac{\cos ax}{a}\).
Thus, the resulting expression will contain a \(\cos ax\) term, not a \(\sin ax\) term.
This makes Statement B structurally incorrect and Statement C structurally correct.
Statement D: If the first derivative also evaluates to zero (\(f'(-a^2) = 0\)), we multiply by \(x^2\) and integrate twice.
Integrating a sine function twice gives back a sine function (with a negative sign), making Statement D structurally correct in retaining \(\sin ax\).
Step 4: Final Answer:
Therefore, Statements A, C, and D are correct, making option (C) the right choice.
Quick Tip: When dealing with Particular Integrals for \(\sin(ax)\) or \(\cos(ax)\), remember that failure cases (\(f(-a^2)=0\)) always result in multiplying by \(x\) and applying the integration operator \(1/D\), which flips sine to cosine and cosine to sine.
Match List - I with List - II.

Choose the correct answer from the options given below:
View Solution
Step 1: Concept:
This question tests the definitions and properties of vector fields in vector calculus.
Step 2: Key Formula or Approach:
We relate mathematical operations on a vector field to their physical or geometric meanings.
Step 3: Step-by-step Explanation:
A. \(\nabla \cdot \vec{A} = 0\): A vector field with zero divergence is defined as a solenoidal field. (Matches with III).
B. \(\oint \vec{A} \cdot d\vec{r} = 0\): If the line integral over any closed path is zero, the field is conservative, meaning it does work path-independently. (Matches with I).
C. \(\vec{A} = \nabla \phi\): The gradient of a scalar function \(\phi\) gives a vector field that points in the direction of the steepest ascent or maximum increase of \(\phi\). (Matches with IV).
D. \(\nabla \times \vec{A} = 0\): A vector field with zero curl has no rotation associated with it, hence it is irrotational. (Matches with II).
Step 4: Final Answer:
The correct matching sequence is A-III, B-I, C-IV, D-II.
Quick Tip: A conservative field can always be written as the gradient of a scalar potential (\(\vec{A} = \nabla \phi\)), which directly implies it is irrotational (\(\nabla \times \vec{A} = 0\)) and its closed-loop line integral is zero.
Match List - I with List - II.

Choose the correct answer from the options given below:
View Solution
Step 1: Concept:
The question asks us to compute the modulus and principal argument for two given complex expressions and match them with the correct values.
Step 2: Key Formula or Approach:
For a complex number \(z = x + iy\), the modulus is \(|z| = \sqrt{x^2 + y^2}\).
The principal argument is \(\theta = \tan^{-1}\left(\frac{y}{x}\right)\), properly placed in the correct quadrant with \(-\pi < \theta \leq \pi\).
Step 3: Step-by-step Explanation:
Item A: Modulus of \(\sqrt{3} + i\).
\[ |\sqrt{3} + i| = \sqrt{(\sqrt{3})^2 + (1)^2} = \sqrt{3 + 1} = \sqrt{4} = 2 \]
Matches with II.
Item B: Principal argument of \(\sqrt{3} + i\).
The point lies in the first quadrant.
\[ \arg(\sqrt{3} + i) = \tan^{-1}\left(\frac{1}{\sqrt{3}}\right) = \frac{\pi}{6} \]
Matches with IV.
Item C: Let \(z = \frac{(1+i)^2}{1-i}\). First, simplify the numerator.
\[ (1+i)^2 = 1^2 + i^2 + 2i = 1 - 1 + 2i = 2i \]
Now simplify the expression.
\[ z = \frac{2i}{1-i} = \frac{2i(1+i)}{(1-i)(1+i)} = \frac{2i - 2}{1^2 - i^2} = \frac{-2 + 2i}{2} = -1 + i \]
The modulus is:
\[ |z| = |-1 + i| = \sqrt{(-1)^2 + 1^2} = \sqrt{2} \]
Matches with I.
Item D: Principal argument of \(-1 + i\).
The point \((-1, 1)\) lies in the second quadrant.
\[ \theta = \pi - \tan^{-1}\left(\left|\frac{1}{-1}\right|\right) = \pi - \frac{\pi}{4} = \frac{3\pi}{4} \]
Matches with III.
Step 4: Final Answer:
The matching combination is A-II, B-IV, C-I, D-III.
Quick Tip: When finding the argument, always sketch the complex number on the Argand plane to verify the quadrant, which avoids common sign errors in arctangent calculations.
The locus represented by \(|z - 4| + |z + 4| = 10\) is (Where, \(z = x + iy ; i = \sqrt{-1}\))
View Solution
Step 1: Concept:
We need to identify the geometric shape represented by the complex locus equation \(|z - z_1| + |z - z_2| = k\).
Step 2: Key Formula or Approach:
The equation \(|z - z_1| + |z - z_2| = 2a\) represents an ellipse with foci at \(z_1\) and \(z_2\), provided that the constant sum of distances \(2a\) is greater than the distance between the two foci \(|z_1 - z_2|\).
Step 3: Step-by-step Explanation:
Here, \(z_1 = 4\) and \(z_2 = -4\).
The distance between the foci is \(|z_1 - z_2| = |4 - (-4)| = 8\).
The constant sum is \(2a = 10\).
Since \(10 > 8\), the condition \(2a > |z_1 - z_2|\) is satisfied.
This means the point \(z\) moves such that the sum of its distances from two fixed points is constant and greater than the distance between them.
Geometrically, this defines an ellipse.
Step 4: Final Answer:
The locus is an ellipse.
Quick Tip: If the equation was \(|z - z_1| - |z - z_2| = 2a\), it would represent a hyperbola. If \(|z - z_1| + |z - z_2| = |z_1 - z_2|\), it would represent a line segment connecting the two foci.
For the differential equation \((D^2 + 9)y = \cos 3x\), \(y\) can be written as -
View Solution
Step 1: Concept:
We need to find the general solution \(y = y_c + y_p\) for the given second-order linear ordinary differential equation.
Step 2: Key Formula or Approach:
First, find the complementary function (\(y_c\)) by solving the auxiliary equation \((D^2 + 9) = 0\).
Next, find the particular integral (\(y_p\)) using the operator method \(PI = \frac{1}{D^2 + 9} \cos 3x\).
Step 3: Step-by-step Explanation:
Complementary Function:
The auxiliary equation is \(m^2 + 9 = 0\).
Roots are \(m = \pm 3i\).
Thus, \(y_c = A \cos 3x + B \sin 3x\).
Particular Integral:
\[ y_p = \frac{1}{D^2 + 9} \cos 3x \]
Substituting \(D^2 = -3^2 = -9\), we get a zero in the denominator (resonance case).
Using the rule for failure, multiply the numerator by \(x\) and differentiate the denominator with respect to \(D\):
\[ y_p = x \frac{1}{2D} \cos 3x \]
Since \(\frac{1}{D}\) denotes integration with respect to \(x\):
\[ y_p = x \left( \frac{\sin 3x}{3 \times 2} \right) = \frac{x}{6} \sin 3x \]
General Solution:
\[ y = y_c + y_p = A \cos 3x + B \sin 3x + \frac{x}{6} \sin 3x \]
Step 4: Final Answer:
The general solution perfectly matches option (C).
Quick Tip: Whenever the driving frequency equals the natural frequency of the homogenous part (resonance), the Particular Integral will always contain a factor of \(x\), reflecting a linearly growing amplitude.
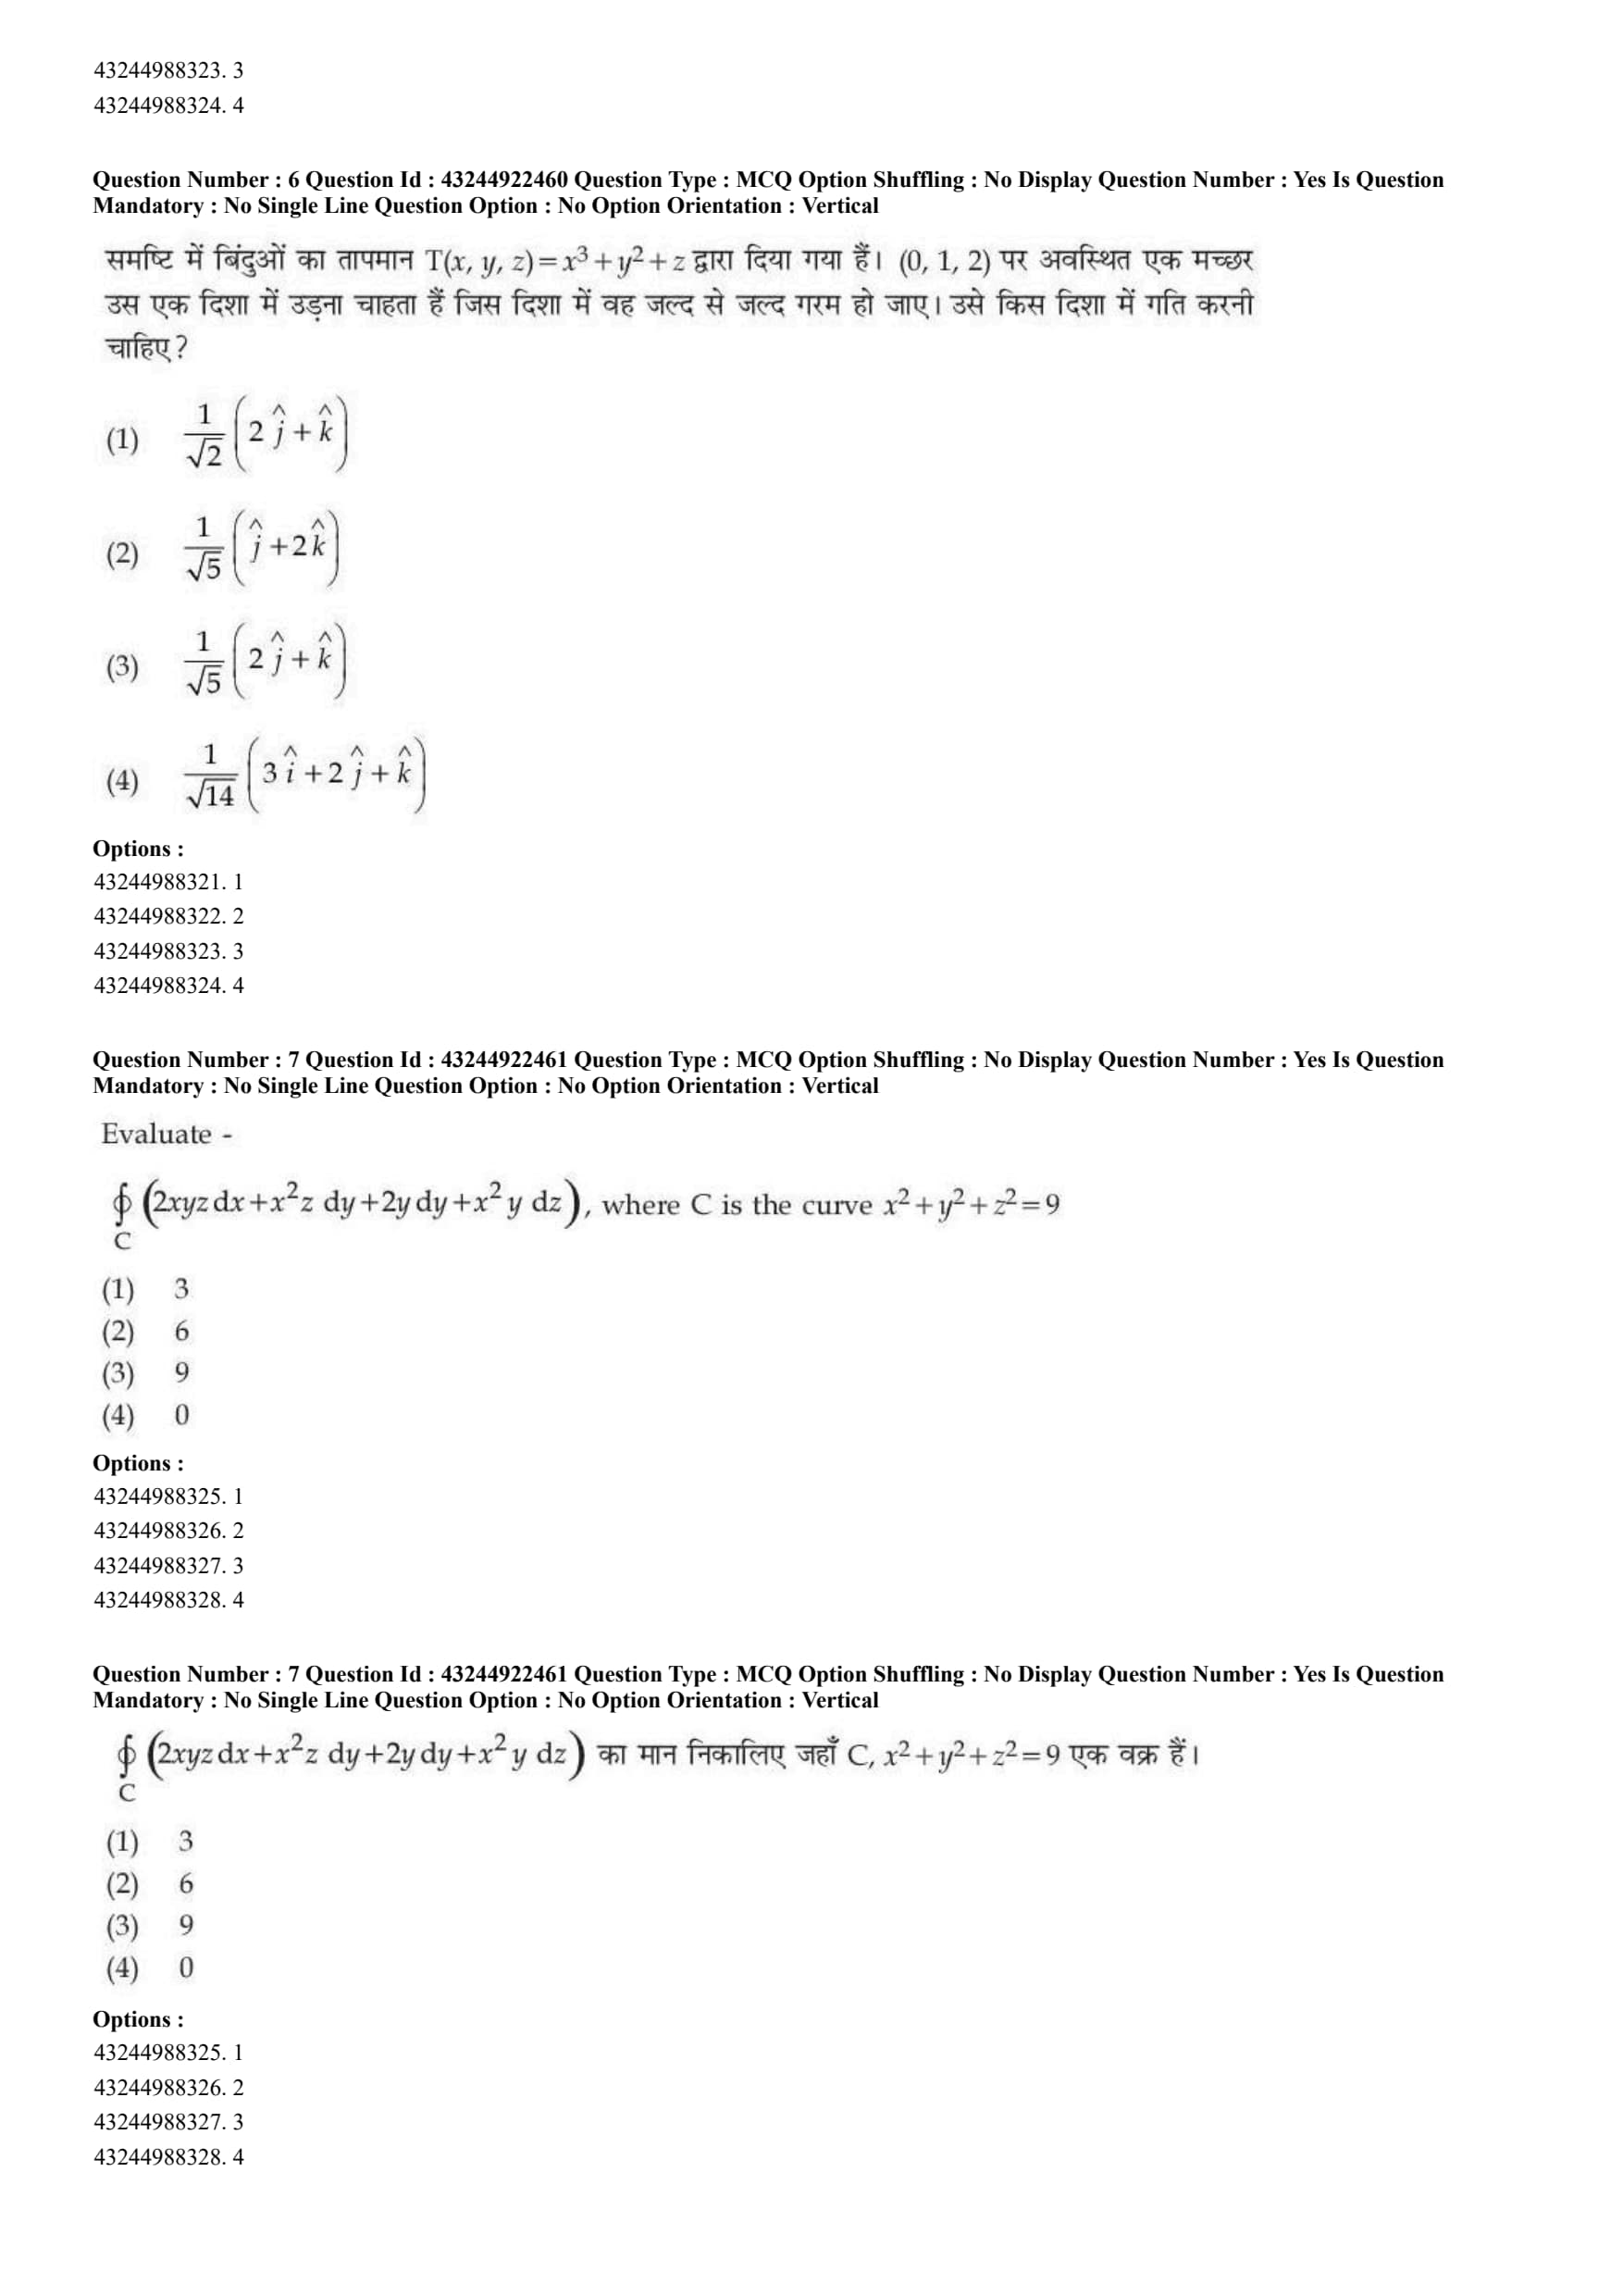
The temperature of the points in space is given by \(T(x, y, z) = x^3 + y^2 + z\). A mosquito located at \((0, 1, 2)\) desires to fly in such a direction that it will get warm as soon as possible. In what direction should it move?
View Solution
Step 1: Concept:
The mosquito wants to experience the maximum rate of increase in temperature. In vector calculus, the direction of maximum increase of a scalar function is given by its gradient.
Step 2: Key Formula or Approach:
The direction of maximum increase is along the gradient vector \(\nabla T\).
The unit vector in this direction is \(\hat{n} = \frac{\nabla T}{|\nabla T|}\).
Step 3: Step-by-step Explanation:
First, compute the gradient of the temperature field \(T(x,y,z)\).
\[ \nabla T = \frac{\partial T}{\partial x}\hat{i} + \frac{\partial T}{\partial y}\hat{j} + \frac{\partial T}{\partial z}\hat{k} \] \[ \nabla T = (3x^2)\hat{i} + (2y)\hat{j} + (1)\hat{k} \]
Next, evaluate this gradient vector at the given location \((0, 1, 2)\).
\[ \nabla T(0,1,2) = 3(0)^2\hat{i} + 2(1)\hat{j} + 1\hat{k} = 0\hat{i} + 2\hat{j} + \hat{k} \]
Finally, find the unit vector to specify the direction.
The magnitude of the gradient is \(|\nabla T| = \sqrt{0^2 + 2^2 + 1^2} = \sqrt{4+1} = \sqrt{5}\).
Therefore, the desired unit direction vector is:
\[ \hat{n} = \frac{1}{\sqrt{5}} (2\hat{j} + \hat{k}) \]
Step 4: Final Answer:
The correct direction is given by option (C).
Quick Tip: The gradient \(\nabla f\) points in the direction of the steepest ascent, while \(-\nabla f\) points in the direction of the steepest descent.
Evaluate \(\oint_C (2xyz \, dx + x^2z \, dy + 2y \, dy + x^2y \, dz)\), where C is the curve \(x^2 + y^2 + z^2 = 9\)
View Solution
Step 1: Concept:
We need to calculate the line integral of a vector field over a closed curve \(C\) lying on a spherical surface.
Step 2: Key Formula or Approach:
The line integral can be written as \(\oint_C \vec{F} \cdot d\vec{r}\), where \(\vec{F} = F_x \hat{i} + F_y \hat{j} + F_z \hat{k}\).
By Stokes' Theorem, if the curl of \(\vec{F}\) is zero (\(\nabla \times \vec{F} = \vec{0}\)), the field is conservative and its line integral over any closed loop is strictly zero.
Step 3: Step-by-step Explanation:
Let's identify the components of the vector field \(\vec{F}\).
\[ \vec{F} = (2xyz)\hat{i} + (x^2z + 2y)\hat{j} + (x^2y)\hat{k} \]
Now, we calculate the curl of \(\vec{F}\), \(\nabla \times \vec{F}\).
\[ \nabla \times \vec{F} = \begin{vmatrix} \hat{i} & \hat{j} & \hat{k}
\frac{\partial}{\partial x} & \frac{\partial}{\partial y} & \frac{\partial}{\partial z}
2xyz & x^2z + 2y & x^2y \end{vmatrix} \]
Expanding the determinant:
\(\hat{i}\) component: \(\frac{\partial}{\partial y}(x^2y) - \frac{\partial}{\partial z}(x^2z + 2y) = x^2 - x^2 = 0\).
\(\hat{j}\) component: \(-\left( \frac{\partial}{\partial x}(x^2y) - \frac{\partial}{\partial z}(2xyz) \right) = -(2xy - 2xy) = 0\).
\(\hat{k}\) component: \(\frac{\partial}{\partial x}(x^2z + 2y) - \frac{\partial}{\partial y}(2xyz) = 2xz - 2xz = 0\).
Since \(\nabla \times \vec{F} = 0\), the vector field is conservative.
The integral of a conservative vector field over any closed loop is always 0, irrespective of the loop's shape or boundary.
Step 4: Final Answer:
The line integral evaluates to 0.
Quick Tip: Whenever you see a complicated line integral over a closed loop, always check if the vector field is conservative by calculating its curl first. It can save a lot of calculation time.
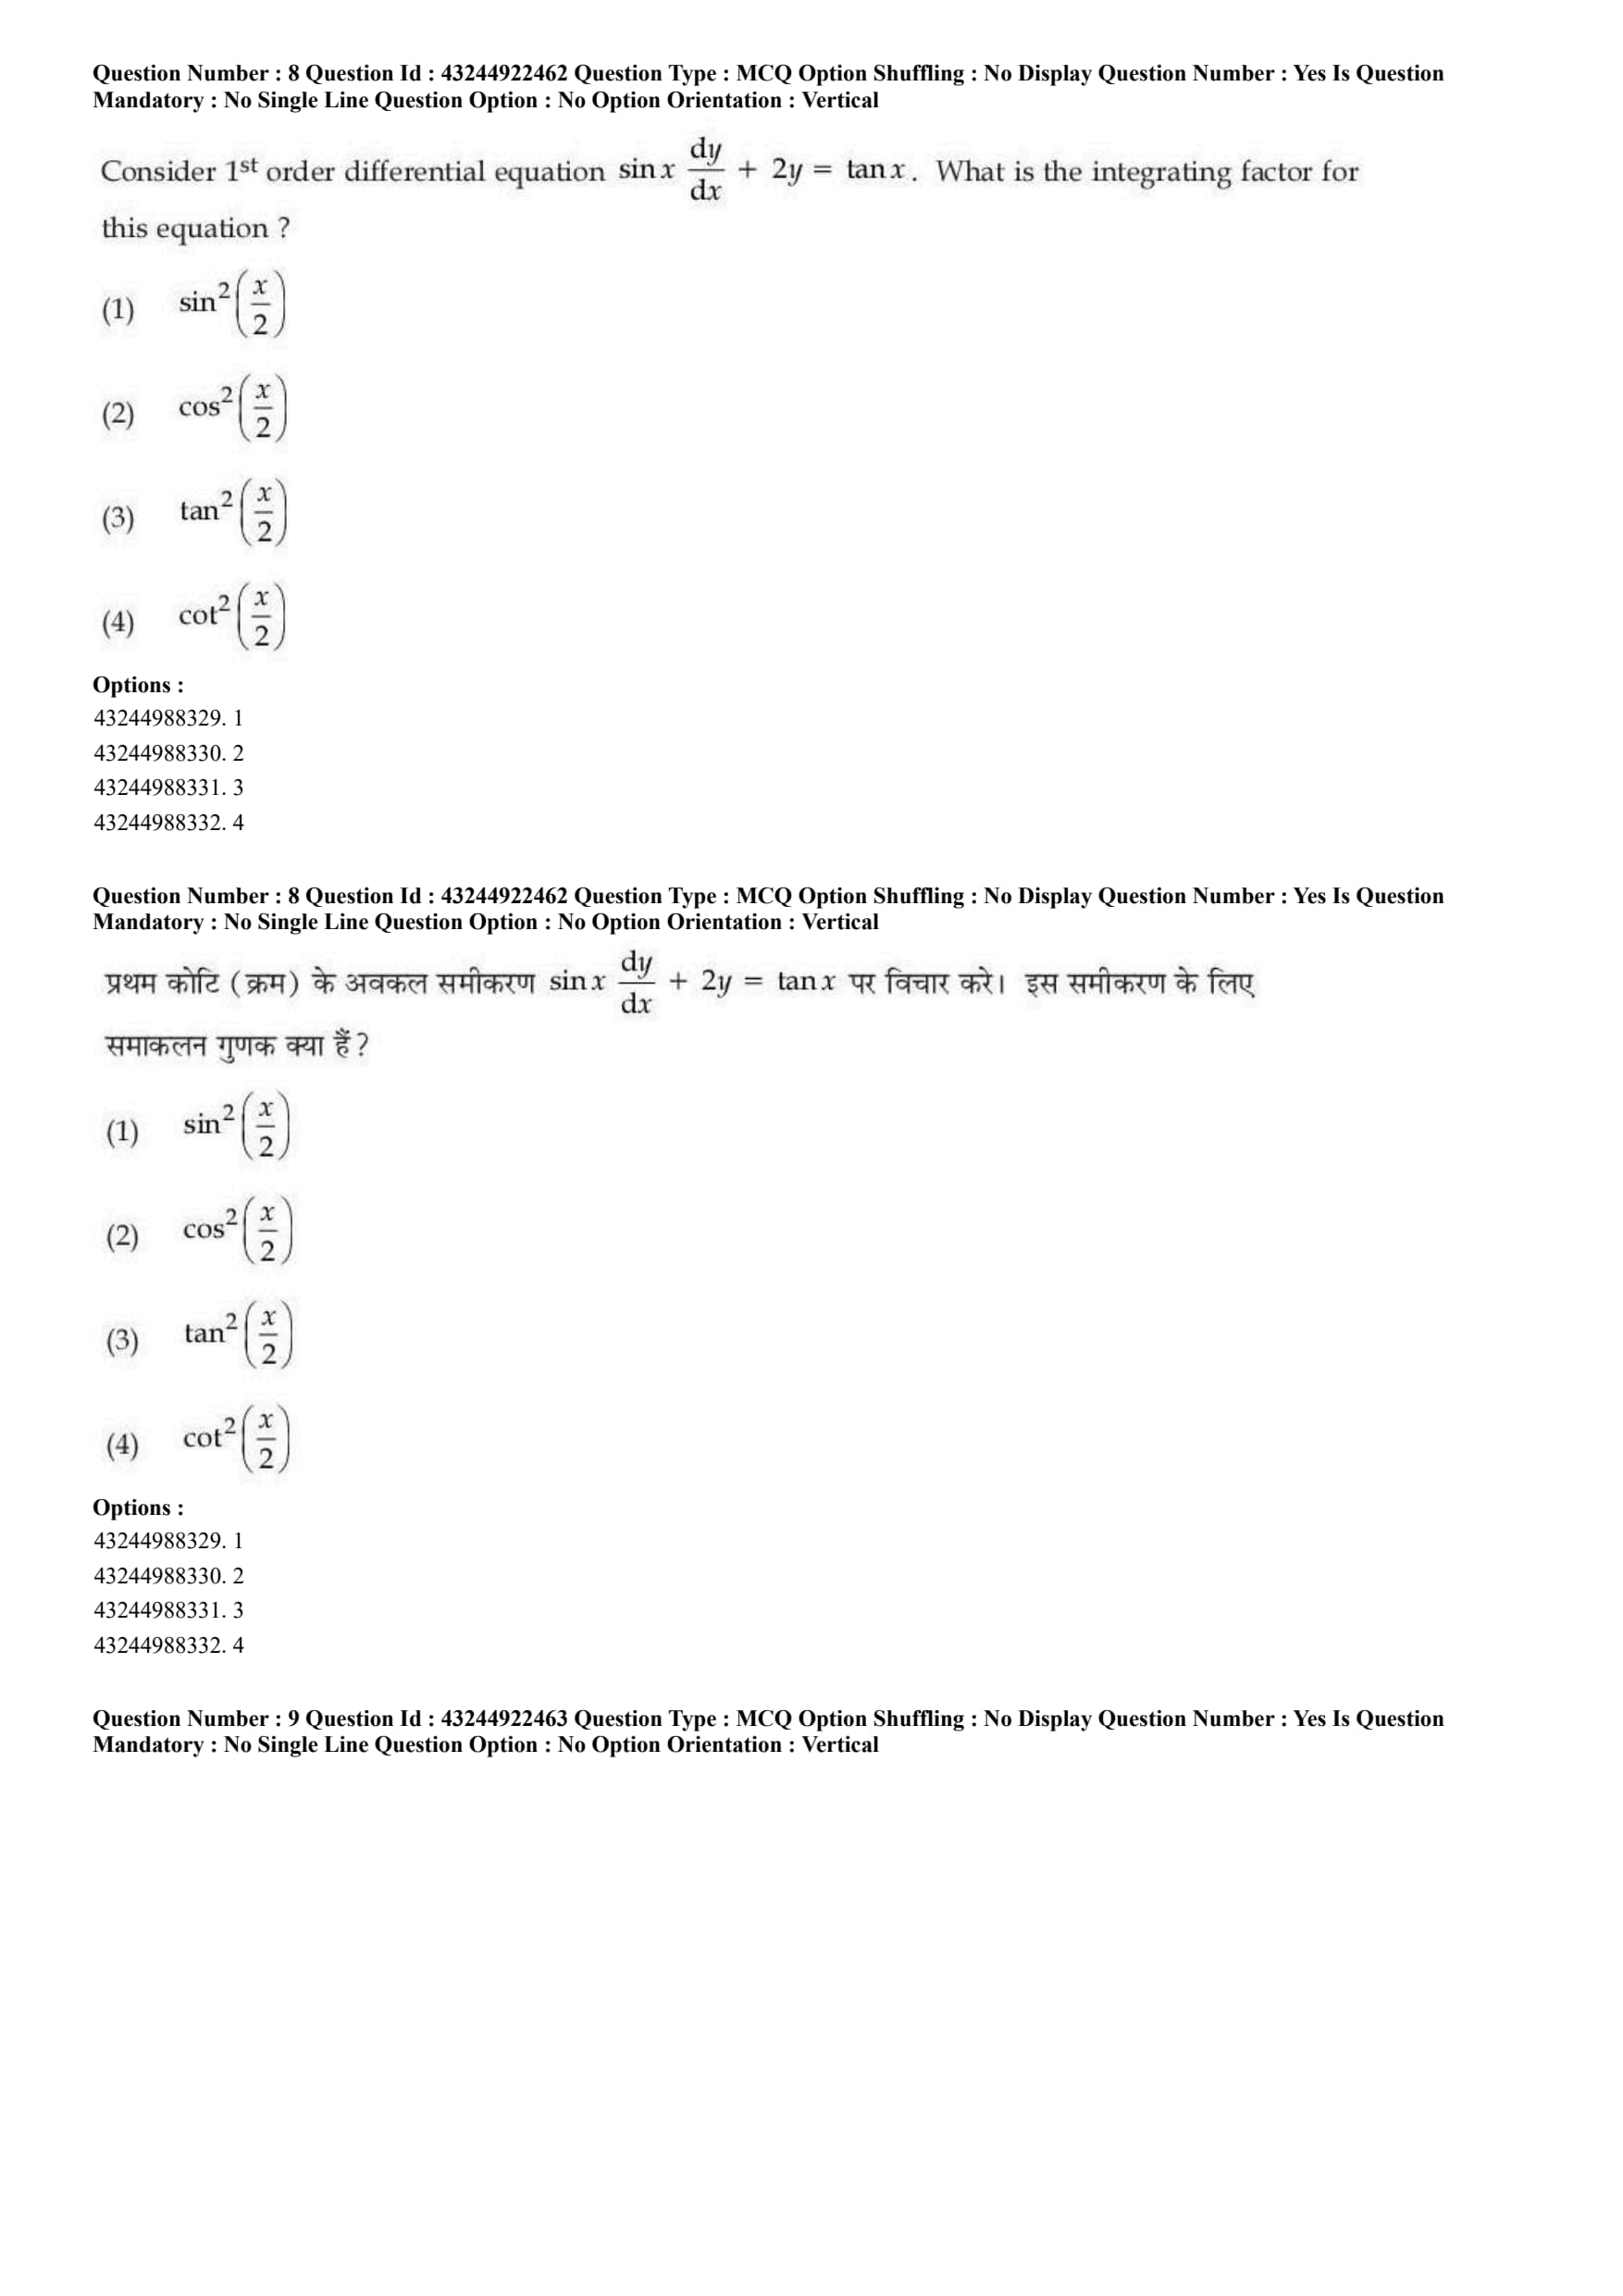
Consider 1st order differential equation \(\sin x \frac{dy}{dx} + 2y = \tan x\). What is the integrating factor for this equation?
View Solution
Step 1: Concept:
We need to find the integrating factor (IF) for a linear first-order differential equation.
Step 2: Key Formula or Approach:
A standard linear differential equation is of the form \(\frac{dy}{dx} + P(x)y = Q(x)\).
The integrating factor is given by \(IF = e^{\int P(x) dx}\).
Step 3: Step-by-step Explanation:
First, convert the given equation into the standard linear form by dividing the entire equation by \(\sin x\).
\[ \frac{dy}{dx} + \frac{2}{\sin x} y = \frac{\tan x}{\sin x} \]
Here, we can identify \(P(x) = \frac{2}{\sin x} = 2 \csc x\).
Now, we calculate the integral of \(P(x)\).
\[ \int P(x) dx = \int 2 \csc x dx \]
The standard integral of \(\csc x\) is \(\ln|\tan(x/2)|\).
\[ \int 2 \csc x dx = 2 \ln\left|\tan\left(\frac{x}{2}\right)\right| = \ln\left(\tan^2\left(\frac{x}{2}\right)\right) \]
Finally, compute the integrating factor (IF).
\[ IF = e^{\ln\left(\tan^2\left(\frac{x}{2}\right)\right)} = \tan^2\left(\frac{x}{2}\right) \]
Step 4: Final Answer:
The integrating factor is \(\tan^2(x/2)\), which corresponds to option (C).
Quick Tip: Remember standard integrals like \(\int \csc x dx = \ln|\tan(x/2)|\) or \(\ln|\csc x - \cot x|\). Both forms are equivalent, but the half-angle form is often faster for MCQ simplifications.
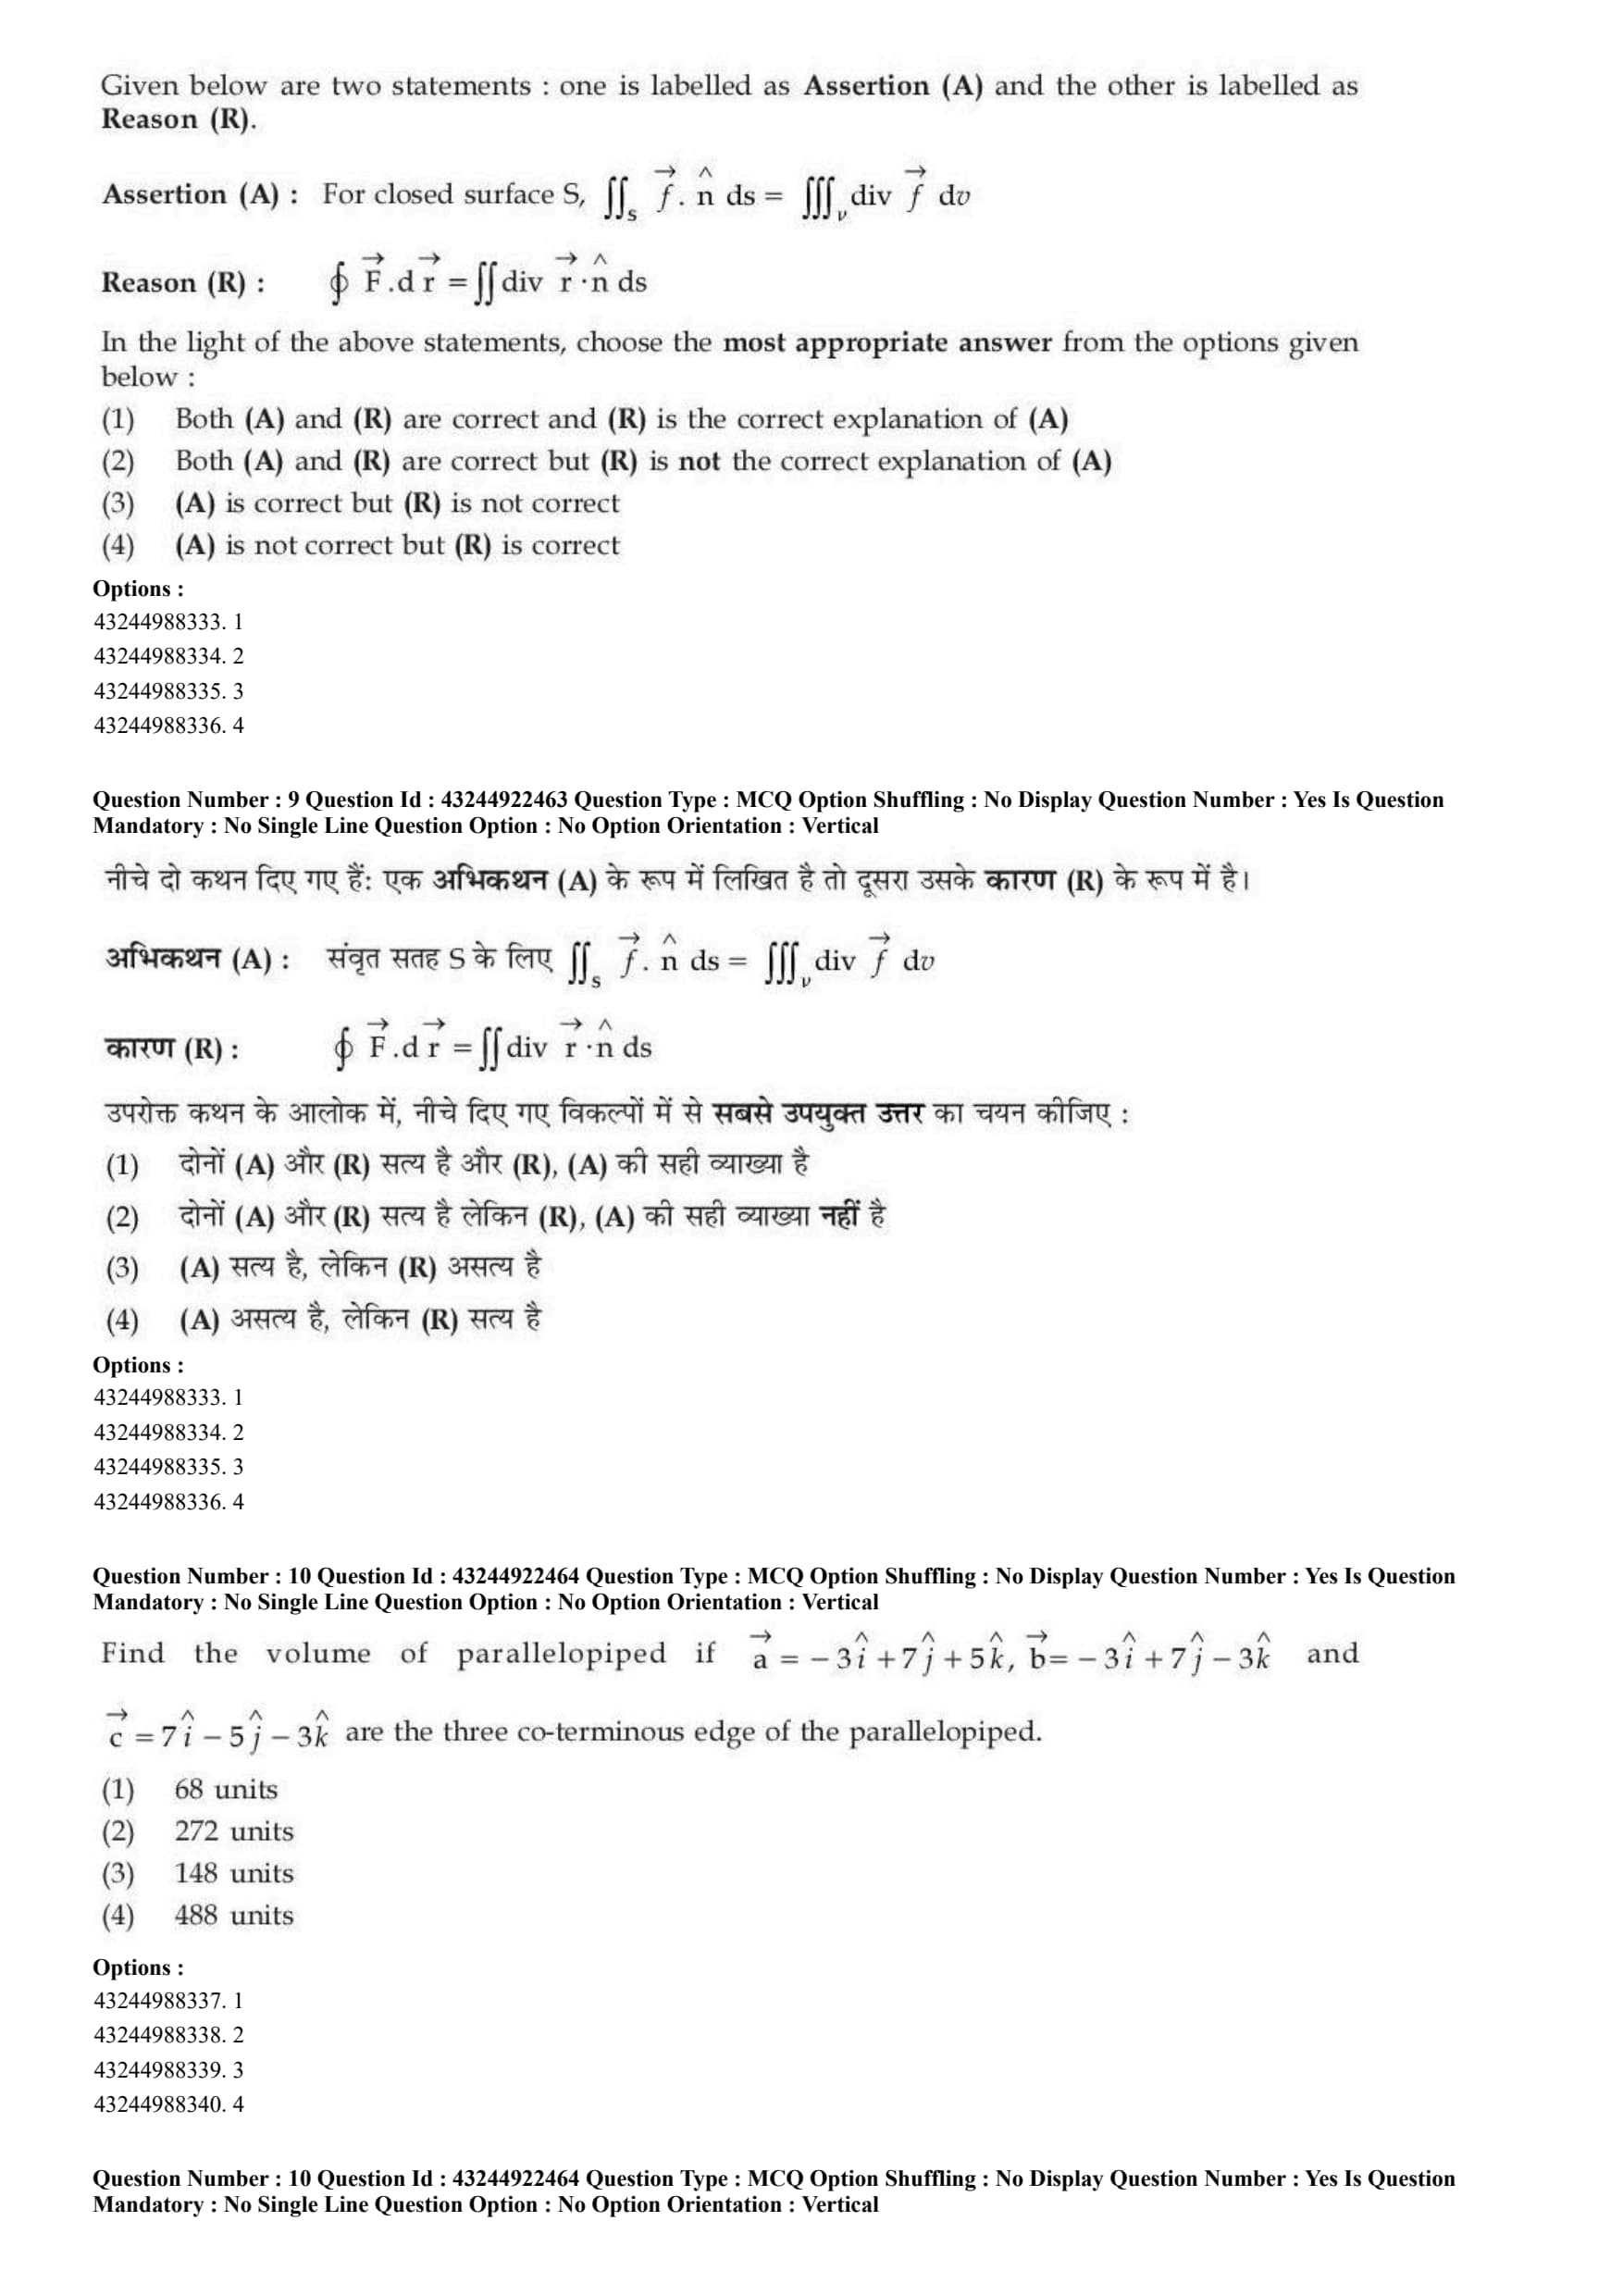
Given below are two statements : one is labelled as Assertion (A) and the other is labelled as Reason (R).
Assertion (A) : For closed surface S, \(\iint_S \vec{f} \cdot \hat{n} \, ds = \iiint_V div \vec{f} \, dv\)
Reason (R) : \(\oint \vec{F} \cdot d\vec{r} = \iint div \vec{r} \cdot \hat{n} \, ds\)
In the light of the above statements, choose the most appropriate answer from the options given below :
View Solution
Step 1: Concept:
The question tests the knowledge of integral theorems in vector calculus, specifically the Gauss Divergence Theorem and Stokes' Theorem.
Step 2: Key Formula or Approach:
Gauss Divergence Theorem: \(\iint_S \vec{F} \cdot d\vec{s} = \iiint_V (\nabla \cdot \vec{F}) dv\).
Stokes' Theorem: \(\oint_C \vec{F} \cdot d\vec{r} = \iint_S (\nabla \times \vec{F}) \cdot d\vec{s}\).
Step 3: Step-by-step Explanation:
Analyzing Assertion (A):
The assertion states that the surface integral of a vector field \(\vec{f}\) over a closed surface \(S\) is equal to the volume integral of its divergence over the enclosed volume \(V\).
This is exactly the statement of the Gauss Divergence Theorem. Thus, Assertion (A) is logically correct.
Analyzing Reason (R):
The reason attempts to state Stokes' Theorem, which connects a line integral to a surface integral.
However, the right side is written as \(\iint div \vec{r} \cdot \hat{n} \, ds\), whereas Stokes' theorem utilizes the curl of the vector field (\(\nabla \times \vec{F\) or \(curl \vec{F}\)), not the divergence.
Therefore, the mathematical expression in Reason (R) is fundamentally incorrect.
Step 4: Final Answer:
Assertion (A) is correct, but Reason (R) is incorrect.
Quick Tip: Divergence Theorem relates a Surface integral with a Volume integral (divergence). Stokes' Theorem relates a Line integral with a Surface integral (curl). Remembering this hierarchy helps identify incorrect theorem statements instantly.
Find the volume of parallelopiped if \(\vec{a} = -3\hat{i} + 7\hat{j} + 5\hat{k}\), \(\vec{b} = -3\hat{i} + 7\hat{j} - 3\hat{k}\) and \(\vec{c} = 7\hat{i} - 5\hat{j} - 3\hat{k}\) are the three co-terminous edges of the parallelopiped.
View Solution
Step 1: Concept:
We are given three vectors that form the co-terminous edges of a parallelopiped. We need to find its volume.
Step 2: Key Formula or Approach:
The volume \(V\) of a parallelopiped whose co-terminous edges are given by vectors \(\vec{a}\), \(\vec{b}\), and \(\vec{c}\) is the absolute value of their scalar triple product.
\[ V = |[\vec{a}, \vec{b}, \vec{c}]| = | \vec{a} \cdot (\vec{b} \times \vec{c}) | \]
This can be computed as the determinant of the matrix formed by the vector components.
Step 3: Step-by-step Explanation:
Construct the determinant from the components of the three vectors:
\[ V = \left| \begin{vmatrix} -3 & 7 & 5
-3 & 7 & -3
7 & -5 & -3 \end{vmatrix} \right| \]
To simplify the calculation, apply the row operation \(R_2 \rightarrow R_2 - R_1\):
\[ \begin{vmatrix} -3 & 7 & 5
0 & 0 & -8
7 & -5 & -3 \end{vmatrix} \]
Now, expand the determinant along the second row:
\[ Determinant = -(-8) \begin{vmatrix} -3 & 7
7 & -5 \end{vmatrix} \]
Calculate the \(2 \times 2\) determinant:
\[ Determinant = 8 [(-3)(-5) - (7)(7)] = 8 [15 - 49] = 8 [-34] = -272 \]
The volume must be a positive quantity.
\[ V = |-272| = 272 units \]
Step 4: Final Answer:
The volume is 272 units.
Quick Tip: Using elementary row operations before expanding a determinant can drastically reduce calculation mistakes by introducing zeros in a row or column.
The ratio of volume of tetrahedron having \(\vec{A}+\vec{B}\), \(\vec{B}+\vec{C}\), \(\vec{C}+\vec{A}\) as concurrent edges to that of volume of tetrahedron having \(\vec{A}, \vec{B}, \vec{C}\) as concurrent edges is :
View Solution
Step 1: Concept:
The question asks for the ratio of the volumes of two tetrahedrons defined by two different sets of concurrent edge vectors.
Step 2: Key Formula or Approach:
The volume of a tetrahedron formed by three concurrent vectors \(\vec{u}, \vec{v}, \vec{w}\) is given by \(\frac{1}{6} |[\vec{u}, \vec{v}, \vec{w}]|\).
We need to establish a relationship between the scalar triple product of \((\vec{A}+\vec{B}), (\vec{B}+\vec{C}), (\vec{C}+\vec{A})\) and that of \(\vec{A}, \vec{B}, \vec{C}\).
Step 3: Step-by-step Explanation:
Let \(V_2\) be the volume of the original tetrahedron with edges \(\vec{A}, \vec{B}, \vec{C}\).
\[ V_2 = \frac{1}{6} [\vec{A}, \vec{B}, \vec{C}] \]
Let \(V_1\) be the volume of the new tetrahedron with edges \(\vec{A}+\vec{B}\), \(\vec{B}+\vec{C}\), \(\vec{C}+\vec{A}\).
\[ V_1 = \frac{1}{6} [\vec{A}+\vec{B}, \vec{B}+\vec{C}, \vec{C}+\vec{A}] \]
We expand the scalar triple product for the new vectors:
\[ [\vec{A}+\vec{B}, \vec{B}+\vec{C}, \vec{C}+\vec{A}] = (\vec{A}+\vec{B}) \cdot ((\vec{B}+\vec{C}) \times (\vec{C}+\vec{A})) \]
Expand the cross product first:
\[ (\vec{B}+\vec{C}) \times (\vec{C}+\vec{A}) = \vec{B} \times \vec{C} + \vec{B} \times \vec{A} + \vec{C} \times \vec{C} + \vec{C} \times \vec{A} \]
Since \(\vec{C} \times \vec{C} = 0\), this simplifies to \(\vec{B} \times \vec{C} + \vec{B} \times \vec{A} + \vec{C} \times \vec{A}\).
Now compute the dot product:
\[ (\vec{A}+\vec{B}) \cdot (\vec{B} \times \vec{C} + \vec{B} \times \vec{A} + \vec{C} \times \vec{A}) \]
Using the distributive property and knowing that the dot product of a vector with a cross product involving itself is zero:
\(\vec{A} \cdot (\vec{B} \times \vec{C}) = [\vec{A}, \vec{B}, \vec{C}]\)
\(\vec{A} \cdot (\vec{B} \times \vec{A}) = 0\)
\(\vec{A} \cdot (\vec{C} \times \vec{A}) = 0\)
\(\vec{B} \cdot (\vec{B} \times \vec{C}) = 0\)
\(\vec{B} \cdot (\vec{B} \times \vec{A}) = 0\)
\(\vec{B} \cdot (\vec{C} \times \vec{A}) = [\vec{B}, \vec{C}, \vec{A}] = [\vec{A}, \vec{B}, \vec{C}]\) (cyclic permutation).
Adding the non-zero terms, we get:
\[ [\vec{A}+\vec{B}, \vec{B}+\vec{C}, \vec{C}+\vec{A}] = [\vec{A}, \vec{B}, \vec{C}] + [\vec{A}, \vec{B}, \vec{C}] = 2[\vec{A}, \vec{B}, \vec{C}] \]
Therefore, \(V_1 = 2 V_2\), and the ratio \(V_1 / V_2\) is 2/1.
Step 4: Final Answer:
The ratio is 2/1, which corresponds to option (B).
Quick Tip: A standard property to memorize for exams is \([\vec{a}+\vec{b}, \vec{b}+\vec{c}, \vec{c}+\vec{a}] = 2[\vec{a}, \vec{b}, \vec{c}]\). This directly applies to parallelepipeds and tetrahedrons formed by these edge combinations.
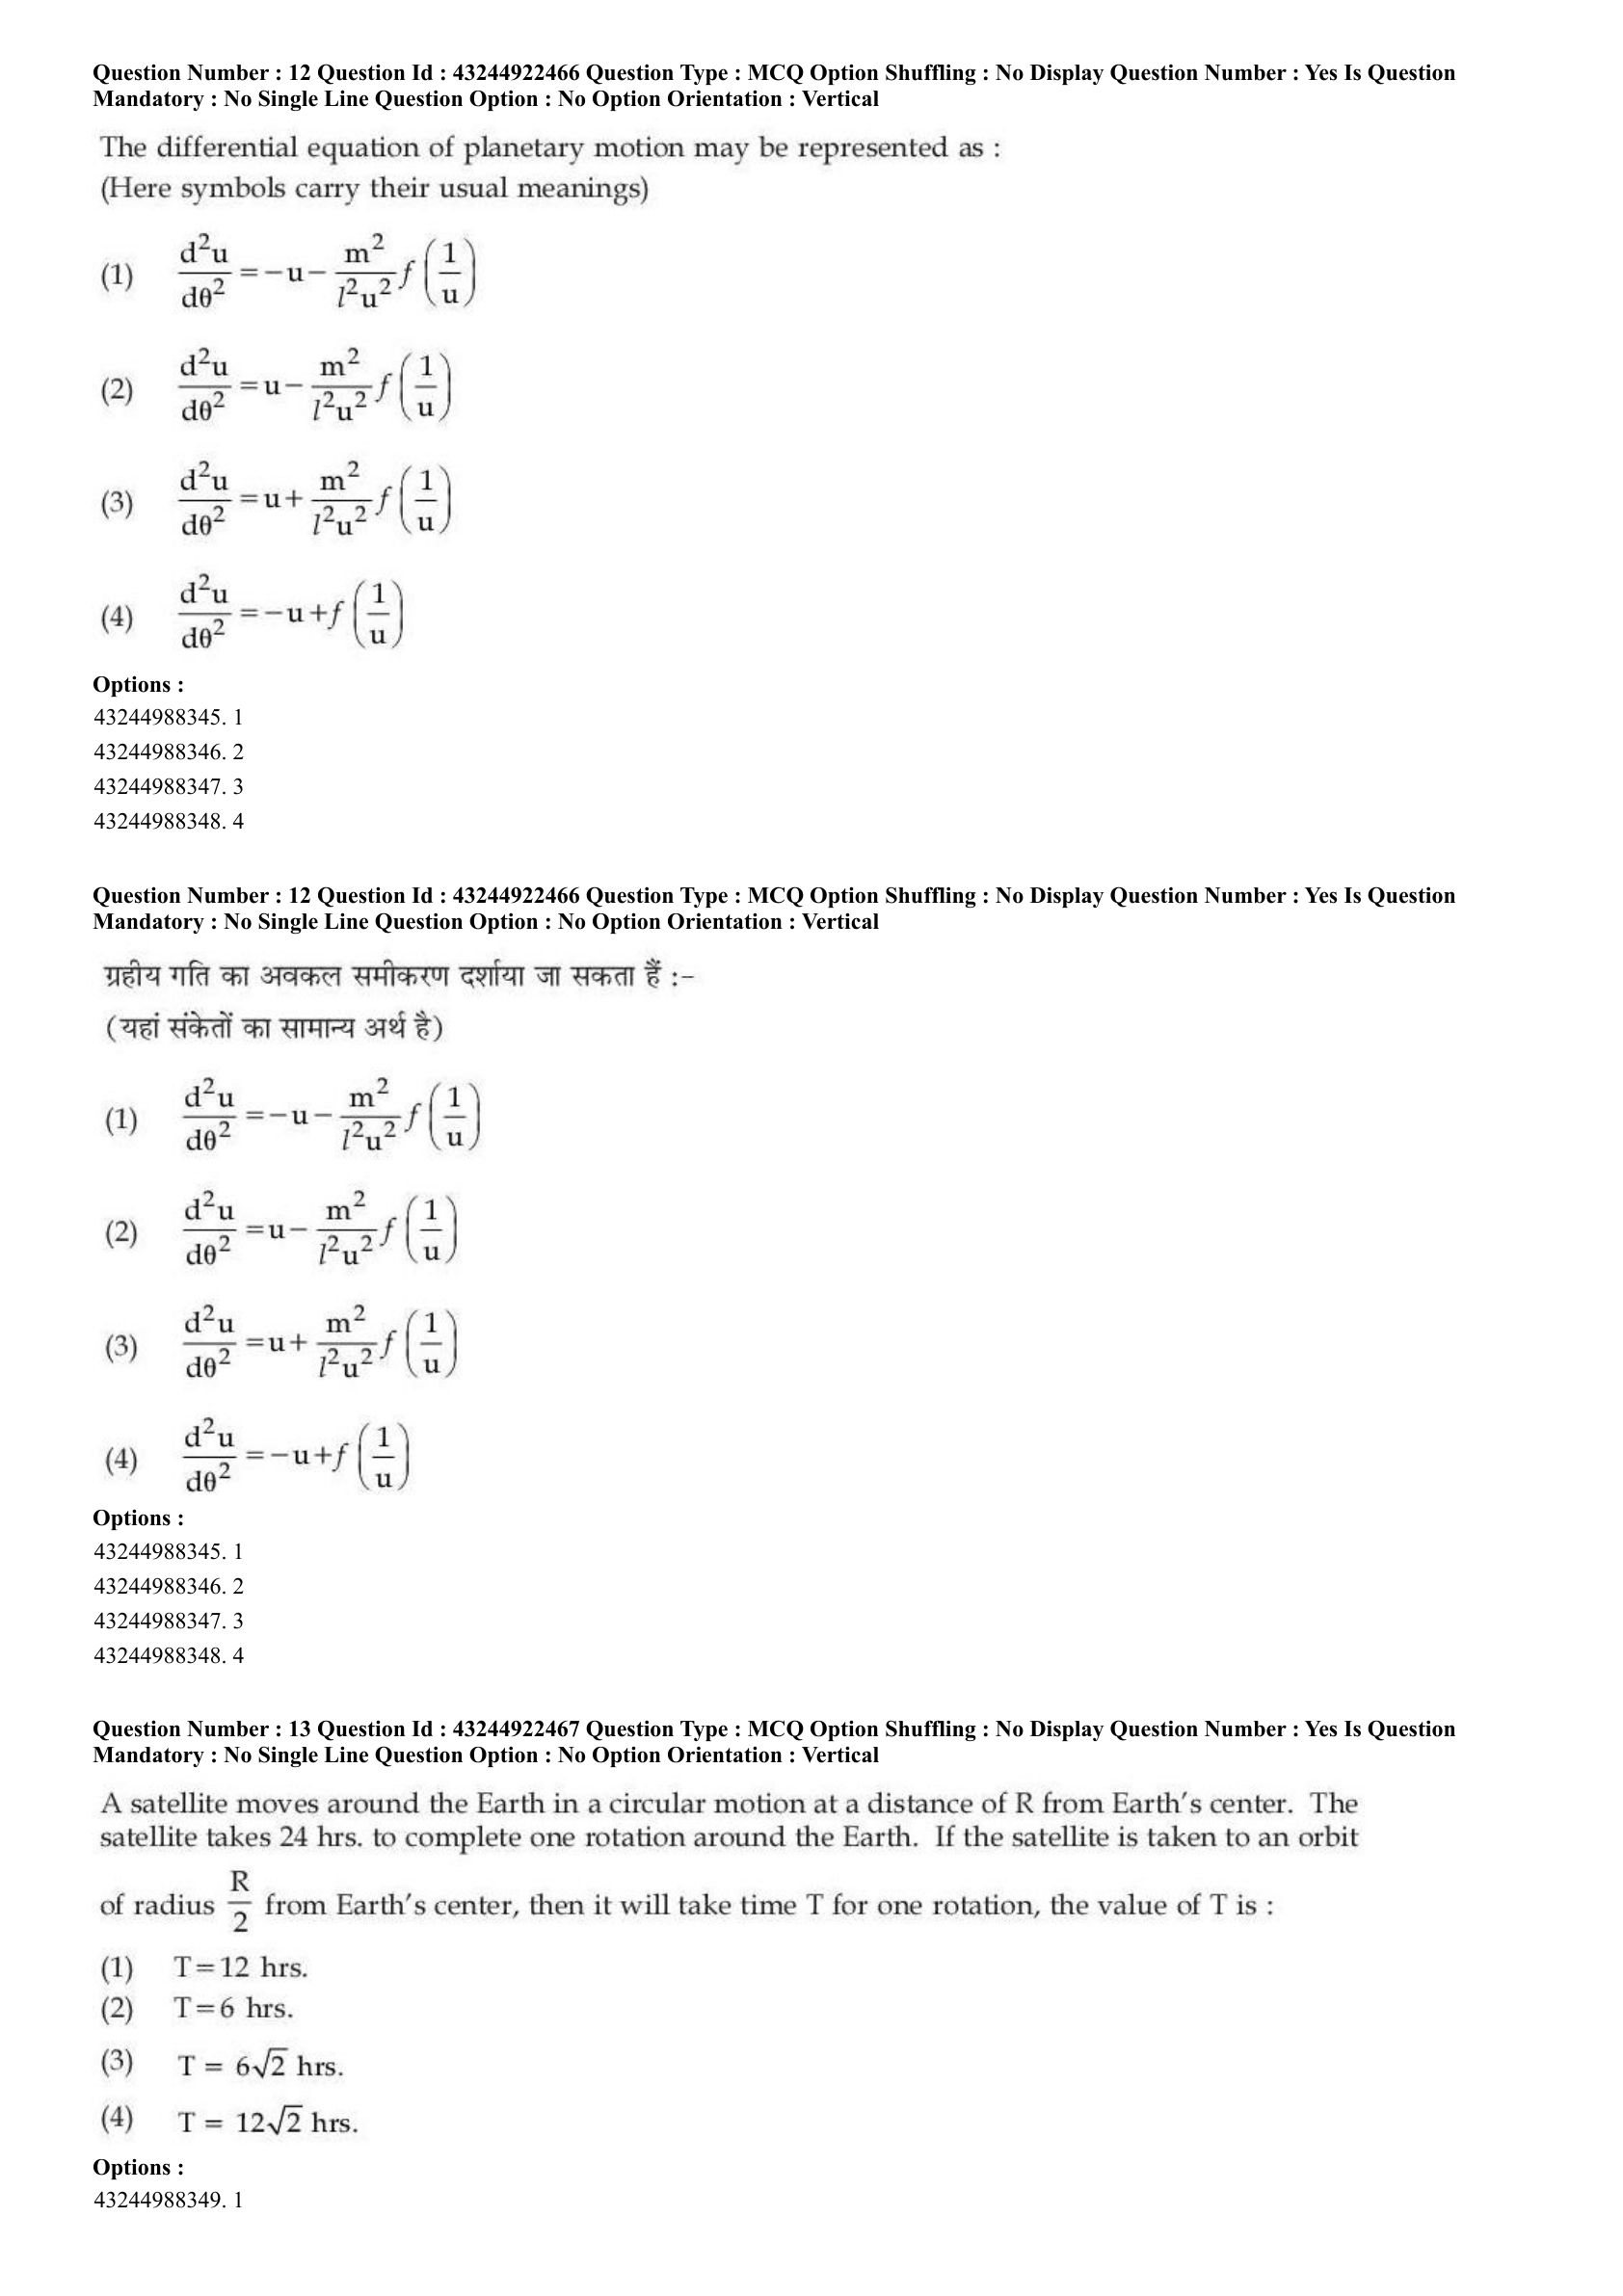
The differential equation of planetary motion may be represented as :
(Here symbols carry their usual meanings)
View Solution
Step 1: Concept:
This question asks for Binet's equation which describes the path (orbit) of a particle moving under a central force.
Step 2: Key Formula or Approach:
In polar coordinates \((r, \theta)\), substituting \(u = 1/r\), the radial equation of motion under a central force \(F(r)\) is \(m(\ddot{r} - r\dot{\theta}^2) = F(r)\).
By introducing angular momentum \(l = m r^2 \dot{\theta}\), we convert the time derivatives into angular derivatives.
Step 3: Step-by-step Explanation:
The angular momentum is given by \(l = m r^2 \dot{\theta} = \frac{m \dot{\theta}}{u^2}\), which gives \(\dot{\theta} = \frac{l u^2}{m}\).
Using the chain rule, \(\dot{r} = \frac{dr}{d\theta} \dot{\theta} = \frac{d}{d\theta}(1/u) \frac{l u^2}{m} = -\frac{1}{u^2} \frac{du}{d\theta} \frac{l u^2}{m} = -\frac{l}{m} \frac{du}{d\theta}\).
Differentiating again w.r.t time:
\(\ddot{r} = \frac{d}{d\theta}\left(-\frac{l}{m} \frac{du}{d\theta}\right) \dot{\theta} = -\frac{l}{m} \frac{d^2u}{d\theta^2} \left(\frac{l u^2}{m}\right) = -\frac{l^2 u^2}{m^2} \frac{d^2u}{d\theta^2}\).
Substitute \(\ddot{r}\) and \(\dot{\theta}\) back into the radial equation \(m(\ddot{r} - r\dot{\theta}^2) = F(1/u)\):
\[ m \left( -\frac{l^2 u^2}{m^2} \frac{d^2u}{d\theta^2} - \frac{1}{u} \left(\frac{l u^2}{m}\right)^2 \right) = F(1/u) \] \[ -\frac{l^2 u^2}{m} \frac{d^2u}{d\theta^2} - \frac{l^2 u^3}{m} = F(1/u) \]
Rearranging for \(\frac{d^2u}{d\theta^2} + u\), we get:
\[ \frac{d^2u}{d\theta^2} + u = -\frac{m}{l^2 u^2} F(1/u) \]
In some notations (as used in this specific question format), \(f(1/u)\) denotes the acceleration due to the central force rather than the absolute force itself. Therefore, \(F(1/u) = m f(1/u)\).
Substituting this, we obtain:
\[ \frac{d^2u}{d\theta^2} + u = -\frac{m}{l^2 u^2} \left[ m f(1/u) \right] = -\frac{m^2}{l^2 u^2} f(1/u) \]
Bringing \(u\) to the right-hand side gives:
\[ \frac{d^2u}{d\theta^2} = -u - \frac{m^2}{l^2 u^2} f(1/u) \]
Step 4: Final Answer:
The resulting differential equation strictly matches option (A).
Quick Tip: Pay close attention to standard symbols in Classical Mechanics. Frequently \(h\) or \(l\) is used for angular momentum per unit mass, but if \(l\) stands for total angular momentum, the extra mass term \(m^2\) naturally appears in Binet's equation.
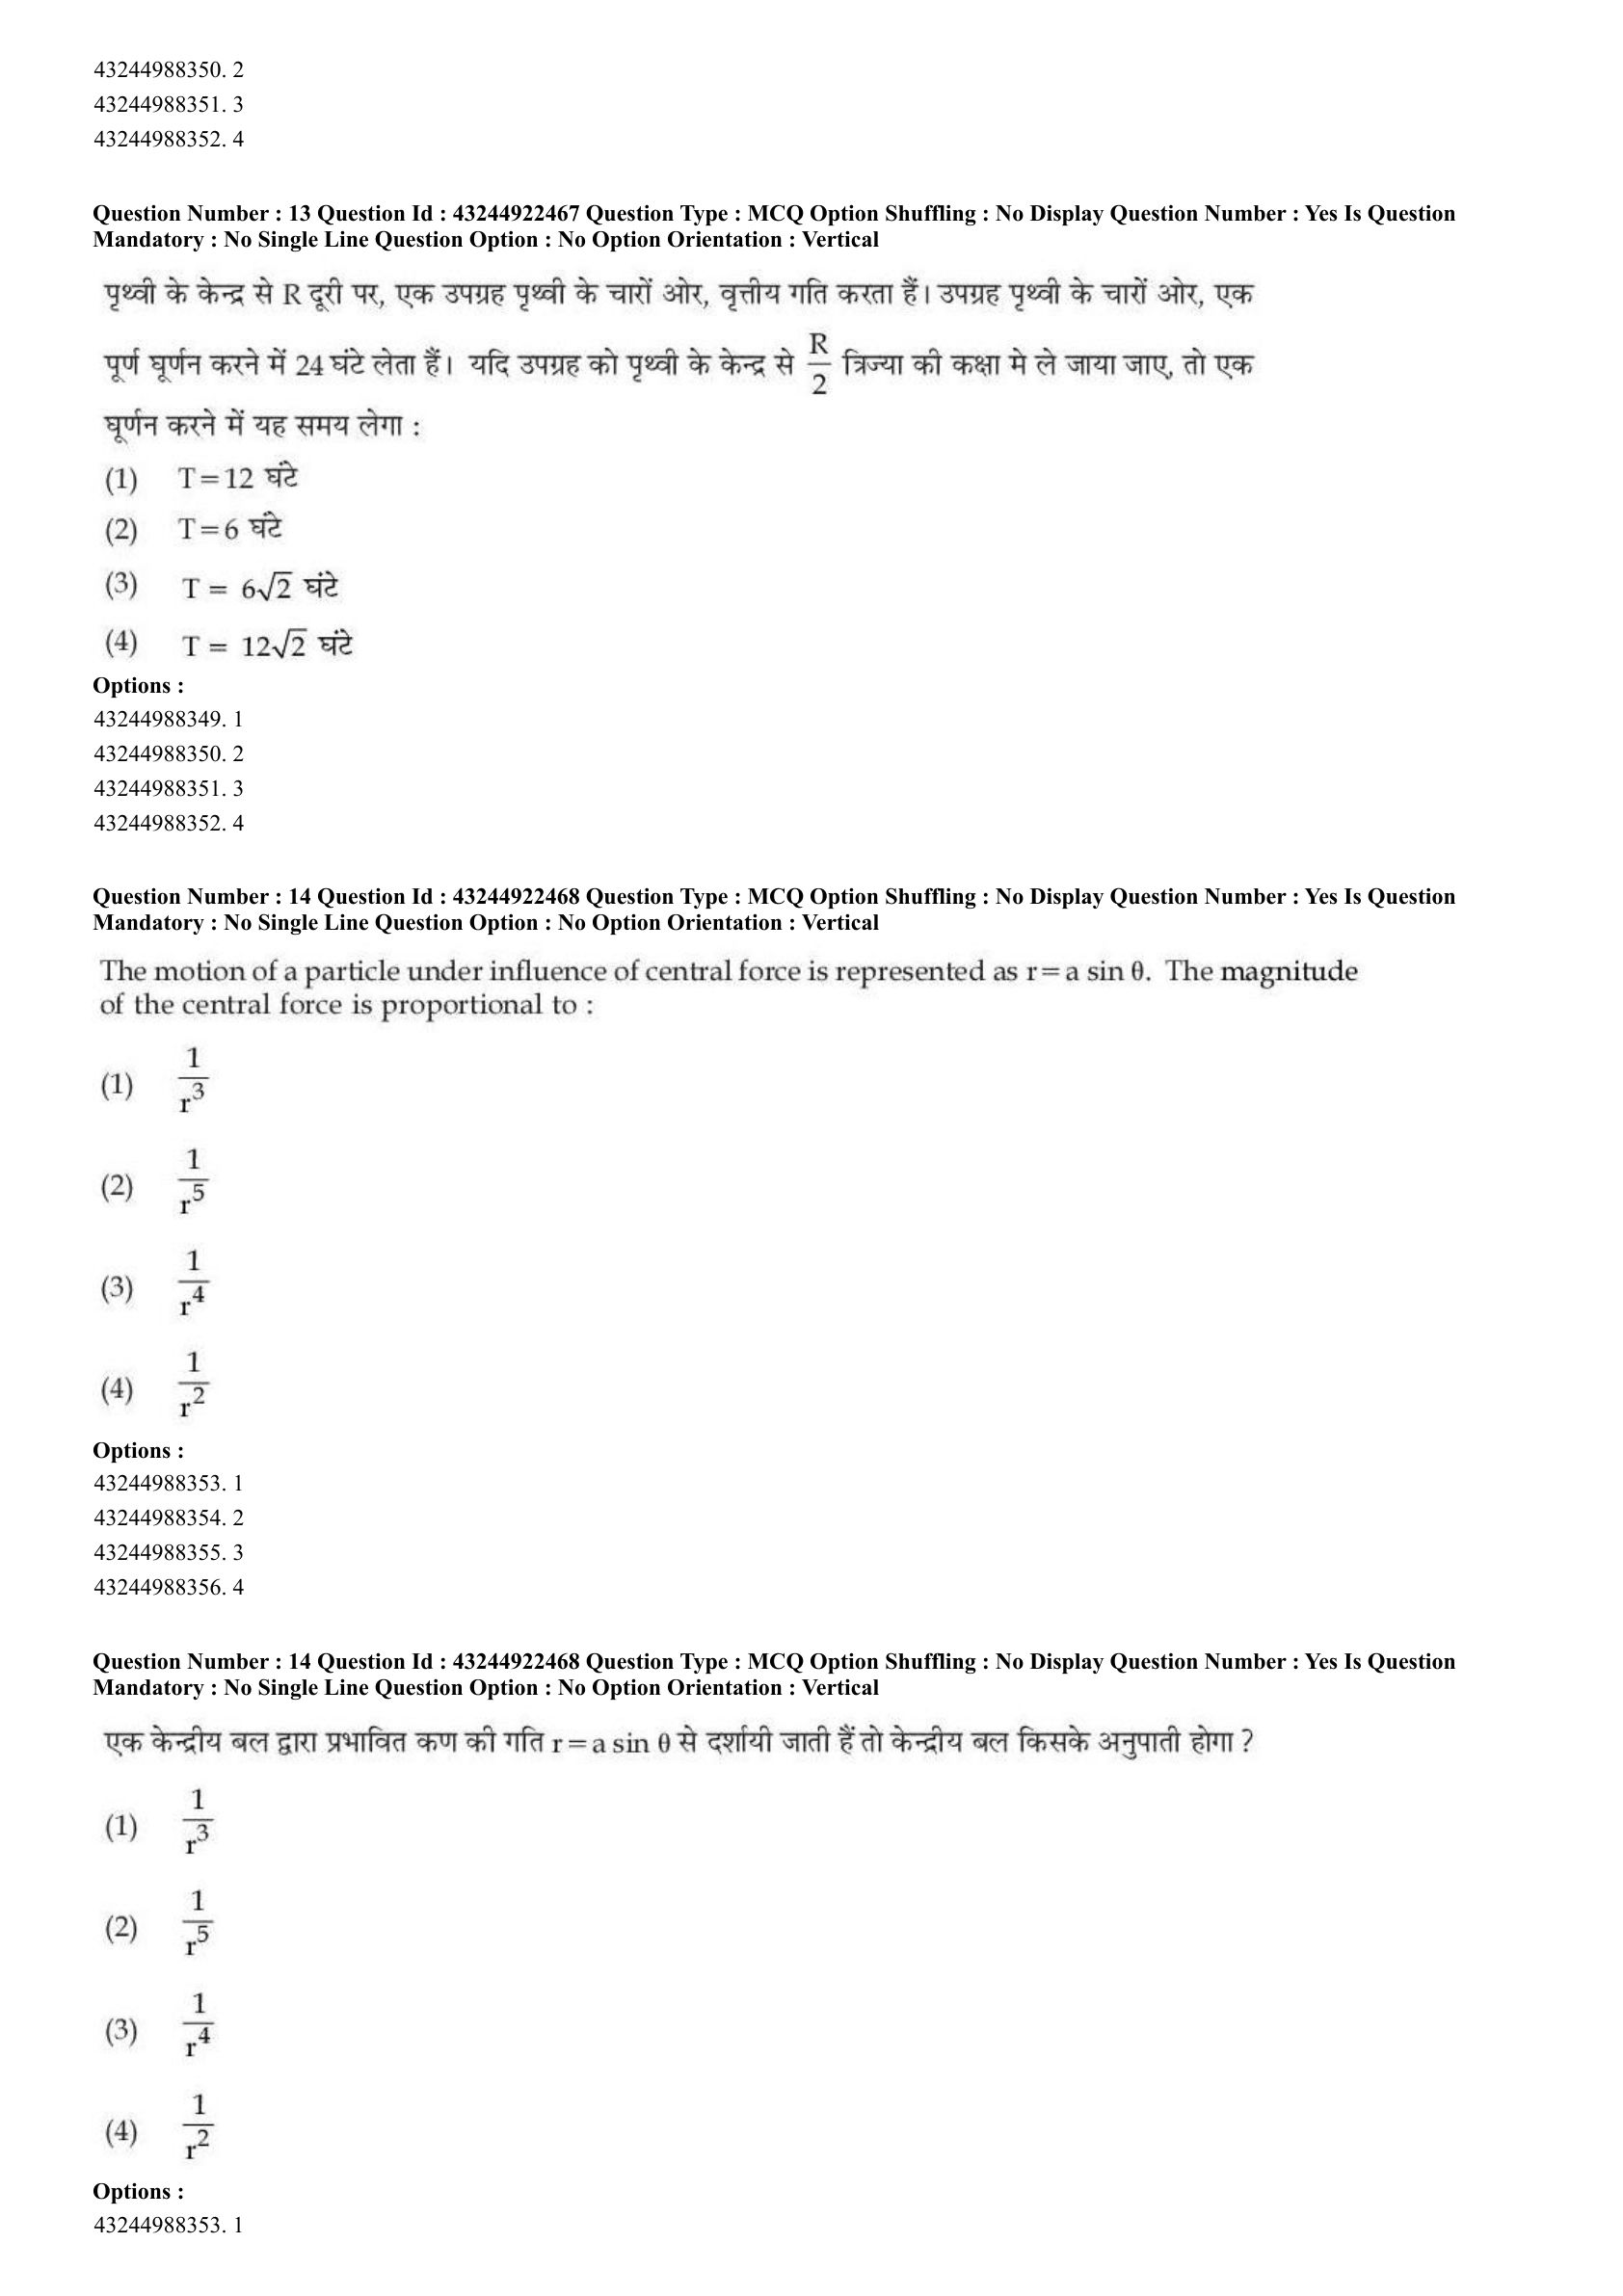
A satellite moves around the Earth in a circular motion at a distance of R from Earth's center. The satellite takes 24 hrs to complete one rotation around the Earth. If the satellite is taken to an orbit of radius R/2 from Earth's center, then it will take time T for one rotation, the value of T is :
View Solution
Step 1: Concept:
The question asks for the new orbital time period when the radius of a satellite's circular orbit is halved.
Step 2: Key Formula or Approach:
According to Kepler's Third Law of Planetary Motion, the square of the time period of an orbit is directly proportional to the cube of its radius.
\[ T^2 \propto R^3 \implies \left(\frac{T_2}{T_1}\right)^2 = \left(\frac{R_2}{R_1}\right)^3 \]
Step 3: Step-by-step Explanation:
Given initial period \(T_1 = 24\) hours and initial radius \(R_1 = R\).
The new radius is \(R_2 = R/2\). We need to find \(T_2 = T\).
Applying Kepler's Third Law:
\[ \frac{T^2}{24^2} = \left(\frac{R/2}{R}\right)^3 = \left(\frac{1}{2}\right)^3 = \frac{1}{8} \]
Take the square root on both sides:
\[ \frac{T}{24} = \left(\frac{1}{8}\right)^{1/2} = \frac{1}{2\sqrt{2}} \]
Rearranging to solve for \(T\):
\[ T = \frac{24}{2\sqrt{2}} = \frac{12}{\sqrt{2}} \]
Rationalize the denominator by multiplying the numerator and denominator by \(\sqrt{2}\):
\[ T = \frac{12\sqrt{2}}{2} = 6\sqrt{2} hours \]
Step 4: Final Answer:
The new time period is \(6\sqrt{2}\) hours, which corresponds to option (C).
Quick Tip: Kepler's third law (\(T^2 \propto R^3\)) is universally valid for all circular and elliptical orbits under inverse-square gravitational forces. Memorizing this shortcut avoids deriving the force balance equation \(mv^2/R = GmM/R^2\).
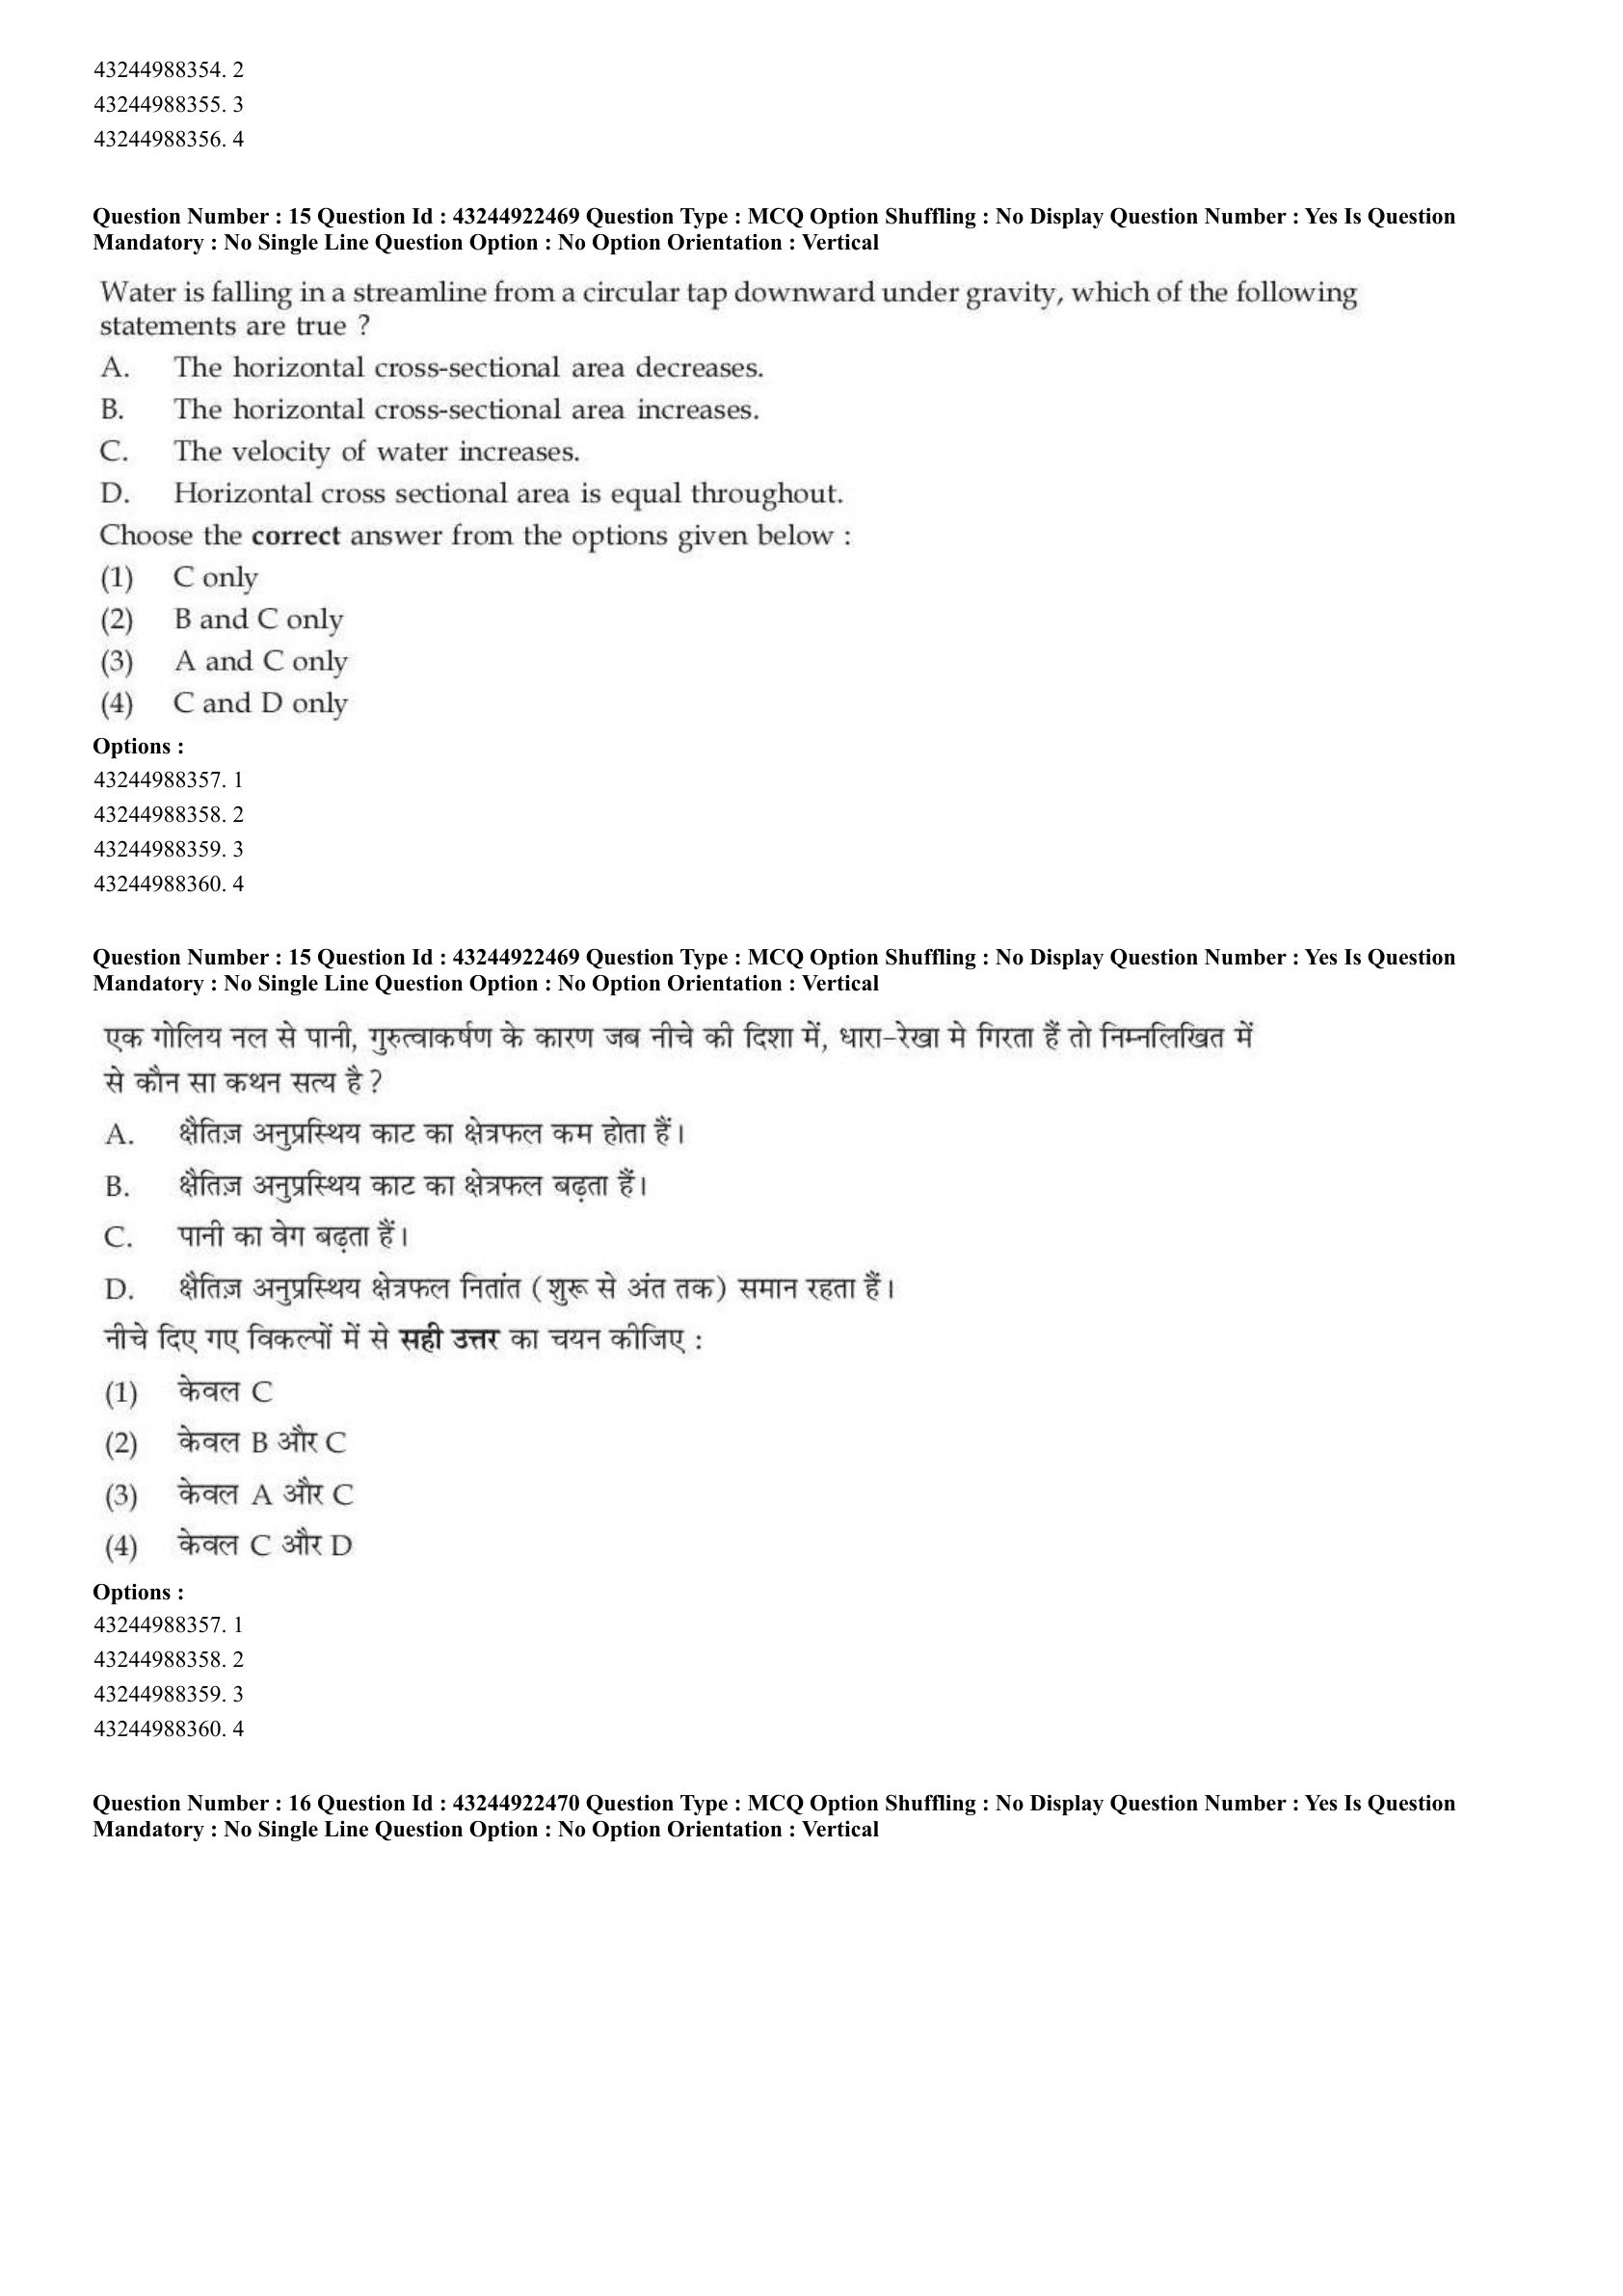
The motion of a particle under influence of central force is represented as \(r = a \sin \theta\). The magnitude of the central force is proportional to :
View Solution
Step 1: Concept:
Given the trajectory equation of a particle moving under a central force, we need to deduce the distance dependency of that central force.
Step 2: Key Formula or Approach:
We use Binet's orbital equation in terms of \(u = 1/r\).
The central force magnitude is proportional to \(u^2 \left( \frac{d^2u}{d\theta^2} + u \right)\).
Step 3: Step-by-step Explanation:
First, express \(u\) in terms of \(\theta\):
Since \(r = a \sin \theta\), we have \(u = \frac{1}{r} = \frac{1}{a \sin \theta} = \frac{1}{a} \csc \theta\).
Differentiate \(u\) with respect to \(\theta\) once:
\[ \frac{du}{d\theta} = -\frac{1}{a} \csc \theta \cot \theta \]
Differentiate a second time using the product rule:
\[ \frac{d^2u}{d\theta^2} = -\frac{1}{a} \left[ (-\csc \theta \cot \theta)(\cot \theta) + (\csc \theta)(-\csc^2 \theta) \right] \] \[ \frac{d^2u}{d\theta^2} = \frac{1}{a} \left( \csc \theta \cot^2 \theta + \csc^3 \theta \right) \]
Use the trigonometric identity \(\cot^2 \theta = \csc^2 \theta - 1\):
\[ \frac{d^2u}{d\theta^2} = \frac{1}{a} \left( \csc \theta (\csc^2 \theta - 1) + \csc^3 \theta \right) = \frac{1}{a} \left( 2\csc^3 \theta - \csc \theta \right) \]
Substitute \(\csc \theta = au\):
\[ \frac{d^2u}{d\theta^2} = \frac{1}{a} \left( 2(au)^3 - au \right) = 2a^2 u^3 - u \]
Now substitute this into the Binet force expression:
\[ F \propto u^2 \left( \frac{d^2u}{d\theta^2} + u \right) = u^2 \left( 2a^2 u^3 - u + u \right) \] \[ F \propto u^2 (2a^2 u^3) = 2a^2 u^5 \]
Since \(u = 1/r\), the force is proportional to \(u^5\), which means \(F \propto \frac{1}{r^5}\).
Step 4: Final Answer:
The magnitude of the central force is proportional to \(1/r^5\).
Quick Tip: For orbits of the form \(r^n = a^n \cos(n\theta)\), the force law is always proportional to \(1/r^{2n+3}\). Here \(r = a \sin \theta\) can be mapped to \(n=1\), leading directly to \(F \propto 1/r^{2(1)+3} = 1/r^5\).
Water is falling in a streamline from a circular tap downward under gravity, which of the following statements are true ?
A. The horizontal cross-sectional area decreases.
B. The horizontal cross-sectional area increases.
C. The velocity of water increases.
D. Horizontal cross sectional area is equal throughout.
Choose the correct answer from the options given below :
View Solution
Step 1: Concept:
The question tests the conceptual understanding of kinematics and fluid dynamics principles for a liquid falling freely under gravity.
Step 2: Key Formula or Approach:
We use the Equation of Continuity for incompressible fluids, which states \(A \times v = Constant\), where \(A\) is the cross-sectional area and \(v\) is the fluid velocity.
We also consider Newtonian kinematics under constant gravitational acceleration.
Step 3: Step-by-step Explanation:
As water falls freely downward from the tap under the influence of gravity, its velocity constantly increases due to acceleration \(g\). (\(v = \sqrt{u^2 + 2gh}\))
This makes statement C correct.
According to the equation of continuity (\(A_1 v_1 = A_2 v_2\)), the product of the cross-sectional area and the velocity must remain constant throughout the streamline flow.
Because the downward velocity \(v\) increases as the water falls, the horizontal cross-sectional area \(A\) must proportionally decrease to keep the product \(A \cdot v\) constant.
This makes statement A correct and statements B and D incorrect.
Step 4: Final Answer:
Statements A and C are correct, corresponding to option (C).
Quick Tip: This is the reason why a stream of water from a tap tapers down into a thin neck before eventually breaking into droplets (due to surface tension and Rayleigh-Plateau instability).
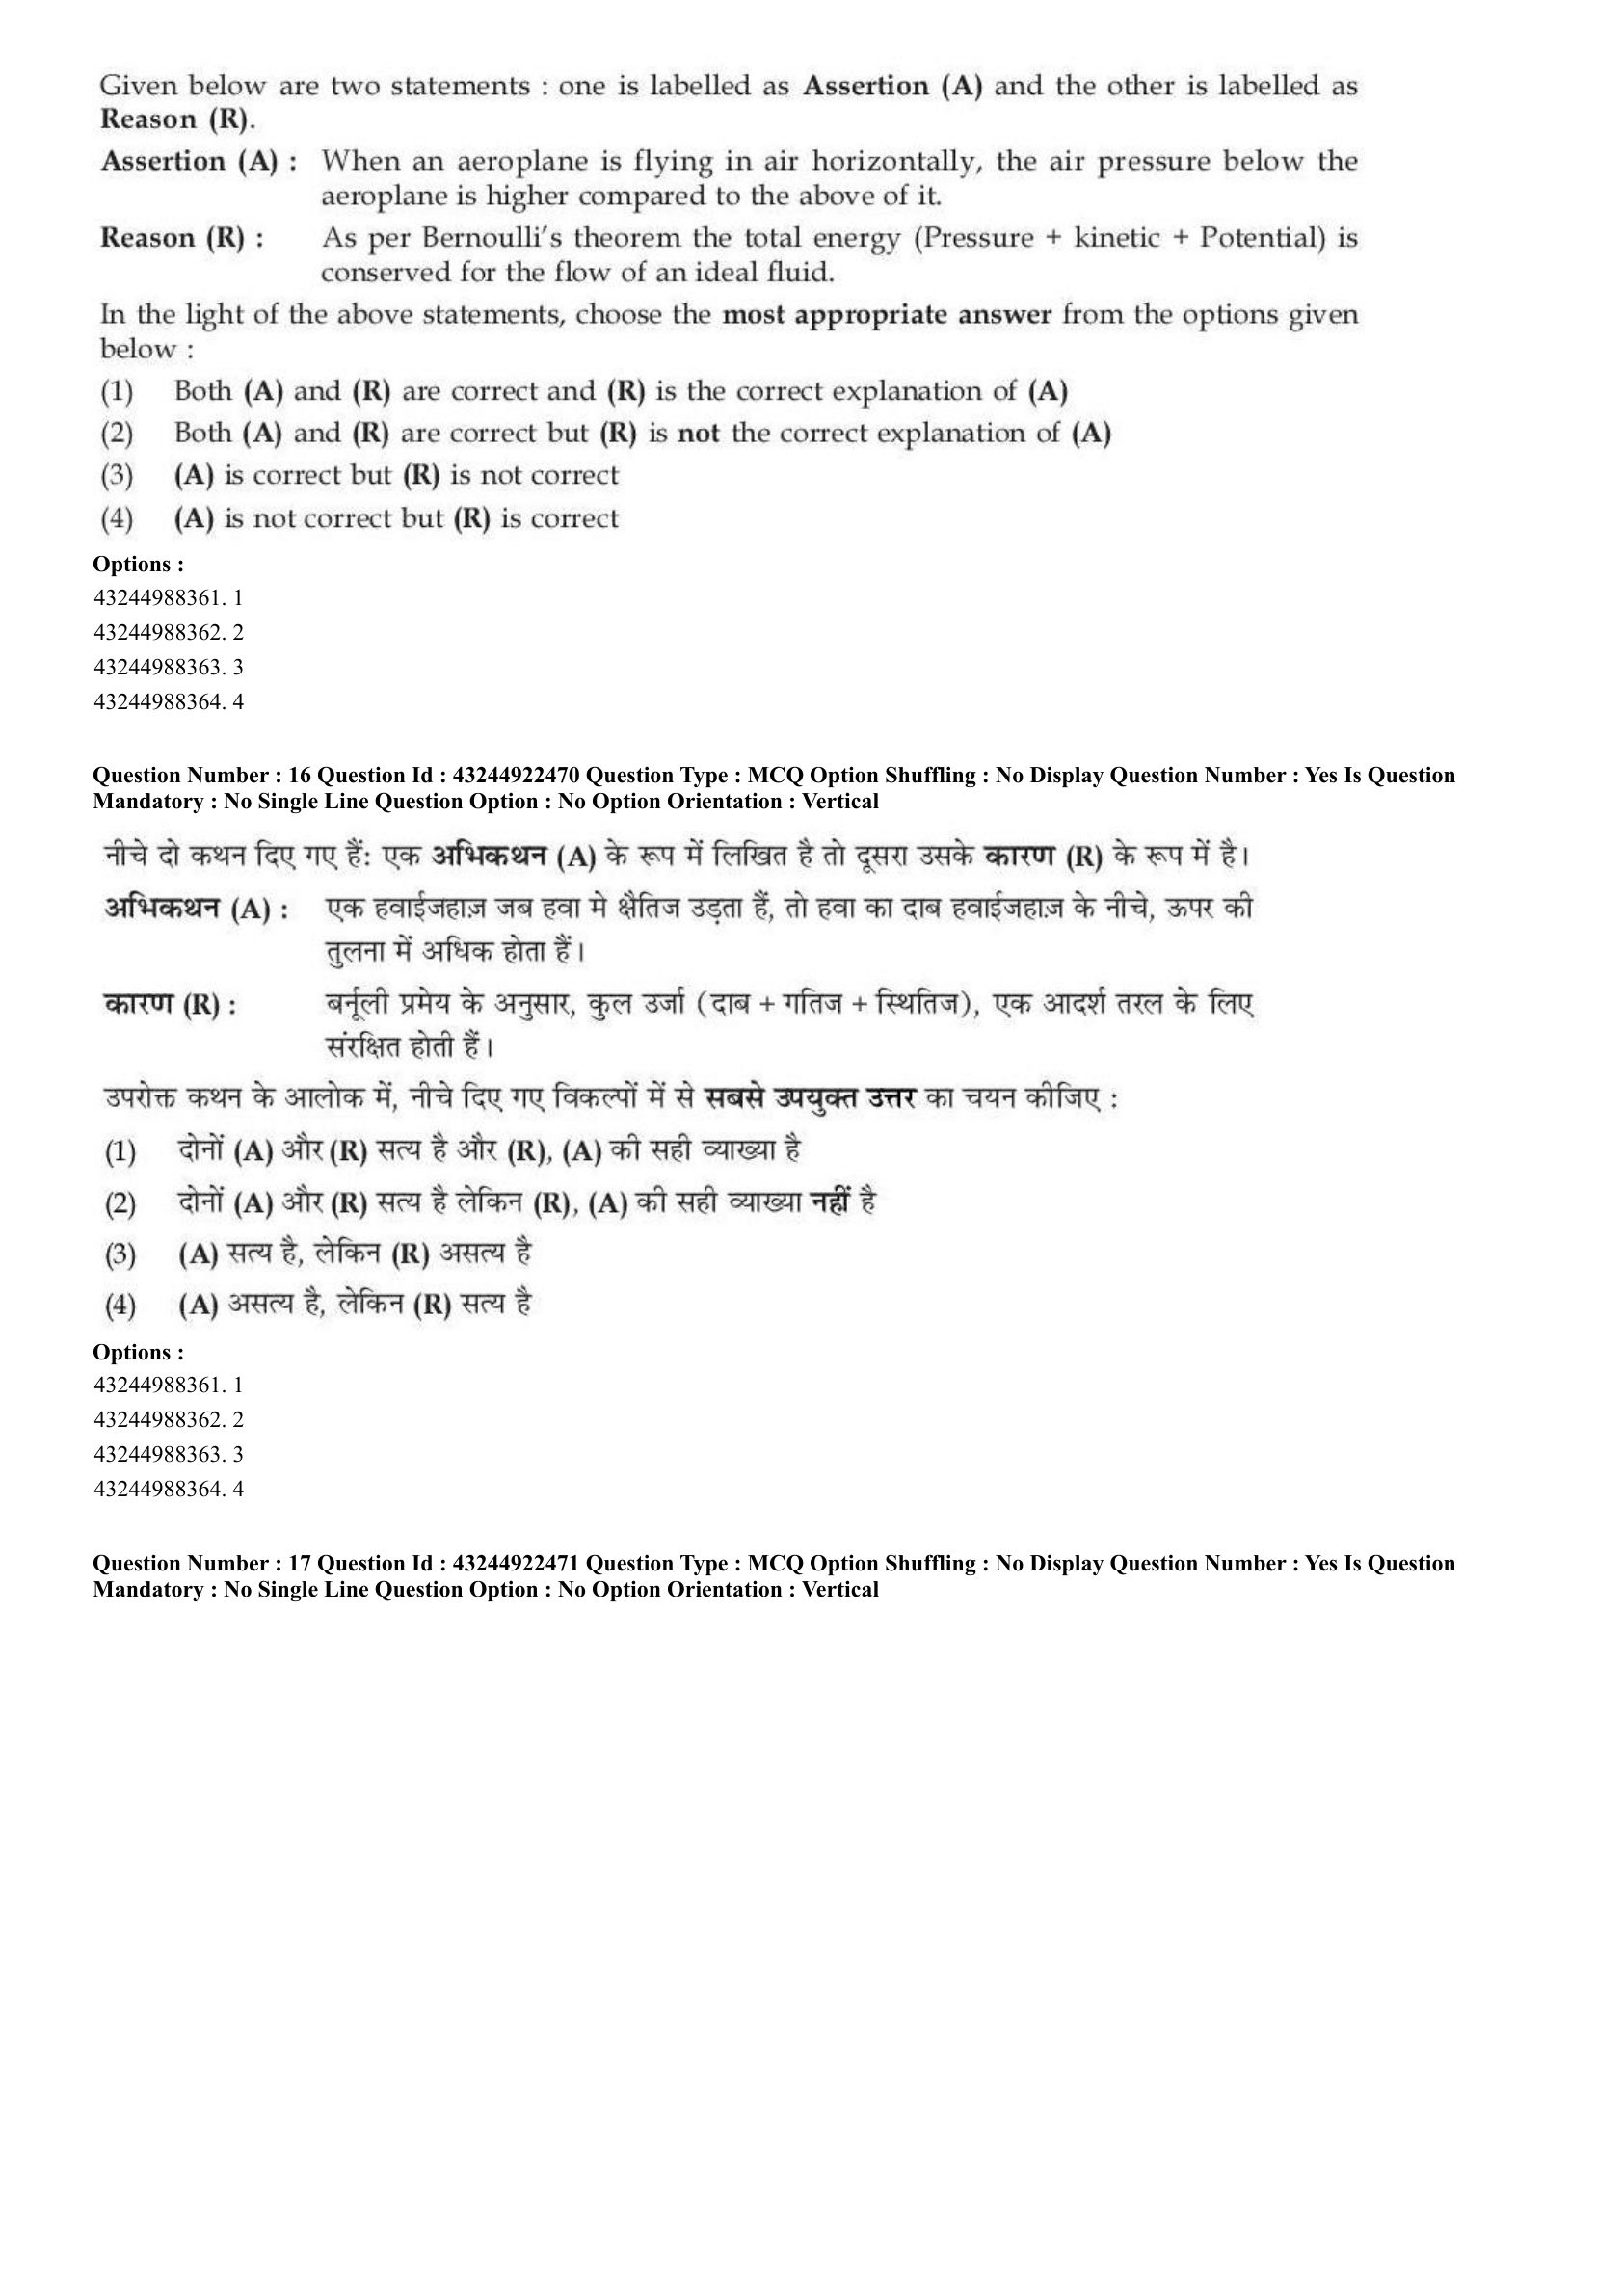
Given below are two statements : one is labelled as Assertion (A) and the other is labelled as Reason (R).
Assertion (A) : When an aeroplane is flying in air horizontally, the air pressure below the aeroplane is higher compared to the above of it.
Reason (R) : As per Bernoulli's theorem the total energy (Pressure + kinetic + Potential) is conserved for the flow of an ideal fluid.
In the light of the above statements, choose the most appropriate answer from the options given below :
View Solution
Step 1: Concept:
The question asks to evaluate an Assertion about aeroplane lift and a Reason concerning Bernoulli's theorem, and to determine if the Reason accurately explains the Assertion.
Step 2: Key Formula or Approach:
Bernoulli's Theorem states that for steady, ideal fluid flow, \(P + \frac{1}{2}\rho v^2 + \rho gh = Constant\).
This establishes an inverse relationship between local fluid velocity and local fluid pressure in a horizontal flow setup.
Step 3: Step-by-step Explanation:
Assertion (A): The wings of an aeroplane are designed with an aerofoil shape. The air moving over the top surface has to travel a longer distance compared to the air moving underneath. Because of this, the air velocity is higher on top and lower at the bottom. By Bernoulli's principle, higher velocity means lower pressure. Therefore, the pressure below the wing is indeed higher than the pressure above it, providing the aerodynamic lift. Assertion (A) is correct.
Reason (R): The reason states Bernoulli's theorem, noting that the sum of pressure energy, kinetic energy, and potential energy per unit volume remains constant. This is a factually correct statement in fluid dynamics. Reason (R) is correct.
Connection: Because the total energy is conserved (as stated in Reason R), an increase in kinetic energy (higher air speed on top) must be offset by a decrease in pressure energy, causing the pressure difference mentioned in Assertion A. Hence, Reason R is the precise physical principle explaining Assertion A.
Step 4: Final Answer:
Both statements are true and (R) is the correct explanation of (A).
Quick Tip: Dynamic lift is a classic application of Bernoulli's theorem. This same principle explains the swinging of a cricket ball (Magnus effect) and the working of an atomizer spray.
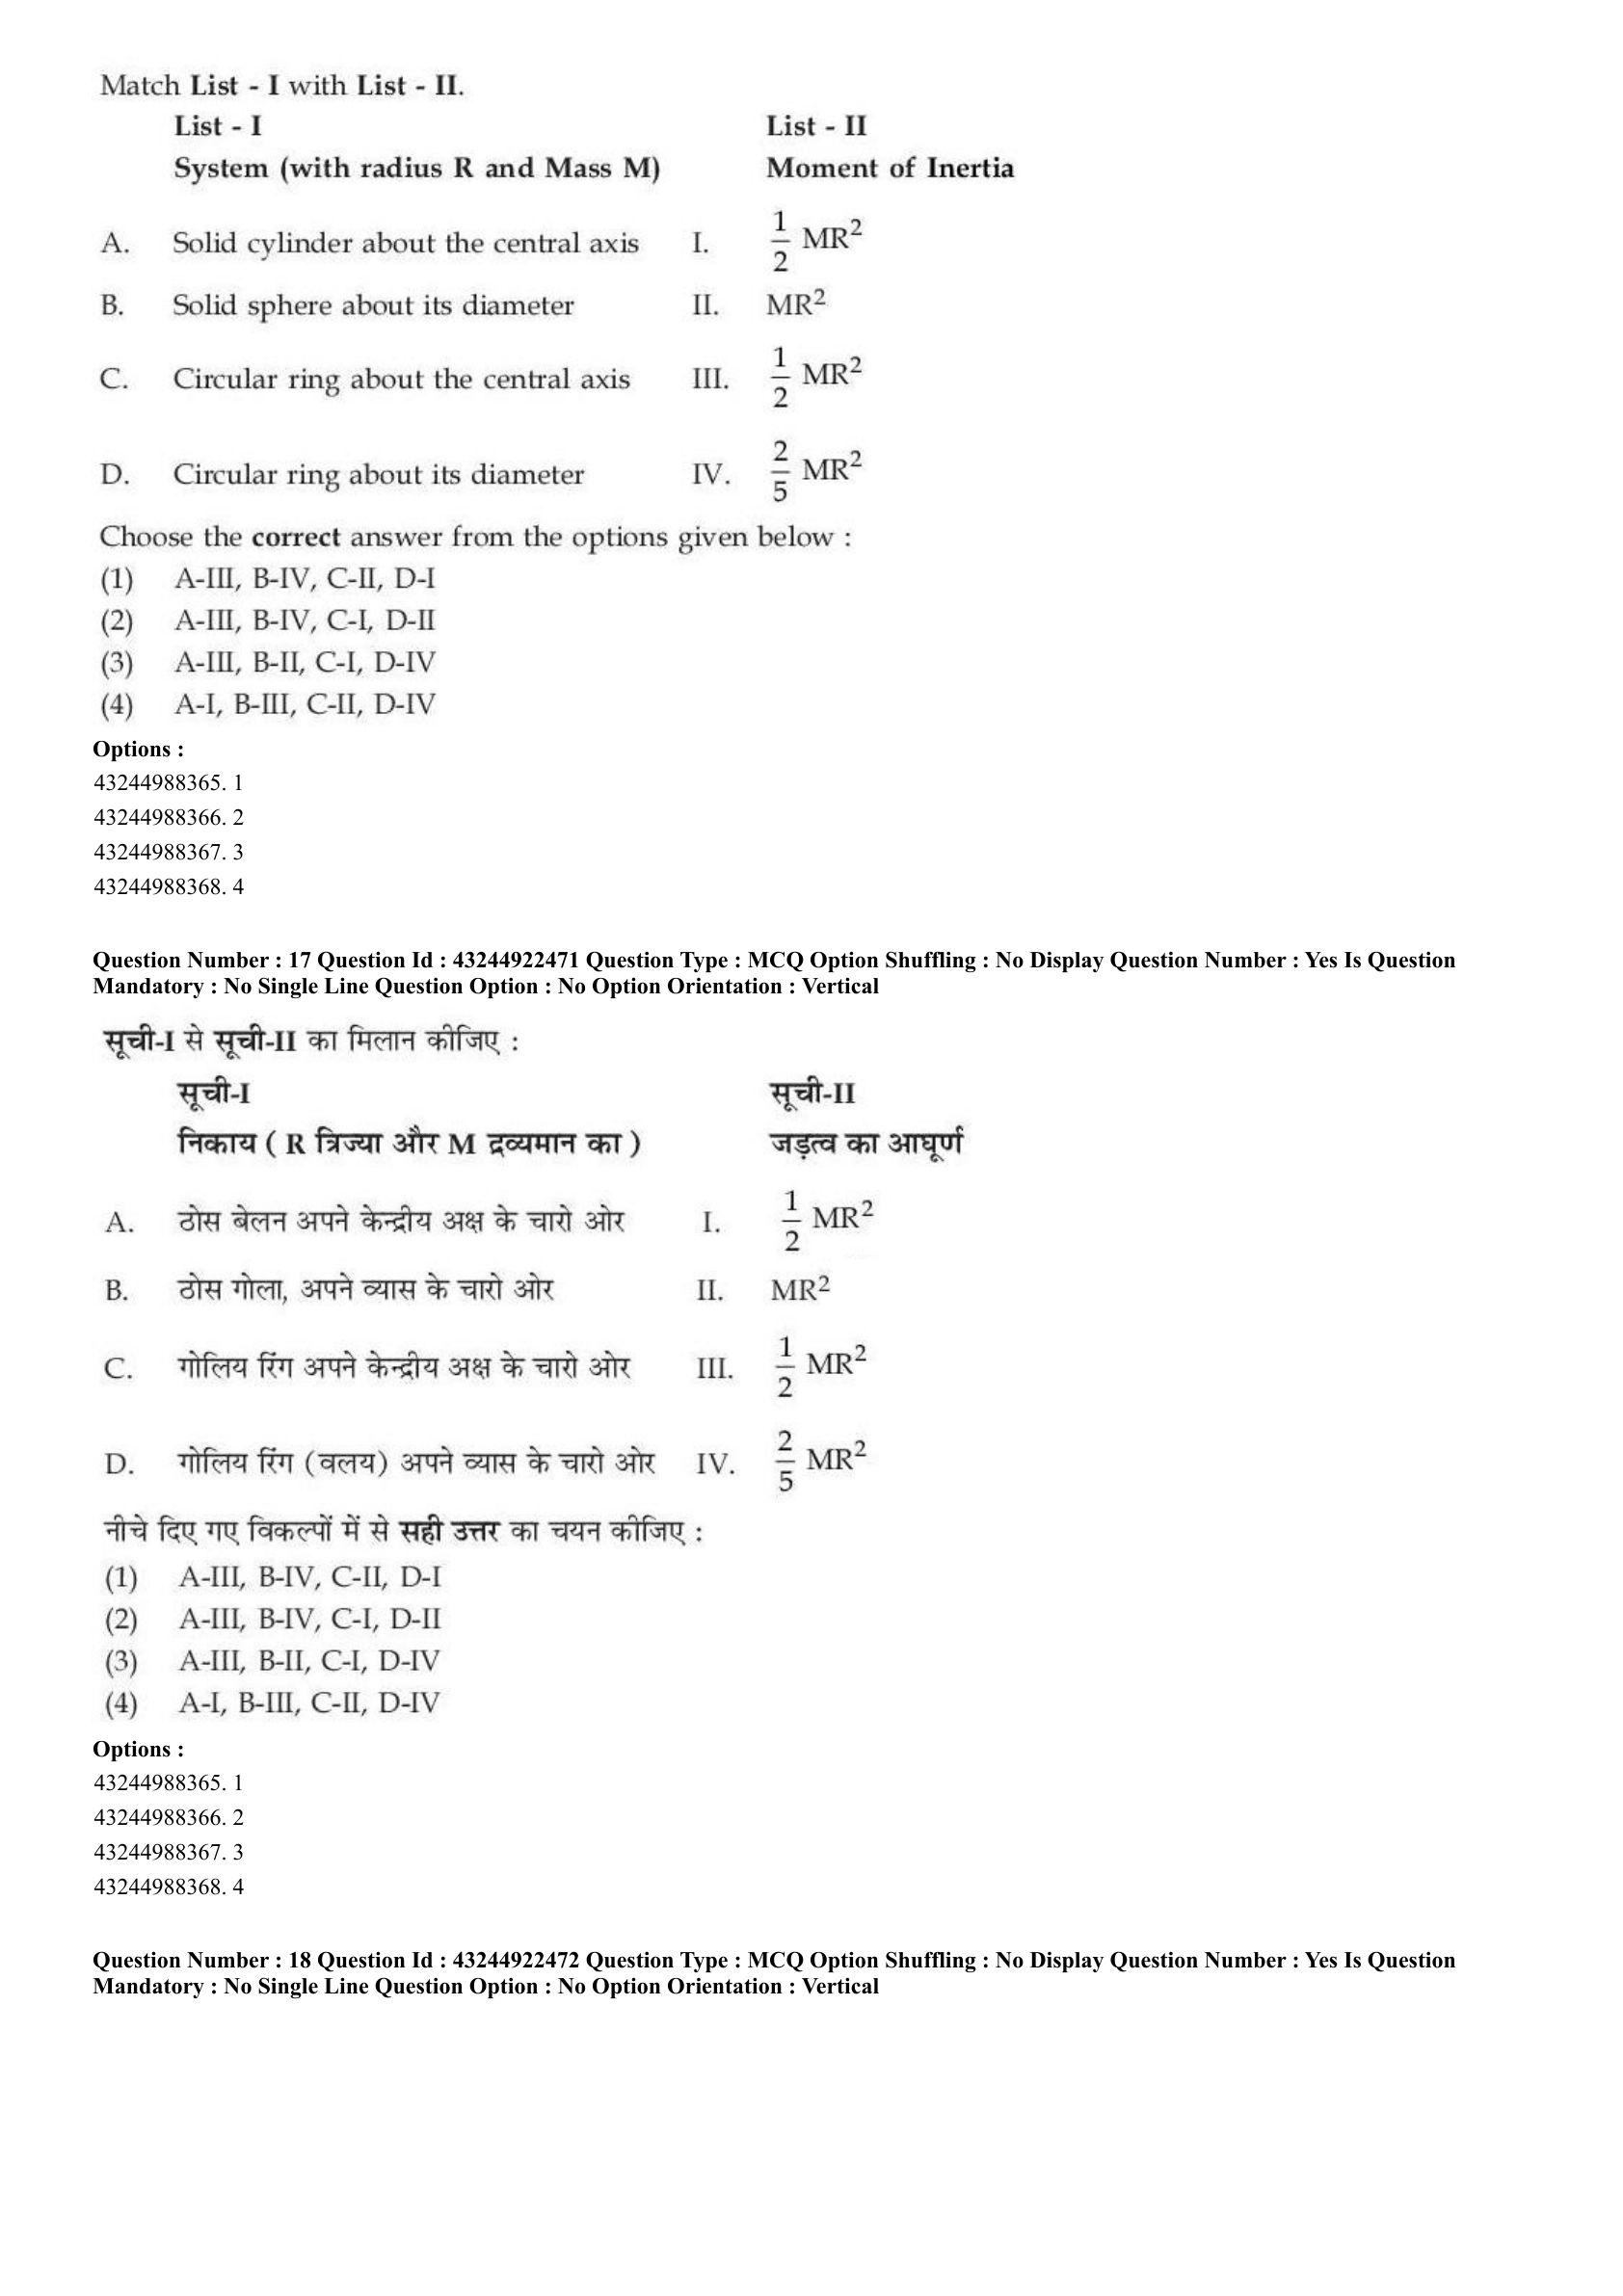
Match List - I with List - II.

Choose the correct answer from the options given below :
View Solution
Step 1: Concept:
We need to map standard rigid bodies and their specific axes of rotation to their known Moment of Inertia formulas.
Step 2: Key Formula or Approach:
Recall standard formulas for the moment of inertia:
- Ring (central axis): \(I = MR^2\)
- Ring (diameter axis): \(I = \frac{1}{2}MR^2\) (By perpendicular axis theorem)
- Solid Cylinder (central axis): \(I = \frac{1}{2}MR^2\)
- Solid Sphere (diameter axis): \(I = \frac{2}{5}MR^2\)
Step 3: Step-by-step Explanation:
A. Solid cylinder about the central axis: Its moment of inertia is \(\frac{1}{2} M R^2\). Since both List-II options I and III carry this value, it could map to either. Let's map it tentatively to III.
B. Solid sphere about its diameter: Its moment of inertia is strictly \(\frac{2}{5} M R^2\). This corresponds uniquely to IV.
C. Circular ring about the central axis: Its moment of inertia is \(M R^2\). This maps uniquely to II.
D. Circular ring about its diameter: Its moment of inertia is \(\frac{1}{2} M R^2\). This will map to the remaining half-MR squared option, which is I.
Reviewing the assembled mapping: A-III, B-IV, C-II, D-I.
This combination exactly matches the sequence provided in option (A).
Step 4: Final Answer:
The matching pairs are properly represented by option (A).
Quick Tip: The Perpendicular Axis Theorem (\(I_z = I_x + I_y\)) easily relates a ring's central axis inertia (\(MR^2\)) to its diameter inertia (\(I_x = I_y = \frac{1}{2}MR^2\)) for planar bodies.
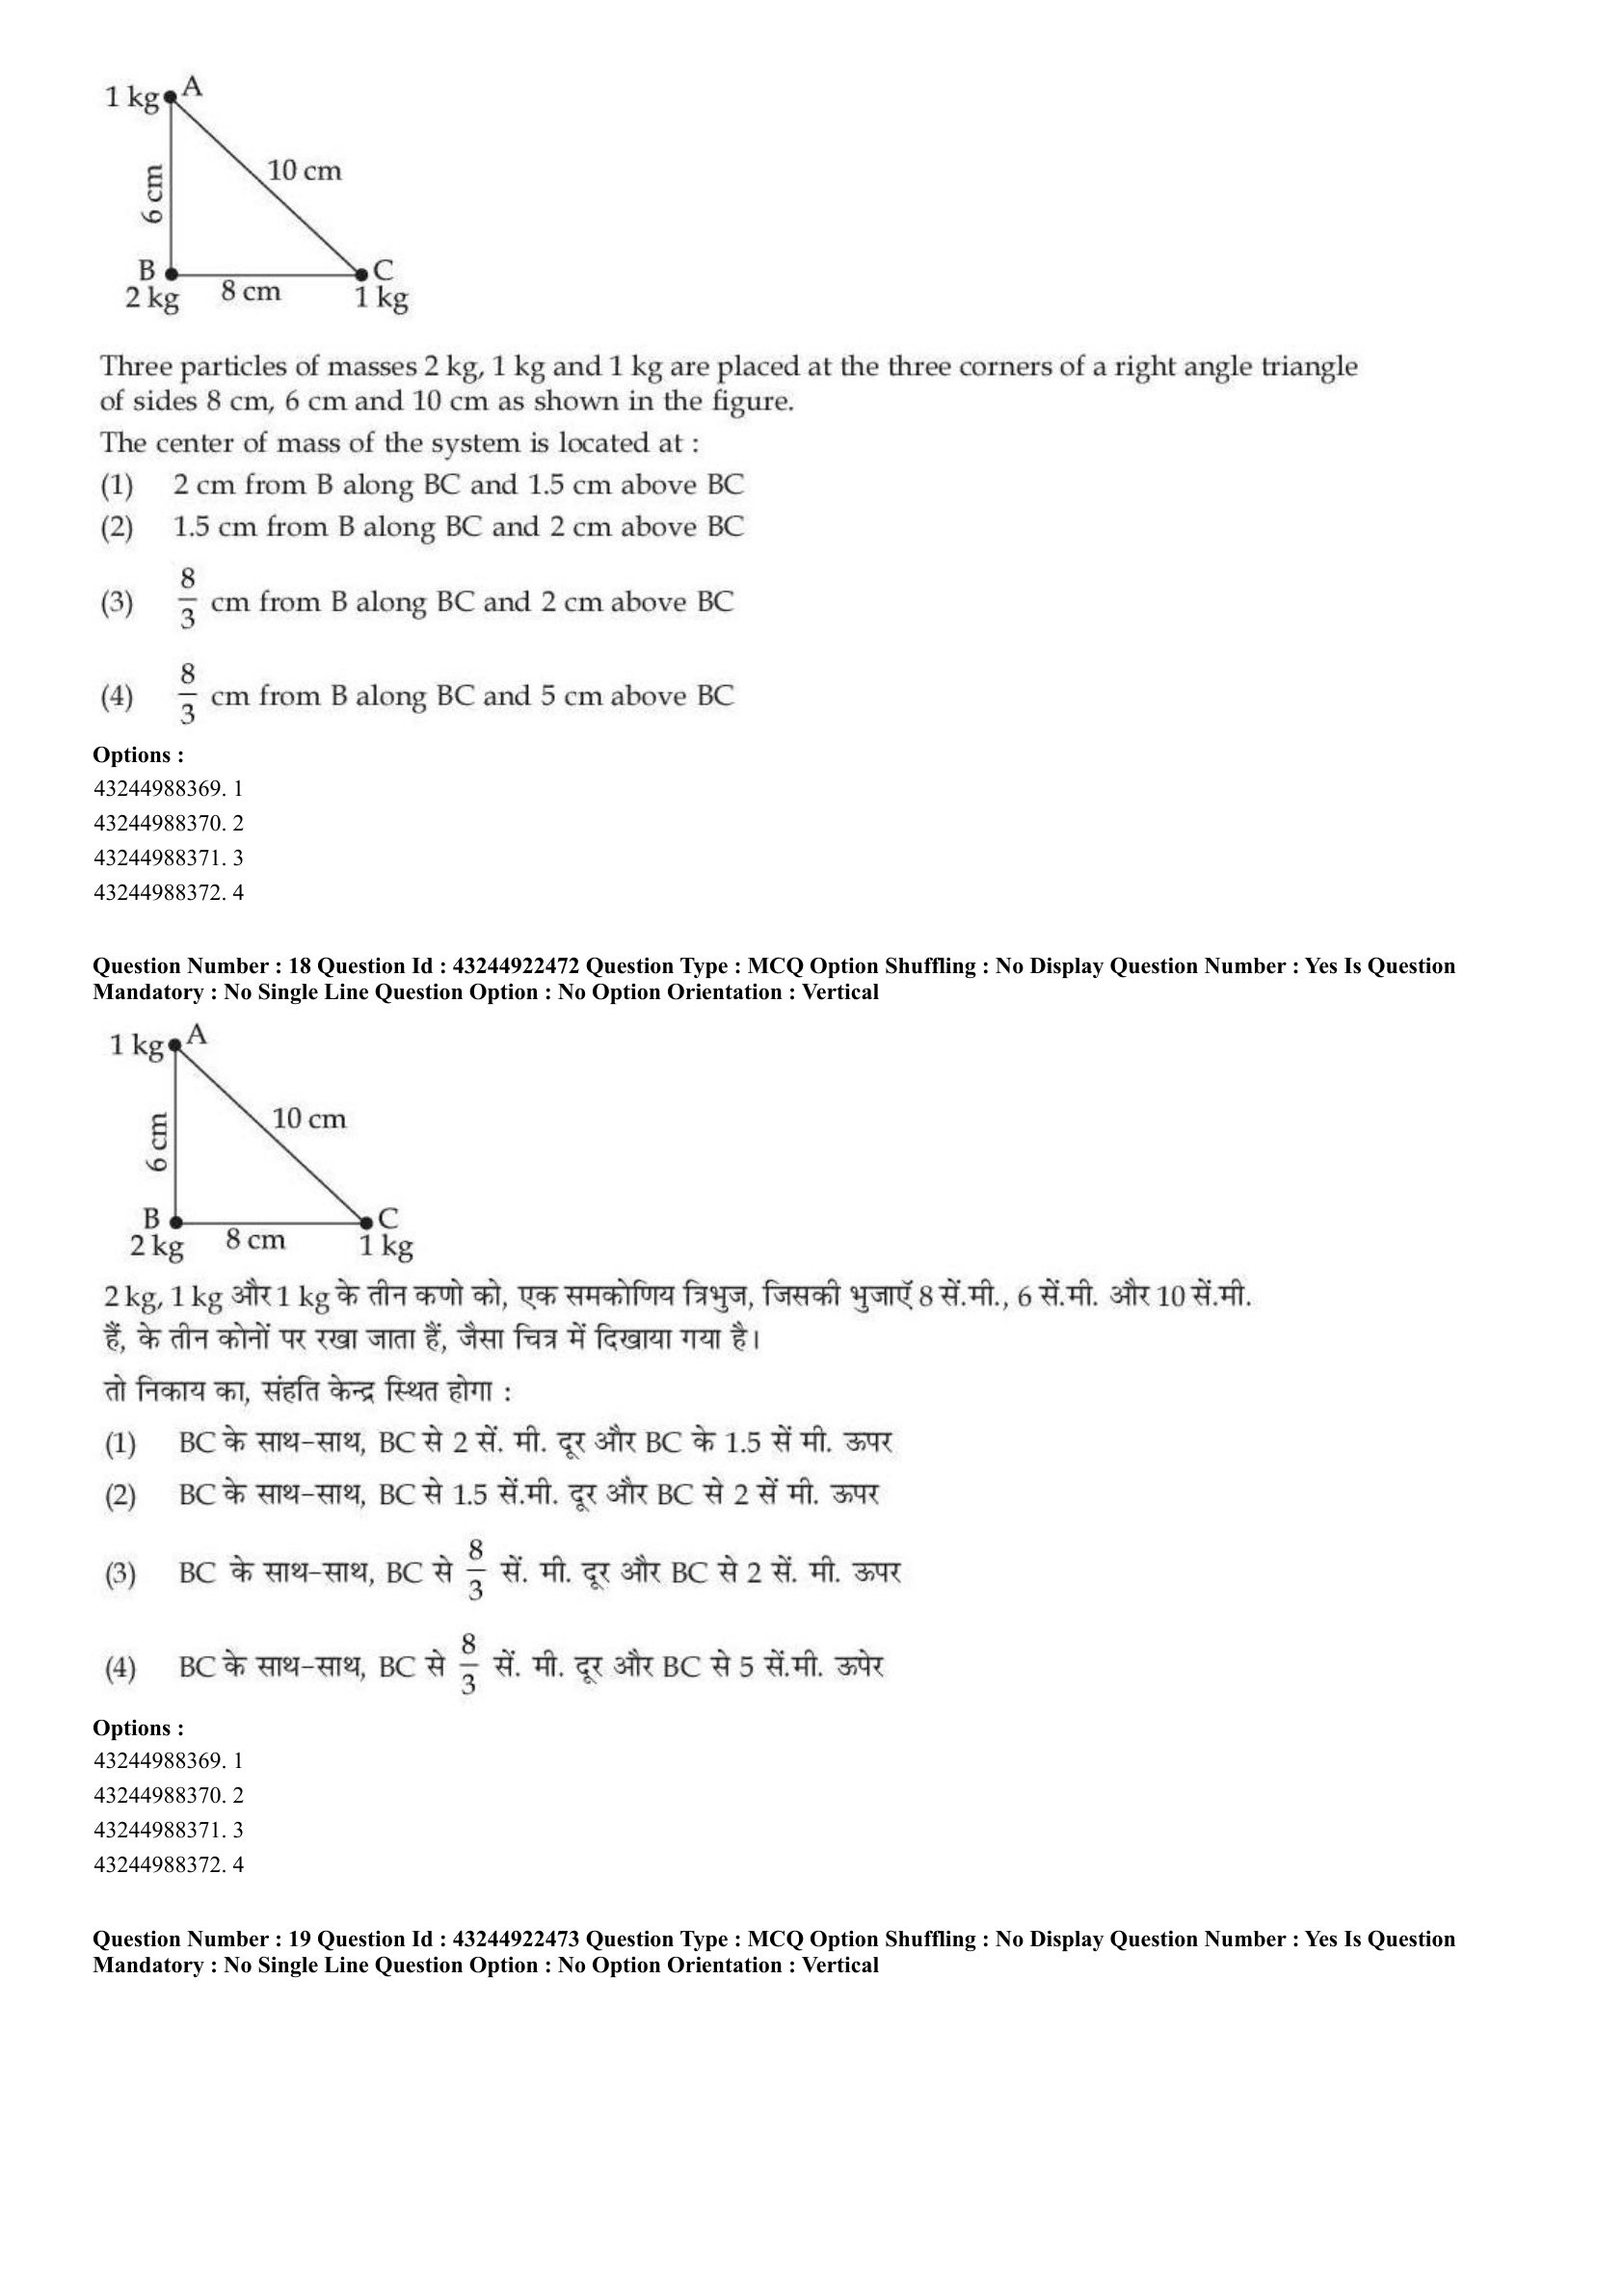
Three particles of masses 2 kg, 1 kg and 1 kg are placed at the three corners of a right angle triangle of sides 8 cm, 6 cm and 10 cm as shown in the figure.

The center of mass of the system is located at :
View Solution
Step 1: Concept:
We need to calculate the exact \(x\) and \(y\) coordinates of the center of mass (COM) for a discrete system of three point masses.
Step 2: Key Formula or Approach:
Set up a Cartesian coordinate system. Let point B be the origin \((0,0)\).
The Center of Mass coordinates are given by:
\(X_{com} = \frac{m_1 x_1 + m_2 x_2 + m_3 x_3}{m_1 + m_2 + m_3}\)
\(Y_{com} = \frac{m_1 y_1 + m_2 y_2 + m_3 y_3}{m_1 + m_2 + m_3}\)
Step 3: Step-by-step Explanation:
Based on the visual description, let the 2 kg mass at corner B sit at the origin \((0, 0)\).
The corner C lies on the x-axis, separated by side length 8 cm, so the 1 kg mass at C is at coordinates \((8, 0)\).
The corner A lies on the y-axis, separated by side length 6 cm, so the 1 kg mass at A is at coordinates \((0, 6)\).
The hypotenuse AC length is \(\sqrt{8^2 + 6^2} = 10\) cm, which matches the problem description.
Calculating the \(x\)-coordinate of the COM:
\[ X_{com} = \frac{(2 kg \times 0 cm) + (1 kg \times 8 cm) + (1 kg \times 0 cm)}{2 + 1 + 1} \] \[ X_{com} = \frac{0 + 8 + 0}{4} = \frac{8}{4} = 2 cm \]
Calculating the \(y\)-coordinate of the COM:
\[ Y_{com} = \frac{(2 kg \times 0 cm) + (1 kg \times 0 cm) + (1 kg \times 6 cm)}{4} \] \[ Y_{com} = \frac{0 + 0 + 6}{4} = \frac{6}{4} = 1.5 cm \]
Hence, the center of mass is located 2 cm along the x-axis (along BC) and 1.5 cm along the y-axis (above BC).
Step 4: Final Answer:
The coordinates denote 2 cm from B along BC and 1.5 cm above BC, which matches option (A).
Quick Tip: Choosing the heaviest mass as the origin often simplifies Center of Mass calculations because it eliminates the largest multiplier from the numerator sum.
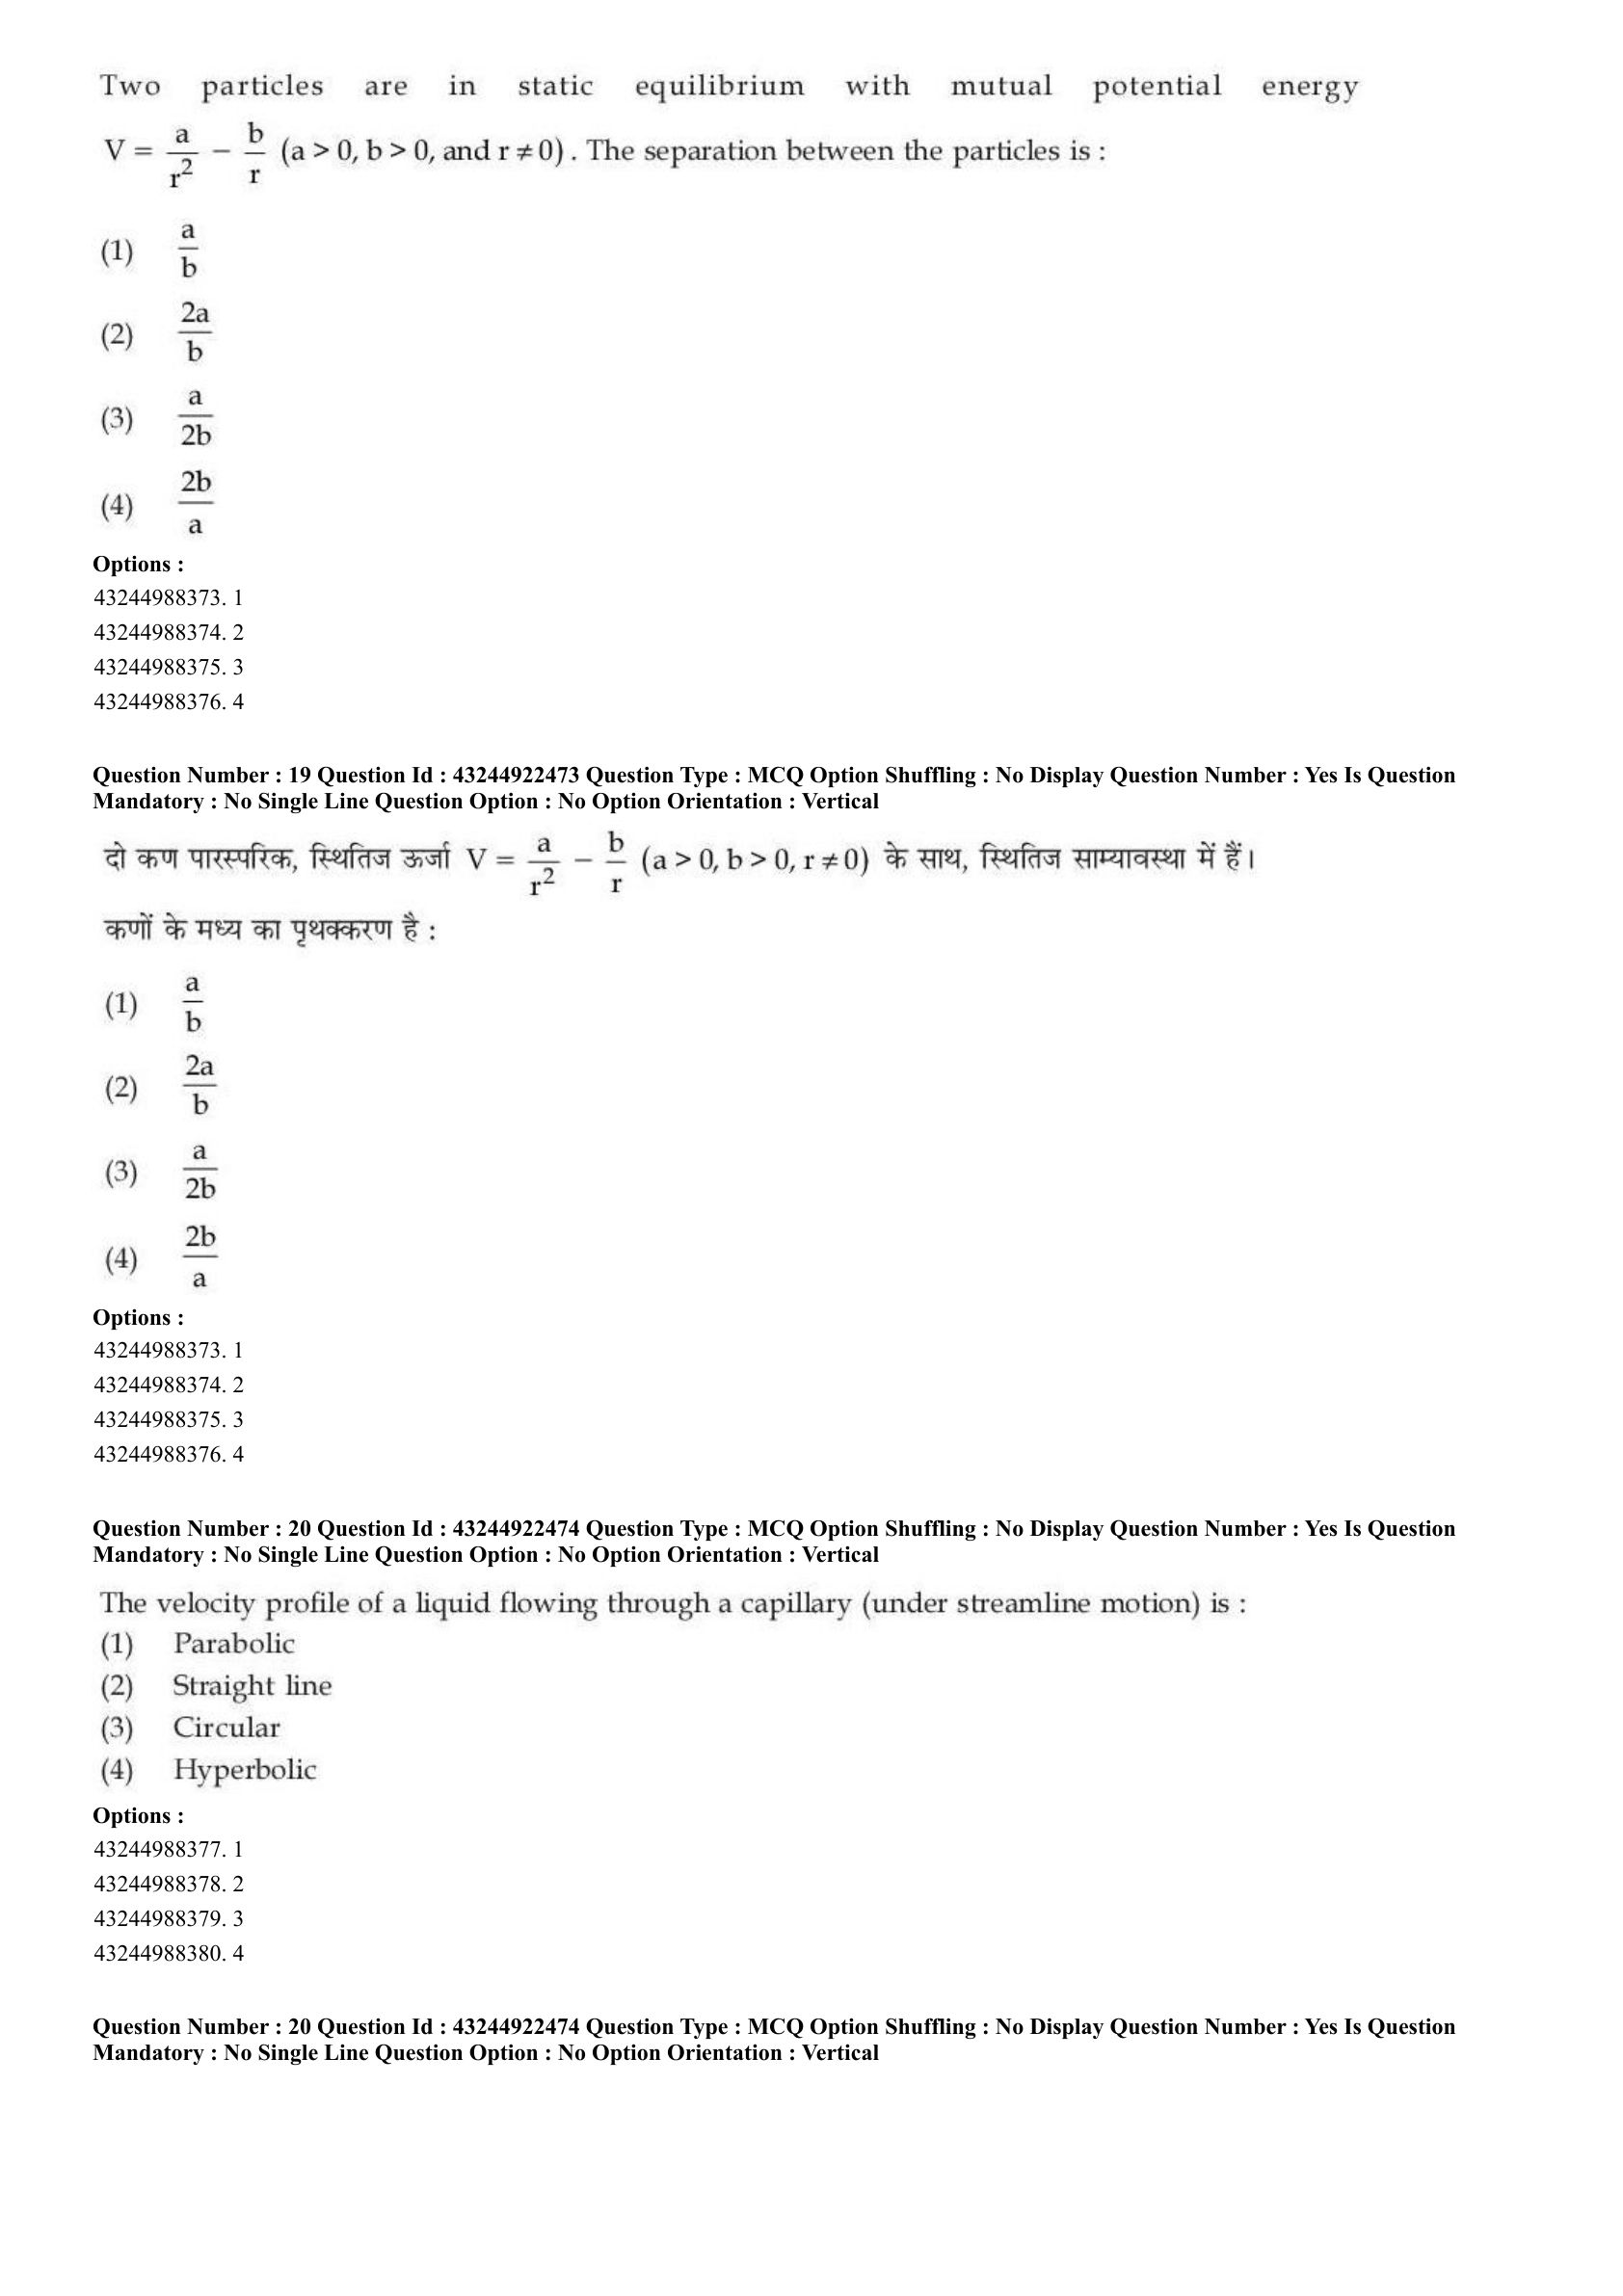
Two particles are in static equilibrium with mutual potential energy \(V = \frac{a}{r^2} - \frac{b}{r}\) (\(a>0, b>0, r \neq 0\)). The separation between the particles is :
View Solution
Step 1: Concept:
The particles are in static equilibrium, which implies the net physical force acting between them must be absolutely zero.
Step 2: Key Formula or Approach:
The conservative force \(F\) is defined as the negative gradient of the potential energy \(V(r)\).
\(F = -\frac{dV}{dr}\).
For static equilibrium, \(F = 0\), leading to \(\frac{dV}{dr} = 0\).
Step 3: Step-by-step Explanation:
First, state the potential energy function:
\[ V(r) = a r^{-2} - b r^{-1} \]
Differentiate \(V(r)\) with respect to \(r\):
\[ \frac{dV}{dr} = \frac{d}{dr}(a r^{-2} - b r^{-1}) = a(-2r^{-3}) - b(-1r^{-2}) \] \[ \frac{dV}{dr} = -\frac{2a}{r^3} + \frac{b}{r^2} \]
Set the derivative to zero to find the equilibrium separation:
\[ -\frac{2a}{r^3} + \frac{b}{r^2} = 0 \]
Multiply the entire equation by \(r^3\) (since \(r \neq 0\)):
\[ -2a + b \cdot r = 0 \]
Solve for \(r\):
\[ b \cdot r = 2a \implies r = \frac{2a}{b} \]
Step 4: Final Answer:
The equilibrium separation between the particles is \(2a/b\), which matches option (B).
Quick Tip: To check if the equilibrium is stable or unstable, compute the second derivative \(d^2V/dr^2\). If it's positive at the equilibrium distance, the equilibrium is stable (a minimum potential).
The velocity profile of a liquid flowing through a capillary (under streamline motion) is :
View Solution
Step 1: Concept:
This question asks for the geometric shape of the velocity distribution for a viscous liquid in laminar (streamline) flow through a cylindrical pipe or capillary.
Step 2: Key Formula or Approach:
According to Poiseuille's Law for viscous fluid flow through a pipe, the velocity \(v\) at a distance \(r\) from the central axis is given by:
\[ v(r) = \frac{\Delta P}{4\eta L} (R^2 - r^2) \]
where \(\Delta P\) is the pressure difference, \(\eta\) is viscosity, \(L\) is length, and \(R\) is the capillary radius.
Step 3: Step-by-step Explanation:
The equation \(v(r) = constant \times (R^2 - r^2)\) dictates how fluid speed changes across the pipe.
When \(r = R\) (at the pipe walls), \(v = 0\). This aligns with the no-slip condition for viscous fluids.
When \(r = 0\) (at the center), the velocity hits its maximum value \(v_{max} = \frac{\Delta P R^2}{4\eta L}\).
The mathematical relation is \(v \propto -r^2\), representing a downward opening quadratic equation.
Plotted spatially across the cross-section, this mathematical function maps out a parabolic curve.
Step 4: Final Answer:
The velocity profile is Parabolic.
Quick Tip: For ideal (non-viscous) fluids, the velocity profile is a flat, straight line (plug flow). The parabolic profile emerges solely due to internal viscous friction between fluid layers.
The product of generalised co-ordinate and its conjugate momentum has the dimension of :
View Solution
Step 1: Concept:
The question asks for the dimensional equivalent of the product of a generalized coordinate \(q\) and its corresponding conjugate momentum \(p\).
Step 2: Key Formula or Approach:
The conjugate momentum is defined using the Lagrangian \(L\): \(p = \frac{\partial L}{\partial \dot{q}}\).
Since Lagrangian has the dimensions of Energy \([ML^2T^{-2}]\), we can derive the dimensional formula of the product.
Step 3: Step-by-step Explanation:
Let \([q]\) be the dimension of the generalized coordinate.
The dimension of the generalized velocity \(\dot{q}\) is \([q]T^{-1}\).
The dimension of conjugate momentum \(p\) is \(\frac{[Energy]}{[\dot{q}]} = \frac{ML^2T^{-2}}{[q]T^{-1}} = \frac{ML^2T^{-1}}{[q]}\).
Now, we take the product of \(p\) and \(q\).
\[ [p \cdot q] = \left( \frac{ML^2T^{-1}}{[q]} \right) \times [q] = ML^2T^{-1} \]
The dimension \(ML^2T^{-1}\) is known as the dimension of "Action".
Among standard physical quantities, Angular Momentum (\(L = \vec{r} \times \vec{p}\)) also has dimensions:
\[ [L] = [Length] \times [Linear Momentum] = L \times (MLT^{-1}) = ML^2T^{-1} \]
Thus, the product shares the exact dimensional unit as Angular momentum.
Step 4: Final Answer:
The product has the dimension of Angular momentum.
Quick Tip: Planck's constant (\(h\)) also carries the same dimensional formula (\(ML^2T^{-1}\)) as action and angular momentum, which is why angular momentum is quantized in units of \(\hbar\) in quantum mechanics.
A beam of light of wavelength 600 nm is focused by a converging lens of diameter 20.0 cm at a distance of 10 cm from it. The diameter of the central bright disc in the diffraction pattern will be :
View Solution
Step 1: Concept:
We are asked to calculate the linear diameter of the Airy disk (central bright diffraction spot) produced when a lens focuses incoming light.
Step 2: Key Formula or Approach:
The angular radius of the central bright disk in circular aperture diffraction is given by \(\theta = 1.22 \frac{\lambda}{D}\).
The linear radius \(r\) at a focal distance \(f\) is \(r = f\theta = 1.22 \frac{\lambda f}{D}\).
The diameter of the central disc is \(d = 2r = 2.44 \frac{\lambda f}{D}\).
Step 3: Step-by-step Explanation:
First, collate the provided values in consistent units. Let's use centimeters as the answer demands it.
\(\lambda = 600 nm = 600 \times 10^{-9} m = 600 \times 10^{-7} cm = 6 \times 10^{-5} cm\).
Focal distance \(f = 10 cm\).
Lens aperture diameter \(D = 20.0 cm\).
Substitute these values into the diameter formula:
\[ d = 2.44 \times \frac{6 \times 10^{-5} cm \times 10 cm}{20.0 cm} \]
Simplify the expression systematically:
\[ d = 2.44 \times \frac{6 \times 10^{-4}}{20} = 2.44 \times \left( \frac{6}{20} \right) \times 10^{-4} \] \[ d = 2.44 \times 0.3 \times 10^{-4} \] \[ d = 0.732 \times 10^{-4} cm = 7.32 \times 10^{-5} cm \]
Rounding it to match the options yields \(7.3 \times 10^{-5}\) cm.
Step 4: Final Answer:
The diameter of the central bright disc is \(7.3 \times 10^{-5}\) cm.
Quick Tip: Read carefully whether a question asks for the radius (\(1.22 \lambda f / D\)) or the diameter (\(2.44 \lambda f / D\)) of the Airy disk. This is a very common trap in optics numericals.
Match List - I with List - II.

Choose the correct answer from the options given below :
View Solution
Step 1: Concept:
This question requires mapping prominent historical physicists to their cornerstone discoveries in nuclear physics.
Step 2: Key Formula or Approach:
This is purely factual and tests general knowledge in Modern Physics.
Step 3: Step-by-step Explanation:
A. Becquerel: Henri Becquerel serendipitously discovered spontaneous \textit{radioactivity using uranium salts in 1896. (Matches with III).
B. Rutherford: Ernest Rutherford identified and named the \textit{alpha particle (and beta particle) as distinct forms of radiation. He later used them to discover the nucleus. (Matches with IV).
C. Chadwick: James Chadwick proved the existence of the \textit{neutron in 1932 by interpreting radiation from beryllium bombarded by alpha particles. (Matches with I).
D. Hahn and Strassmann: Otto Hahn and Fritz Strassmann conducted the chemical experiments in 1938 that demonstrated the \textit{nuclear fission of uranium, confirming theoretical expectations. (Matches with II).
Putting it together: A-III, B-IV, C-I, D-II.
Step 4: Final Answer:
The historical timeline matches completely with option (B).
Quick Tip: History of physics questions frequently feature Chadwick (Neutron), J.J. Thomson (Electron), and Rutherford (Nucleus/Proton). Remembering these trio solves most atomic matching questions.
Which of the following statements are correct ?
A. If the image is virtual, the corresponding object is virtual.
B. The image of a virtual object is virtual.
C. If the final rays are converging, we have a real image.
D. The image formed by a concave mirror is certainly real if the object is virtual.
E. Total internal reflection can take place only if light goes from optically rarer medium to denser medium.
Choose the correct answer from the options given below :
View Solution
Step 1: Concept:
We need to analyze various theoretical statements about geometrical optics including image formation and total internal reflection.
Step 2: Key Formula or Approach:
A real image is formed when light rays physically intersect (converge).
A virtual object represents incident rays that are converging towards a point behind the mirror/lens.
Mirror formula \(1/v + 1/u = 1/f\) is used to evaluate the nature of images for different configurations.
Step 3: Step-by-step Explanation:
Statement A: False. A real object can easily form a virtual image (e.g., looking at a standard plane mirror, or a real object placed within the focal length of a concave mirror).
Statement B: False. A virtual object can form a real image. For instance, a plane mirror forms a real image of a virtual object.
Statement C: True. By definition, a real image is formed when output light rays physically converge at a distinct coordinate point in space.
Statement D: True. For a concave mirror, the focal length \(f\) is negative (\(f = -|f|\)). A virtual object means incident rays are converging, hence object distance \(u\) is positive (\(u = +|u|\)). Using the mirror equation \(\frac{1}{v} = \frac{1}{f} - \frac{1}{u} = -\frac{1}{|f|} - \frac{1}{|u|}\). The result is strictly negative, meaning \(v < 0\), which signifies a real image formed in front of the mirror.
Statement E: False. Total Internal Reflection (TIR) occurs strictly when light attempts to travel from an optically \textit{denser medium to an optically \textit{rarer medium, not the other way around.
Step 4: Final Answer:
Only statements C and D are theoretically correct, rendering option (D) the correct choice.
Quick Tip: Think of a virtual object as already-converging rays thrown onto a mirror/lens. A concave mirror aggressively converges rays further, so an already converging beam will inevitably cross and form a real image in front of it.
Which of the following statements are true for sound waves ?
A. A wave going in a solid may be transverse
B. A wave going in a solid may be longitudinal
C. A wave moving in a gas must be longitudinal
D. A standing wave is produced on a string clamped at one end and free at other. The length of the string must be integral multiple of \(\lambda/2\)
E. Longitudinal wave cannot have a unique wavelength
Choose the correct answer from the options given below :
View Solution
Step 1: Concept:
The question tests fundamental properties of mechanical waves propagating in different mediums and boundary conditions for standing waves.
Step 2: Key Formula or Approach:
Analyze each statement based on the elastic properties of mediums (bulk modulus, shear modulus) and boundary conditions for standing waves (node/antinode formation).
Step 3: Step-by-step Explanation:
Statement A \& B: Solids possess both bulk elasticity and shear elasticity. Therefore, they can transmit compressive forces (enabling longitudinal waves) and shear forces (enabling transverse waves, like seismic S-waves). Both statements are true.
Statement C: Gases and liquids lack shear strength (they cannot resist deformation perfectly). Therefore, they cannot propagate transverse waves. Mechanical waves in gases must exclusively be longitudinal. Statement C is true.
Statement D: For a string clamped at one end (forms a node) and free at the other (forms an antinode), the allowed lengths for resonance are odd multiples of a quarter wavelength: \(L = (2n-1)\lambda/4\). The statement incorrectly claims it must be an integral multiple of \(\lambda/2\). Statement D is false.
Statement E: A continuous, harmonic longitudinal wave (like a pure sine tone) inherently possesses a perfectly well-defined, unique wavelength. Statement E is false.
Step 4: Final Answer:
Only statements A, B, and C are true.
Quick Tip: Earthquakes generate both P-waves (Primary, longitudinal) and S-waves (Secondary, transverse). P-waves travel through both solid earth and liquid magma, while S-waves can only travel through the solid crust and mantle.
The rays of different colours fail to converge at a point after going through a converging lens. This defect is called :
View Solution
Step 1: Concept:
The question describes an optical defect where light of different wavelengths (colours) has varying focal points.
Step 2: Key Formula or Approach:
Identify the definition of various lens aberrations.
The refractive index of a lens material depends on the wavelength of light (\(\mu = f(\lambda)\)), a phenomenon called dispersion.
Step 3: Step-by-step Explanation:
According to the Lens Maker's Formula, \(\frac{1}{f} = (\mu - 1)\left(\frac{1}{R_1} - \frac{1}{R_2}\right)\).
Because of dispersion, the refractive index \(\mu\) is greater for blue light than for red light.
This causes the focal length \(f\) to be shorter for blue light and longer for red light.
Consequently, white light passing through a single lens splits, with different colours focusing at slightly different distances along the optical axis.
This failure of multi-colored rays to converge at a single point is specifically defined as Chromatic Aberration.
Spherical aberration relates to the lens geometry failing to focus marginal and paraxial rays of the same color.
Coma relates to off-axis point sources appearing comet-like.
Step 4: Final Answer:
The defect is identified as chromatic aberration.
Quick Tip: Chromatic aberration can be largely eliminated by using an achromatic doublet, which pairs a convex lens of crown glass with a concave lens of flint glass to cancel out the dispersion effects.
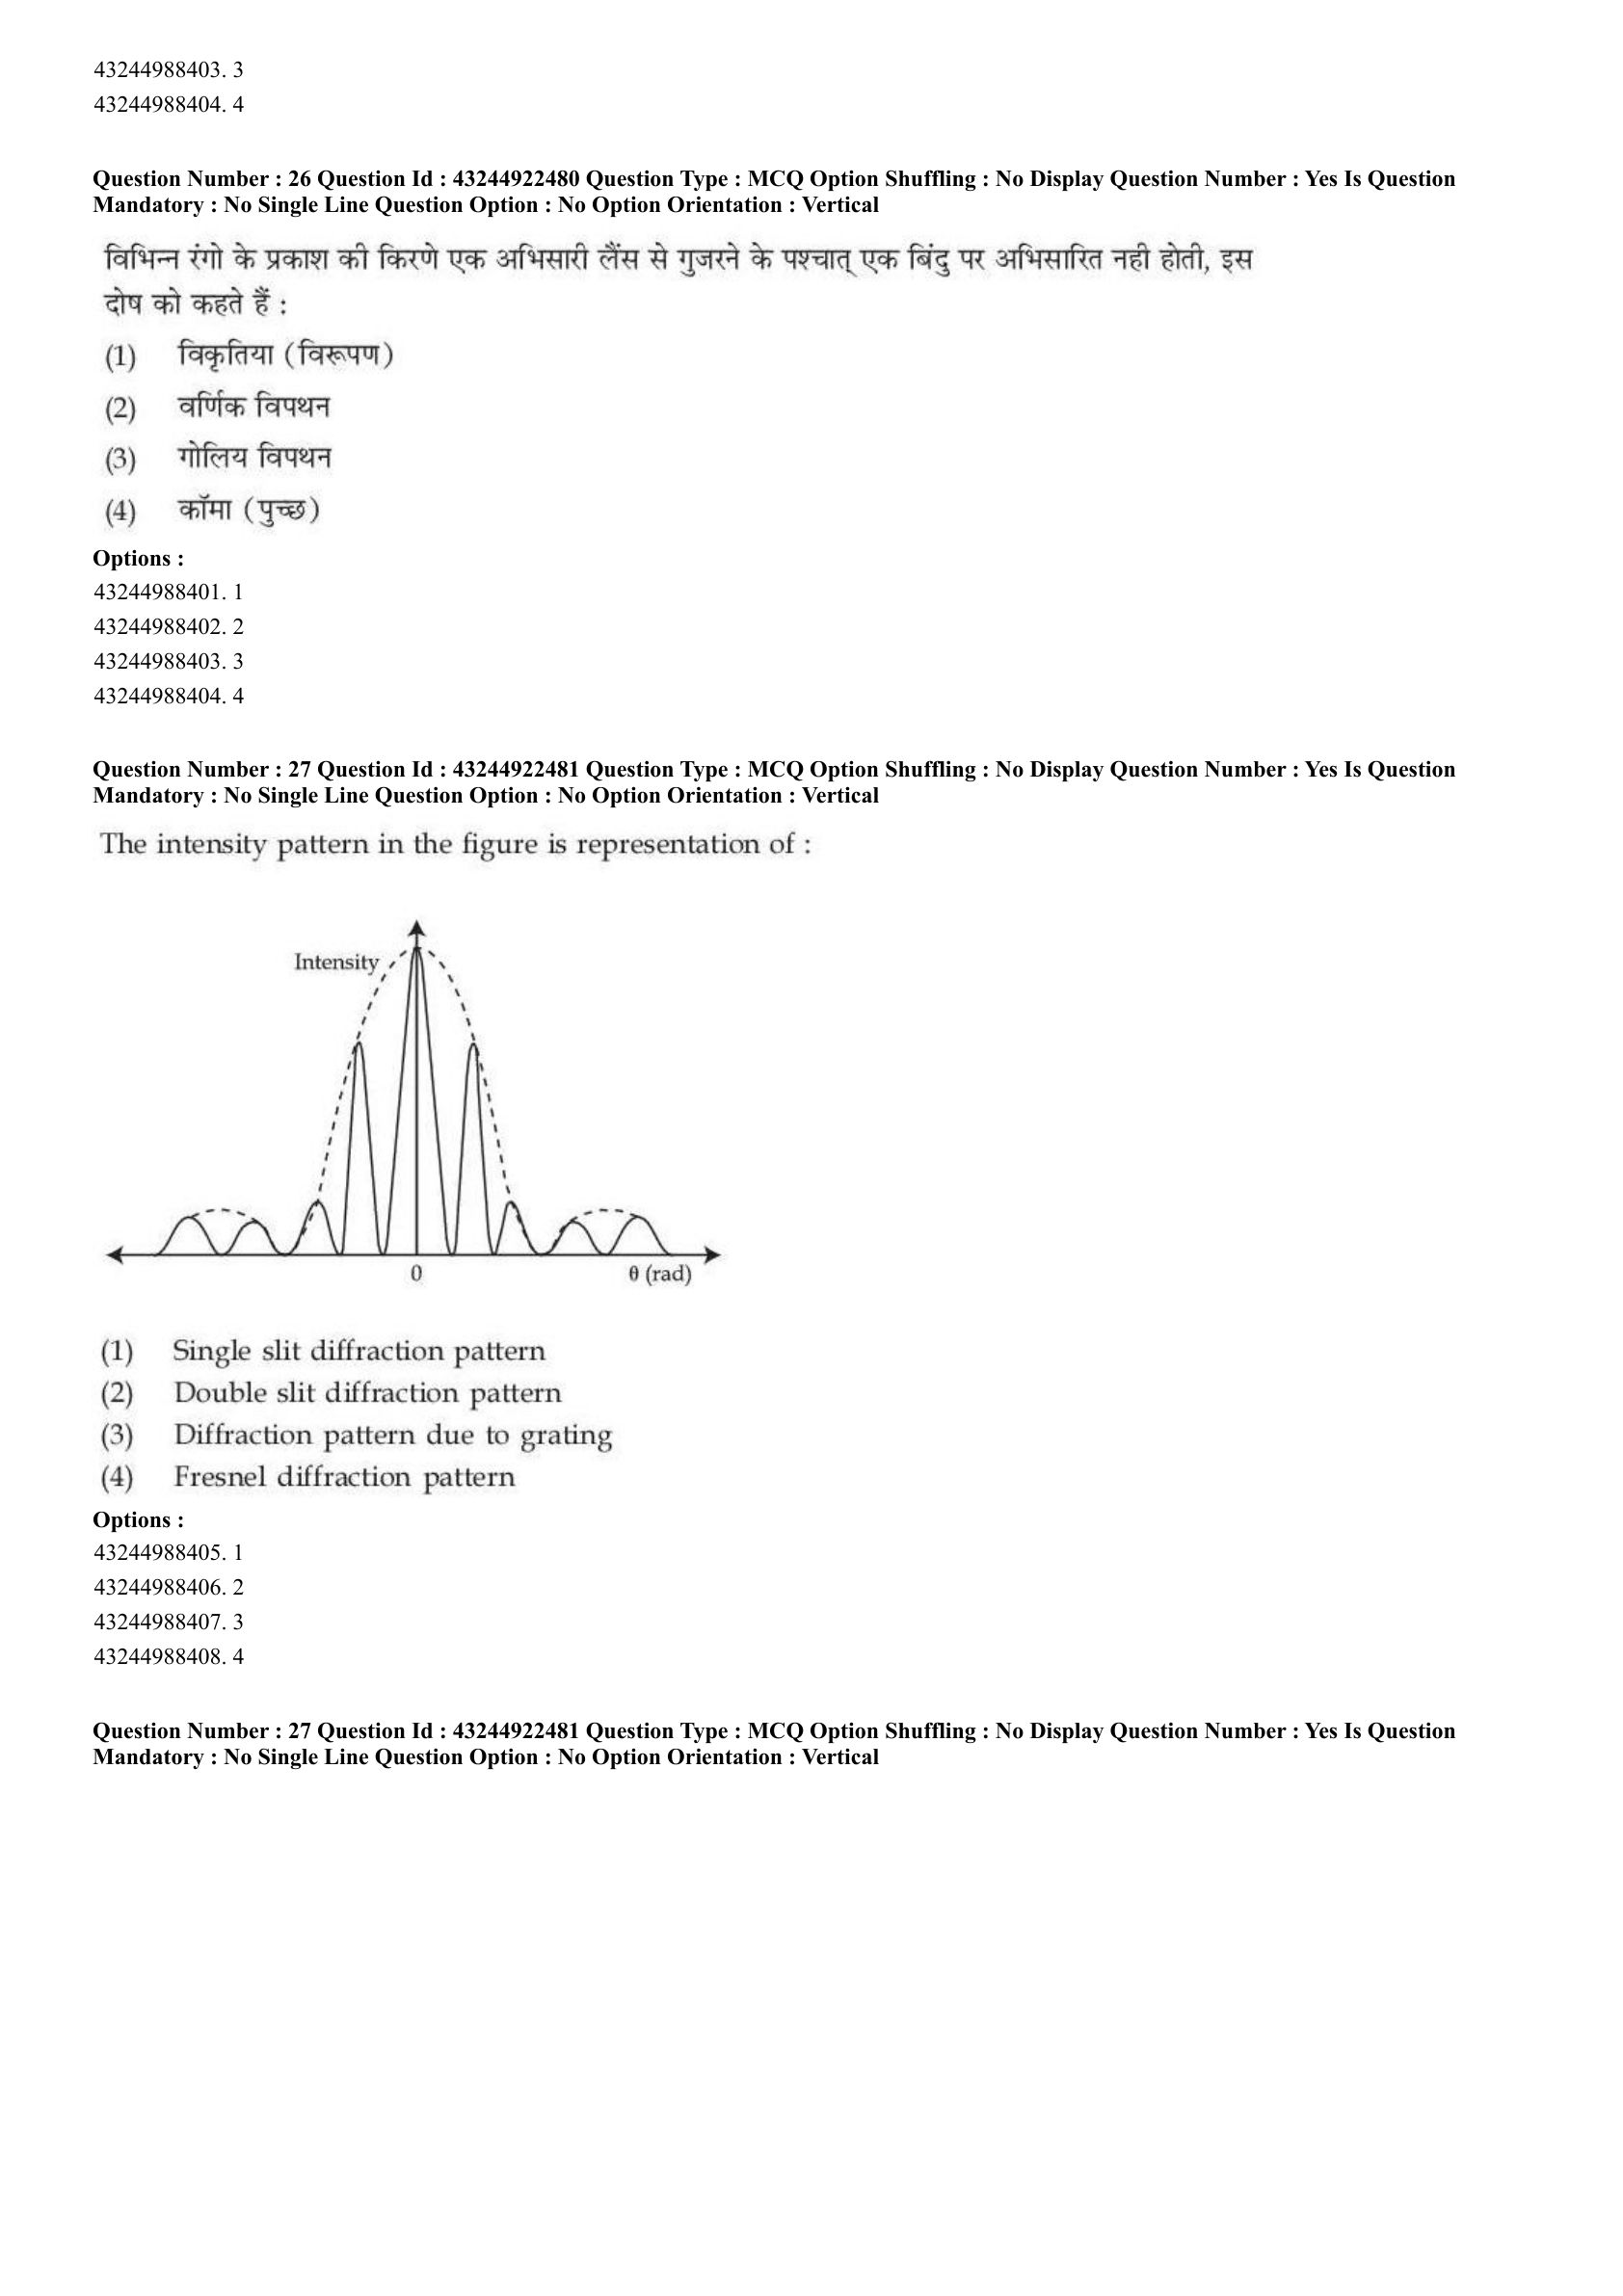
The intensity pattern in the figure is representation of :

View Solution
Step 1 : Concept:
The question tests the ability to visually identify the standard intensity distribution patterns produced by different optical phenomena.
Step 2 : Key Formula or Approach:
The intensity distribution for a single slit Fraunhofer diffraction is given by \( I(\theta) = I_0 \left( \frac{\sin \alpha}{\alpha} \right)^2 \), where \( \alpha = \frac{\pi a \sin \theta}{\lambda} \).
Step 3 : Step-by-step Explanation:
The given figure shows a large, dominant central maximum.
The intensity of the secondary maxima on either side decreases rapidly as the angle \( \theta \) increases.
The angular width of the central maximum is twice as wide as the secondary maxima.
These are the hallmark characteristics of a single-slit Fraunhofer diffraction pattern.
In contrast, an ideal double-slit interference pattern would have fringes of equal intensity (modulated by a much broader diffraction envelope), and a grating pattern would have extremely sharp, narrow principal maxima separated by large regions of near-zero intensity.
Step 4 : Final Answer:
The pattern represents a single slit diffraction pattern.
Quick Tip: Always remember: Single slit = wide and bright central peak with rapidly decaying side peaks. Double slit = multiple fringes of roughly equal width, modulated by a single-slit envelope.
Which of the following equations represents a wave travelling along y-axis ?
View Solution
Step 1 : Concept:
We need to identify the mathematical representation of a progressive (traveling) wave propagating along the y-axis.
Step 2 : Key Formula or Approach:
A standard progressive wave traveling in the positive direction of a spatial axis \( z \) is represented by \( \psi(z,t) = A \sin(kz - \omega t) \) or \( A \cos(kz - \omega t) \).
The spatial variable inside the phase argument \( (kz - \omega t) \) dictates the direction of propagation.
Step 3 : Step-by-step Explanation:
Option (A): \( y = A \cos ky \sin \omega t \). The spatial and temporal parts are separated into a product. This represents a standing wave, not a traveling wave.
Option (B): \( y = A \sin ky \cos \omega t \). Similar to (A), this is also a standing wave equation.
Option (C): \( x = A \sin (ky - \omega t) \). The phase argument is \( (ky - \omega t) \), which indicates that the wave is traveling along the positive y-axis. The displacement is along the x-axis, making it a transverse wave.
Option (D): \( y = A \sin (kx - \omega t) \). The phase argument is \( (kx - \omega t) \), which means this wave is traveling along the positive x-axis, with displacement along the y-axis.
Step 4 : Final Answer:
Only option (C) represents a wave traveling along the y-axis.
Quick Tip: To quickly find the propagation direction, set the phase to a constant: \( ky - \omega t = const \). Differentiating with respect to time gives \( k \frac{dy}{dt} - \omega = 0 \implies v_y = \frac{\omega}{k} > 0 \), confirming propagation in the +y direction.
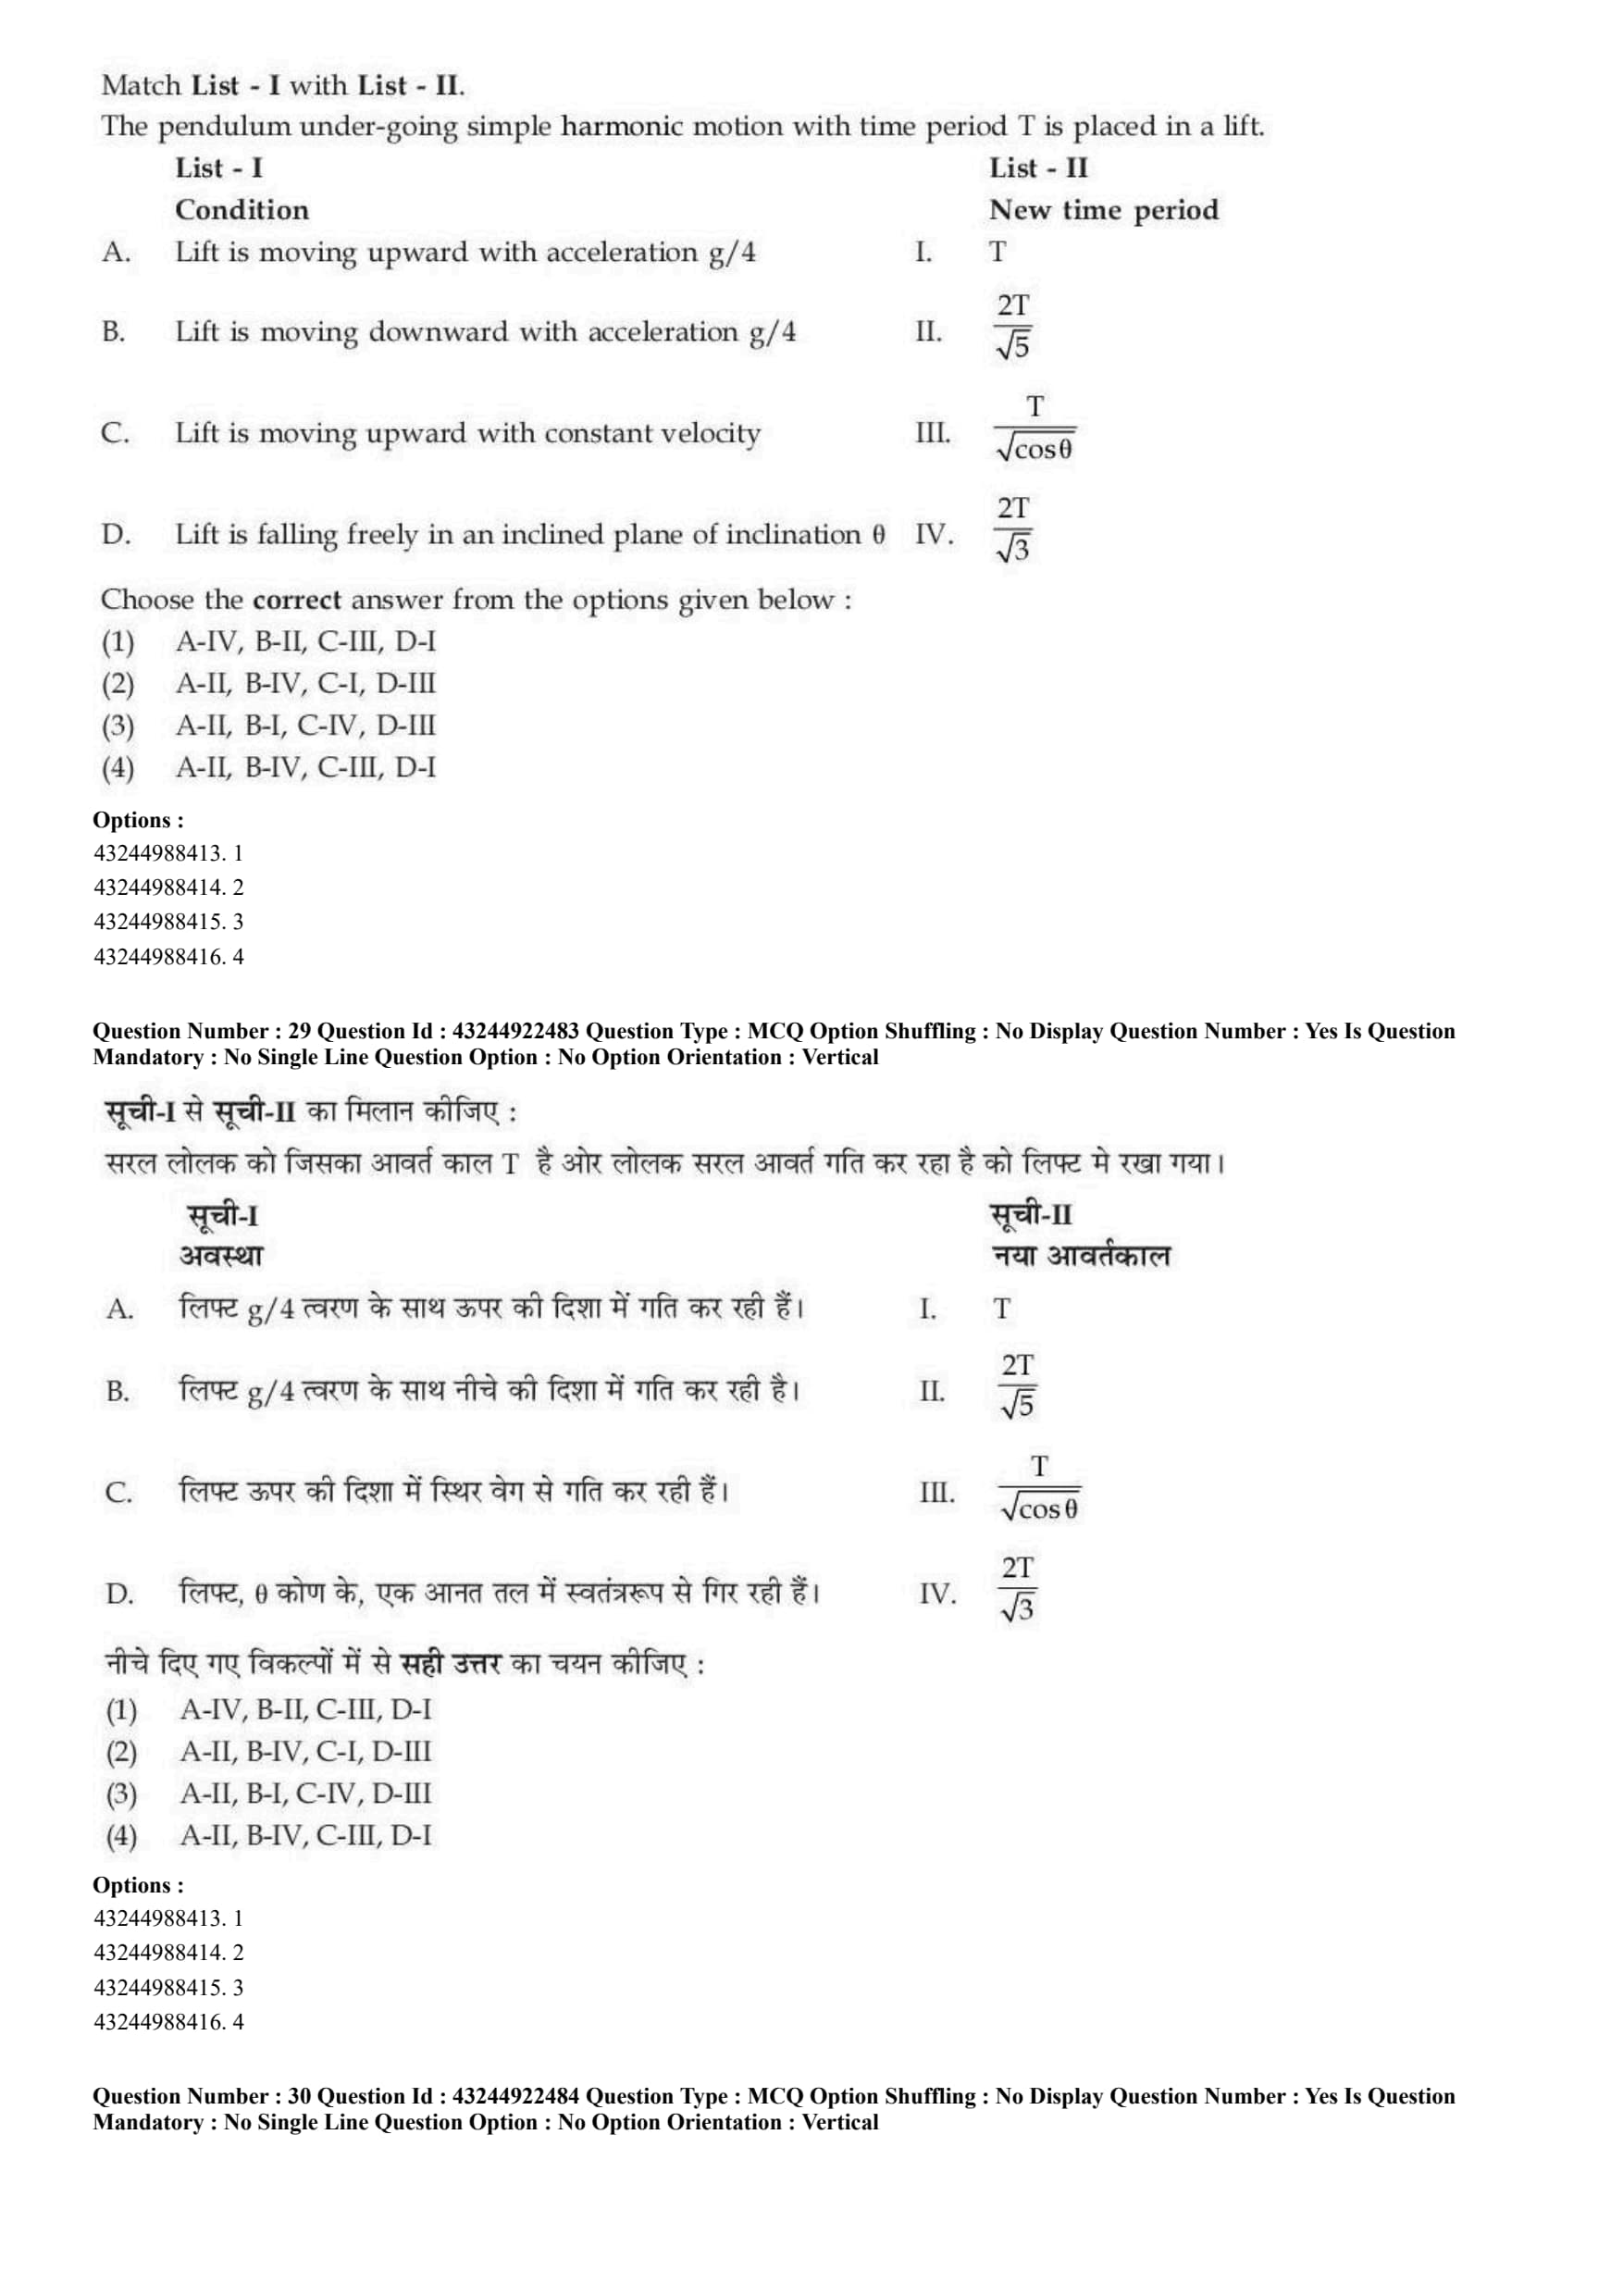
Match List - I with List - II.

Choose the correct answer from the options given below :
View Solution
Step 1 : Concept:
The time period of a simple pendulum depends on the effective acceleration due to gravity relative to its frame of reference.
Step 2 : Key Formula or Approach:
The standard time period is \( T = 2\pi\sqrt{\frac{l}{g}} \).
In a non-inertial frame, the new time period is \( T' = 2\pi\sqrt{\frac{l}{g_{eff}}} \), where \( \vec{g}_{eff} = \vec{g} - \vec{a} \).
Step 3 : Step-by-step Explanation:
A. Lift accelerating upward at \( a = g/4 \):
The pseudo-force acts downwards, so \( g_{eff} = g + \frac{g}{4} = \frac{5g}{4} \).
\( T' = 2\pi\sqrt{\frac{l}{5g/4}} = \frac{2}{\sqrt{5}} \left( 2\pi\sqrt{\frac{l}{g}} \right) = \frac{2T}{\sqrt{5}} \). (Matches II).
B. Lift accelerating downward at \( a = g/4 \):
The pseudo-force acts upwards, so \( g_{eff} = g - \frac{g}{4} = \frac{3g}{4} \).
\( T' = 2\pi\sqrt{\frac{l}{3g/4}} = \frac{2}{\sqrt{3}} \left( 2\pi\sqrt{\frac{l}{g}} \right) = \frac{2T}{\sqrt{3}} \). (Matches IV).
C. Lift moving upward with constant velocity:
Acceleration \( a = 0 \), hence there is no pseudo-force.
\( g_{eff} = g \).
\( T' = T \). (Matches I).
D. Lift falling freely on an inclined plane of angle \( \theta \):
The lift accelerates down the incline with \( a = g \sin\theta \).
The component of gravity perpendicular to the incline is \( g \cos\theta \), which acts as the restoring force's effective gravity.
\( g_{eff} = g \cos\theta \).
\( T' = 2\pi\sqrt{\frac{l}{g \cos\theta}} = \frac{T}{\sqrt{\cos\theta}} \). (Matches III).
Step 4 : Final Answer:
The correct matching is A-II, B-IV, C-I, D-III.
Quick Tip: When dealing with pendulum in an accelerating vehicle, always visualize the effective gravity vector \( \vec{g}_{eff} \). The pendulum will always rest parallel to \( \vec{g}_{eff} \) in steady state.
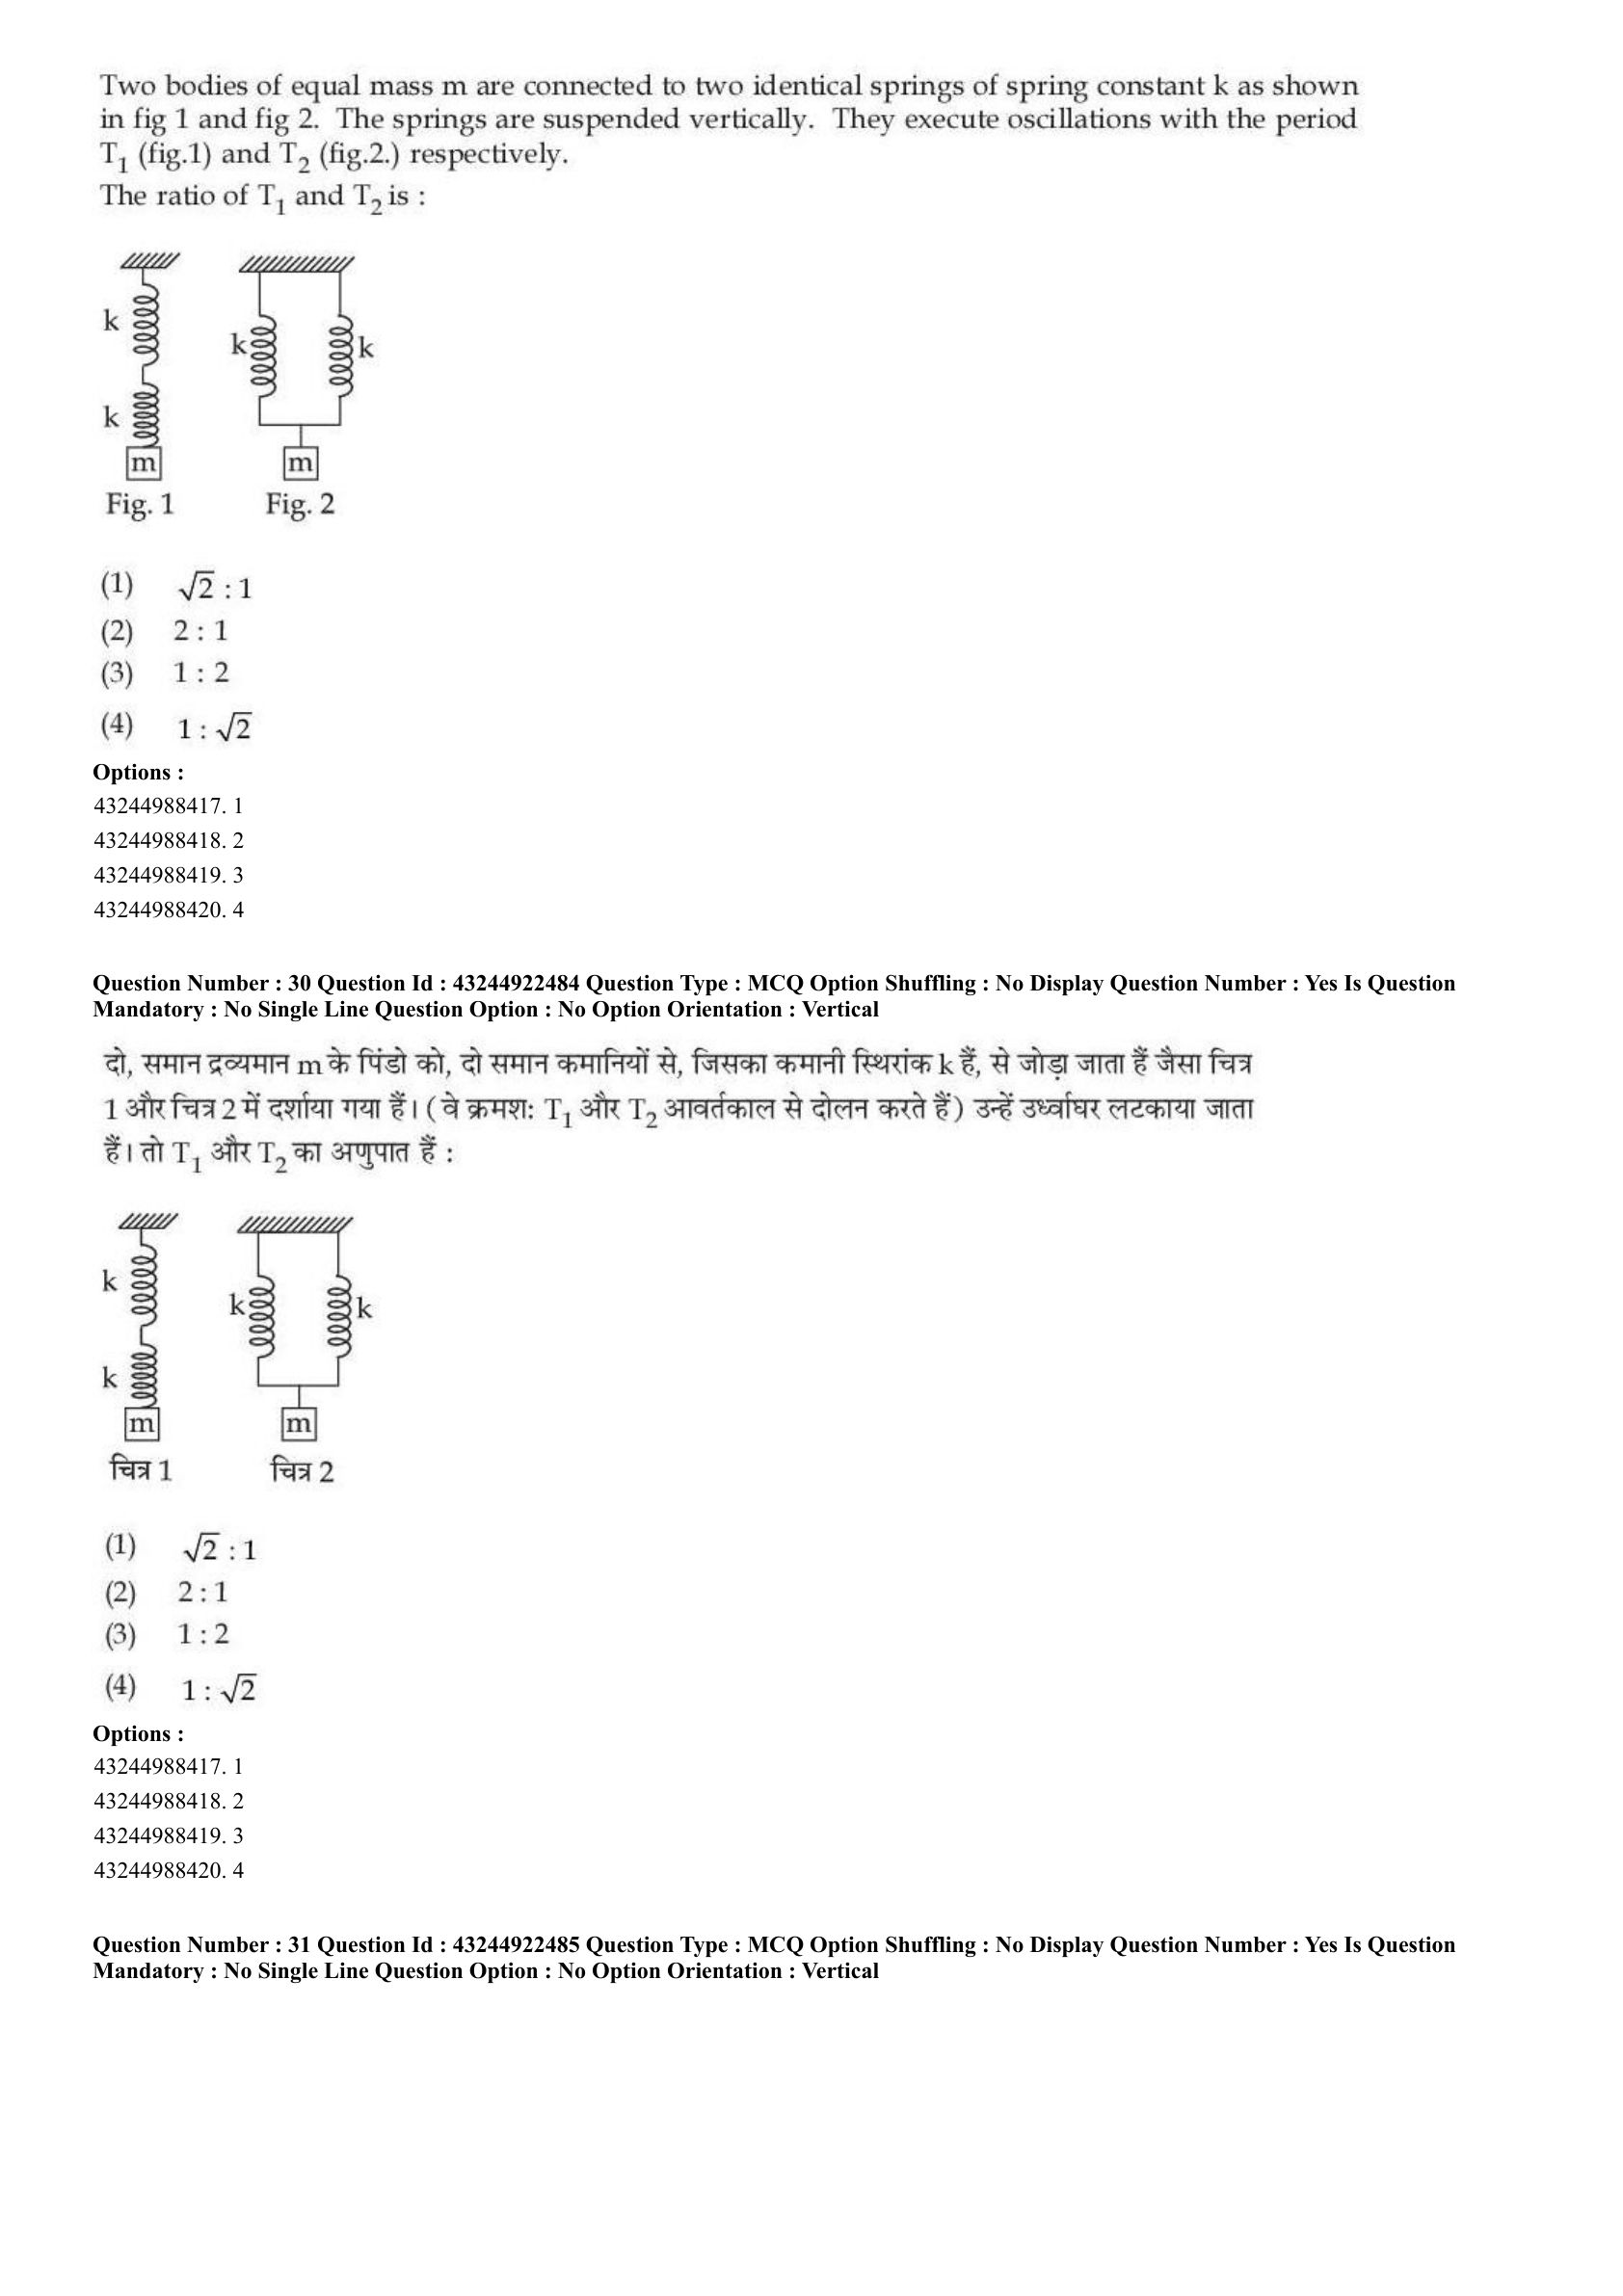
Two bodies of equal mass m are connected to two identical springs of spring constant k as shown in fig 1 and fig 2. The springs are suspended vertically. They execute oscillations with the period \( T_1 \) (fig.1) and \( T_2 \) (fig.2) respectively.
The ratio of \( T_1 \) and \( T_2 \) is :

View Solution
Step 1 : Concept:
The problem involves calculating the effective spring constant for springs connected in series and parallel combinations to find their oscillation periods.
Step 2 : Key Formula or Approach:
For a mass-spring system, the time period is \( T = 2\pi\sqrt{\frac{m}{k_{eff}}} \).
For springs in series: \( \frac{1}{k_{series}} = \frac{1}{k_1} + \frac{1}{k_2} \).
For springs in parallel: \( k_{parallel} = k_1 + k_2 \).
Step 3 : Step-by-step Explanation:
In Fig. 1, the two identical springs (constant \( k \)) are connected end-to-end. This is a series combination.
\( \frac{1}{k_{eff1}} = \frac{1}{k} + \frac{1}{k} = \frac{2}{k} \implies k_{eff1} = \frac{k}{2} \).
The time period for the series combination is:
\( T_1 = 2\pi\sqrt{\frac{m}{k/2}} = 2\pi\sqrt{\frac{2m}{k}} \).
In Fig. 2, the two identical springs are connected side-by-side to the mass. This is a parallel combination.
\( k_{eff2} = k + k = 2k \).
The time period for the parallel combination is:
\( T_2 = 2\pi\sqrt{\frac{m}{2k}} \).
Now, compute the ratio \( \frac{T_1}{T_2} \):
\( \frac{T_1}{T_2} = \frac{2\pi\sqrt{\frac{2m}{k}}}{2\pi\sqrt{\frac{m}{2k}}} = \sqrt{\frac{2m}{k} \times \frac{2k}{m}} = \sqrt{4} = 2 \).
Therefore, the ratio is 2:1.
Step 4 : Final Answer:
The ratio \( T_1 \) to \( T_2 \) is 2:1, which corresponds to option (B).
Quick Tip: Remember that springs in series become "softer" (less stiff, larger period), while springs in parallel become "stiffer" (smaller period). Since the stiffness changes by a factor of 4 between series (\(k/2\)) and parallel (\(2k\)), the time period (which goes as \(1/\sqrt{k}\)) must change by a factor of 2.
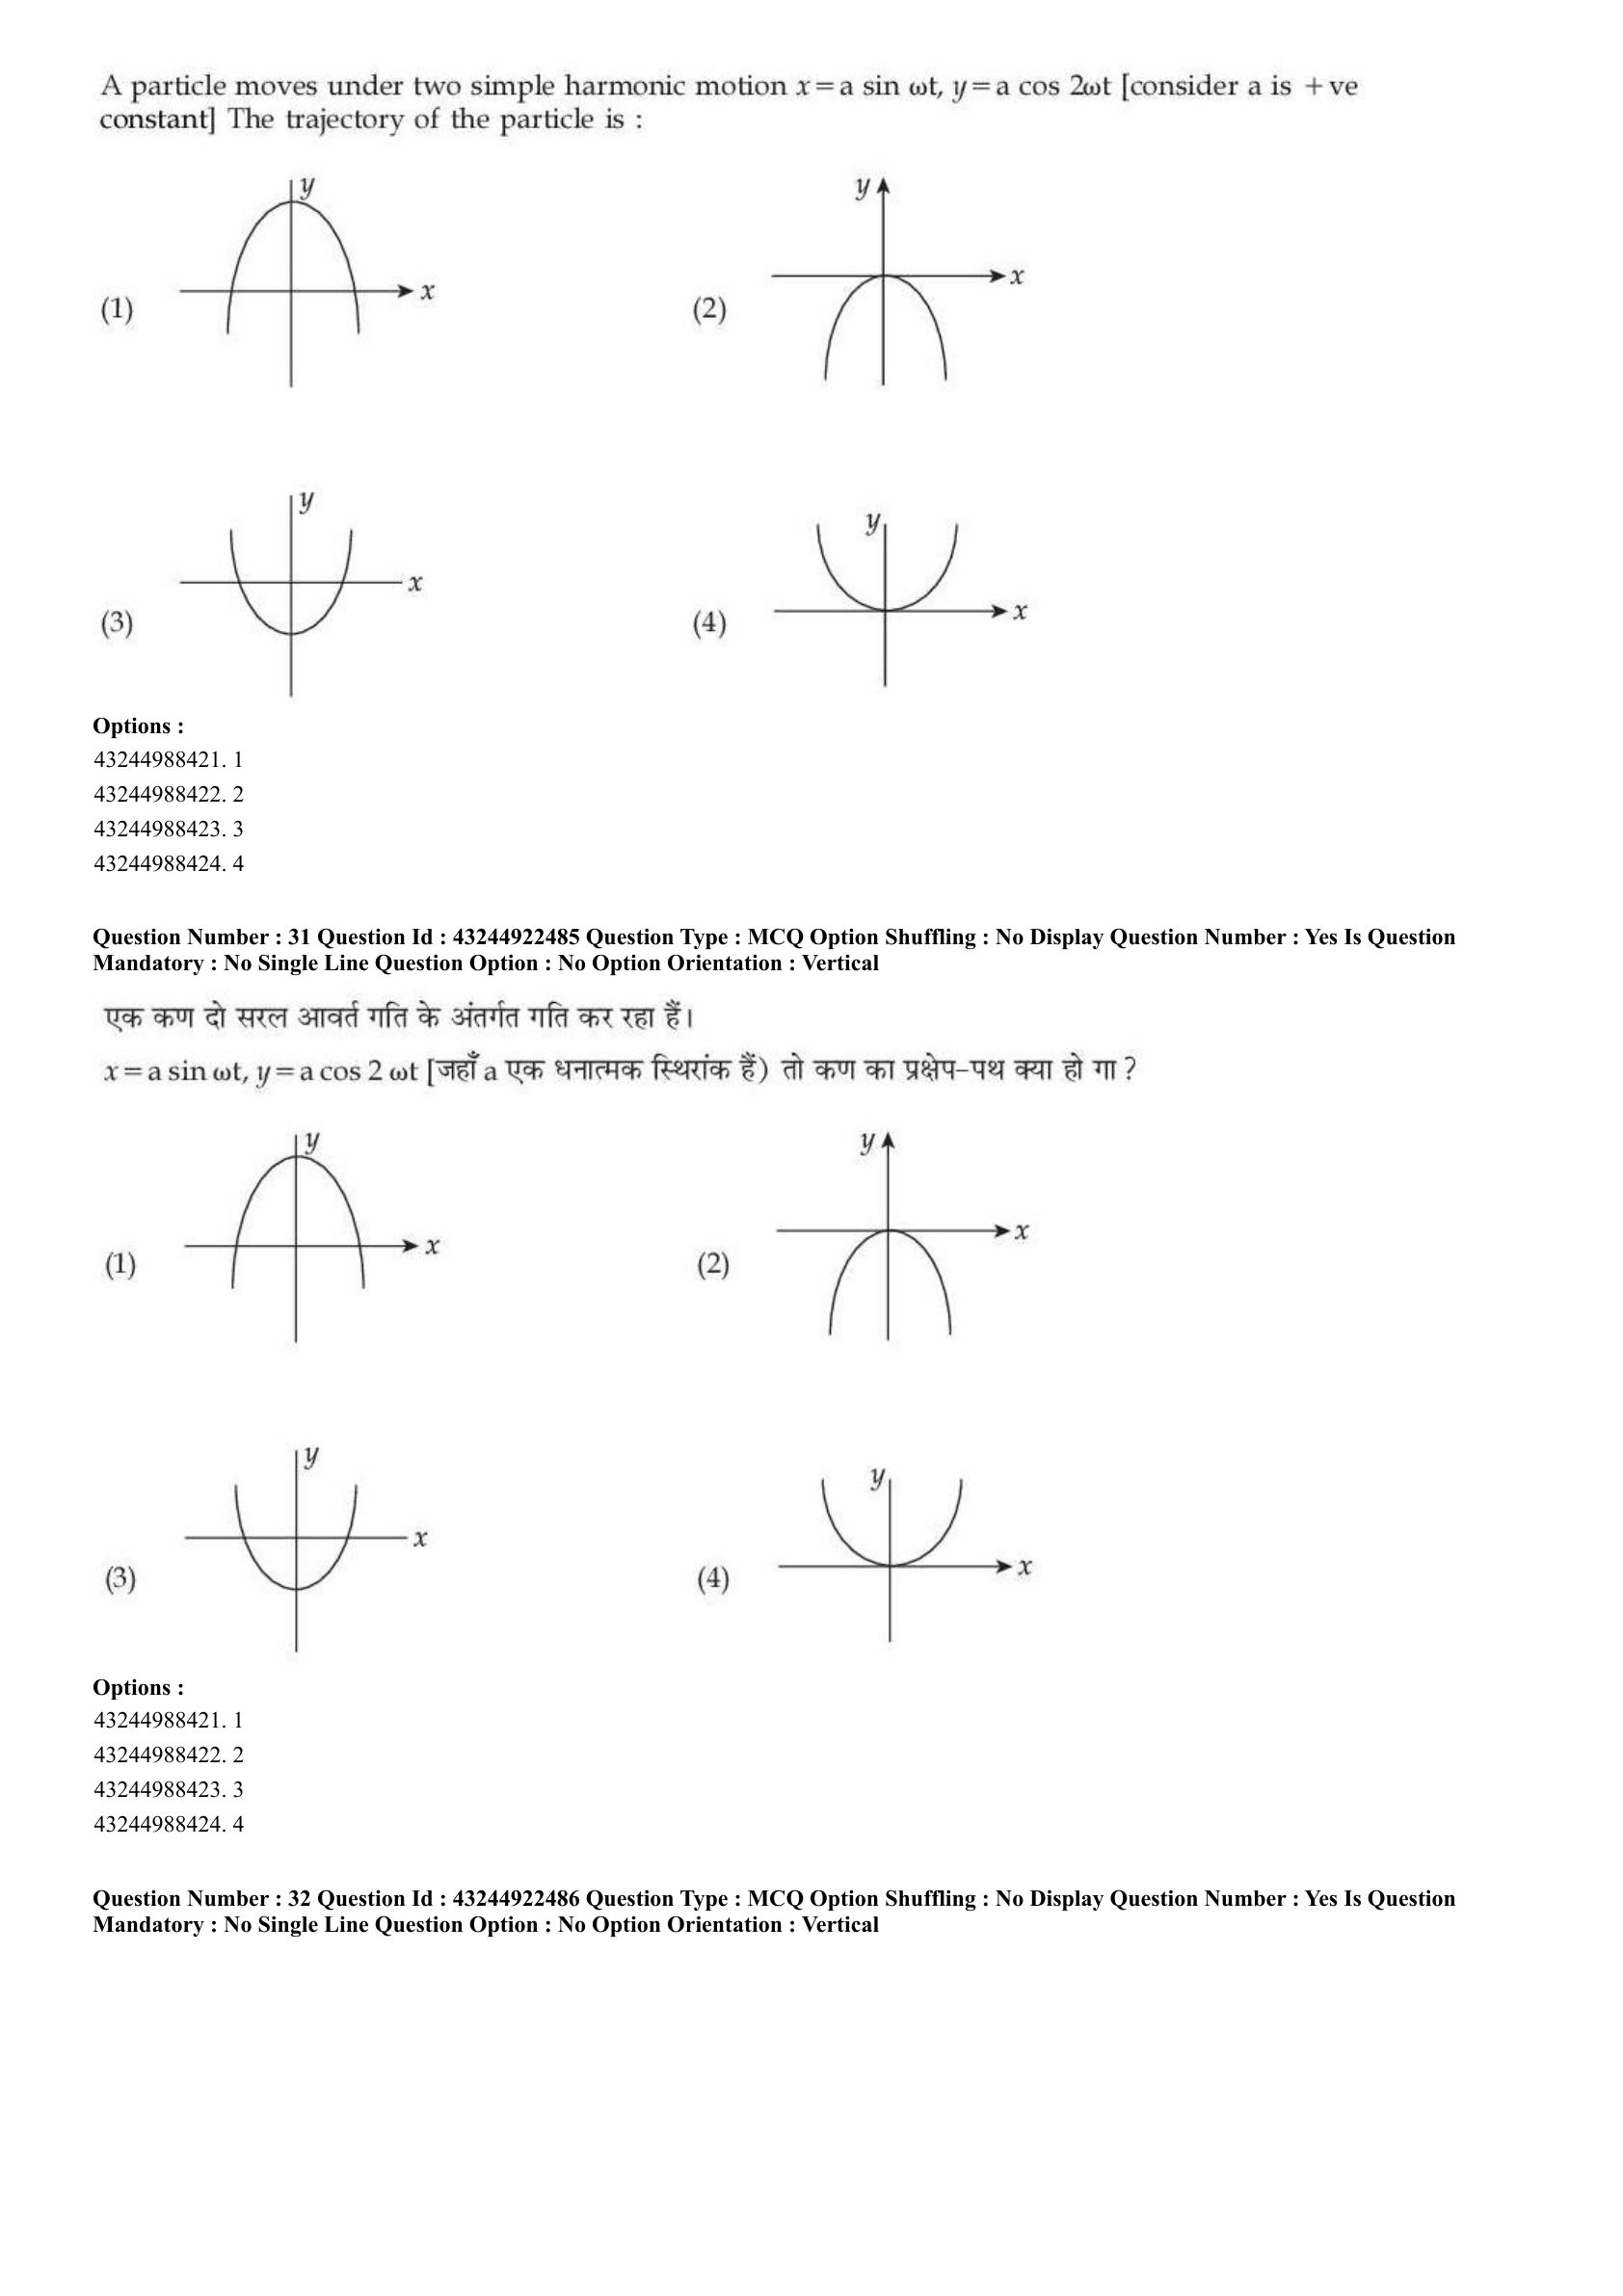
A particle moves under two simple harmonic motion \( x = a \sin \omega t \), \( y = a \cos 2\omega t \) [consider a is +ve constant] The trajectory of the particle is :

View Solution
Step 1 : Concept:
When a particle is subjected to two mutually perpendicular simple harmonic motions with frequencies in a rational ratio, its path is a Lissajous figure.
Step 2 : Key Formula or Approach:
We eliminate the time variable \( t \) from the parametric equations \( x(t) \) and \( y(t) \) to find the spatial trajectory equation \( y = f(x) \).
Use the double angle trigonometric identity: \( \cos 2\theta = 1 - 2\sin^2 \theta \).
Step 3 : Step-by-step Explanation:
The given equations are:
\( x = a \sin \omega t \implies \sin \omega t = \frac{x}{a} \)
\( y = a \cos 2\omega t \)
Substitute the identity for \( \cos 2\omega t \):
\( y = a (1 - 2\sin^2 \omega t) \)
Substitute \( \sin \omega t = \frac{x}{a} \) into the \( y \) equation:
\( y = a \left(1 - 2\left(\frac{x}{a}\right)^2\right) \)
\( y = a - \frac{2x^2}{a} \)
This represents a parabola opening downwards with its vertex at \( (0, a) \).
Crucially, because the \( x \) motion is a simple harmonic motion \( x = a \sin \omega t \), the particle's x-coordinate is strictly bounded between \( -a \) and \( +a \).
When \( x = \pm a \), the y-coordinate evaluates to \( y = a - \frac{2a^2}{a} = a - 2a = -a \).
Therefore, the trajectory is not an infinite parabola but a finite segment terminating at coordinates \( (a, -a) \) and \( (-a, -a) \).
Graph (1) correctly shows this bounded downward-opening parabolic segment (often drawn with vertical delimiter lines indicating the bounding box limits).
Step 4 : Final Answer:
The correct trajectory is the bounded downward parabola in option (A).
Quick Tip: For Lissajous figures where frequencies are in the ratio 1:2, the phase difference dictates the shape. A \( \pi/2 \) relative phase difference (sine vs cosine here) typically yields a parabola. Always check the physical bounds (\( -A \leq x \leq A \)) to differentiate between a mathematical curve and a physical trajectory segment.
A particle is subjected to two simple harmonic motion \( y_1 = a \sin \omega t \) and \( y_2 = b \sin (\omega t + \pi) \). The maximum speed of the particle is :
View Solution
Step 1 : Concept:
The question deals with the superposition of two collinear simple harmonic motions having the same frequency but a specific phase difference.
Step 2 : Key Formula or Approach:
When two SHMs \( y_1 \) and \( y_2 \) are superimposed, the resultant displacement is \( y = y_1 + y_2 \).
The maximum speed of a particle executing SHM with amplitude \( A \) and angular frequency \( \omega \) is \( v_{max} = A\omega \).
Step 3 : Step-by-step Explanation:
The individual displacements are given by:
\( y_1 = a \sin \omega t \)
\( y_2 = b \sin (\omega t + \pi) \)
Using the trigonometric identity \( \sin(\theta + \pi) = -\sin\theta \), we can rewrite \( y_2 \):
\( y_2 = -b \sin \omega t \)
Now, find the resultant displacement by adding them linearly:
\( y = y_1 + y_2 = a \sin \omega t - b \sin \omega t \)
\( y = (a - b) \sin \omega t \)
The resultant motion is also a simple harmonic motion with the same angular frequency \( \omega \) and a net amplitude of \( A = |a - b| \).
The maximum speed is given by the product of the resultant amplitude and angular frequency:
\( v_{max} = A\omega = |a - b|\omega \)
Assuming \( a > b \) (as per the standard presentation in the options), the maximum speed is \( (a - b)\omega \).
Step 4 : Final Answer:
The maximum speed is \( (a-b)\omega \), corresponding to option (B).
Quick Tip: A phase difference of \( \pi \) (or \( 180^{\circ} \)) means the two oscillations are exactly out of phase (destructive interference). Hence, their amplitudes directly subtract.
When the width of the slit decreases in a single slit diffraction experiment, then the fringe width (\( \beta \)) :
View Solution
Step 1 : Concept:
The question tests the relationship between the physical slit width and the spatial spread of the resulting diffraction pattern on a screen.
Step 2 : Key Formula or Approach:
In a single slit diffraction setup, the angular position of the first minimum is given by \( \sin \theta = \frac{\lambda}{a} \), where \( a \) is the slit width.
For small angles, \( \theta \approx \frac{\lambda}{a} \).
The linear fringe width (often represented as the width of the central maximum) is \( \beta = \frac{2\lambda D}{a} \), where \( D \) is the distance to the screen.
Step 3 : Step-by-step Explanation:
The formula \( \beta = \frac{2\lambda D}{a} \) reveals an inverse mathematical relationship between the fringe width \( \beta \) and the slit width \( a \).
This means \( \beta \propto \frac{1}{a} \).
According to the problem statement, the width of the slit \( a \) is decreased.
Consequently, due to the inverse proportionality, the fringe width \( \beta \) on the screen must increase.
Physically, forcing light through a narrower opening causes it to diffract or spread out more intensely across the viewing plane.
Step 4 : Final Answer:
The fringe width increases, making option (A) correct.
Quick Tip: This inverse relation is an optical manifestation of the uncertainty principle: confining the photon's transverse position more strictly (smaller \( \Delta x \)) results in a larger spread in its transverse momentum (larger \( \Delta p_x \)), leading to a wider pattern.
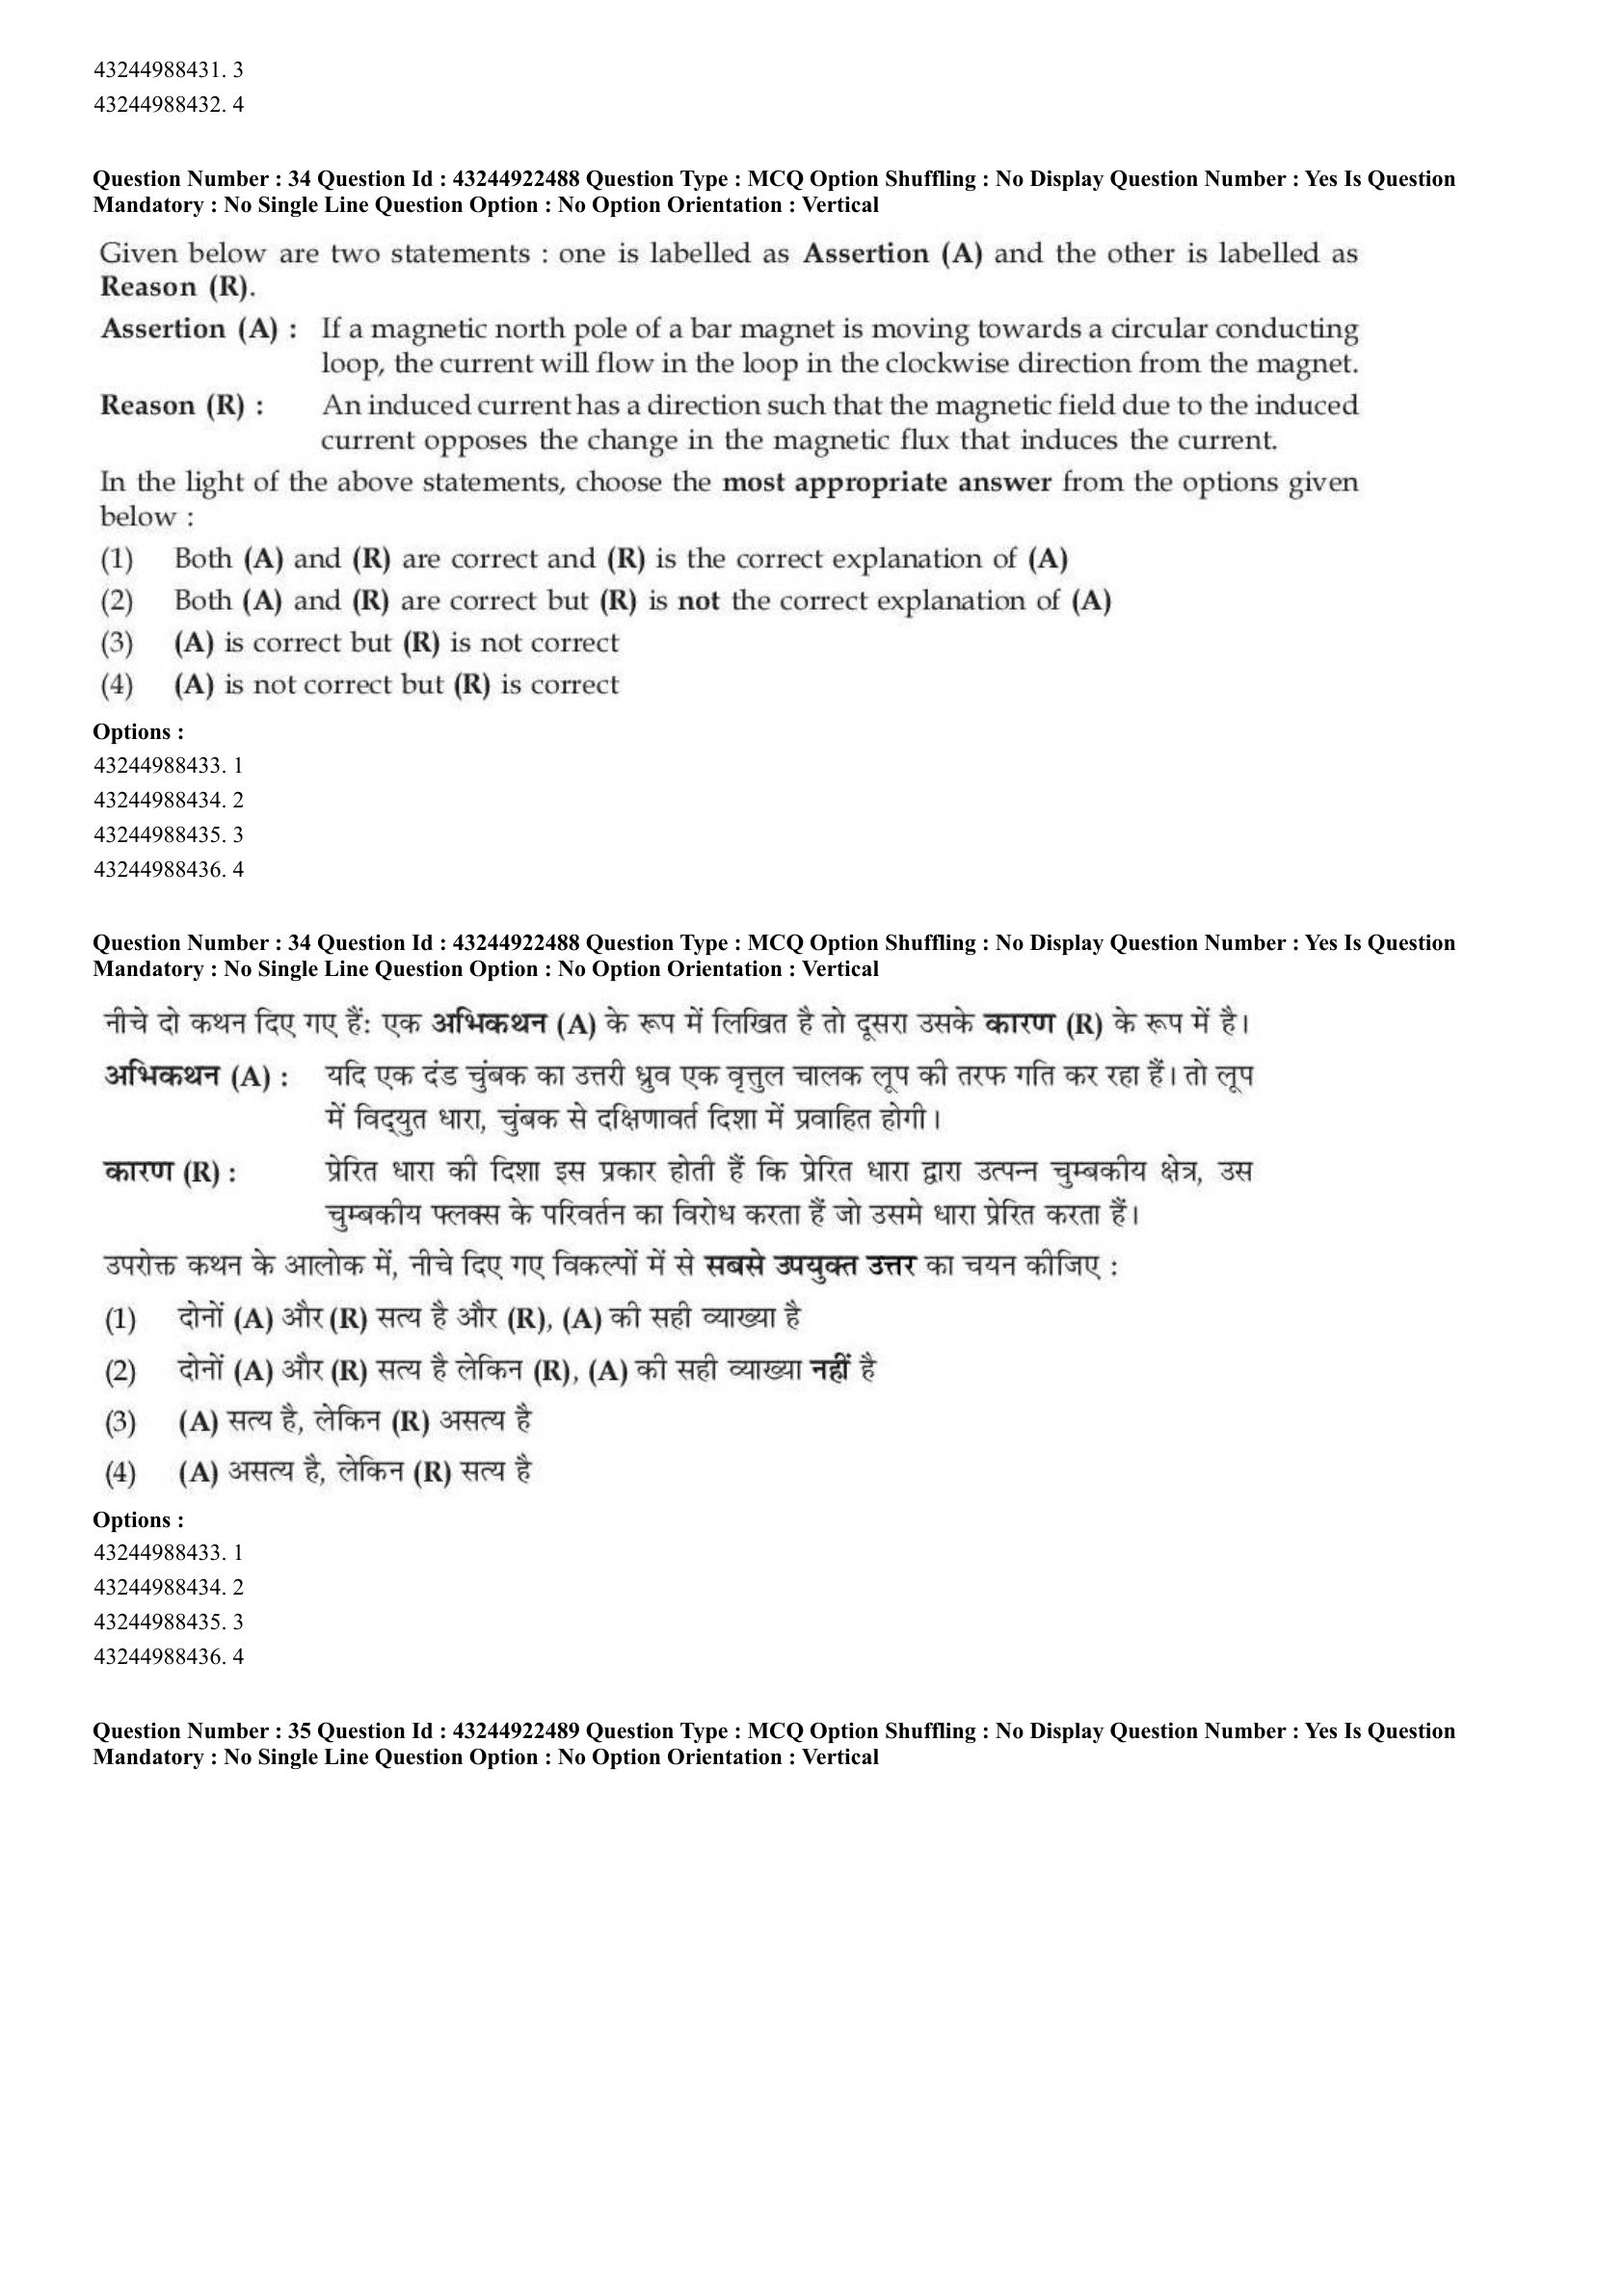
Given below are two statements : one is labelled as Assertion (A) and the other is labelled as Reason (R).
Assertion (A) : If a magnetic north pole of a bar magnet is moving towards a circular conducting loop, the current will flow in the loop in the clockwise direction from the magnet.
Reason (R) : An induced current has a direction such that the magnetic field due to the induced current opposes the change in the magnetic flux that induces the current.
In the light of the above statements, choose the most appropriate answer from the options given below :
View Solution
Step 1 : Concept:
The problem evaluates the application of Lenz's Law and Faraday's Law of Electromagnetic Induction to determine the direction of induced currents.
Step 2 : Key Formula or Approach:
Lenz's Law dictates that the direction of the induced current is always such that it opposes the change in magnetic flux that produced it.
A face of a coil with counter-clockwise current acts as a Magnetic North pole, while a clockwise current acts as a Magnetic South pole.
Step 3 : Step-by-step Explanation:
Analyzing Reason (R): The reason states the exact definition of Lenz's Law. Thus, Reason (R) is factually correct.
Analyzing Assertion (A): When the North pole of a magnet approaches a conducting loop, the magnetic flux through the loop increases.
According to Lenz's law, the loop must generate a magnetic field to repel this approaching North pole to oppose the change.
To repel a North pole, the face of the loop pointing towards the magnet must behave as a North pole itself.
By the right-hand grip rule, for the loop to present a North pole, the induced current must flow in an anti-clockwise direction as viewed from the magnet's perspective.
The Assertion (A) wrongly claims the current will flow in the clockwise direction. Thus, Assertion (A) is incorrect.
Step 4 : Final Answer:
Assertion (A) is not correct, but Reason (R) is correct.
Quick Tip: Remember the "Clock Face Rule": The letter 'N' has ends pointing counter-clockwise (Anti-clockwise = North), while the letter 'S' has ends pointing clockwise (Clockwise = South).
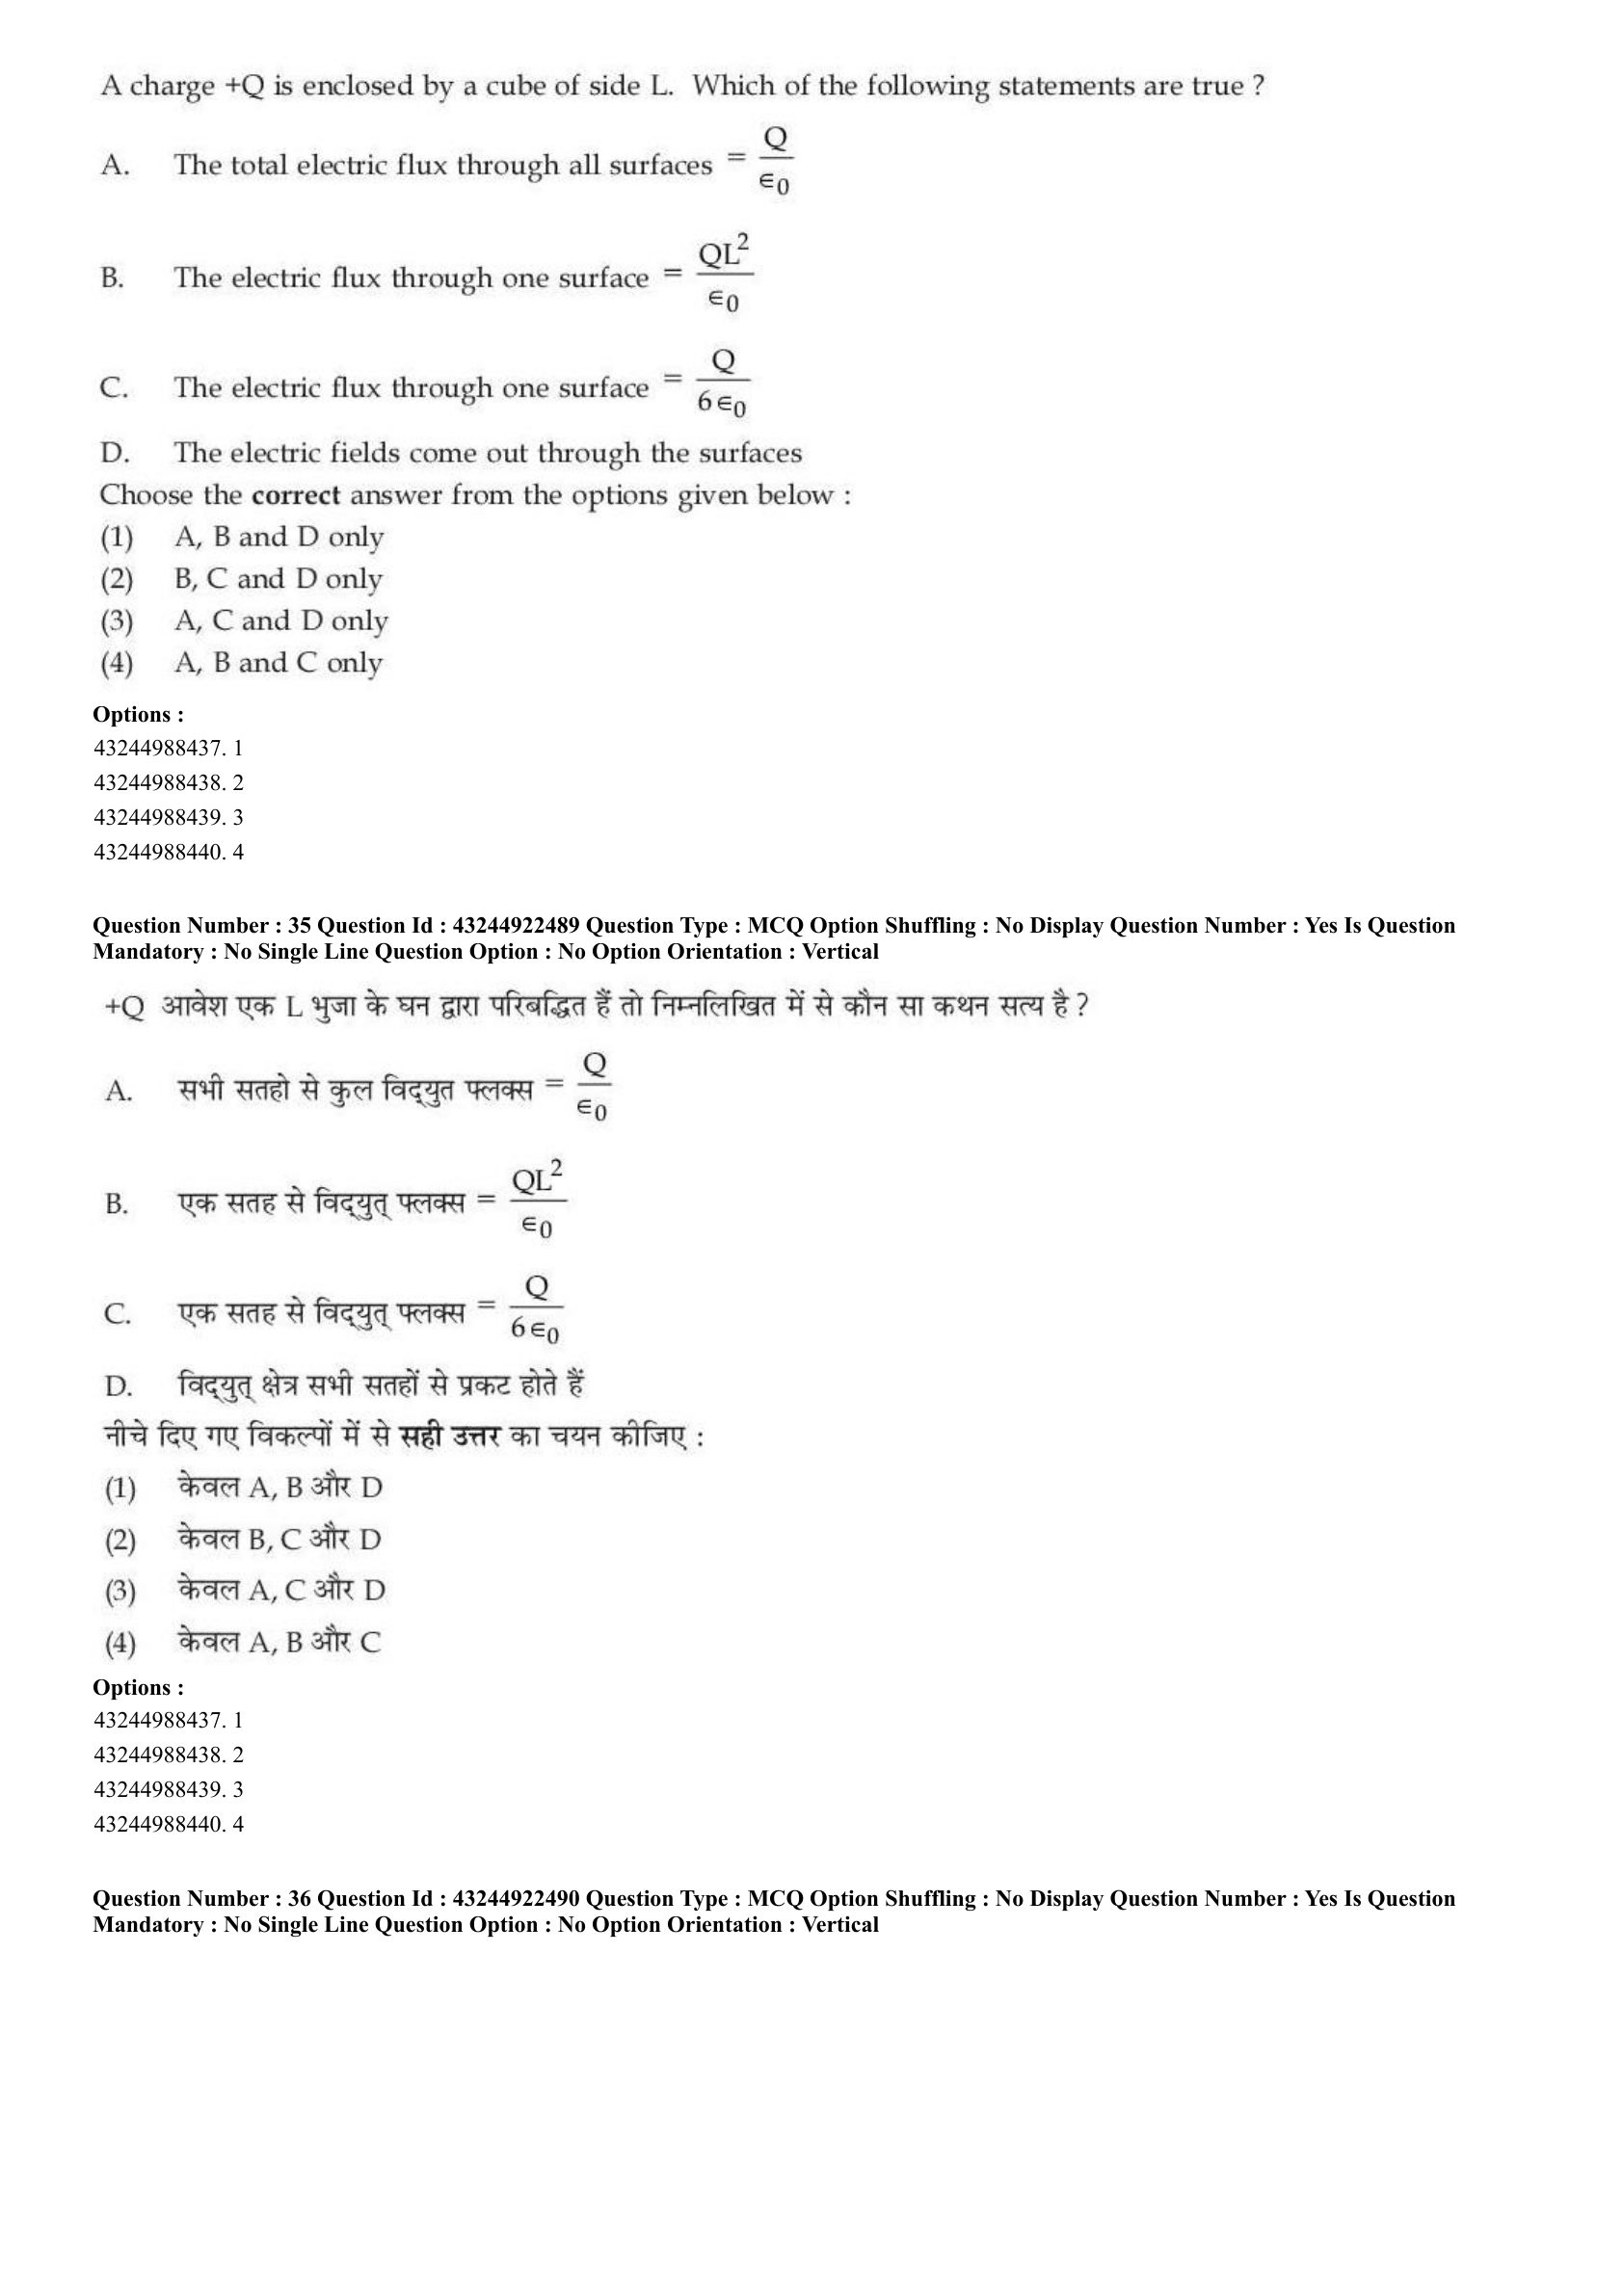
A charge +Q is enclosed by a cube of side L. Which of the following statements are true ?
A. The total electric flux through all surfaces = \( \frac{Q}{\epsilon_0} \)
B. The electric flux through one surface = \( \frac{Q L^2}{\epsilon_0} \)
C. The electric flux through one surface = \( \frac{Q}{6\epsilon_0} \)
D. The electric fields come out through the surfaces
Choose the correct answer from the options given below :
View Solution
Step 1 : Concept:
The question tests the principles of Gauss's Law in electrostatics applied to highly symmetric closed surfaces.
Step 2 : Key Formula or Approach:
Gauss's Law states that the net electric flux \( \Phi_E \) through any closed surface is equal to the enclosed charge divided by the permittivity of free space: \( \Phi_{total} = \oint \vec{E} \cdot d\vec{A} = \frac{Q_{enclosed}}{\epsilon_0} \).
Step 3 : Step-by-step Explanation:
Statement A: According directly to Gauss's Law, the total flux through the entire closed cube is \( \frac{Q}{\epsilon_0} \). This statement is true.
Statement B: This proposes a flux formula dependent on the side length squared, which contradicts Gauss's law since flux depends solely on the enclosed charge, not the size of the symmetrical enclosing surface. This is false.
Statement C: Assuming the charge +Q is located symmetrically at the center of the cube, the total flux is divided equally among the 6 identical square faces. Thus, the flux through one surface is \( \frac{1}{6} \times \frac{Q}{\epsilon_0} = \frac{Q}{6\epsilon_0} \). This statement is true. (Standard exam questions imply central placement unless specified otherwise).
Statement D: The enclosed charge is positive (+Q). Electric field lines originate from positive charges and point radially outward. Therefore, the electric field lines will come out through the surfaces of the cube. This statement is true.
Step 4 : Final Answer:
Statements A, C, and D are true, leading to option (C).
Quick Tip: If the charge was placed at the corner of the cube instead of the center, the flux through the entire cube would be \( \frac{Q}{8\epsilon_0} \), and the flux through the faces touching that corner would be strictly zero!
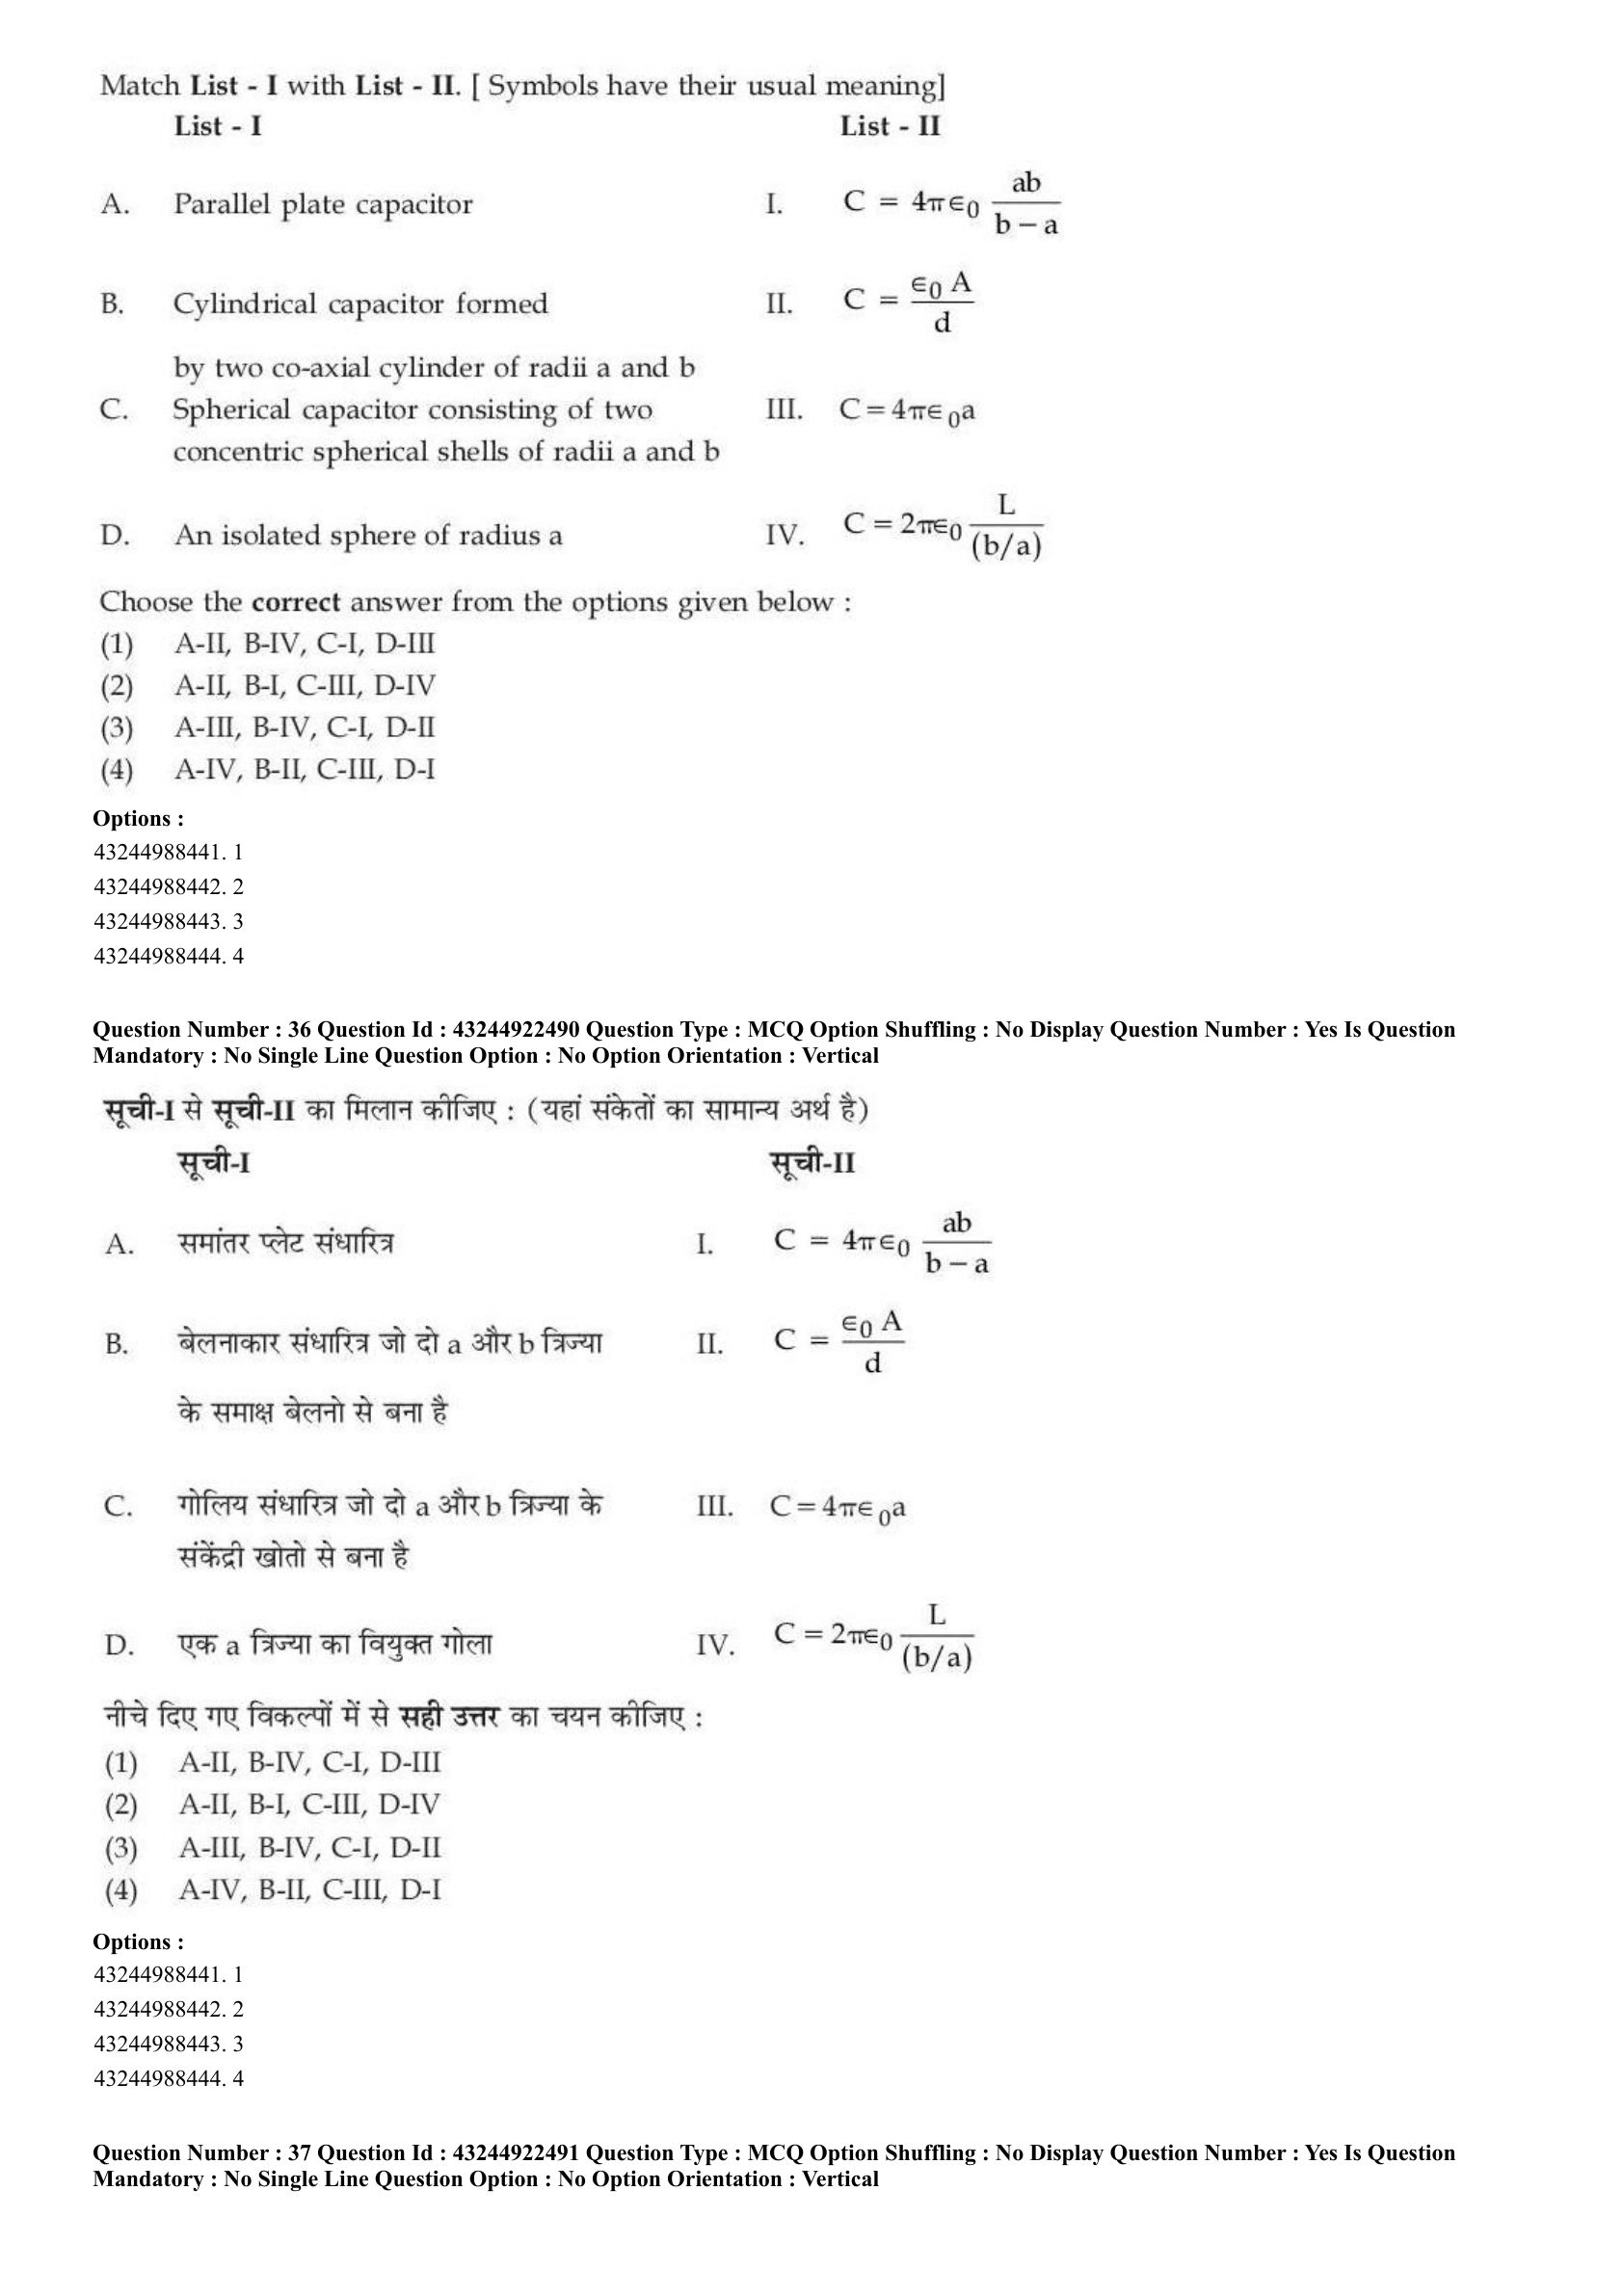
Match List - I with List - II. [ Symbols have their usual meaning]
List - I

Choose the correct answer from the options given below :
View Solution
Step 1 : Concept:
We need to match standard electrostatic geometries to their theoretically derived capacitance formulas.
Step 2 : Key Formula or Approach:
Capacitance is defined as \( C = \frac{Q}{V} \). For each standard geometry, calculating the potential difference \( V \) generated by charge \( Q \) leads to these specific formulas.
Step 3 : Step-by-step Explanation:
A. Parallel plate capacitor: The classic formula for a capacitor with plate area A and separation d is \( C = \frac{\epsilon_0 A}{d} \). Matches II.
B. Cylindrical capacitor: For two coaxial cylinders of length L and radii a (inner) and b (outer), the capacitance is derived by integrating the \( 1/r \) electric field, giving \( C = \frac{2\pi\epsilon_0 L}{\ln(b/a)} \). Matches IV.
C. Spherical capacitor: For two concentric shells, the potential difference is \( \frac{Q}{4\pi\epsilon_0} \left(\frac{1}{a} - \frac{1}{b}\right) \), which simplifies to a capacitance of \( C = 4\pi\epsilon_0 \frac{ab}{b-a} \). Matches I.
D. Isolated sphere: Taking the outer radius \( b \to \infty \) in the spherical capacitor formula gives the capacitance of a single isolated conducting sphere as \( C = 4\pi\epsilon_0 a \). Matches III.
Step 4 : Final Answer:
The complete match is A-II, B-IV, C-I, D-III, which is option (A).
Quick Tip: An isolated sphere acts as a capacitor where the "second plate" is placed at infinity, giving it a baseline capacity to hold charge. For Earth (\( R \approx 6400 \) km), this isolated capacitance is roughly 711 \(\mu\)F.
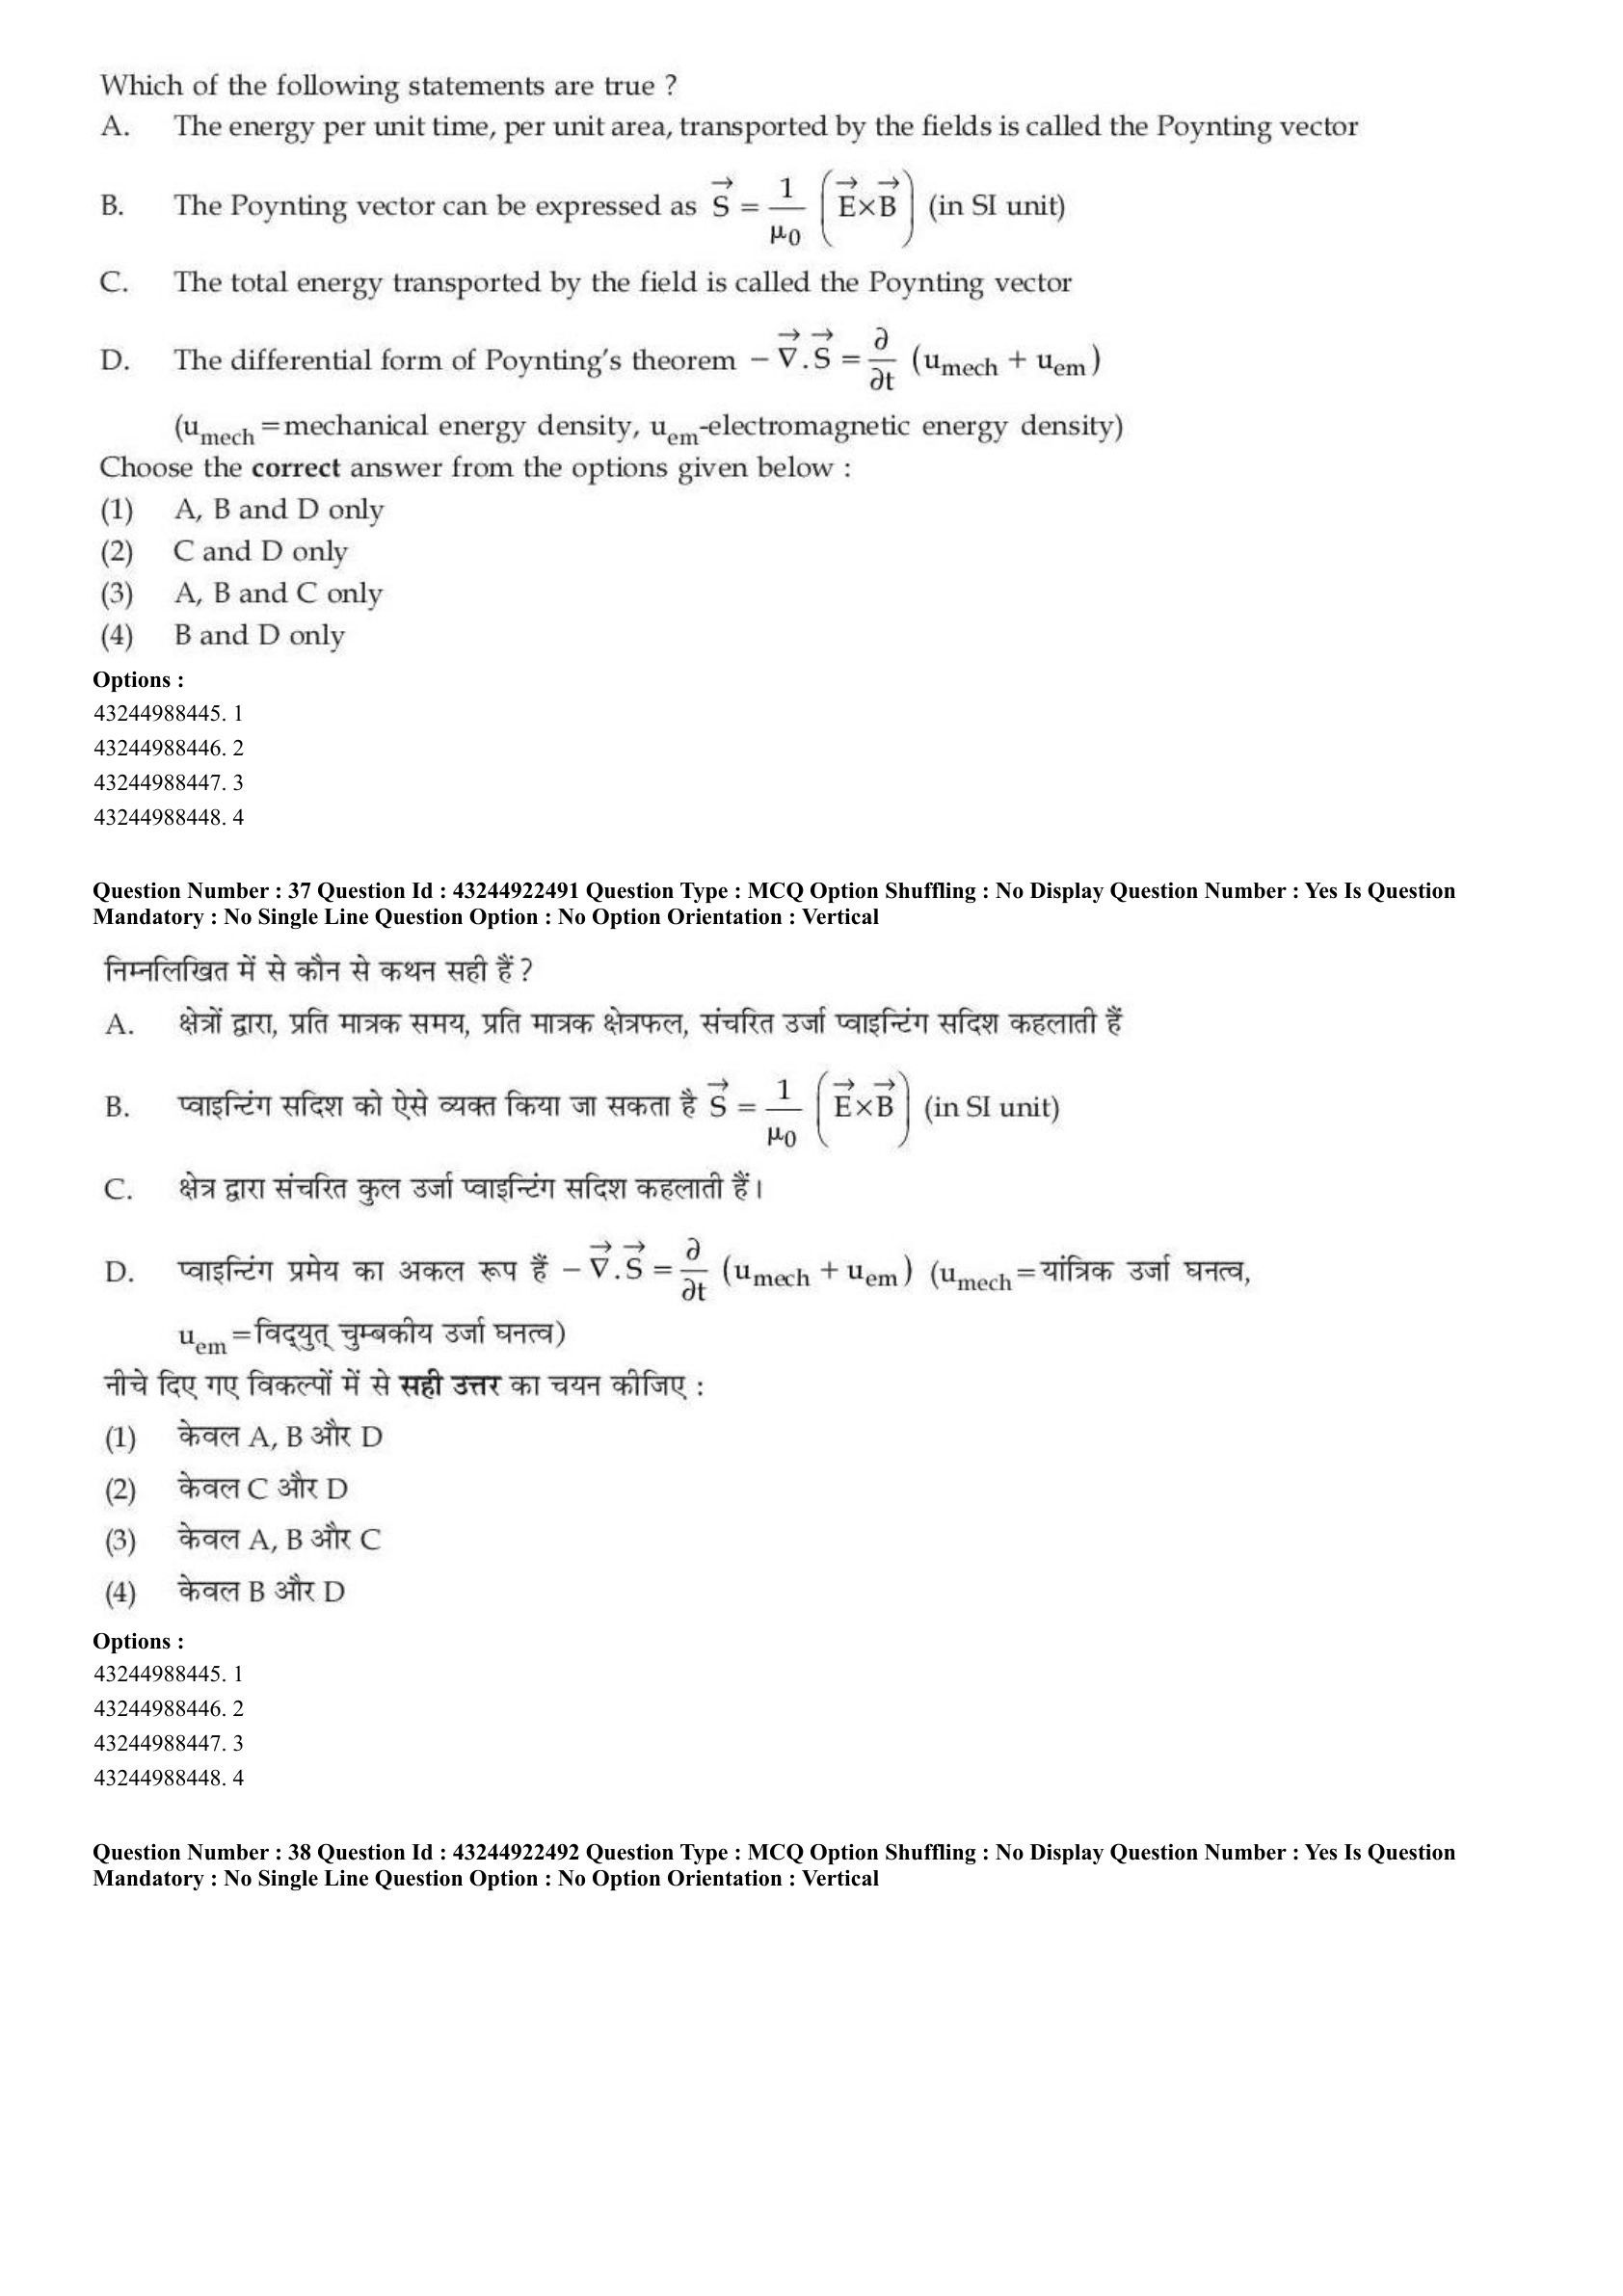
Which of the following statements are true ?
A. The energy per unit time, per unit area, transported by the fields is called the Poynting vector
B. The Poynting vector can be expressed as \( \vec{S} = \frac{1}{\mu_0}(\vec{E} \times \vec{B}) \) (in SI unit)
C. The total energy transported by the field is called the Poynting vector
D. The differential form of Poynting's theorem \( - \nabla \cdot \vec{S} = \frac{\partial}{\partial t}(u_{mech} + u_{em}) \)
(\( u_{mech} \) = mechanical energy density, \( u_{em} \)-electromagnetic energy density)
Choose the correct answer from the options given below :
View Solution
Step 1 : Concept:
The question tests theoretical concepts related to electromagnetic energy transfer, specifically the Poynting vector and Poynting's Theorem.
Step 2 : Key Formula or Approach:
The Poynting vector is defined as \( \vec{S} = \vec{E} \times \vec{H} \).
Poynting's theorem represents the work-energy theorem in electrodynamics.
Step 3 : Step-by-step Explanation:
Statement A: By definition, the Poynting vector represents the directional energy flux density, which is the rate of energy transfer per unit area (Energy / (Time \(\times\) Area) or Power/Area). This statement is True.
Statement B: In vacuum/free space, \( \vec{H} = \frac{\vec{B}}{\mu_0} \). Therefore, \( \vec{S} = \vec{E} \times \frac{\vec{B}}{\mu_0} = \frac{1}{\mu_0}(\vec{E} \times \vec{B}) \). This statement is True.
Statement C: The Poynting vector is NOT the total energy; it is the energy flux density. To get total energy, one must integrate it over time and an area. This statement is False.
Statement D: Poynting's theorem is written as \( -\nabla \cdot \vec{S} = \frac{\partial u_{em}}{\partial t} + \vec{J} \cdot \vec{E} \). The term \( \vec{J} \cdot \vec{E} \) describes the rate at which the EM field does work on charges, converting EM energy into mechanical (or thermal) energy density \( u_{mech} \). Thus, \( \vec{J} \cdot \vec{E} = \frac{\partial u_{mech}}{\partial t} \). Substituting this gives \( -\nabla \cdot \vec{S} = \frac{\partial}{\partial t}(u_{mech} + u_{em}) \). This statement is True.
Step 4 : Final Answer:
Statements A, B, and D are true, perfectly matching option (A).
Quick Tip: Poynting's theorem is essentially the local statement of the conservation of energy for an electromagnetic system. The negative divergence of \( \vec{S} \) signifies the energy flowing *into* a small volume element.
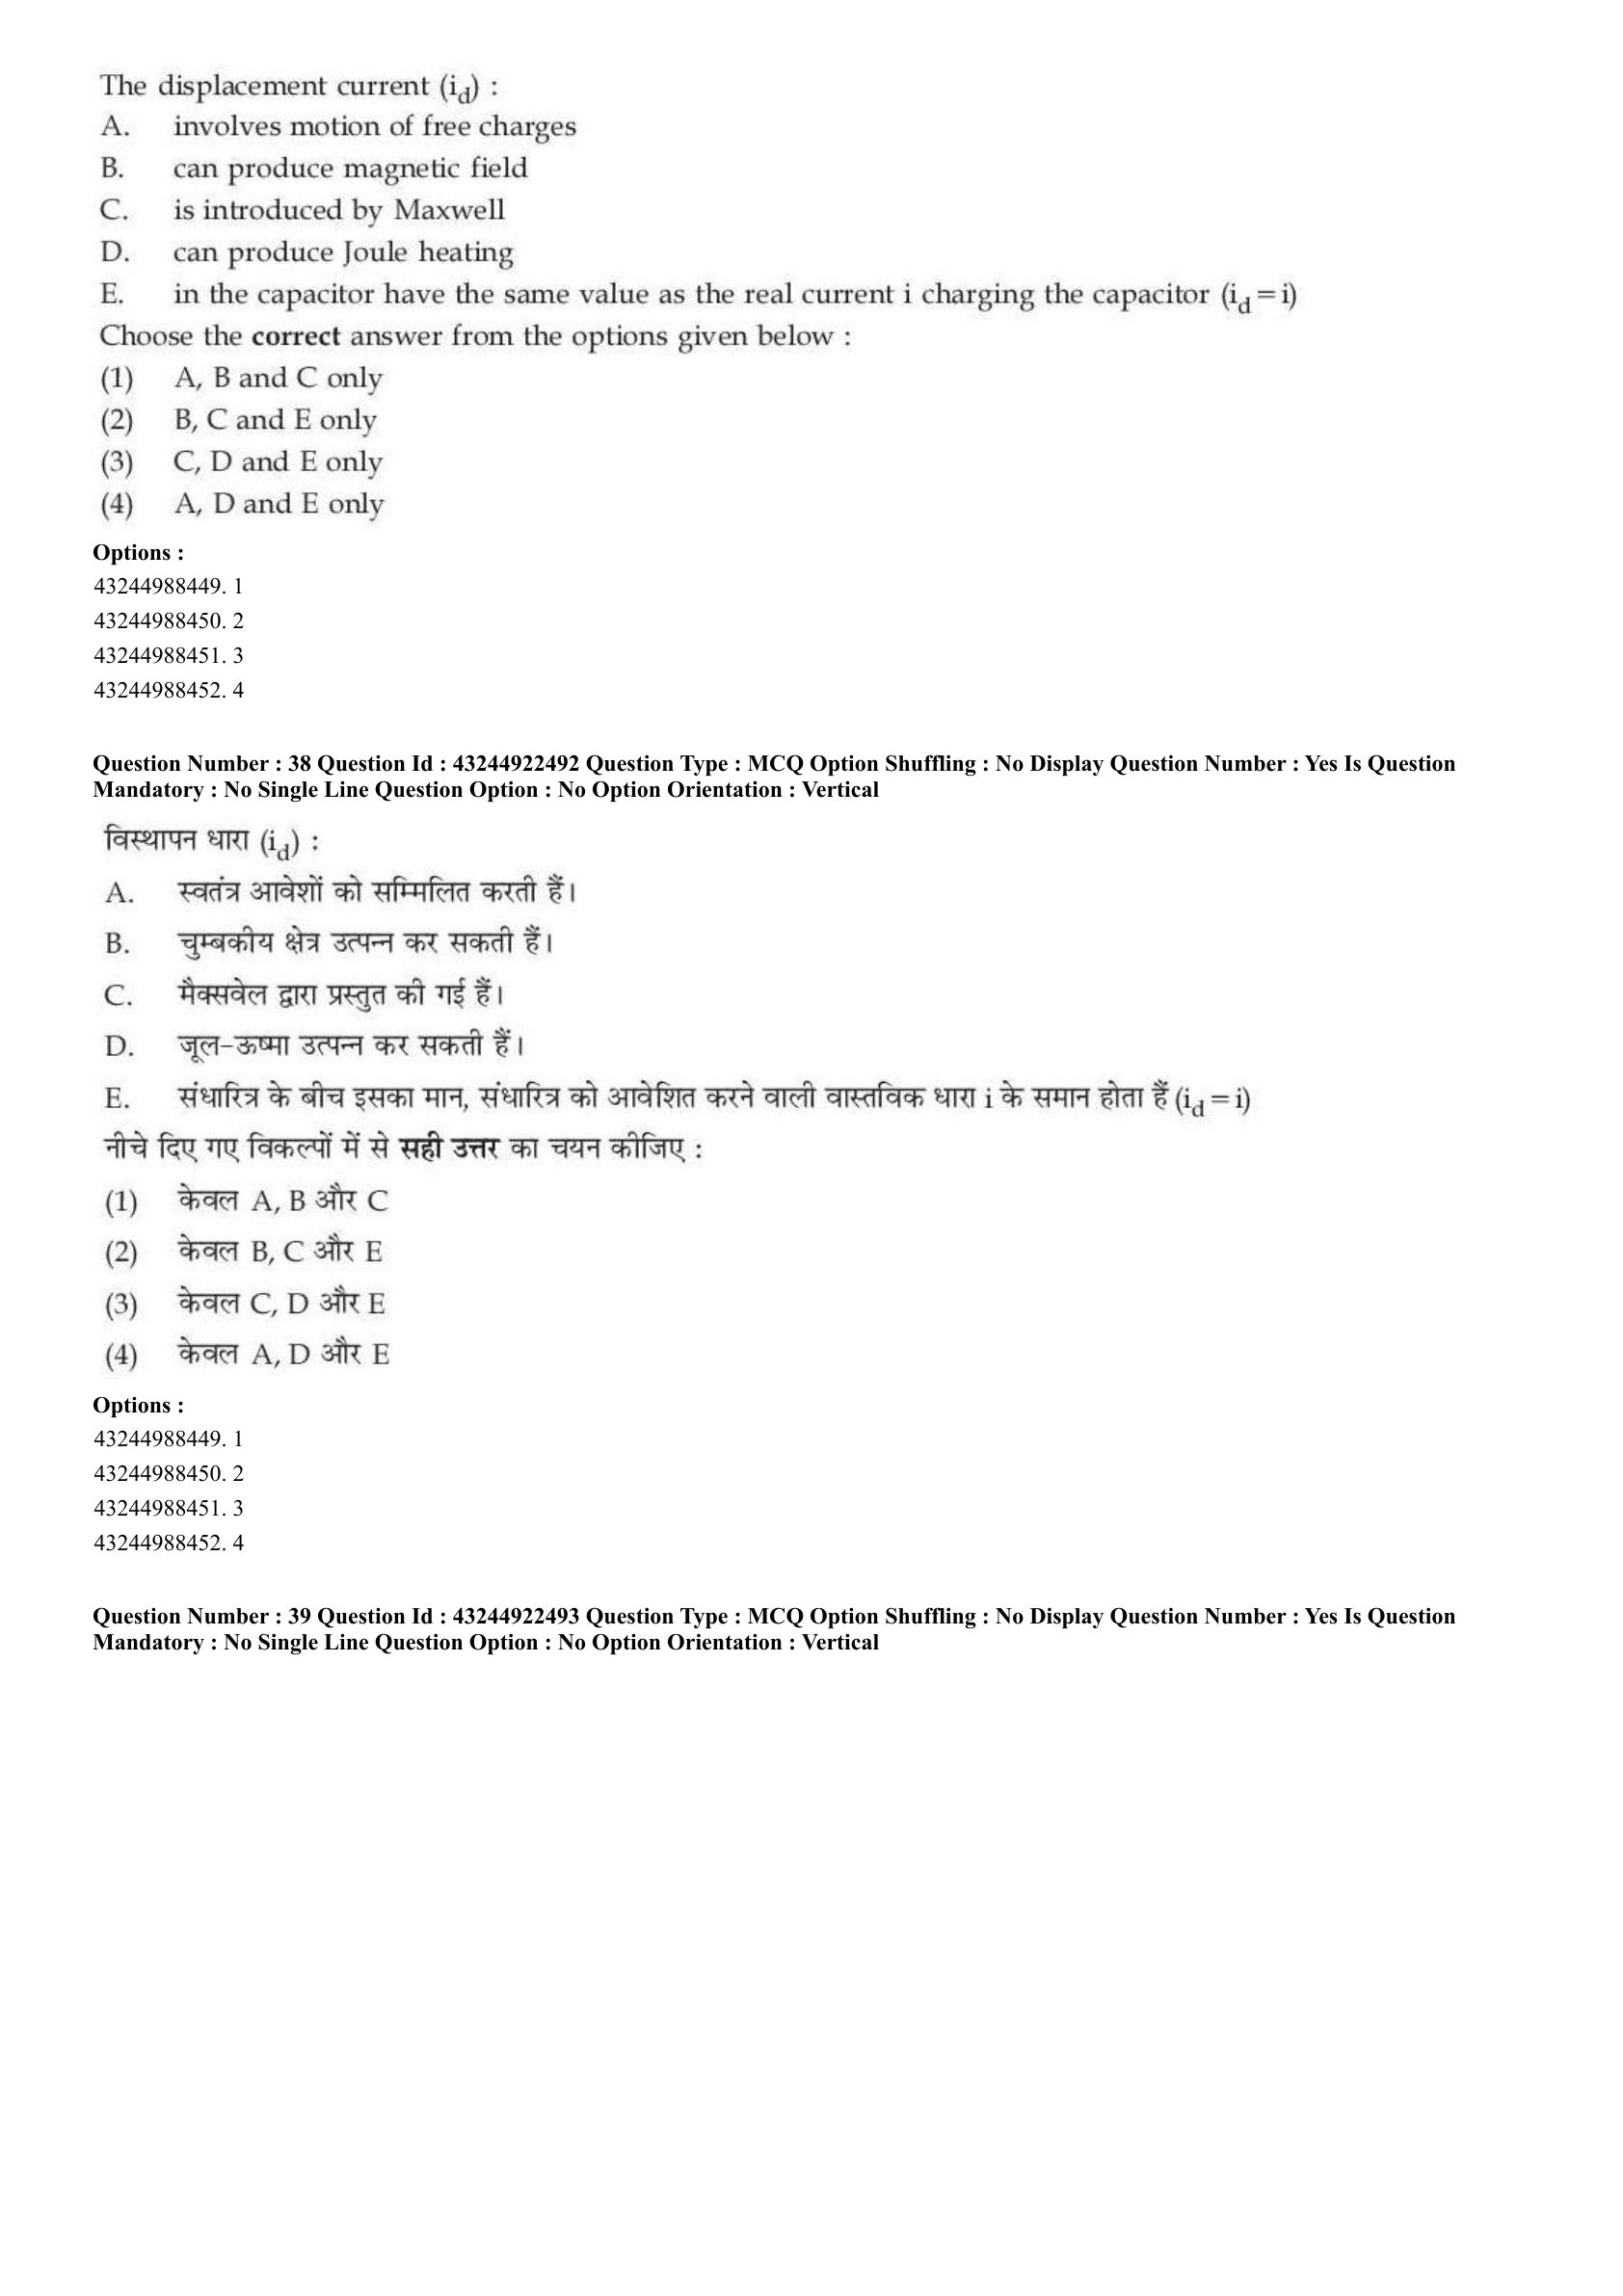
The displacement current (\( i_d \)) :
A. involves motion of free charges
B. can produce magnetic field
C. is introduced by Maxwell
D. can produce Joule heating
E. in the capacitor have the same value as the real current i charging the capacitor (\( i_d = i \))
Choose the correct answer from the options given below :
View Solution
Step 1 : Concept:
This question tests the conceptual definition and physical properties of the Maxwell displacement current.
Step 2 : Key Formula or Approach:
Displacement current is defined mathematically as \( I_d = \epsilon_0 \frac{d\Phi_E}{dt} \), where \( \Phi_E \) is the electric flux. It was added to Ampere's Law to maintain the continuity of current.
Step 3 : Step-by-step Explanation:
Statement A: Displacement current arises entirely due to a time-varying electric field in a region (even in a perfect vacuum), not from the physical drift of real free charges. This statement is False.
Statement B: According to the Ampere-Maxwell Law \( \oint \vec{B} \cdot d\vec{l} = \mu_0(I_c + I_d) \), displacement current acts as a completely valid source for generating a magnetic field. This statement is True.
Statement C: James Clerk Maxwell theoretically postulated it to resolve a logical inconsistency in Ampere's law when applied to charging capacitors. This statement is True.
Statement D: Joule heating (\( I^2 R \)) occurs when real charges collide with lattice atoms while moving through a conductor. Since displacement current lacks real moving charges, it cannot cause Joule heating. This statement is False.
Statement E: To satisfy Kirchhoff's current law and charge conservation across a capacitor gap, the conduction current \( I_c \) flowing in the wires must perfectly equal the displacement current \( I_d \) flowing between the plates. This statement is True.
Step 4 : Final Answer:
Statements B, C, and E are correct, matching option (B).
Quick Tip: Displacement current is what allows electromagnetic waves to propagate through empty space! Without it, changing electric fields wouldn't create magnetic fields, and self-sustaining EM waves would be impossible.
Match List - I with List - II.

Choose the correct answer from the options given below :
View Solution
Step 1 : Concept:
This question tests the phase relationships between AC voltage and current in various fundamental AC circuit components.
Step 2 : Key Formula or Approach:
- Resistor: \( V = IR \) (In phase).
- Inductor: \( V = L \frac{dI}{dt} \) (Current lags voltage).
- Capacitor: \( I = C \frac{dV}{dt} \) (Current leads voltage).
Step 3 : Step-by-step Explanation:
A. Pure resistive circuit: Voltage and current follow Ohm's law simultaneously, meaning they rise and fall together. They are exactly in phase. Matches II.
B. Pure inductive circuit: Due to back EMF, it takes time for current to build up. Consequently, the current lags behind the applied voltage by exactly \( 90^{\circ} \) (\( \pi/2 \) rad). Matches IV.
C. Pure capacitive circuit: Current must flow first to build up charge and generate voltage across the plates. Therefore, the current leads the voltage by exactly \( 90^{\circ} \). Matches I.
D. Pure LC circuit: The circuit acts as either a net inductor or a net capacitor depending on which reactance is larger (\( X_L > X_C \) or \( X_C > X_L \)). Because there is no resistance, the phase angle will strictly be either \( -90^{\circ} \) (lag) or \( +90^{\circ} \) (lead). Matches III.
Step 4 : Final Answer:
The matching pairs are A-II, B-IV, C-I, D-III, which correctly aligns with option (C).
Quick Tip: Use the acronym \textbf{CIVIL}: In a \textbf{C}apacitor, \textbf{I} (current) leads \textbf{V} (voltage). \textbf{V} leads \textbf{I} in an \textbf{L} (inductor). This mnemonic solves most basic AC phase questions instantly.
Given below are two statements : one is labelled as Assertion (A) and the other is labelled as Reason (R).
Assertion (A) : The electrostatic force between two positively charged particles \( q_1 \) and \( q_2 \) separated by a distance d is given by \( \vec{F} = \frac{1}{\epsilon_0} \frac{q_1 q_2}{d^2} \hat{d} \) (\( d \neq 0 \))
Reason (R) : Two similar charges repel each other and apply forces according to the Coulomb's Law.
In the light of the above statements, choose the most appropriate answer from the options given below :
View Solution
Step 1 : Concept:
The question tests the precise mathematical formulation of Coulomb's Law and its qualitative physical principles.
Step 2 : Key Formula or Approach:
Coulomb's Law mathematically is: \( \vec{F} = \frac{1}{4\pi\epsilon_0} \frac{q_1 q_2}{r^2} \hat{r} \), where \( 4\pi \) is a crucial geometric factor arising from the spherical integration of field lines in 3D space.
Step 3 : Step-by-step Explanation:
Analyzing Assertion (A): The formula given in the assertion is \( \vec{F} = \frac{1}{\epsilon_0} \frac{q_1 q_2}{d^2} \hat{d} \). This expression is fundamentally missing the \( 4\pi \) constant in the denominator. Because the constant is incorrect, the formula is mathematically false. Thus, Assertion (A) is not correct.
Analyzing Reason (R): The reason states that two similar (like) charges repel each other and interact governed by Coulomb's Law. This is a universally true qualitative statement in electrostatics. Reason (R) is correct.
Step 4 : Final Answer:
Since (A) is false and (R) is true, the correct choice is option (D).
Quick Tip: Always scrutinize the constants in given formulas! Exam setters frequently omit terms like \( 4\pi \), \( 1/2 \), or \( \mu_0 \) to catch students who only glance at the variables.
A solid metal sphere with a spherical cavity has a total charge +Q. S is the center of the spherical cavity, R is just outside the metal sphere and P is little away from the metal sphere as shown in figure. The relation between the magnitude of the electric fields (E) at S, R and P are :

View Solution
Step 1 : Concept:
This question relies on electrostatic shielding inside a conductor cavity and the behavior of electric fields outside a charged spherical conductor.
Step 2 : Key Formula or Approach:
Inside any empty cavity within a conductor, \( E = 0 \).
Outside a spherical conductor with charge Q, the electric field acts as if all charge is concentrated at the center: \( E(r) = \frac{1}{4\pi\epsilon_0} \frac{Q}{r^2} \) for \( r \geq r_{surface} \).
Step 3 : Step-by-step Explanation:
At Point S (Inside the cavity): Since the sphere is made of metal (conductor) and there is no charge placed explicitly inside the cavity, the net electric field inside the cavity must be strictly zero. Therefore, \( E_S = 0 \).
At Point R (Just outside the sphere): The charge +Q resides entirely on the outer surface of the metal sphere. The electric field is maximal right at the surface, given by \( E_R = \frac{Q}{4\pi\epsilon_0 r_R^2} \).
At Point P (Further away): The point P is further from the sphere's center than R. Because the electric field falls off as \( 1/r^2 \), a larger distance means a weaker field. Therefore, \( E_P = \frac{Q}{4\pi\epsilon_0 r_P^2} \). Since \( r_P > r_R \), it follows that \( E_P < E_R \).
Both \( E_R \) and \( E_P \) have positive non-zero magnitudes, while \( E_S \) is exactly zero.
Combining these relations yields: \( E_R > E_P > E_S \).
Step 4 : Final Answer:
The correct order is \( E_R > E_P > E_S \), which is option (B).
Quick Tip: Electrostatic shielding dictates that external charges cannot create fields inside an empty conductive cavity, and static charges on the conductor itself only create fields on the exterior. Point S is always zero unless a discrete charge is placed directly inside it.
Eight (8) electrons (of charge -e) are equally spaced and fixed on the perimeter around a circle of radius r. If there is no other charge nearby, the electric field E and the electric potential V at the centre of the circle will be :
View Solution
Step 1 : Concept:
The problem uses the principle of superposition for both vector quantities (Electric Field) and scalar quantities (Electric Potential) for a highly symmetric discrete charge distribution.
Step 2 : Key Formula or Approach:
Electric Field (Vector): \( \vec{E}_{net} = \sum \vec{E}_i \)
Electric Potential (Scalar): \( V_{net} = \sum V_i = \sum \frac{1}{4\pi\epsilon_0} \frac{q_i}{r_i} \)
Step 3 : Step-by-step Explanation:
Electric Field: The 8 electrons are equally spaced, meaning they form a regular octagon. For every electron located at angle \( \theta \), there is another electron exactly opposite at \( \theta + 180^{\circ} \). The electric field vectors generated by any two diametrically opposite electrons are equal in magnitude but perfectly opposite in direction, canceling each other completely. Thus, \( \vec{E}_{net} = 0 \).
Electric Potential: Potential is a scalar. We simply algebraically sum the individual potentials contributed by each electron.
For a single electron, \( V_1 = \frac{1}{4\pi\epsilon_0} \frac{-e}{r} \).
Since all 8 electrons are equidistant from the center (at distance \( r \)), the total potential is:
\( V = 8 \times V_1 = 8 \times \left( \frac{1}{4\pi\epsilon_0} \frac{-e}{r} \right) \).
Simplify the fraction: \( V = \frac{-8e}{4\pi\epsilon_0 r} = \frac{-2e}{\pi\epsilon_0 r} \).
Checking the options, option (D) precisely matches this calculated potential and the zero electric field.
Step 4 : Final Answer:
The potential is \( \frac{-2e}{\pi\epsilon_0 r} \) and the electric field is zero.
Quick Tip: For ANY regular polygon of charges (or a continuous uniform ring), the electric field at the exact geometric center is always zero due to symmetry. However, the potential never cancels unless there are opposing signs of charge, because it adds algebraically.
The electric field just outside a charged infinite plane conductor with surface charge density \( \sigma \) is given by :
View Solution
Step 1 : Concept:
This question asks for a standard derivation result of Gauss's Law applied to the boundary of an electrically conductive material.
Step 2 : Key Formula or Approach:
Using a Gaussian pillbox at the surface of a conductor: \( \oint \vec{E} \cdot d\vec{A} = \frac{Q_{enclosed}}{\epsilon_0} \).
Step 3 : Step-by-step Explanation:
Consider a small Gaussian pillbox positioned partially inside and partially outside the surface of the conductor.
Inside a conductor in electrostatic equilibrium, the electric field is always zero. Thus, no flux passes through the inner face of the pillbox.
The electric field just outside a conductor is always perpendicular to the surface. Thus, no flux passes through the curved cylindrical sides of the pillbox.
The only flux is through the outer face of area \( A \): \( \Phi = E \cdot A \).
The charge enclosed by the pillbox is \( Q_{enclosed} = \sigma \cdot A \), where \( \sigma \) is the local surface charge density.
Applying Gauss's Law: \( E \cdot A = \frac{\sigma \cdot A}{\epsilon_0} \).
Solving for E gives \( E = \frac{\sigma}{\epsilon_0} \).
Contrast this with a thin insulating (non-conducting) sheet, which creates fields on both sides simultaneously, leading to \( E = \frac{\sigma}{2\epsilon_0} \). The question specifies a "conductor".
Step 4 : Final Answer:
The electric field is \( \frac{\sigma}{\epsilon_0} \).
Quick Tip: A thick conducting slab can be thought of as two charged surfaces (each with \( \sigma \) density) separated by some distance. By superposition, outside the slab the fields add up: \( \frac{\sigma}{2\epsilon_0} + \frac{\sigma}{2\epsilon_0} = \frac{\sigma}{\epsilon_0} \). Inside, they cancel out giving zero!
A charge +Q is placed in front of an infinite metal plate at a distance r. If another charge is placed at the same point instead of the \( 1^{st} \) one, it experiences twice the force, then the value of the \( 2^{nd} \) charge is :
View Solution
Step 1 : Concept:
This problem uses the Method of Image Charges, which replaces the conductive metal plate with an equivalent "image" charge to simplify force calculations.
Step 2 : Key Formula or Approach:
A point charge \( q \) placed at a distance \( r \) in front of an infinite grounded conducting plate induces a surface charge. The force exerted on \( q \) by this plate is perfectly mathematically equivalent to the force exerted by an imaginary image charge \( -q \) located at a distance \( r \) behind the plate.
The total distance between the real charge and image charge is \( 2r \).
Force \( F = \frac{1}{4\pi\epsilon_0} \frac{q^2}{(2r)^2} \).
Step 3 : Step-by-step Explanation:
For the first scenario with charge +Q:
The image charge is -Q at distance \( 2r \).
The initial force is \( F_1 = \frac{1}{4\pi\epsilon_0} \frac{Q^2}{4r^2} \).
For the second scenario, let the new charge be \( q' \).
Its image charge will be \( -q' \) at distance \( 2r \).
The new force is \( F_2 = \frac{1}{4\pi\epsilon_0} \frac{(q')^2}{4r^2} \).
We are given that the new force is twice the initial force: \( F_2 = 2F_1 \).
Substituting the expressions:
\( \frac{1}{4\pi\epsilon_0} \frac{(q')^2}{4r^2} = 2 \left( \frac{1}{4\pi\epsilon_0} \frac{Q^2}{4r^2} \right) \).
Canceling identical terms on both sides yields:
\( (q')^2 = 2Q^2 \).
Taking the square root gives the value of the new charge:
\( q' = \sqrt{2}Q \).
Step 4 : Final Answer:
The value of the second charge must be \( \sqrt{2}Q \).
Quick Tip: Notice that because the force involves the interaction of the real charge with its own proportional image charge, the force scales with the \textbf{square} of the charge (\( F \propto q^2 \)), not linearly! Hence, doubling the force only requires a \( \sqrt{2} \) increase in charge.
Relationship between energy and momentum for a relativistic particle is : (Here 'm' is the rest mass of the particle, and other symbols have their usual meanings)
View Solution
Step 1 : Concept:
This question asks for the fundamental energy-momentum invariant relation in Einstein's Special Theory of Relativity.
Step 2 : Key Formula or Approach:
The relativistic total energy is \( E = \gamma m_0 c^2 \) and the relativistic momentum is \( p = \gamma m_0 v \), where \( \gamma = \frac{1}{\sqrt{1 - v^2/c^2}} \) and \( m_0 \) is the rest mass.
Squaring and subtracting these equations yields an invariant equation independent of velocity.
Step 3 : Step-by-step Explanation:
Start with \( E = \frac{mc^2}{\sqrt{1 - v^2/c^2}} \).
Square it: \( E^2 = \frac{m^2 c^4}{1 - v^2/c^2} \).
Similarly, \( p = \frac{mv}{\sqrt{1 - v^2/c^2}} \), so \( p^2 c^2 = \frac{m^2 v^2 c^2}{1 - v^2/c^2} \).
Subtract \( p^2 c^2 \) from \( E^2 \):
\( E^2 - p^2 c^2 = \frac{m^2 c^4 - m^2 v^2 c^2}{1 - v^2/c^2} = \frac{m^2 c^4 (1 - v^2/c^2)}{1 - v^2/c^2} \).
The \( (1 - v^2/c^2) \) terms cancel out perfectly, leaving:
\( E^2 - p^2 c^2 = m^2 c^4 = (mc^2)^2 \).
Rearranging this gives the famous relation:
\( E^2 = (pc)^2 + (mc^2)^2 \).
This matches option (A) perfectly.
Step 4 : Final Answer:
The correct equation is \( E^2 = (mc^2)^2 + p^2c^2 \).
Quick Tip: This invariant relation is famously represented as a right-angled triangle where the hypotenuse is Total Energy (E), one side is Rest Energy (\( mc^2 \)), and the other side is Momentum Energy (\( pc \)). For massless particles like photons (\( m=0 \)), it collapses elegantly to \( E = pc \).
Match List - I with List - II.

Choose the correct answer from the options given below :
View Solution
Step 1 : Concept:
In quantum mechanics, physical observables (like momentum and energy) are represented by linear differential operators acting on wave functions.
Step 2 : Key Formula or Approach:
The fundamental correspondence is mapping classical variables to differential operators based on the de Broglie plane wave \( \psi(x,t) = e^{i(px - Et)/\hbar} \).
Step 3 : Step-by-step Explanation:
A. Linear momentum (\( P \)): In position space, the momentum operator is derived by finding an operator that extracts \( p \) from the plane wave. \( \hat{P}_x = -i\hbar \frac{\partial}{\partial x} \). Since \( \frac{1}{i} = -i \), this is equivalent to \( \frac{\hbar}{i} \frac{\partial}{\partial x} \). Matches IV.
B. Kinetic energy (\( KE \)): Classically, \( KE = \frac{p^2}{2m} \). Replacing \( p \) with its operator: \( \hat{KE} = \frac{1}{2m} \left(-i\hbar \frac{\partial}{\partial x}\right)^2 = \frac{1}{2m} (-\hbar^2 \frac{\partial^2}{\partial x^2}) = -\frac{\hbar^2}{2m} \frac{\partial^2}{\partial x^2} \). Matches II.
C. Total energy (\( E \)): To extract energy E from the time phase \( e^{-iEt/\hbar} \), we apply a time derivative. The resulting operator is \( \hat{E} = i\hbar \frac{\partial}{\partial t} \). Matches III.
D. Hamiltonian (\( H \)): The Hamiltonian expresses total energy structurally in space as the sum of Kinetic and Potential energy operators. \( \hat{H} = \hat{KE} + U(x) = -\frac{\hbar^2}{2m} \frac{\partial^2}{\partial x^2} + U(x) \). Matches I.
Step 4 : Final Answer:
The mapping is A-IV, B-II, C-III, D-I, which is option (A).
Quick Tip: The time-dependent Schrödinger equation is essentially setting the functional Energy operator (Hamiltonian) equal to the temporal Energy operator: \( \hat{H}\psi = \hat{E}\psi \).
A particle confined along x-axis has the wave function \( \psi = ax \) between \( x=0 \) and \( x=1 \). \( \psi=0 \) elsewhere. The expectation value of the particle's position will be :
View Solution
Step 1 : Concept:
This problem requires two core quantum mechanical computations: Normalizing a wavefunction and then calculating an expectation value.
Step 2 : Key Formula or Approach:
Normalization condition: \( \int_{-\infty}^{\infty} |\psi(x)|^2 dx = 1 \).
Expectation value of position: \( \langle x \rangle = \int_{-\infty}^{\infty} \psi^*(x) \, x \, \psi(x) dx \).
Step 3 : Step-by-step Explanation:
First, determine the normalization constant \( a \):
\( \int_0^1 (ax)^2 dx = 1 \)
\( a^2 \int_0^1 x^2 dx = 1 \)
\( a^2 \left[ \frac{x^3}{3} \right]_0^1 = 1 \implies a^2 \left( \frac{1}{3} \right) = 1 \implies a^2 = 3 \).
Now, substitute \( a^2 = 3 \) into the expectation value formula:
\( \langle x \rangle = \int_0^1 (ax) \cdot x \cdot (ax) dx \)
\( \langle x \rangle = \int_0^1 a^2 x^3 dx \)
Since we already found \( a^2 = 3 \):
\( \langle x \rangle = 3 \int_0^1 x^3 dx \)
\( \langle x \rangle = 3 \left[ \frac{x^4}{4} \right]_0^1 = 3 \left( \frac{1}{4} - 0 \right) = \frac{3}{4} \).
Step 4 : Final Answer:
The expectation value of the position is 3/4.
Quick Tip: Notice that you rarely need to compute the actual value of 'a' (\( a = \sqrt{3} \)). Keeping it as \( a^2 \) is usually sufficient and prevents messy square root algebra in intermediate steps!
Spacecraft A is moving at 0.5 c with respect to earth. If spacecraft B is to pass A at relative speed of 0.3 c in the same direction, what speed must B have with respect to the earth ?
(c = Speed of light in air)
View Solution
Step 1 : Concept:
The problem involves velocity composition at speeds approaching the speed of light, necessitating the use of Einstein's Relativistic Velocity Addition formula rather than classical Galilean addition.
Step 2 : Key Formula or Approach:
The relativistic velocity addition formula is:
\( v = \frac{u + v'}{1 + \frac{u v'}{c^2}} \)
Where:
\( v \) = Velocity of object (B) relative to the rest frame (Earth).
\( u \) = Velocity of the moving frame (A) relative to the rest frame (Earth).
\( v' \) = Velocity of object (B) relative to the moving frame (A).
Step 3 : Step-by-step Explanation:
Identify the given values from the text:
Velocity of spacecraft A relative to Earth: \( u = 0.5c \).
Velocity of spacecraft B relative to spacecraft A (since it "passes A"): \( v' = 0.3c \).
Substitute these values into the velocity addition formula:
\( v = \frac{0.5c + 0.3c}{1 + \frac{(0.5c)(0.3c)}{c^2}} \)
Simplify the numerator and the denominator:
Numerator: \( 0.5c + 0.3c = 0.8c \)
Denominator: \( 1 + (0.5)(0.3) = 1 + 0.15 = 1.15 \)
Calculate the final velocity:
\( v = \frac{0.8c}{1.15} \)
\( v = \frac{80}{115} c \approx 0.6956 c \)
Looking at the options provided (0.2c, 0.8c, 0.6c, 0.7c), 0.6956c is approximately 0.7c. (Note: Galilean addition would incorrectly give \( 0.5 + 0.3 = 0.8c \), which is a trap option).
Step 4 : Final Answer:
The required speed with respect to Earth is approximately 0.7 c.
Quick Tip: Always expect classical addition (\( v = u + v' \)) to be one of the wrong multiple-choice options in relativity questions! Relativistic addition ALWAYS yields a result strictly smaller than classical addition when both velocities are in the same direction.
The binding energy \( E_b \) in MeV of the nucleus \( {}^A_Z X \) with N = A - Z neutrons is given by :
View Solution
Step 1 : Concept:
The problem defines the calculation of Nuclear Binding Energy using mass defect, transitioning from unified atomic mass units (u) directly to energy units (MeV).
Step 2 : Key Formula or Approach:
Mass defect \( \Delta m = (Sum of mass of free nucleons) - (Actual mass of the bound nucleus) \).
Binding Energy \( E_b = \Delta m \times c^2 \).
To convert mass defect in atomic mass units (u) to energy in MeV, multiply by the conversion factor \( 1 u \approx 931.49 MeV/c^2 \).
Step 3 : Step-by-step Explanation:
First, calculate the total theoretical mass of the separated constituents. A nucleus has Z protons and N neutrons. However, standard nuclear tables provide atomic masses, not bare nuclear masses.
Using atomic masses accounts for electrons naturally. The mass of Z hydrogen atoms \( Zm({}^1_1 H) \) includes Z protons and Z electrons.
Subtracting the atomic mass of the element \( m({}^A_Z X) \) (which also includes Z electrons) perfectly cancels out the electron mass, leaving just the nuclear mass defect.
Therefore, Mass Defect \( \Delta m = [Z m({}^1_1 H) + N m(n)] - m({}^A_Z X) \).
This quantity \( \Delta m \) must be strictly positive since bound systems have less mass than free constituents (mass is lost as energy during binding). This eliminates options 1 and 2, where the subtraction order is reversed, which would result in negative energy.
To convert this mass defect (in u) to energy (in MeV), we multiply by 931.49. (Dividing by it would give an incorrect, tiny unit).
Hence, \( E_b = \left[ Zm({}^1_1 H) + N m(n) - m({}^A_Z X) \right] \times 931.49 MeV \).
Step 4 : Final Answer:
The correct formulation is option (D).
Quick Tip: Using the mass of a Hydrogen atom (\( ^1_1H \)) instead of a bare proton (\( p \)) is a standard, highly useful trick in nuclear physics calculations. It effortlessly accounts for electron mass binding without needing extra terms, provided neutral atomic masses are used throughout.
In relation to photoelectric effect which of the following statements are correct ?
A. The energies of electrons liberated by light depend upon the frequency of the light.
B. The stopping potential depends upon the frequency of light.
C. The stopping potential is same for the all intensities of light of the same frequency.
D. Photoelectron current is proportional to the light intensity for all retarding voltages.
E. Maximum kinetic energy of photoelectron is inversely proportional to the frequency of incident light.
Choose the correct answer from the options given below :
View Solution
Step 1 : Concept:
The question tests the fundamental experimental observations of the photoelectric effect and Einstein's photoelectric equation.
Step 2 : Key Formula or Approach:
Einstein's Photoelectric equation is \(K_{max} = h\nu - \Phi = eV_0\), where \(K_{max}\) is the maximum kinetic energy, \(\nu\) is the incident frequency, \(\Phi\) is the work function, and \(V_0\) is the stopping potential.
Step 3 : Step-by-step Explanation:
Statement A: True. As seen from \(K_{max} = h\nu - \Phi\), the kinetic energy of liberated electrons depends directly on the frequency of the incident light.
Statement B: True. The stopping potential \(V_0 = \frac{h\nu - \Phi}{e}\) is a linear function of the incident frequency \(\nu\).
Statement C: True. Changing the intensity (brightness) of light only changes the number of photons hitting the surface per second, not their individual energies. Hence, the maximum kinetic energy and the stopping potential remain unchanged for a given frequency.
Statement D: True. For any given retarding voltage (that is less negative than the stopping potential), doubling the light intensity doubles the number of photoelectrons emitted per second, which proportionally doubles the measured photocurrent.
Statement E: False. The maximum kinetic energy is linearly proportional to the frequency (\(K_{max} \propto \nu\)), not inversely proportional.
Step 4 : Final Answer:
Statements A, B, C, and D are correct, matching option (A).
Quick Tip: Always remember: Intensity affects the number of electrons (current), while frequency affects the energy of electrons (stopping potential). They are completely independent in the quantum model of light.
In the radioactive decay, the relation between mean life time (\(\bar{T}\)) and half-life (\(T_{1/2}\)) is given by :
View Solution
Step 1 : Concept:
We need to establish the mathematical relationship between the mean life (or average life) and the half-life of a radioactive substance.
Step 2 : Key Formula or Approach:
The half-life \(T_{1/2}\) is related to the decay constant \(\lambda\) by \(T_{1/2} = \frac{\ln 2}{\lambda} \approx \frac{0.693}{\lambda}\).
The mean life \(\bar{T}\) is simply the reciprocal of the decay constant: \(\bar{T} = \frac{1}{\lambda}\).
Step 3 : Step-by-step Explanation:
From the mean life formula, we have \(\lambda = \frac{1}{\bar{T}}\).
Substitute this into the half-life equation:
\[ T_{1/2} = \frac{\ln 2}{1/\bar{T}} = \bar{T} \ln 2 \]
Rearranging to solve for the mean life \(\bar{T}\):
\[ \bar{T} = \frac{T_{1/2}}{\ln 2} \]
Since \(\ln 2 \approx 0.6931\), we calculate the reciprocal:
\[ \frac{1}{\ln 2} \approx 1.4427 \]
Therefore, the relation becomes:
\[ \bar{T} \approx 1.44 \, T_{1/2} \]
Step 4 : Final Answer:
The correct relation is \(\bar{T} = 1.44 \, T_{1/2}\), which corresponds to option (B).
Quick Tip: Mean life is always longer than the half-life. Specifically, it is about \(44%\) longer. This is because a few atoms survive for an extremely long time, pulling the mathematical average up!
Given below are two statements : one is labelled as Assertion (A) and the other is labelled as Reason (R).
Assertion (A) : In many-electron atom the orbital motion of electron creates magnetic field that interact with their magnetic moments.
Reason (R) : If the angular momentum of individual electrons are specified, the total angular momentum can be known.
In the light of the above statements, choose the most appropriate answer from the options given below :
View Solution
Step 1 : Concept:
This question tests atomic physics concepts, particularly spin-orbit coupling and the vector addition of angular momenta in multi-electron atoms.
Step 2 : Key Formula or Approach:
Assertion (A) describes Spin-Orbit interaction (LS coupling), where the internal magnetic field from orbital motion (\(\vec{L}\)) interacts with the electron's intrinsic spin magnetic moment (\(\vec{S}\)).
Reason (R) states the principle of angular momentum addition (e.g., \(\vec{J} = \vec{L} + \vec{S}\) or \(\vec{J} = \sum \vec{j}_i\)).
Step 3 : Step-by-step Explanation:
Analyzing Assertion (A): In any atom, an electron moving in its orbit acts as a tiny current loop, producing an internal magnetic field. The electron also possesses an intrinsic spin magnetic moment. The interaction between this magnetic field and the spin magnetic moment leads to fine-structure splitting. This is factually correct.
Analyzing Reason (R): In a multi-electron atom, knowing the individual orbital and spin angular momenta of the electrons allows us to calculate the total angular momentum of the atom using coupling schemes (like LS-coupling or jj-coupling). This statement is also factually correct.
Evaluating the Connection: While both statements are true principles of atomic physics, knowing how to add angular momentum vectors (Reason R) is not the fundamental physical \textit{cause of the magnetic interaction described in Assertion A. The cause is purely electromagnetic.
Step 4 : Final Answer:
Both statements are correct, but (R) is not the correct explanation of (A).
Quick Tip: In assertion-reason questions, try putting the word "BECAUSE" between them. "The orbital motion creates a magnetic field interacting with spin BECAUSE we can add individual angular momenta to find the total." This makes no logical sense, confirming (B) is the answer.
Which of the following statements are correct ?
A. Wave function of a particle in a box \(\psi_n = A \sin \frac{\sqrt{2m E_n}}{h} x\)
B. Normalized wave function of the particle \(\psi_n = \sqrt{\frac{2}{L}} \sin \frac{n\pi x}{L}\)
C. \(\psi_n\) cannot be negative
D. Wave function of a particle in a box \(\psi_n = A \sin \frac{n\pi x}{L}\)
E. \(|\psi_n|^2\) can be less than zero
Choose the correct answer from the options given below :
View Solution
Step 1 : Concept:
The question assesses the mathematical properties and physical interpretations of wavefunctions for a particle in a 1D infinite potential well (particle in a box).
Step 2 : Key Formula or Approach:
The standard solution to the Schrödinger equation for a 1D box of length \(L\) is \(\psi_n(x) = A \sin(kx)\), where \(k = \frac{n\pi}{L}\).
The energy eigenvalues are \(E_n = \frac{p^2}{2m} = \frac{\hbar^2 k^2}{2m}\).
Step 3 : Step-by-step Explanation:
Statement A: We know \(E_n = \frac{\hbar^2 k^2}{2m}\), which gives \(k = \frac{\sqrt{2mE_n}}{\hbar}\). Thus, the unnormalized wavefunction can be written as \(\psi_n = A \sin(kx) = A \sin \left( \frac{\sqrt{2mE_n}}{\hbar} x \right)\). This is True. (Note: The OCR says \(h\) in the denominator, but standard notation implies \(\hbar\), making it structurally correct in context).
Statement B: Applying the normalization condition \(\int_0^L |\psi_n|^2 dx = 1\) yields the constant \(A = \sqrt{2/L}\). So the normalized function is exactly \(\psi_n = \sqrt{\frac{2}{L}} \sin \frac{n\pi x}{L}\). This is True.
Statement C: A wavefunction \(\psi_n\) is a probability amplitude and takes on both positive and negative values (like a sine wave). Only the square magnitude must be non-negative. This statement is False.
Statement D: This is the generic unnormalized functional form representing the boundary conditions (\(\psi=0\) at \(x=0\) and \(x=L\)). This is True.
Statement E: The probability density is defined as \(|\psi_n|^2\). The square of a real or complex magnitude is strictly non-negative (\(\geq 0\)). It can never be less than zero. This statement is False.
Step 4 : Final Answer:
Only statements A, B, and D are correct, matching option (C).
Quick Tip: Remember that the wavefunction itself (\(\psi\)) has no direct physical meaning and can be negative or complex. It is the probability density (\(|\psi|^2\)) that is physically observable, real, and strictly positive.
Match List - I with List - II.

Choose the correct answer from the options given below :
View Solution
Step 1 : Concept:
This question tests knowledge of crystallography, specifically the distribution of the 14 Bravais lattices among the 7 fundamental crystal systems.
Step 2 : Key Formula or Approach:
Memorize the distribution of the 14 Bravais lattices:
- Cubic: 3 (Simple, Body-centered, Face-centered)
- Tetragonal: 2 (Simple, Body-centered)
- Orthorhombic: 4 (Simple, Base-centered, Body-centered, Face-centered)
- Hexagonal: 1 (Simple)
- Rhombohedral (Trigonal): 1 (Simple)
- Monoclinic: 2 (Simple, Base-centered)
- Triclinic: 1 (Simple)
Step 3 : Step-by-step Explanation:
A. Monoclinic: Has 2 lattice types. Matches II.
B. Triclinic: Has only 1 lattice type (the least symmetric system). Matches III.
C. Cubic: Has 3 lattice types (SC, BCC, FCC). Matches IV.
D. Orthorhombic: Has 4 lattice types (the highest number of variations). Matches I.
Step 4 : Final Answer:
The matching combination is A-II, B-III, C-IV, D-I, which corresponds to option (B).
Quick Tip: A quick mnemonic for the number of Bravais lattices is 3-2-4-1-1-2-1 for (Cubic, Tetragonal, Orthorhombic, Hexagonal, Rhombohedral, Monoclinic, Triclinic). Orthorhombic is unique as it exhibits all four possible centering types!
In a p - n junction diode :
A. Thermal electron current and recombination electron currents are small when there is no bias.
B. In no bias condition, there is no net current.
C. When an external voltage is applied to make p end negative, the result is a large current (net electron current) from n to p.
D. When p end is more positive, there will a large net electron current from n to p.
Choose the correct answer from the options given below :
View Solution
Step 1 : Concept:
The question tests the fundamental transport mechanisms (drift and diffusion) operating inside a p-n junction diode under zero bias, forward bias, and reverse bias conditions.
Step 2 : Key Formula or Approach:
- Zero bias: Drift current exactly equals diffusion current, so Net Current = 0. Both components are inherently small due to the high built-in potential barrier.
- Forward bias (p is positive): Barrier reduces, causing a massive diffusion of majority carriers. Electrons flow from n to p.
- Reverse bias (p is negative): Barrier increases, halting diffusion. Only a tiny thermal drift current (saturation current) flows.
Step 3 : Step-by-step Explanation:
Statement A: Under no bias, the built-in potential creates a large barrier. Only a tiny fraction of highly energetic electrons can diffuse across it, and this is perfectly balanced by an equally tiny thermal drift current of minority carriers. Thus, both are small. This is True.
Statement B: Because the drift and diffusion currents are equal and opposite in magnitude at equilibrium, they perfectly cancel out. Thus, net current is zero. This is True.
Statement C: Making the p-end negative applies a reverse bias. This thickens the depletion region and raises the barrier, resulting in near-zero current (only a microampere leakage current). It does NOT result in a large current. This is False.
Statement D: Making the p-end positive applies a forward bias. This collapses the potential barrier, allowing majority carriers to diffuse freely. A huge number of electrons flood from the n-side to the p-side, constituting a large net electron current from n to p. This is True.
Step 4 : Final Answer:
Statements A, B, and D are correct, making option (A) the right choice.
Quick Tip: Be careful with the phrasing "electron current". Conventional current in forward bias is from p to n. But the physical flow of electrons is indeed from n (where they are abundant) to p.
Second neighbour distance in a simple cubic lattice is :
View Solution
Step 1 : Concept:
The question asks for the geometric distance to the second-nearest atoms in a simple cubic (SC) crystal lattice characterized by a lattice constant \(a\).
Step 2 : Key Formula or Approach:
Visualize a reference atom at the origin \((0,0,0)\) of a 3D Cartesian coordinate system. The positions of all other atoms are \((ha, ka, la)\) where \(h, k, l\) are integers.
The distance is \(d = a\sqrt{h^2 + k^2 + l^2}\).
Step 3 : Step-by-step Explanation:
First nearest neighbors: These are located along the coordinate axes at \((\pm 1, 0, 0), (0, \pm 1, 0), (0, 0, \pm 1)\).
The distance is \(d_1 = a\sqrt{1^2+0+0} = a\). There are 6 such neighbors.
Second nearest neighbors: These are located along the face diagonals at \((\pm 1, \pm 1, 0), (\pm 1, 0, \pm 1), (0, \pm 1, \pm 1)\).
The distance is \(d_2 = a\sqrt{1^2+1^2+0} = \sqrt{2}a\). There are 12 such neighbors.
Third nearest neighbors: These are located along the body diagonals at \((\pm 1, \pm 1, \pm 1)\).
The distance is \(d_3 = a\sqrt{1^2+1^2+1^2} = \sqrt{3}a\). There are 8 such neighbors.
The value of \(\sqrt{2}\) is approximately \(1.414\).
Hence, the second neighbour distance is \(1.414a\).
Step 4 : Final Answer:
The correct distance is 1.414 a, matching option (B).
Quick Tip: For a Face-Centered Cubic (FCC) lattice, the atoms touch along the face diagonal, so the nearest neighbor distance is \(a/\sqrt{2}\) (\(0.707a\)), and the second nearest is \(a\). For Body-Centered Cubic (BCC), they touch along the body diagonal, making the nearest neighbor \(\sqrt{3}a/2\) (\(0.866a\)) and the second nearest \(a\).
Which of the following is not a part of the NOR gate truth table (\(S_1 \, S_2 \, Q\)) where, \(S_1, S_2\) are inputs and Q is the output ?
View Solution
Step 1 : Concept:
The question requires us to identify the incorrect input-output combination for a standard 2-input NOR gate.
Step 2 : Key Formula or Approach:
The Boolean logic expression for a NOR gate is \(Q = \overline{S_1 + S_2}\).
The output is High (1) ONLY when BOTH inputs are Low (0). If any input is High (1), the output is Low (0).
Step 3 : Step-by-step Explanation:
Let's evaluate each option by applying the NOR logic:
option (B) [0 0 1]: \(S_1=0, S_2=0 \implies Q = \overline{0+0} = \overline{0} = 1\). This is a valid part of the truth table.
option (C) [0 1 0]: \(S_1=0, S_2=1 \implies Q = \overline{0+1} = \overline{1} = 0\). This is a valid part of the truth table.
option (D) [1 0 0]: \(S_1=1, S_2=0 \implies Q = \overline{1+0} = \overline{1} = 0\). This is a valid part of the truth table.
option (A) [1 1 1]: \(S_1=1, S_2=1 \implies Q = \overline{1+1} = \overline{1} = 0\). However, the option lists the output \(Q\) as 1.
Therefore, the combination '1 1 1' is strictly incorrect for a NOR gate.
Step 4 : Final Answer:
The sequence 1 1 1 is not part of the NOR truth table, making option (A) the correct answer.
Quick Tip: A NOR gate is often called a "Universal Gate" because you can build any other logic gate using only NOR gates. Its truth table is exactly the inverse of an OR gate.
In an inverted operational amplifier, the phase difference between the output voltage signal and input signal is :
View Solution
Step 1 : Concept:
This question tests the basic defining property of an inverting operational amplifier (op-amp) circuit.
Step 2 : Key Formula or Approach:
The closed-loop voltage gain for an inverting amplifier is given by \(A_v = -\frac{R_f}{R_{in}}\), where \(R_f\) is the feedback resistor and \(R_{in}\) is the input resistor.
Step 3 : Step-by-step Explanation:
The mathematical formula for the output voltage is \(V_{out} = \left(-\frac{R_f}{R_{in}}\right) V_{in}\).
The negative sign in the gain equation is highly significant. It implies a polarity reversal.
For AC signals, a polarity reversal mathematically corresponds exactly to a phase shift of \(\pi\) radians, or \(180^\circ\).
Therefore, as the input signal swings positive, the output swings negative, maintaining a strict \(180^\circ\) phase difference at all times.
Step 4 : Final Answer:
The phase difference is \(180^\circ\), which is option (A).
Quick Tip: If the signal is fed into the '+' terminal (Non-inverting amplifier), the gain is \(1 + R_f/R_{in}\), which is strictly positive, meaning the phase shift is exactly \(0^\circ\).
Which of the following represents the input characteristics of a common base (CB) configuration of BJT ?
View Solution
Step 1 : Concept:
The question asks to identify the correct variables plotted to obtain the input characteristics of a Bipolar Junction Transistor (BJT) configured in Common Base (CB) mode.
Step 2 : Key Formula or Approach:
In any BJT configuration, the "Input Characteristic" is a plot of the Input Current against the Input Voltage, while keeping the Output Voltage strictly constant.
Step 3 : Step-by-step Explanation:
Identify the terminals: In a Common Base (CB) configuration, the Base terminal is shared (common) between the input and output loops.
Identify the input loop: The input signal is applied to the Emitter terminal relative to the Base.
Therefore, the Input Current is the Emitter Current (\(I_E\)).
The Input Voltage is the voltage between the Emitter and Base (\(V_{EB}\) or \(V_{BE}\)).
Identify the output loop: The output is taken from the Collector relative to the Base. The output voltage is \(V_{CB}\).
Hence, the input characteristic curve plots \(I_E\) against \(V_{BE}\) for various fixed values of \(V_{CB}\).
Let's review the options:
(1) \(I_B\) vs \(V_{BE}\): This is for Common Emitter (CE) input.
(3) \(I_C\) vs \(V_{CE}\): This is for Common Emitter (CE) output.
(4) \(I_C\) vs \(V_{CB}\): This is for Common Base (CB) output.
option (B) correctly identifies the CB input variables.
Step 4 : Final Answer:
The correct representation is \(I_E\) versus \(V_{BE}\), making option (B) the right choice.
Quick Tip: A CB input characteristic looks remarkably similar to a standard forward-biased p-n junction diode curve, because you are essentially just graphing the behavior of the Emitter-Base diode.
Which of the following represents the current gain of a common collector (CC) configuration of BJT ?
View Solution
Step 1 : Concept:
We need to determine the mathematical expression for the current gain (\(\gamma\)) in a Common Collector (CC) transistor configuration in terms of the Common Emitter gain (\(\beta\)).
Step 2 : Key Formula or Approach:
Current gain is defined as the ratio of Output Current to Input Current.
For a BJT, Kirchhoff's Current Law gives the fundamental relation: \(I_E = I_B + I_C\).
The Common Emitter (CE) current gain is \(\beta = \frac{I_C}{I_B}\).
Step 3 : Step-by-step Explanation:
In a Common Collector (CC) configuration (also known as an Emitter Follower), the input is applied to the Base and the output is taken from the Emitter.
Therefore, Input Current = \(I_B\), and Output Current = \(I_E\).
The CC current gain (often denoted as \(\gamma\)) is calculated as:
\[ \gamma = \frac{Output Current}{Input Current} = \frac{I_E}{I_B} \]
Using the fundamental relation \(I_E = I_B + I_C\), substitute it into the gain equation:
\[ \gamma = \frac{I_B + I_C}{I_B} = \frac{I_B}{I_B} + \frac{I_C}{I_B} \]
Since \(\frac{I_C}{I_B}\) is defined as \(\beta\):
\[ \gamma = 1 + \beta \]
Step 4 : Final Answer:
The CC current gain is \(1 + \beta\), which matches option (C).
Quick Tip: The three basic current gains are: Common Base (\(\alpha = I_C/I_E \approx 0.99\)), Common Emitter (\(\beta = I_C/I_B \approx 100\)), and Common Collector (\(\gamma = I_E/I_B = 1+\beta \approx 101\)). CC has the highest current gain of all configurations!
Which one is not correct for zener diode ?
View Solution
Step 1 : Concept:
This question asks to distinguish the physical properties, mechanisms, and applications of a Zener diode from other semiconductor devices to find an incorrect statement.
Step 2 : Key Formula or Approach:
Analyze the physics behind a Zener diode: It operates in reverse bias. Depending on the doping level, its breakdown is caused by either the Zener effect (quantum tunneling) or the Avalanche effect (impact ionization).
Step 3 : Step-by-step Explanation:
Statement B: A Zener diode is famously utilized as a shunt voltage regulator because it maintains a nearly constant voltage across its terminals in the breakdown region, regardless of current fluctuations. This is True.
Statement C: The actual "Zener Breakdown" mechanism occurs in highly doped diodes where the depletion region is extremely thin. High electric fields pull electrons directly from the p-side valence band through the forbidden gap into the n-side conduction band. This is a quantum tunneling effect. This is True.
Statement D: "Avalanche Breakdown" occurs in more lightly doped Zener diodes (usually breaking down above 6V). High electric fields accelerate minority carriers to high kinetic energies. They collide with crystal lattice atoms, knocking out bound electrons and creating secondary electron-hole pairs (impact ionization). This is True.
Statement A: Although Zener breakdown involves a quantum tunneling mechanism, a Zener diode is fundamentally NOT similar to a Tunnel Diode. A Tunnel diode is doped orders of magnitude heavier, operates primarily in \textit{forward bias, and exhibits a distinctive "Negative Resistance" region used for high-frequency microwave oscillators. Zener diodes lack negative resistance and operate in \textit{reverse bias for regulation. Therefore, calling them "similar" is practically and characteristically incorrect.
Step 4 : Final Answer:
Statement A is incorrect, making option (A) the required answer.
Quick Tip: Commercially, any diode designed to safely operate in reverse breakdown is called a "Zener Diode", even if its actual physical mechanism is Avalanche breakdown! (Typically Zener effect dominates \(<5V\), and Avalanche dominates \(>6V\)).
If \(y = \overline{A+B} + \overline{AB} + B\), then :
A. \(y=0\)
B. \(y=1\)
C. \(y = A+\bar{A}\)
D. \(y = A+\bar{B}\)
Choose the correct answer from the options given below :
View Solution
Step 1 : Concept:
This question requires simplifying a Boolean logic expression using De Morgan's laws and fundamental Boolean identity rules.
Step 2 : Key Formula or Approach:
De Morgan's First Law: \(\overline{A+B} = \bar{A} \cdot \bar{B}\)
De Morgan's Second Law: \(\overline{AB} = \bar{A} + \bar{B}\)
Complement Identity: \(X + \bar{X} = 1\)
OR Identity: \(1 + X = 1\)
Step 3 : Step-by-step Explanation:
Start with the given boolean expression:
\[ y = \overline{A+B} + \overline{AB} + B \]
Apply De Morgan's theorems to the first two terms:
\[ y = (\bar{A} \cdot \bar{B}) + (\bar{A} + \bar{B}) + B \]
Remove unnecessary parentheses to group the terms logically:
\[ y = \bar{A}\bar{B} + \bar{A} + (\bar{B} + B) \]
According to the complement law of Boolean algebra, a variable ORed with its exact complement is always 1 (\(\bar{B} + B = 1\)):
\[ y = \bar{A}\bar{B} + \bar{A} + 1 \]
According to the OR identity, anything ORed with a logic '1' yields a logic '1' (\(X + 1 = 1\)):
\[ y = 1 \]
Now let's evaluate the given lettered statements:
A. \(y=0\) (False, we found \(y=1\))
B. \(y=1\) (True)
C. \(y = A+\bar{A}\). Since \(A+\bar{A}\) evaluates to 1, this states \(y=1\). (True)
D. \(y = A+\bar{B}\). This is a variable expression, not a constant 1. (False)
Step 4 : Final Answer:
Statements B and C are correct, which corresponds to option (C).
Quick Tip: Whenever you are simplifying long Boolean chains separated by '+' (OR) operations, always look out for any \(X + \bar{X}\) pairings. Once you spot one, the entire expression instantly collapses to 1, saving you tons of calculation time!
Four gates are represented below :

Sequentially they are known as -
Choose the correct answer from the options given below :
View Solution
Step 1 : Concept:
The question tests visual identification of standard digital logic gate symbols, including standard gates, inverted-output gates, and inverted-input gates (Bubbled gates).
Step 2 : Key Formula or Approach:
- D-shape = AND logic.
- Shield/Curved shape = OR logic.
- Bubble at output = Inversion of the final logic (NOT operation on output).
- Bubble at inputs = Inversion of inputs before logic operation.
- Use De Morgan's theorem to identify equivalent bubbled gates: \(\bar{A} \cdot \bar{B} = \overline{A+B}\) (Bubbled AND = NOR).
Step 3 : Step-by-step Explanation:
Gate A: This is a D-shaped symbol (AND) with a small circle (bubble) at the output terminal. An AND gate followed by a NOT operation is a NAND gate.
Gate B: This symbol has a curved input line and a pointed output (OR shape) with a bubble at the output. An OR gate followed by a NOT operation is a NOR gate.
Gate C: This is a D-shaped symbol (AND logic). Crucially, there are two bubbles on the input lines, meaning the inputs are inverted before the AND operation.
The boolean expression is \(Y = \bar{A \cdot \bar{B}\).
By De Morgan's Law, \(\bar{A} \cdot \bar{B} = \overline{A+B}\). This is the exact logic equation for a NOR gate. Thus, a Bubbled AND gate is logically identical to a NOR gate.
Gate D: This is a standard D-shaped symbol with no bubbles anywhere. This is a plain AND gate.
The sequential sequence is therefore: NAND, NOR, NOR, AND.
Step 4 : Final Answer:
This sequence perfectly matches option (C).
Quick Tip: Remember De Morgan's visual equivalents: A Bubbled-AND gate acts like a NOR gate. A Bubbled-OR gate acts like a NAND gate. These are heavily used to trick students in circuit diagram simplification!
The numbers are given in Decimal (10), Binary (2), Octal (8), and Hexadecimal (16) bases. Which of the followings are correct ?
A. \((43)_8 = (23)_{16}\)
B. \((23.25)_{10} = (10111.01)_2\)
C. \((B7)_{16} = (1011 \, 0111)_2\)
D. \((1001.1)_2 = (9.5)_{10}\)
Choose the correct answer from the options given below :
View Solution
Step 1 : Concept:
The question tests the ability to correctly convert numeric values between various number systems: binary, octal, decimal, and hexadecimal.
Step 2 : Key Formula or Approach:
- Convert to decimal to verify cross-base equality: \((d_2 d_1 d_0)_b = d_2 b^2 + d_1 b^1 + d_0 b^0\).
- For fractional binary: \(0.b_{-1}b_{-2} = b_{-1} \times 2^{-1} + b_{-2} \times 2^{-2}\).
- Hex-to-Binary: Each hex digit expands directly into exactly 4 binary bits.
Step 3 : Step-by-step Explanation:
Checking A: Convert both sides to Decimal.
Left side: \((43)_8 = 4 \times 8^1 + 3 \times 8^0 = 32 + 3 = 35_{10}\).
Right side: \((23)_{16} = 2 \times 16^1 + 3 \times 16^0 = 32 + 3 = 35_{10}\).
Since both equal 35, Statement A is True.
Checking B: Convert Binary to Decimal.
Integer part: \(10111_2 = 1\cdot 16 + 0\cdot 8 + 1\cdot 4 + 1\cdot 2 + 1\cdot 1 = 16 + 4 + 2 + 1 = 23_{10}\).
Fraction part: \(0.01_2 = 0\cdot 2^{-1} + 1\cdot 2^{-2} = 0 + 0.25 = 0.25_{10}\).
Combining them gives \(23.25_{10}\). Statement B is True.
Checking C: Convert Hex directly to Binary.
Hex 'B' equals decimal 11, which is \(1011_2\) in 4-bit binary.
Hex '7' equals decimal 7, which is \(0111_2\) in 4-bit binary.
Concatenating them gives \((1011 \, 0111)_2\). Statement C is True.
Checking D: Convert Binary to Decimal.
Integer part: \(1001_2 = 1\cdot 8 + 0\cdot 4 + 0\cdot 2 + 1\cdot 1 = 9_{10}\).
Fraction part: \(0.1_2 = 1\cdot 2^{-1} = 0.5_{10}\).
Combining them gives \(9.5_{10}\). Statement D is True.
Step 4 : Final Answer:
All four conversions are mathematically correct, matching option (D).
Quick Tip: To rapidly convert Hex to Binary, memorize the 4-bit patterns for 0-F. To convert Octal to Binary, memorize the 3-bit patterns for 0-7. Direct conversion is much faster than routing through decimal base during exams!
An ideal OPAMP circuit is given below where \(R_1 = 1k\Omega, R_2 = 1k\Omega\), and emf \(V_i = \sin \omega t\) in volt.

A. The current through \(R_1 \neq\) The current through \(R_2\).
B. The potential at P, \(V_P = V_i\).
C. Amplitude of \(V_0\) is 2V.
D. The output voltage are in opposite phase with input emf.
Choose the correct answer from the options given below :
View Solution
Step 1 : Concept:
The question requires reverse-engineering an op-amp circuit diagram to determine its configuration (Non-inverting amplifier) and calculating its electrical characteristics.
Step 2 : Key Formula or Approach:
For an ideal op-amp, the current flowing into the input terminals is exactly zero (\(I_{in} = 0\)).
The concept of "Virtual Short" dictates that the voltage at the inverting terminal equals the voltage at the non-inverting terminal (\(V_+ = V_-\)) if negative feedback is present.
The gain of a non-inverting amplifier is \(A_v = 1 + \frac{R_f}{R_{in}}\).
Step 3 : Step-by-step Explanation:
Circuit Analysis: Observing the diagram, the input voltage \(V_i\) is connected directly to the upper terminal, which is the non-inverting (+) input. The feedback resistor \(R_1\) connects the output \(V_0\) to the lower terminal (node P), which is the inverting (-) input. Resistor \(R_2\) connects node P to ground. This is the classic "Non-inverting Amplifier" topology.
Evaluating Statement B: Due to the virtual short principle, the potential at the inverting terminal (Node P) tracks the potential at the non-inverting terminal. Hence, \(V_P = V_+ = V_i\). Statement B is True.
Evaluating Statement A: Since the ideal op-amp draws zero current into its '-' terminal, all the current flowing through feedback resistor \(R_1\) must continue seamlessly through \(R_2\) to ground (Kirchhoff's Current Law at node P). Therefore, Current through \(R_1\) = Current through \(R_2\). Statement A is False.
Evaluating Statement C: The voltage gain formula is \(V_0 = V_i (1 + R_1 / R_2)\). Given \(R_1 = 1k\Omega\) and \(R_2 = 1k\Omega\), the gain is \(1 + (1/1) = 2\).
The input voltage is \(V_i = 1 \cdot \sin \omega t\), meaning its peak amplitude is \(1V\).
The output voltage is \(V_0 = 2 \cdot \sin \omega t\). Thus, the amplitude of \(V_0\) is 2V. Statement C is True.
Evaluating Statement D: The equation \(V_0 = +2 V_i\) shows a positive gain scalar. There is no negative sign, indicating zero phase shift between input and output. They are in phase, not opposite phase. Statement D is False.
Step 4 : Final Answer:
Only statements B and C are correct, corresponding to option (B).
Quick Tip: Always locate where the input signal is applied. If the input goes to the '+' terminal and the '-' terminal is grounded via a resistor network, it is a Non-Inverting Amplifier (Gain \(\geq 1\), Phase shift = 0).
A, B, C, D, E are inputs and \(Y_0\) is output.

The output \(Y_0\) for the above logic gate circuit is given by :
View Solution
Step 1 : Concept:
This problem involves tracing digital logic signals through a multi-stage combinational logic circuit to derive the final boolean expression.
Step 2 : Key Formula or Approach:
Identify each gate by its distinct graphical shape:
- Curved input = OR gate (operation: \(+\))
- D-shape input = AND gate (operation: \(\cdot\))
- Bubble at output = NOT operation applied to the result (bar over expression).
Step 3 : Step-by-step Explanation:
Gate 1 (Top Left): The inputs are A and B. The symbol has a curved input side, signifying an OR gate.
Output of Gate 1 = \(A + B\).
Gate 2 (Middle): The inputs are C and the output of Gate 1 (\(A+B\)). The symbol has a straight D-shape input side, signifying an AND gate. However, it also features a small bubble at the output tip, signifying inversion. Thus, it is a NAND gate.
Output of Gate 2 = \(\overline{(A+B) \cdot C}\).
Gate 3 (Bottom Left): The inputs are D and E. The symbol has a straight D-shape input side without any bubble, signifying an AND gate.
Output of Gate 3 = \(D \cdot E\).
Gate 4 (Final Gate on Right): The inputs are the outputs from Gate 2 and Gate 3. The symbol has a curved input side, signifying an OR gate. There is no bubble.
Final Output \(Y_0\) = (Output of Gate 2) \(+\) (Output of Gate 3).
Substituting the derived expressions into the final gate:
\[ Y_0 = \overline{(A+B)\cdot C} + DE \]
Step 4 : Final Answer:
The correct boolean expression matches option (B).
Quick Tip: Tracing combinational logic circuits is easiest when you write the intermediate boolean expressions directly onto the schematic lines as you move from left to right. It prevents grouping errors in the final equation.
Which of the following statements are correct ?
A. Sinusoidal oscillator provide output sine wave signals
B. Non sinusoidal oscillator generate rectangular or square wave signal
C. Loop gain with negative feedback = \(\frac{A_v}{1-\beta A_v}\)
D. Loop gain with positive feedback = \(\frac{A_v}{1+\beta A_v}\)
E. When the feedback signal is in phase with input signal, the feedback is negative
Choose the correct answer from the options given below :
View Solution
Step 1 : Concept:
The question tests fundamental definitions and feedback theory equations related to electronic oscillators and amplifier circuits.
Step 2 : Key Formula or Approach:
- Closed-loop gain for Negative Feedback: \(A_f = \frac{A_v}{1 + \beta A_v}\) (Denominators are \(+1\)).
- Closed-loop gain for Positive Feedback: \(A_f = \frac{A_v}{1 - \beta A_v}\) (Denominators are \(-1\)).
(Note: Loop gain itself is simply the product \(\beta A_v\)).
Step 3 : Step-by-step Explanation:
Statement A: True. By definition, a sinusoidal (harmonic) oscillator is a circuit designed to produce a continuous sine-wave output.
Statement B: True. Non-sinusoidal oscillators (like relaxation oscillators, multivibrators, or 555 timers) generate non-sine waveforms such as square, rectangular, or triangular waves.
Statement C: False. The formula given (\(\frac{A_v}{1-\beta A_v}\)) represents the closed-loop overall gain for Positive feedback, not negative feedback. (Furthermore, strictly speaking, it's the "closed-loop gain", not the "loop gain").
Statement D: False. The formula given (\(\frac{A_v{1+\beta A_v}\)) represents the closed-loop overall gain for \textit{Negative feedback, not positive feedback.
Statement E: False. If the feedback signal is completely in phase (\(0^\circ\) difference) with the original input signal, they will add together constructively. Constructive addition defines \textit{Positive feedback, which is required for oscillators, not negative feedback.
Step 4 : Final Answer:
Only statements A and B are correct, pointing to option (C).
Quick Tip: An easy way to remember feedback formulas: Negative feedback reduces gain, so you divide by a larger number (\(1 + \beta A\)). Positive feedback increases gain (heading towards infinite gain/oscillation at Barkhausen criterion), so you divide by a smaller number (\(1 - \beta A\)).
Which of the statements are true ?
A. Gravitational force is conservative force
B. Frictional force is non conservative force
C. Centrifugal force is pseudo force
D. Coriolis force is non-pseudo force
Choose the correct answer from the options given below :
View Solution
Step 1 : Concept:
This question tests basic classical mechanics definitions regarding the nature of different types of forces: conservative vs. non-conservative, and real vs. pseudo (fictitious) forces.
Step 2 : Key Formula or Approach:
- A force is conservative if the work done by it in moving an object between two points is completely independent of the path taken (e.g., Gravity, Electrostatic).
- A force is a pseudo force if it doesn't originate from a physical interaction but appears solely because the observer is in a non-inertial (accelerating or rotating) reference frame.
Step 3 : Step-by-step Explanation:
Statement A: Gravity is a fundamental central force. The work done against gravity depends only on the change in vertical height, not on the path taken. Hence, it is a conservative force. This is True.
Statement B: Friction transforms kinetic energy into unrecoverable thermal energy (heat). The work done by friction heavily depends on the length of the path taken. Therefore, it is a non-conservative force. This is True.
Statement C: Centrifugal force is an apparent outward force experienced by an object observed from a rotating reference frame. It arises due to inertia, not a physical push/pull. It is a classic pseudo force. This is True.
Statement D: The Coriolis force is an apparent deflection of moving objects when observed from a rotating reference frame (like the Earth causing wind patterns to curve). Like centrifugal force, it arises purely from the frame's rotation, making it definitively a pseudo force. The statement wrongly labels it "non-pseudo". This is False.
Step 4 : Final Answer:
Statements A, B, and C are true, rendering option (C) correct.
Quick Tip: Any force whose formula explicitly requires the angular velocity vector \(\vec{\omega}\) of the coordinate system (like Centrifugal \(m \vec{\omega} \times (\vec{\omega} \times \vec{r})\) or Coriolis \(-2m(\vec{\omega} \times \vec{v})\)) is guaranteed to be a pseudo force.
For single particle in a cubical box, the energies of the first excited state in terms of \(C = \left( \frac{\pi^2 \hbar^2}{2m V^{2/3}} \right)\) (where V = volume) will be :
View Solution
Step 1 : Concept:
The question asks for the energy eigenvalue of the first excited state for a quantum particle confined in a 3D rigid cubical box.
Step 2 : Key Formula or Approach:
The allowed energy levels for a particle in a 3D cubical box of side length \(L\) are given by:
\[ E = \frac{\pi^2 \hbar^2}{2m L^2} (n_x^2 + n_y^2 + n_z^2) \]
where quantum numbers \(n_x, n_y, n_z\) are positive integers (\(1, 2, 3, \dots\)).
For a cube, Volume \(V = L^3\), which implies \(L^2 = V^{2/3}\).
Step 3 : Step-by-step Explanation:
First, re-write the energy formula substituting the Volume \(V\):
\[ E = \frac{\pi^2 \hbar^2}{2m V^{2/3}} (n_x^2 + n_y^2 + n_z^2) \]
The problem defines a constant \(C = \frac{\pi^2 \hbar^2}{2m V^{2/3}}\).
Therefore, the energy expression simplifies nicely to:
\[ E = C \cdot (n_x^2 + n_y^2 + n_z^2) \]
Ground State: The lowest possible energy occurs when all quantum numbers are at their minimum value of 1. (\(n_x=1, n_y=1, n_z=1\)).
\[ E_{ground} = C \cdot (1^2 + 1^2 + 1^2) = 3C \]
First Excited State: To reach the next lowest energy level, we must increase exactly one of the quantum numbers to 2, keeping the others at 1. There are three degenerate combinations that achieve this: (2,1,1), (1,2,1), and (1,1,2).
For any of these combinations, calculate the energy:
\[ E_{1st\_excited} = C \cdot (2^2 + 1^2 + 1^2) = C \cdot (4 + 1 + 1) = 6C \]
Step 4 : Final Answer:
The energy of the first excited state is 6 C, matching option (A).
Quick Tip: The 3D cubical box is a classic example of "degeneracy". The ground state (1,1,1) is non-degenerate (degeneracy=1), while the first excited state (2,1,1) is 3-fold degenerate because there are 3 distinct physical states possessing the exact same energy of 6C.
Two carnot engines A and B are operated in series. Engine A absorbs heat at 250 K and rejects heat to a sink at temperature T. Engine B absorbs all of the heat rejected by engine A and rejects the heat to the sink at 100 K. If the work done in both the case is equal, then the value of T will be :
View Solution
Step 1 : Concept:
The problem involves two Carnot heat engines operating in tandem (series). The exhaust heat of the first engine serves perfectly as the input heat for the second engine. We are equating their mechanical work outputs.
Step 2 : Key Formula or Approach:
For any Carnot engine operating between \(T_{high}\) and \(T_{low}\), the heat transferred is directly proportional to the absolute temperature of the reservoir: \(\frac{Q_1}{T_1} = \frac{Q_2}{T_2} = Constant (k)\).
By the First Law of Thermodynamics, Work Done is \(W = Q_{in} - Q_{out}\).
Step 3 : Step-by-step Explanation:
Let Engine A operate between temperatures \(T_1 = 250 K\) and an intermediate temperature \(T\).
It absorbs heat \(Q_1\) and rejects heat \(Q_2\).
Its work output is \(W_A = Q_1 - Q_2\).
From Carnot principles, we can write \(Q_1 = k \cdot 250\) and \(Q_2 = k \cdot T\).
Substituting this gives: \(W_A = k(250 - T)\).
Let Engine B operate between the intermediate temperature \(T\) and a final sink \(T_3 = 100 K\).
It absorbs all the rejected heat \(Q_2\) and rejects a new amount of heat \(Q_3\).
Its work output is \(W_B = Q_2 - Q_3\).
Using the same proportionality constant \(k\) (since \(Q_2\) is identical for both), \(Q_3 = k \cdot 100\).
Substituting this gives: \(W_B = k(T - 100)\).
The problem explicitly states that the work done by both engines is equal (\(W_A = W_B\)):
\[ k(250 - T) = k(T - 100) \]
Cancel the constant \(k\) from both sides:
\[ 250 - T = T - 100 \]
Rearrange the equation to solve for \(T\):
\[ 250 + 100 = T + T \] \[ 350 = 2T \implies T = \frac{350}{2} = 175 K \]
Step 4 : Final Answer:
The intermediate temperature T is 175 K, which is option (B).
Quick Tip: Shortcut for Carnot engines in series:
1. If their \textbf{Work Outputs} are equal, the intermediate temperature is the Arithmetic Mean: \(T = \frac{T_1 + T_3}{2}\).
2. If their \textbf{Efficiencies} are equal, the intermediate temperature is the Geometric Mean: \(T = \sqrt{T_1 T_3}\).
Here, work is equal, so \(T = (250+100)/2 = 175\) K. Solved in 5 seconds!
On the resistance scale for a platinum resistance thermometer, the temperature is defined as :
(where symbols carry their usual meanings)
View Solution
Step 1 : Concept:
This question asks for the standard linear interpolation formula used to define the temperature scale based on the thermometric property of electrical resistance.
Step 2 : Key Formula or Approach:
The fundamental assumption of an empirical temperature scale is that the thermometric property (Resistance \(R\)) varies linearly with temperature (\(\theta\)).
\(\theta = aR + b\)
By calibrating at the ice point (\(0^\circC, R_0\)) and steam point (\(100^\circC, R_{100}\)), we can solve for constants \(a\) and \(b\) to derive the scale formula.
Step 3 : Step-by-step Explanation:
Let's perform the linear interpolation between the two fixed calibration points:
Point 1 (Ice Point): Temperature = \(0\), Resistance = \(R_0\)
Point 2 (Steam Point): Temperature = \(100\), Resistance = \(R_{100}\)
For an unknown temperature \(\theta_R\) corresponding to a measured resistance \(R_\theta\), the ratio of the change in property must equal the ratio of the change in temperature:
\[ \frac{Current Temp - Ice Temp}{Steam Temp - Ice Temp} = \frac{Current Resistance - Ice Resistance}{Steam Resistance - Ice Resistance} \]
Substituting the symbols:
\[ \frac{\theta_R - 0}{100 - 0} = \frac{R_\theta - R_0}{R_{100} - R_0} \]
Rearranging the equation to solve for the unknown temperature \(\theta_R\):
\[ \theta_R = \left( \frac{R_\theta - R_0}{R_{100} - R_0} \right) \times 100 \]
This matches the mathematical expression in option (B).
Step 4 : Final Answer:
The correct defining formula is given by option (B).
Quick Tip: This identical formula format applies to ANY linear thermometric property! For a mercury-in-glass thermometer, replace Resistance (\(R\)) with Length (\(L\)). For a constant volume gas thermometer, replace it with Pressure (\(P\)).
Which of the following statements are true ?
A. For indistinguishable particles, a specification of the total number of particles in each energy state defines a microstate
B. In Bose-Einstein condensation bosons accumulate in lower energy levels and large number of them occupy ground state
C. For a system of distinguishable particles, a specification of energy state and energy level of each particles defines a microstate
D. A given microstate may consist of a number of macrostates
E. Entropy is proportional to logarithm of the thermodynamic probability
Choose the correct answer from the options given below :
View Solution
Step 1 : Concept:
This question tests foundational definitions in statistical mechanics, differentiating between microstates and macrostates for distinguishable and indistinguishable particles, alongside core thermodynamic laws.
Step 2 : Key Formula or Approach:
- A macrostate is defined by macroscopic parameters, typically represented by the set of occupation numbers \(\{n_1, n_2, n_3, \dots\}\).
- A microstate is a specific detailed configuration specifying exactly which individual particle is in which specific state.
- Entropy formula: \(S = k_B \ln W\) (where \(W\) or \(\Omega\) is thermodynamic probability).
Step 3 : Step-by-step Explanation:
Statement E: Boltzmann's famous entropy formula is \(S = k_B \ln \Omega\). This means entropy is strictly proportional to the natural logarithm of the number of accessible microstates (thermodynamic probability). This is definitively True.
Statement D: This statement has the hierarchy backward. A single Macrostate consists of many underlying Microstates that look macroscopically identical. A microstate cannot consist of macrostates. This is strictly False. (Knowing this immediately eliminates options 3 and 4).
Statement B: Below a critical temperature, a macroscopic fraction of indistinguishable bosons collapses into the lowest possible quantum state (the ground state), forming a Bose-Einstein Condensate. This is True.
Statement C: If particles are distinguishable (like classical gas molecules), tagging "Particle \#1 is in State X, Particle \#2 is in State Y" constitutes a uniquely defined configuration. Thus, specifying the state of each specific particle exactly defines a microstate. This is True.
Statement A: Specifying only the \textit{number of particles in each state (e.g., "There are 3 particles in level 1") defines a Macrostate. For indistinguishable quantum particles (Bosons/Fermions), a macrostate naturally corresponds to only one microstate, but definitionally, the occupation number array \(\{n_i\\) is the definition of a Macrostate, not a microstate. Because of this semantic precision, A is often considered false in strict contexts.
Given options (A) [A, B, C] and (B) [B, C, E], since E is universally true and absent from (A), option (B) is the only logically sound choice.
Step 4 : Final Answer:
Statements B, C, and E are definitely correct, making option (B) the right answer.
Quick Tip: Using the process of elimination based on undeniably true/false statements (like E being true and D being false) bypasses ambiguous semantic traps (like statement A) frequently found in theoretical multiple-choice questions.
Two moles of a perfect monoatomic gas, initially kept in a cylinder at a standard pressure and temperature are made to expand until its volume is doubled. Which of the following statement is correct ?
A. Heat transfer will be maximum in adiabatic process
B. Heat transfer will be minimum in isobaric process
C. Change in internal energy is greatest in isothermal process
D. Change in internal energy is least in isobaric process
E. Maximum work is done if the expansion is isobaric
Choose the correct answer from the options given below :
View Solution
Step 1 : Concept:
The question requires comparing the thermodynamic variables (Heat \(Q\), Work \(W\), and Internal Energy change \(\Delta U\)) for three different expansion processes (isobaric, isothermal, adiabatic) where the volume doubles from \(V_0\) to \(2V_0\).
Step 2 : Key Formula or Approach:
Work done is the area under the P-V curve: \(W = \int P dV\).
Internal Energy of ideal gas depends solely on temperature: \(\Delta U = nC_v\Delta T\).
First Law of Thermodynamics: \(Q = \Delta U + W\).
Step 3 : Step-by-step Explanation:
Analyzing Work (W): Plotting a P-V graph starting from \((P_0, V_0)\) to volume \(2V_0\):
- Isobaric line is horizontal (constant pressure). Area = \(P_0(2V_0 - V_0) = P_0 V_0\).
- Isothermal curve drops as \(P \propto 1/V\). Area is below the isobaric line.
- Adiabatic curve drops steepest as \(P \propto 1/V^\gamma\) (\(\gamma > 1\)). Area is the smallest.
Thus, \(W_{isobaric} > W_{isothermal} > W_{adiabatic}\). Statement E (Maximum work is done if expansion is isobaric) is True.
Analyzing Internal Energy (\(\Delta U\)):
- Isobaric expands at constant P, requiring T to double (\(PV = nRT\)). \(\Delta U\) is heavily positive (greatest).
- Isothermal requires constant T, so \(\Delta T = 0\). \(\Delta U = 0\).
- Adiabatic expansion does work at the expense of internal energy, so T drops. \(\Delta U\) is negative (least).
Therefore, Statements C and D have it completely backward and are False.
Analyzing Heat Transfer (Q):
- Adiabatic process, by definition, has exactly zero heat transfer (\(Q = 0\)). This is the minimum possible heat transfer.
- Isobaric requires massive heat input to both do maximum work and increase internal energy (\(Q = \Delta U + W\)). It has the maximum heat transfer.
Therefore, Statements A and B have it completely backward and are False.
Only statement E holds true.
Step 4 : Final Answer:
Only statement E is correct, matching option (A).
Quick Tip: Drawing a quick P-V indicator diagram showing the three expansion paths diverging from the same starting point instantly reveals the hierarchy for Work (Area under curve) and Temperature (distance from origin). Isobaric is always highest, Adiabatic is always lowest.
Given below are two statements : one is labelled as Assertion (A) and the other is labelled as Reason (R).
Assertion (A) : At a constant temperature, increase in pressure makes the sequence of phase changes (gas, liquid, solid) for water which is different from that of most other materials.
Reason (R) : Volume of water increases as temperature increases from \(0^\circC\) to \(4^\circC\).
In the light of the above statements, choose the most appropriate answer from the options given below :
View Solution
Step 1 : Concept:
This question tests knowledge of the anomalous expansion of water and its unique Phase Diagram (specifically the negative slope of the solid-liquid fusion curve).
Step 2 : Key Formula or Approach:
Water has a maximum density at \(4^\circC\). Consequently, as ice melts into water, it \textit{contracts (volume decreases).
According to Le Chatelier's principle or the Clausius-Clapeyron equation, applying high pressure to ice forces it into the denser liquid phase.
Step 3 : Step-by-step Explanation:
Analyzing Assertion (A): For almost all normal substances, increasing pressure at a constant temperature forces molecules closer together, transitioning the substance from Gas \(\to\) Liquid \(\to\) Solid.
For water, because liquid water is denser than solid ice, extreme pressure applied to ice will actually melt it into a liquid. Therefore, starting from water vapor at an appropriate temperature (e.g., slightly below \(0^\circC\)), increasing pressure turns Gas \(\to\) Solid (Deposition to Ice) \(\to\) Liquid (Pressure melting). This unique sequence makes the assertion True.
Analyzing Reason (R): The reason claims that the volume of water increases as it is heated from \(0^\circC\) to \(4^\circC\). This is factually incorrect. This is the region of anomalous expansion where water \textit{contracts (volume decreases) as it approaches its maximum density at \(4^\circC\). Therefore, Reason (R) is strictly False.
Step 4 : Final Answer:
Assertion (A) is correct, but Reason (R) is false. This corresponds to option (C).
Quick Tip: The anomalous expansion of water (contracting from \(0^\circC\) to \(4^\circC\)) is exactly why ice floats on water, and why the solid-liquid boundary on water's phase diagram uniquely slopes to the left!
The average energy of a molecule obeying Maxwell's Law is :
View Solution
Step 1 : Concept:
The question asks for the mean kinetic energy of a gas molecule following classical Maxwell-Boltzmann statistics in three-dimensional space.
Step 2 : Key Formula or Approach:
According to the Law of Equipartition of Energy, every independent quadratic degree of freedom contributes an average thermal energy of \(\frac{1}{2} k_B T\) to a molecule.
Step 3 : Step-by-step Explanation:
A standard monoatomic gas molecule moving freely in 3D space has translational motion along three independent orthogonal axes (\(x, y, z\)).
Therefore, it possesses exactly \(f = 3\) translational degrees of freedom.
Applying the equipartition theorem, the total average translational kinetic energy per molecule is:
\[ E_{avg} = f \times \left( \frac{1}{2} k_B T \right) = 3 \times \frac{1}{2} k_B T = \frac{3}{2} k_B T \]
This matches the classical derivation obtained by integrating the Maxwell-Boltzmann velocity distribution function: \(\int \frac{1}{2}mv^2 f(v) dv = \frac{3}{2}k_B T\).
Step 4 : Final Answer:
The average energy is \(\frac{3}{2} K_B T\), which is option (B).
Quick Tip: While a monoatomic gas has \(\frac{3}{2} kT\), a rigid diatomic gas (like \(O_2\) or \(N_2\) at room temp) has \(f=5\) (3 translational + 2 rotational), giving it an average energy of \(\frac{5}{2} kT\). Unless otherwise specified, generic "molecule" in this context implies basic 3D translational energy.



Comments