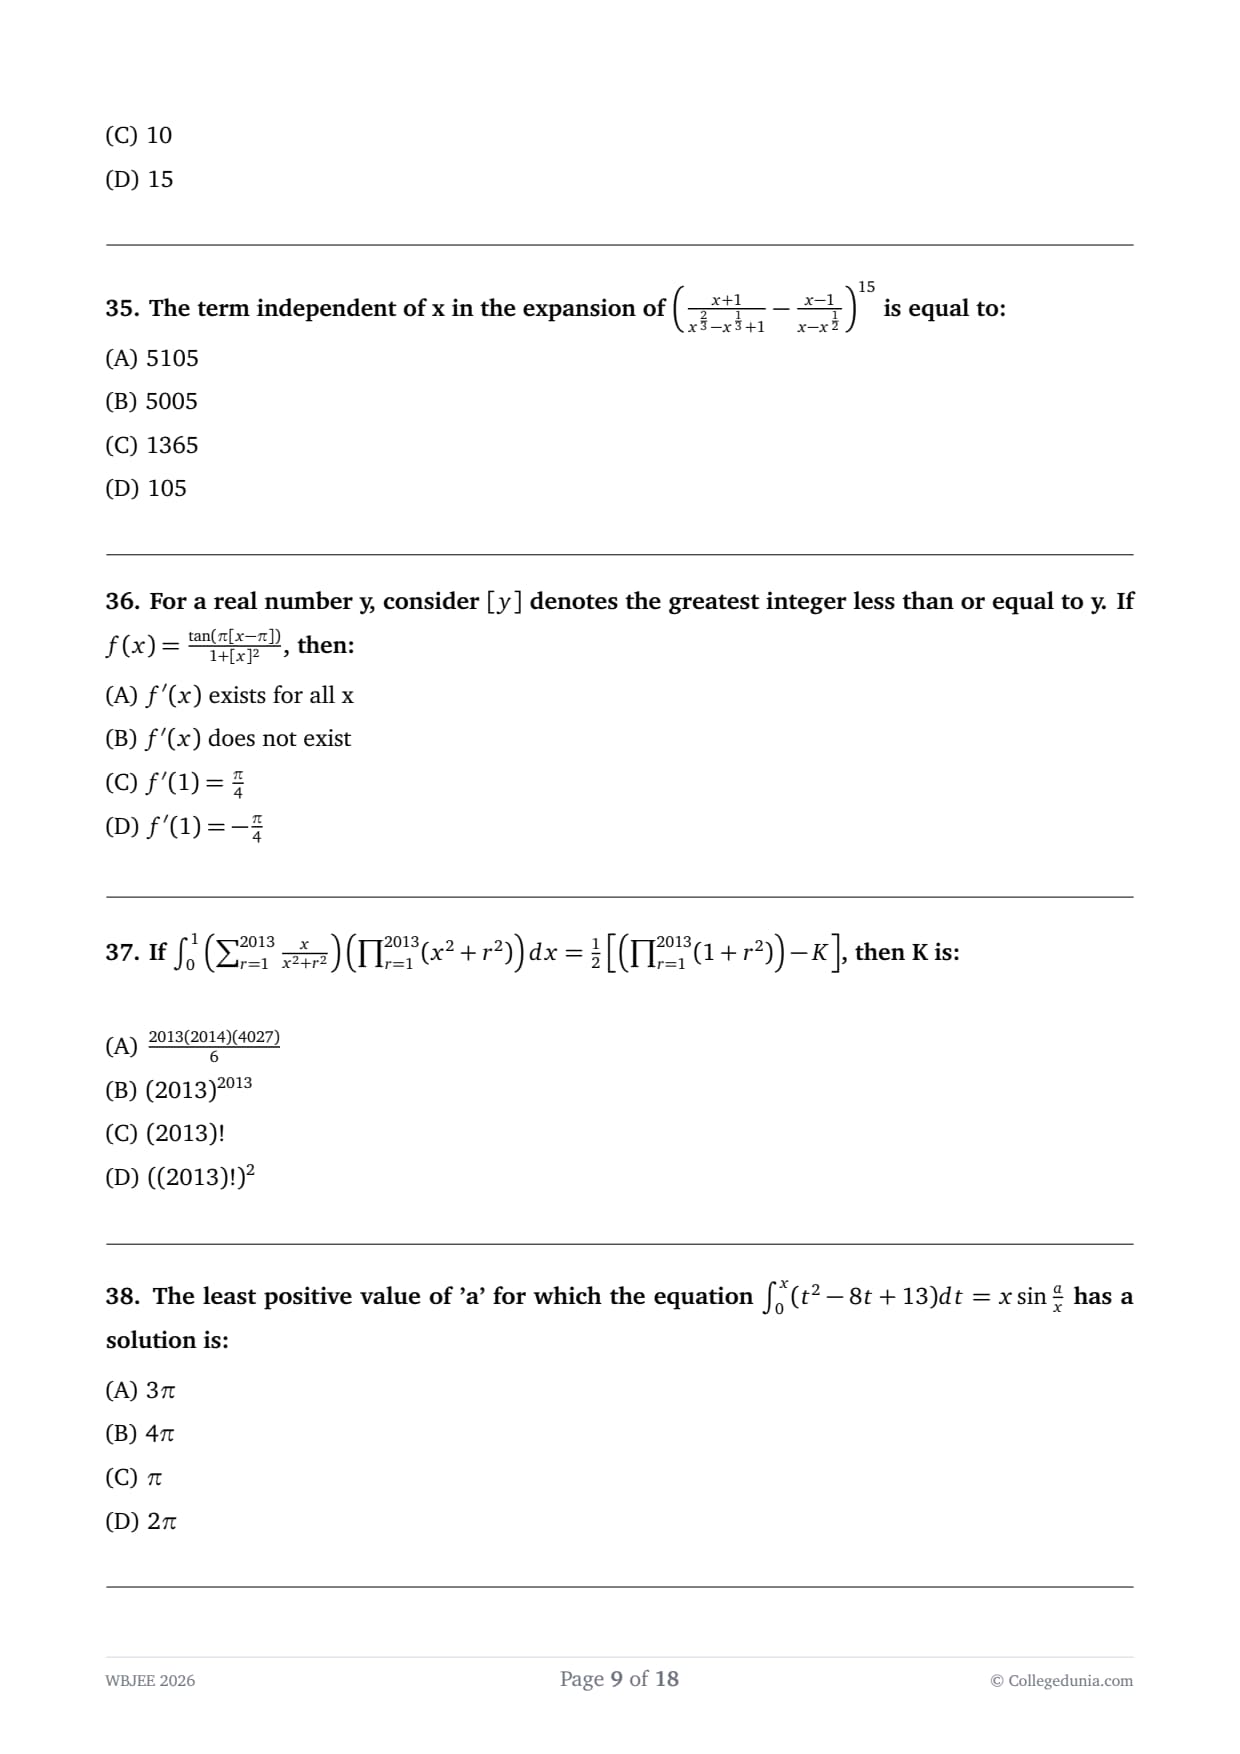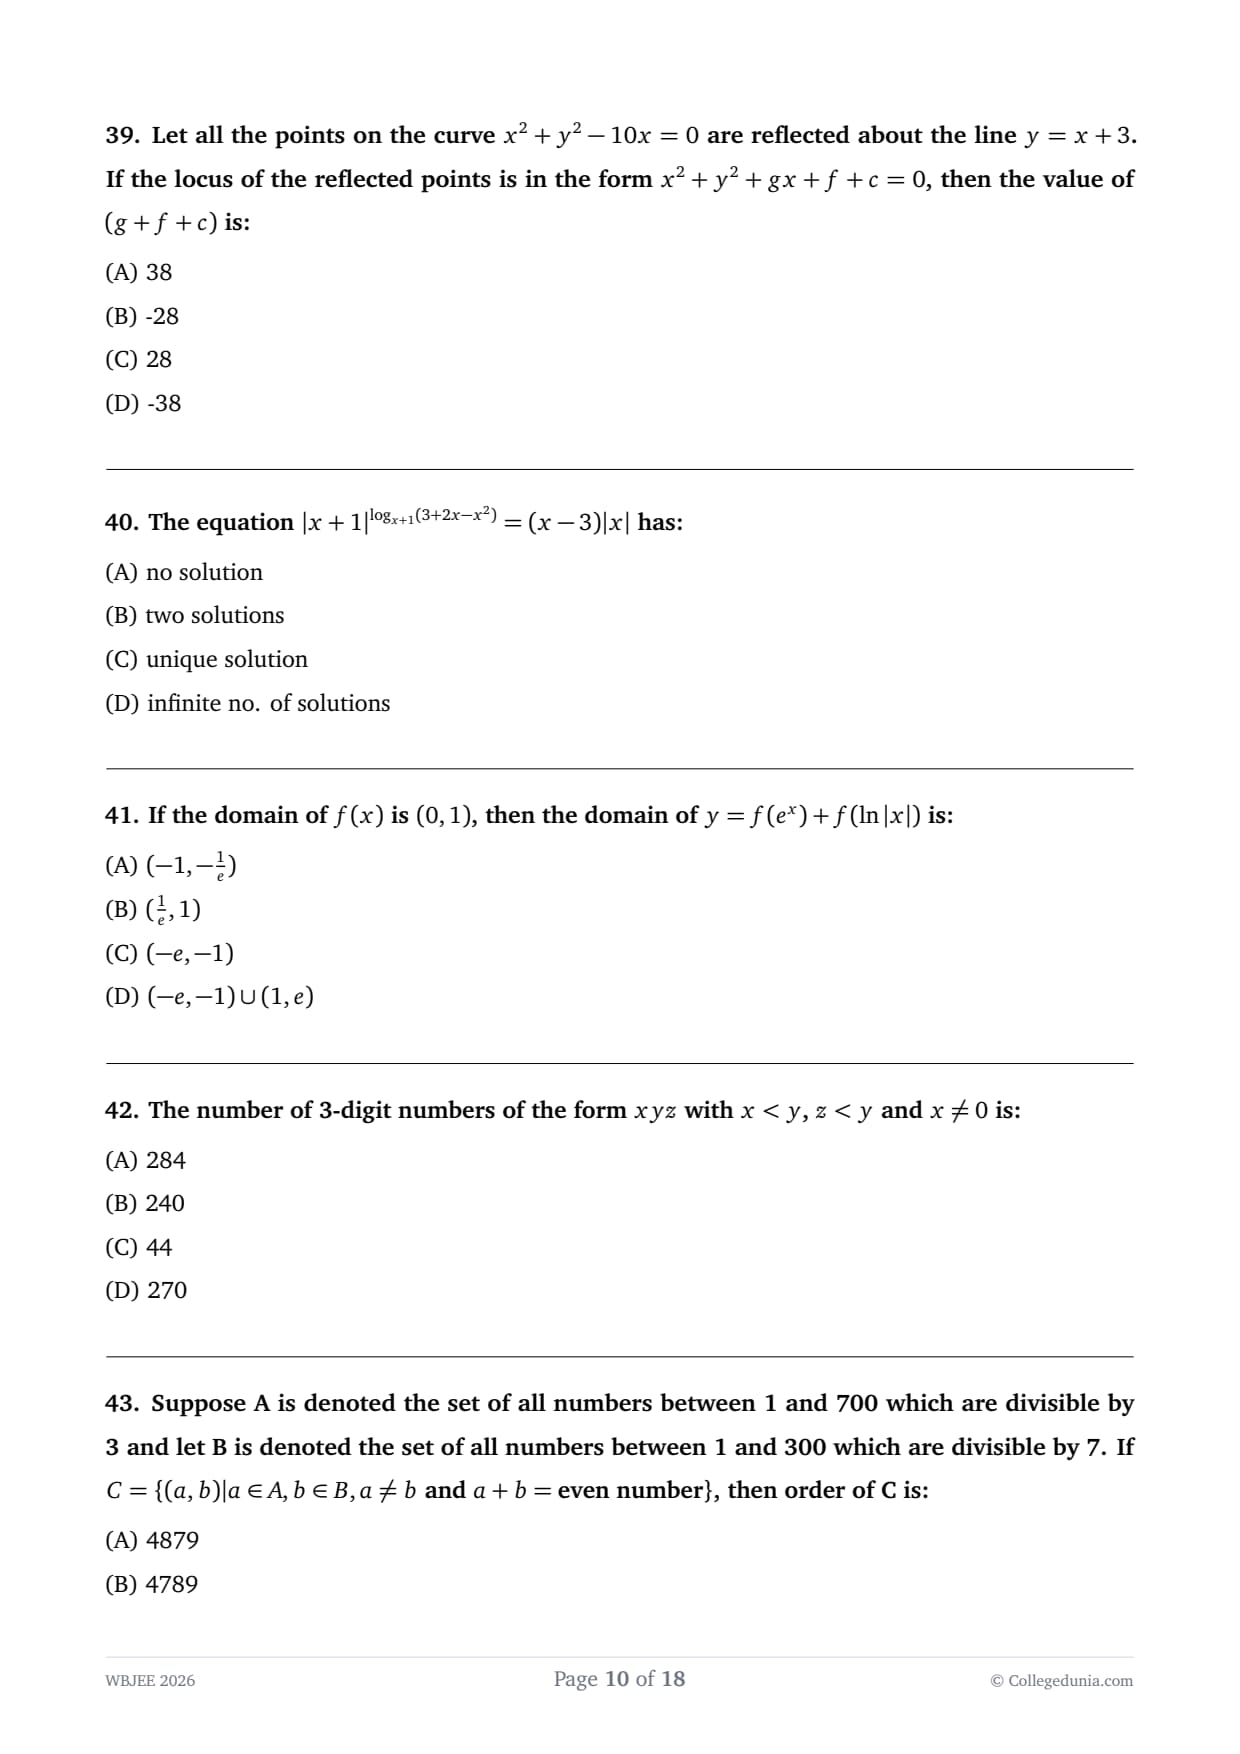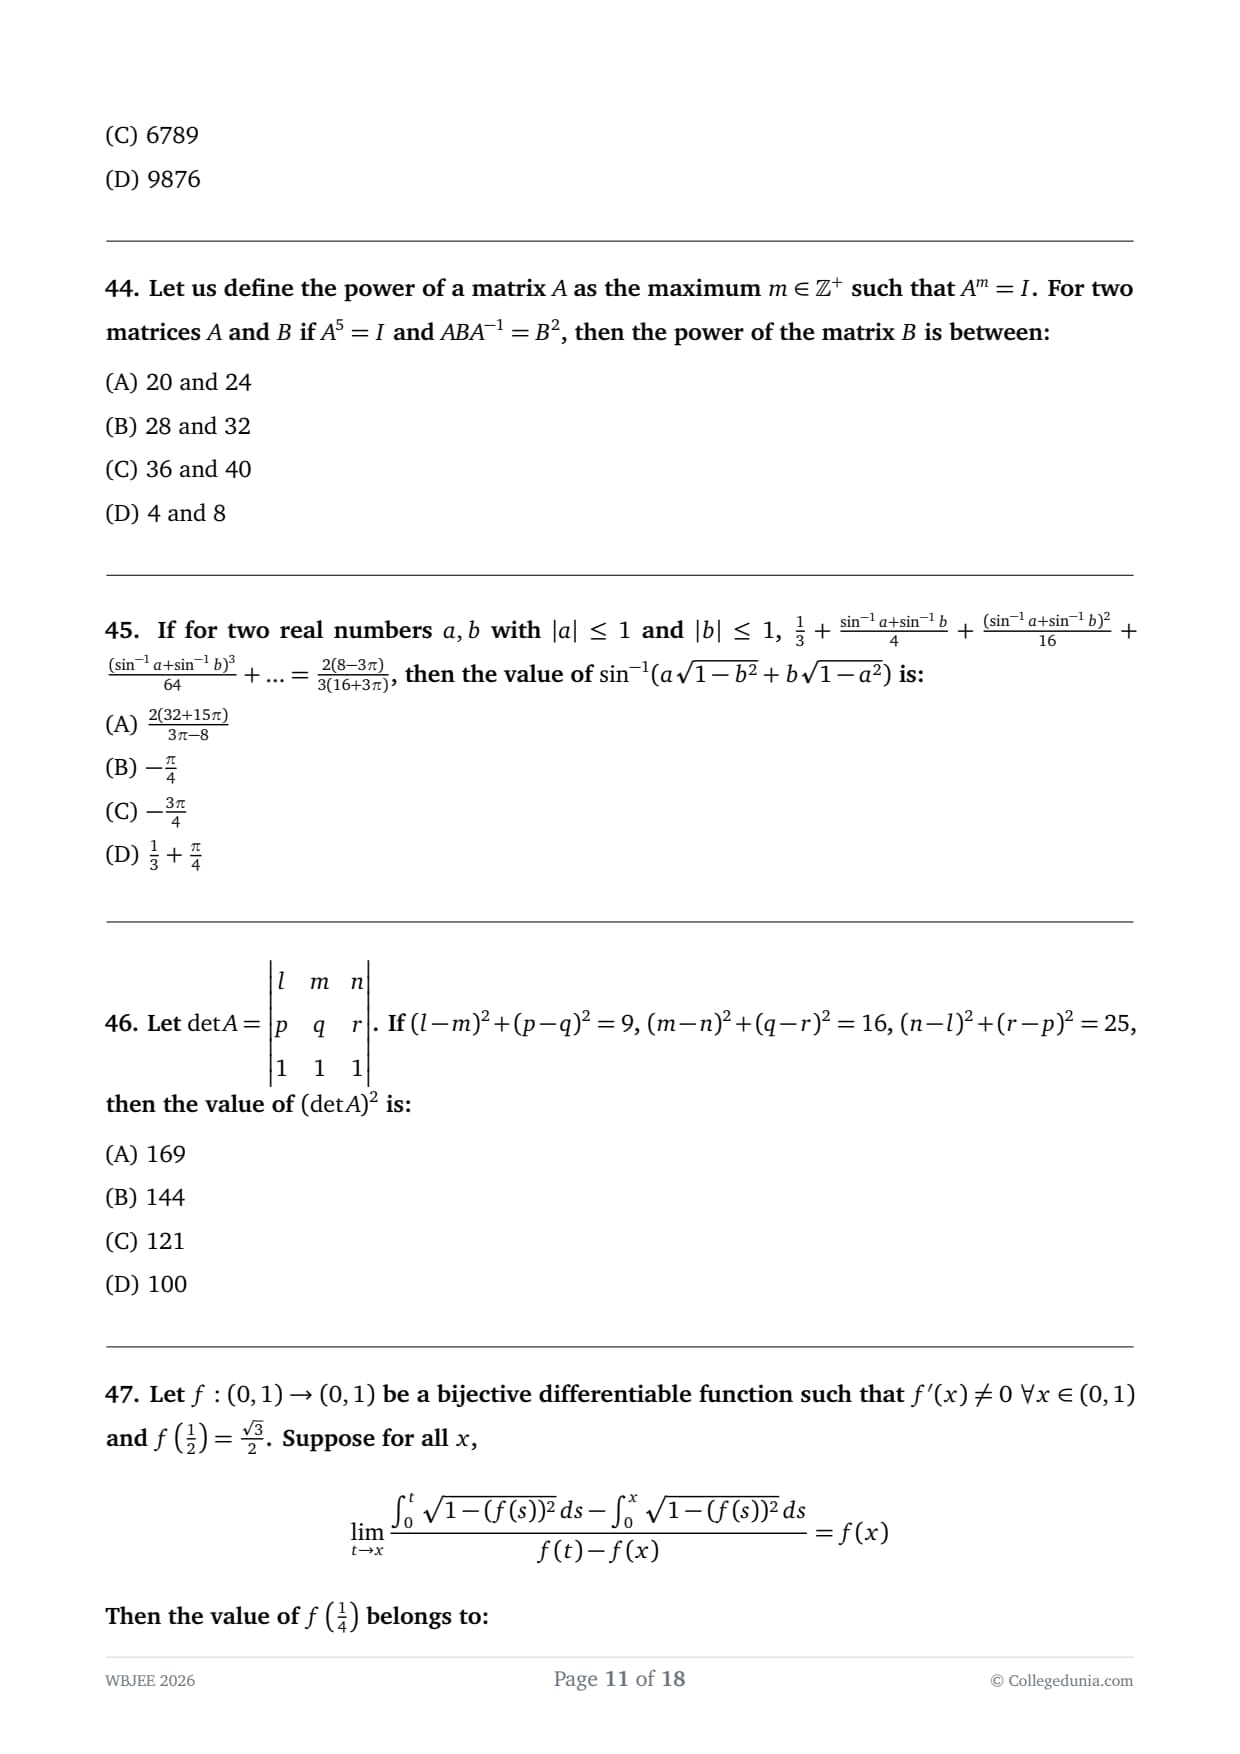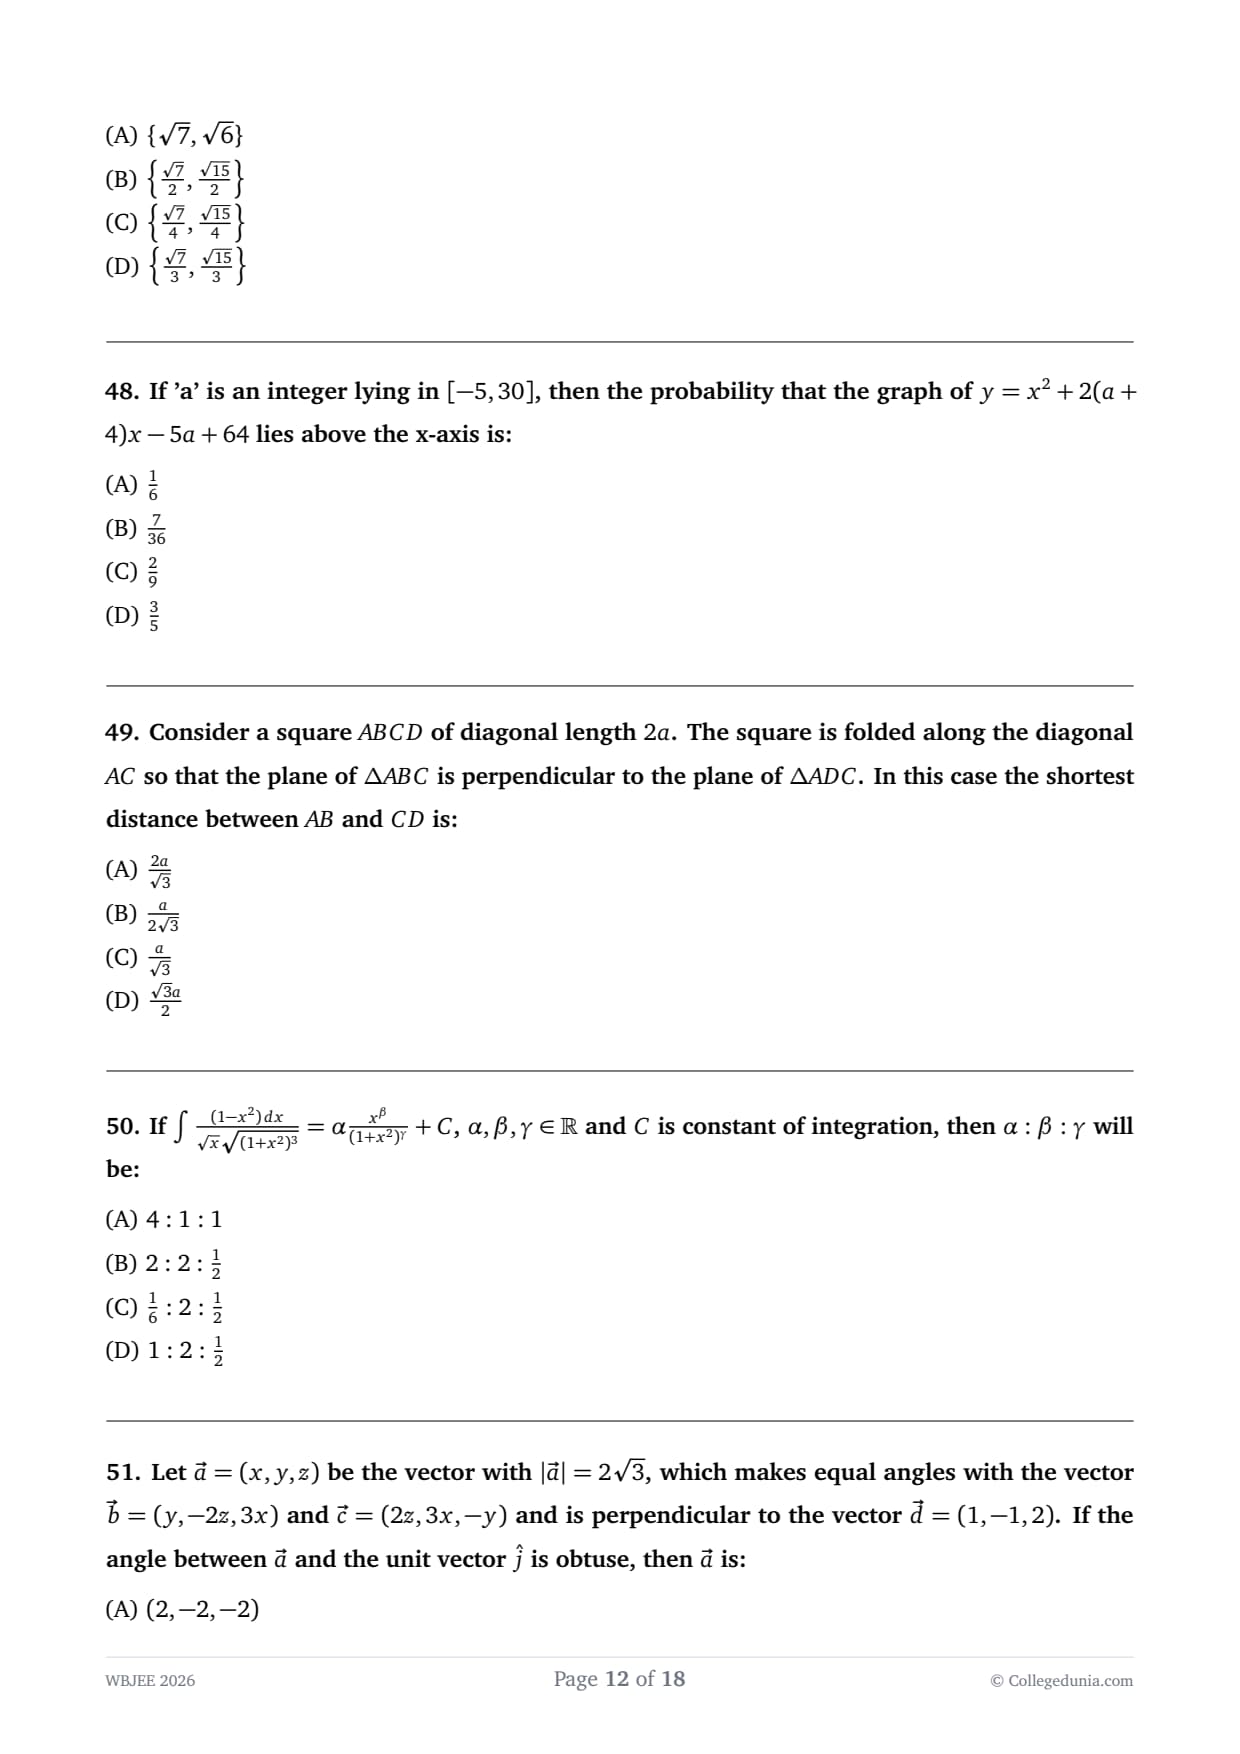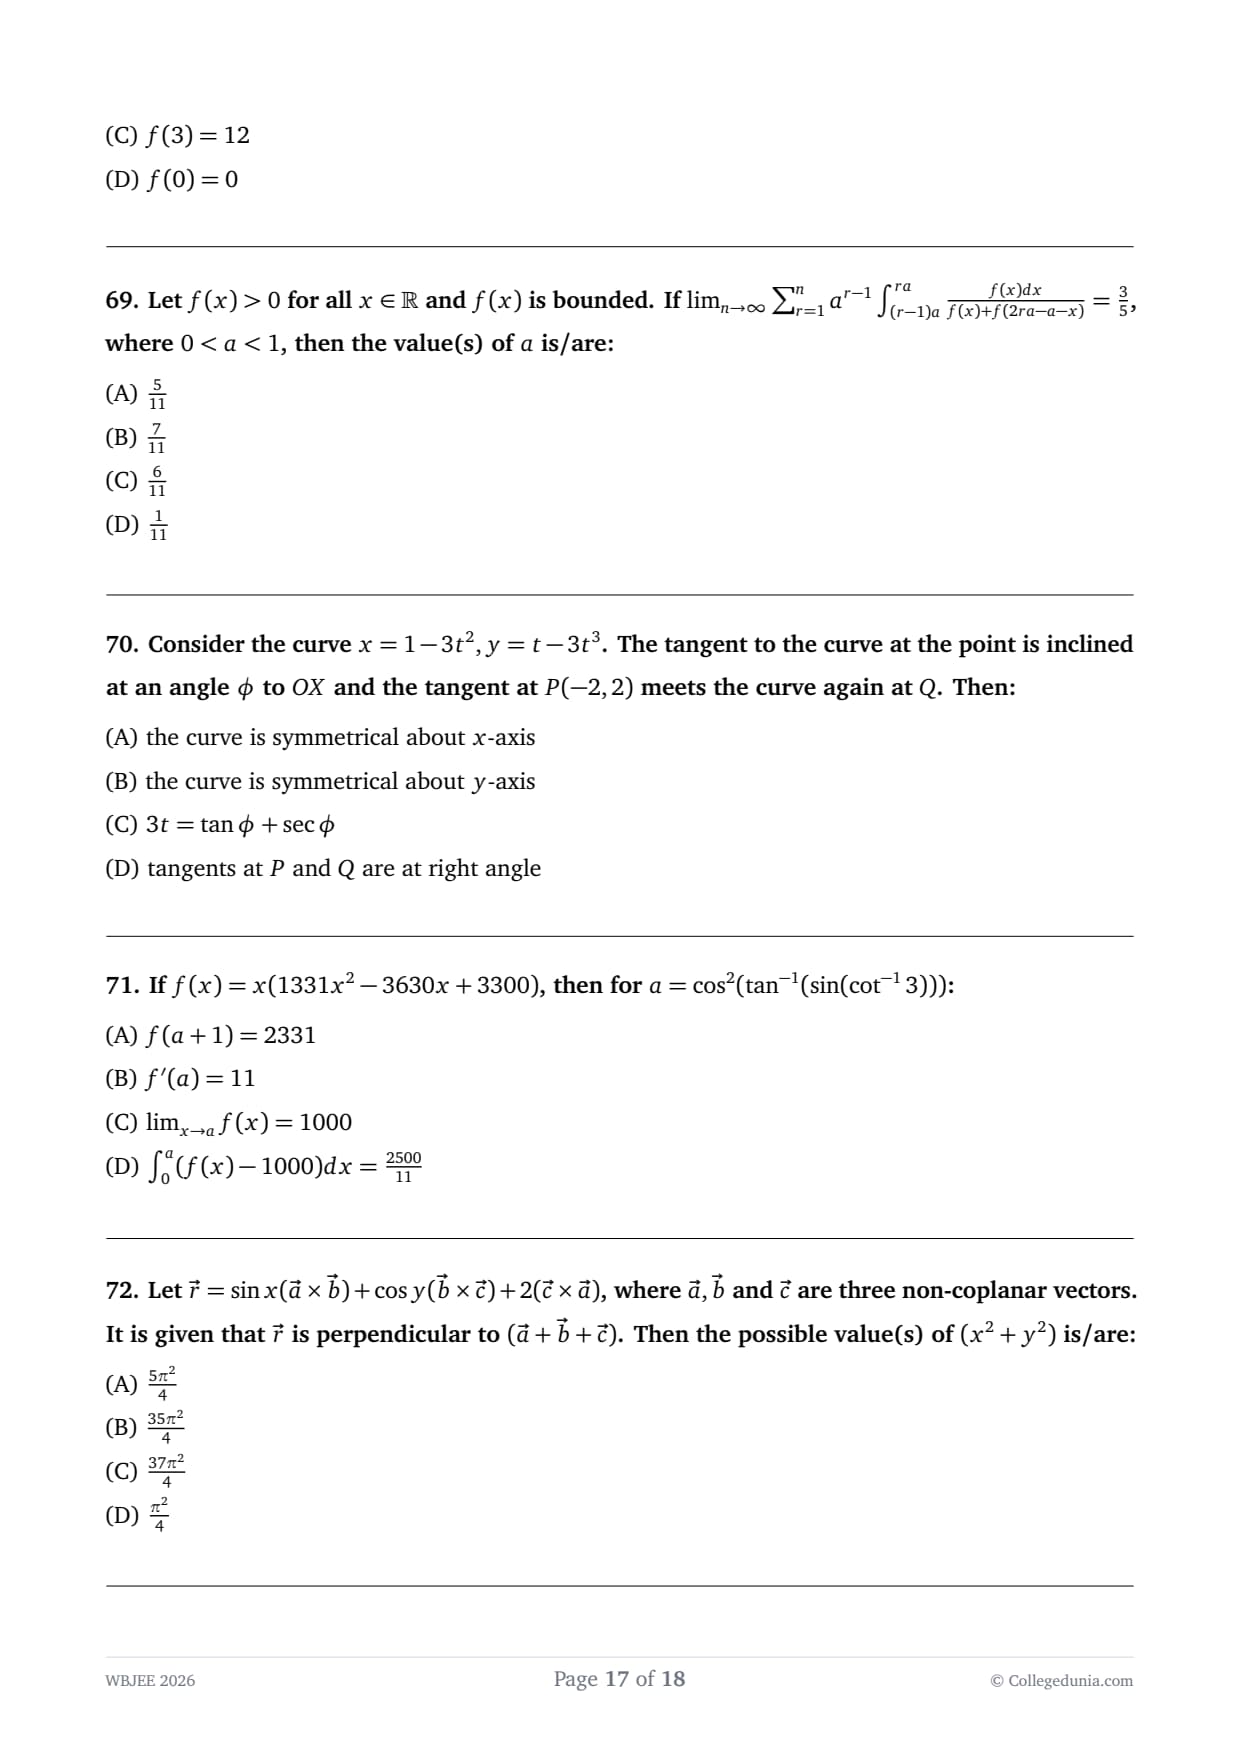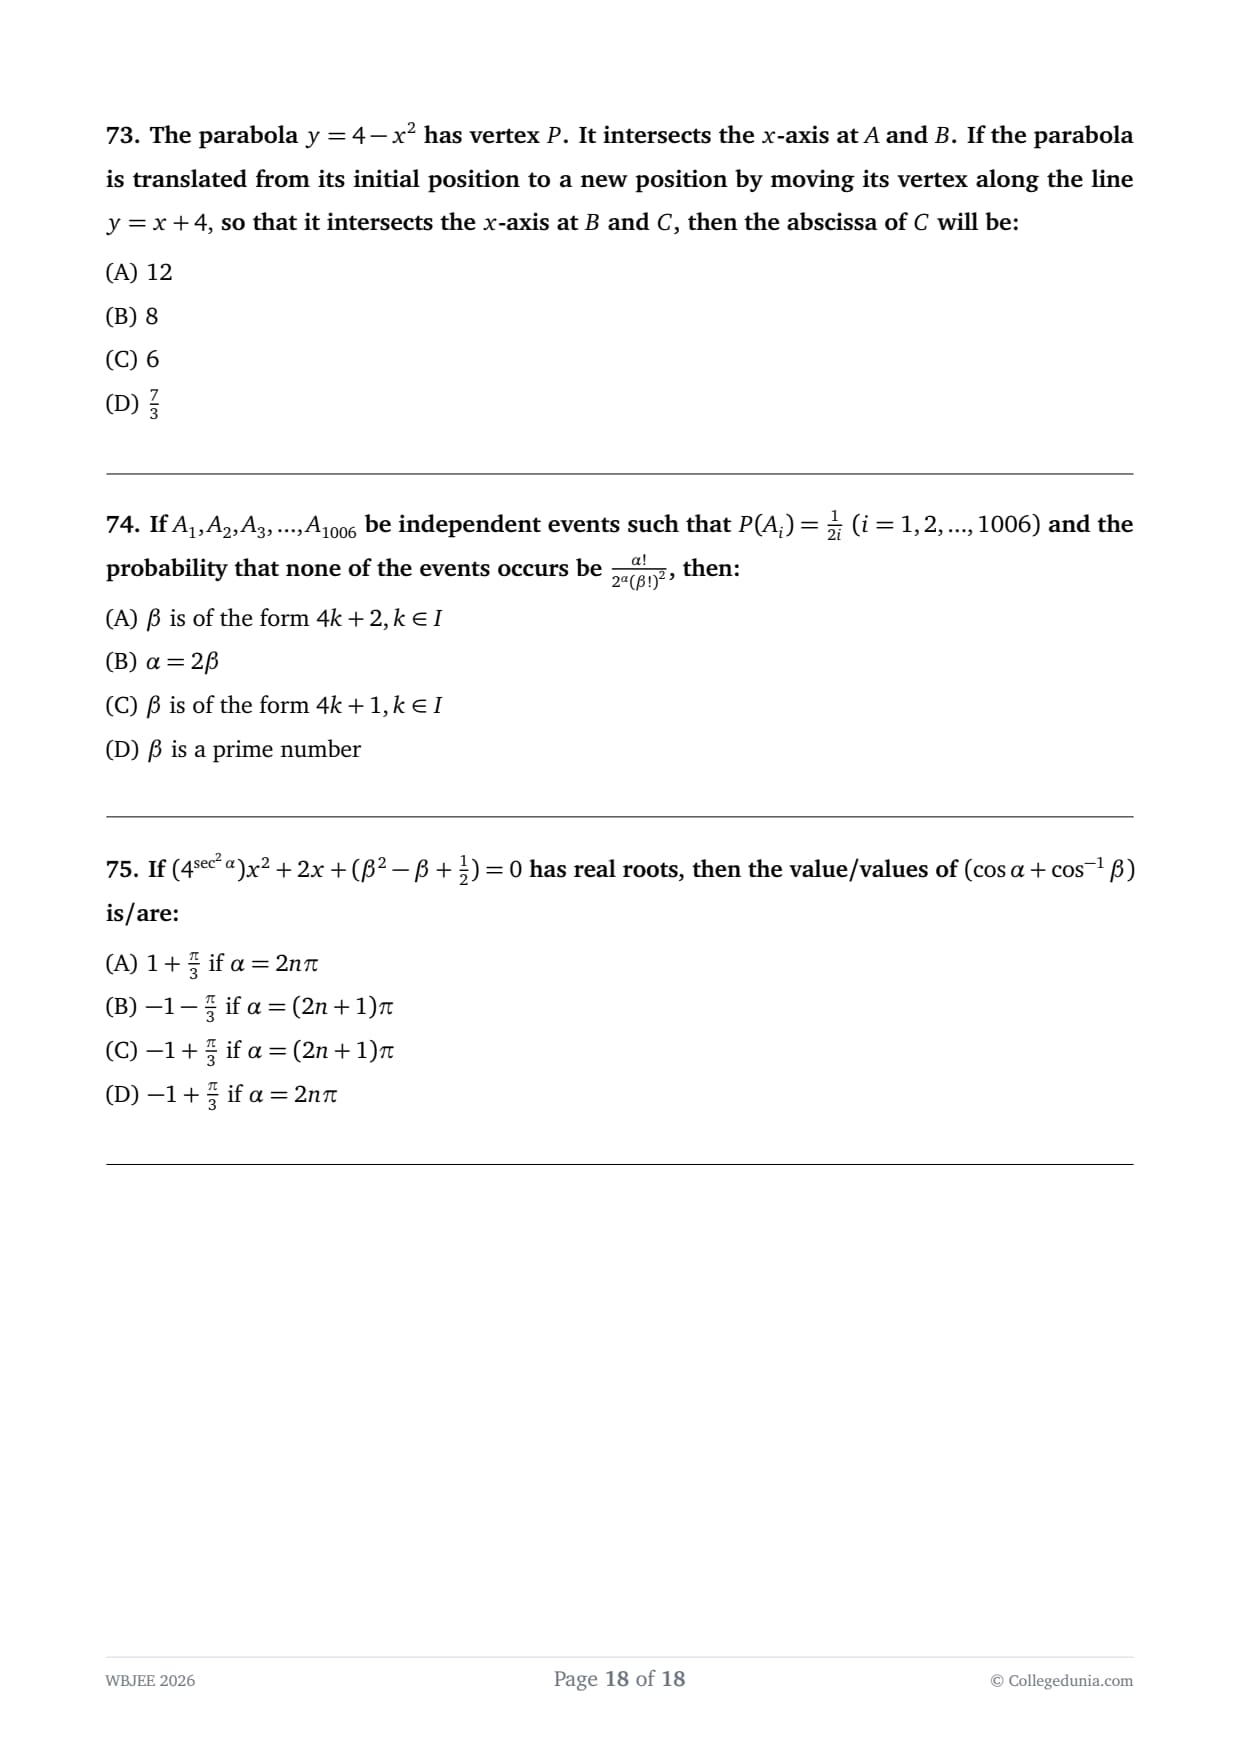

WBJEE 2026 Physics and Chemistry Question Paper is available for download here. West Bengal Joint Entrance Examinations Board (WBJEEB) conducted WBJEE 2026 Physics and Chemistry exam on May 24 from 2 pm to 4 pm. WBJEE 2026 Physics and Chemistry Question Paper consists of 80 questions for 100 marks to be attempted in 120 minutes.

  • WBJEE Physics and Chemistry Paper contains 40 questions each and is divided into 3 question categories.
  • Category 1 contains 30 questions for 1 mark each and negative marking of 0.25.
  • Category 2 contains 5 questions for 2 marks each and negative marking of 0.5.
  • Category 3 contains 5 questions for 2 marks each and no negative marking.

Candidates can download WBJEE 2026 Physics and Chemistry Question Paper with Answer Key and Solution PDF from the links provided below.

WBJEE 2026 Physics and Chemistry Question Paper with Solutions PDF

WBJEE Physics and Chemistry Question Paper 2026 Download PDF Check Solutions

Question 1:

Two identical metal bars are heated in two different temperatures and allowed to cool in the same surroundings. Which one of the following figures correctly shows their cooling curves?


Fig A

Fig B

Fig C

Fig D

  • (A) Fig A
  • (B) Fig B
  • (C) Fig C
  • (D) Fig D
Correct Answer: (D)
View Solution


Step 1: Understanding the Question:

We need to identify the correct cooling curves for two identical metal bars starting from different initial temperatures and cooling in the same environment.


Step 2: Key Formula or Approach:

According to Newton's Law of Cooling, the rate of cooling of a body is proportional to the difference in temperature between the body and its surroundings:
\[ \frac{dT}{dt} = -k(T - T_0) \]

Integrating this differential equation gives the temperature at any time \( t \):
\[ T(t) = T_0 + (T_i - T_0)e^{-kt} \]

where \( T_i \) is the initial temperature, \( T_0 \) is the surrounding temperature, and \( k \) is the cooling constant.


Step 3: Detailed Explanation:

For two identical bars, the cooling constant \( k \) is identical. Since they are kept in the same surroundings, \( T_0 \) is also identical.

Let the initial temperatures of the two bars be \( T_{i1} \) and \( T_{i2} \), with \( T_{i1} > T_{i2} \).

The temperature profiles for the two bars are:
\[ T_1(t) = T_0 + (T_{i1} - T_0)e^{-kt} \]
\[ T_2(t) = T_0 + (T_{i2} - T_0)e^{-kt} \]

Since \( T_{i1} - T_0 > T_{i2} - T_0 \) and \( e^{-kt} > 0 \), we have \( T_1(t) > T_2(t) \) for all \( t \ge 0 \).

This means the two cooling curves never cross each other and both approach the surrounding temperature \( T_0 \) asymptotically as \( t \to \infty \).

This behavior is correctly depicted only in figure (D).


Step 4: Final Answer:

The correct cooling curves are shown in figure (D).
Quick Tip: Cooling curves for identical objects in the same surroundings can never intersect. At any given temperature, the instantaneous rate of cooling is uniquely determined, so the curves must remain parallel-like, gradually converging at infinity.


Question 2:

Consider a fuse wire of length \( l \) and radius \( r \). The time of heating (\( t \)) for passing the maximum current will depend on

  • (A) \( t \propto r^2 l \)
  • (B) \( t \propto r^{3/2} \)
  • (C) \( t \propto r^4 l^0 \)
  • (D) \( t \propto r^{2/3} \)
Correct Answer: (C) \( t \propto r^4 l^0 \)
View Solution


Step 1: Understanding the Question:

The question asks us to find the relation between the heating time \( t \) of a fuse wire and its physical dimensions (length \( l \) and radius \( r \)) when it carries the maximum current.


Step 2: Key Formula or Approach:

We use the conservation of thermal energy, assuming adiabatic heating (no heat loss to the surroundings) during the rapid melting of the fuse:
\[ Heat generated by the current = Heat required to raise the temperature to the melting point \]

The resistance of the wire of resistivity \( \rho \), length \( l \), and radius \( r \) is:
\[ R = \frac{\rho l}{\pi r^2} \]

The mass of the wire of density \( d \) is:
\[ m = \pi r^2 l d \]


Step 3: Detailed Explanation:

Let \( I \) be the maximum current, \( s \) be the specific heat capacity, and \( \Delta T \) be the rise in temperature to reach the melting point.

The heat generated in time \( t \) is:
\[ H_{generated} = I^2 R t = I^2 \left( \frac{\rho l}{\pi r^2} \right) t \]

The heat absorbed by the wire to reach its melting point is:
\[ H_{absorbed} = m s \Delta T = (\pi r^2 l d) s \Delta T \]

Equating the heat generated to the heat absorbed:
\[ I^2 \left( \frac{\rho l}{\pi r^2} \right) t = (\pi r^2 l d) s \Delta T \]

Solving for the heating time \( t \):
\[ t = \left( \frac{\pi^2 d s \Delta T}{\rho I^2} \right) r^4 \]

From this expression, we observe that:

- The heating time \( t \) is independent of the length \( l \) of the wire (i.e., \( t \propto l^0 \)).

- The heating time \( t \) is proportional to the fourth power of the radius (i.e., \( t \propto r^4 \)).

Thus, \( t \propto r^4 l^0 \).


Step 4: Final Answer:

The time of heating is proportional to \( r^4 l^0 \), which corresponds to option (C).
Quick Tip: In adiabatic heating of a wire, both the heat capacity and the total resistance scale linearly with length \( l \). As a result, the length factor always cancels out, making the heating time completely independent of the length of the fuse wire.


Question 3:

A circular coil, carrying current, has radius \( R \). The distance from the centre of the coil on the axis where the magnetic induction will be \( \frac{1}{27}th \) of its value at the centre of the coil is

  • (A) \( 2\sqrt{2} R \)
  • (B) \( 3\sqrt{2} R \)
  • (C) \( 3 R \)
  • (D) \( 2\sqrt{3} R \)
Correct Answer: (A) \( 2\sqrt{2} R \)
View Solution


Step 1: Understanding the Question:

We need to find the axial distance \( x \) from the center of a current-carrying circular coil of radius \( R \) where the magnetic induction is \( \frac{1}{27}th \) of the magnetic induction at its center.


Step 2: Key Formula or Approach:

The magnetic field \( B(x) \) at a distance \( x \) on the axis of a circular coil of radius \( R \) with \( N \) turns carrying current \( I \) is:
\[ B(x) = \frac{\mu_0 N I R^2}{2(R^2 + x^2)^{3/2}} \]

The magnetic field \( B_0 \) at the center of the coil (\( x = 0 \)) is:
\[ B_0 = \frac{\mu_0 N I}{2R} \]


Step 3: Detailed Explanation:

According to the problem:
\[ B(x) = \frac{1}{27} B_0 \]

Substituting the expressions for \( B(x) \) and \( B_0 \):
\[ \frac{\mu_0 N I R^2}{2(R^2 + x^2)^{3/2}} = \frac{1}{27} \left( \frac{\mu_0 N I}{2R} \right) \]

Canceling the common term \( \frac{\mu_0 N I}{2} \) on both sides:
\[ \frac{R^2}{(R^2 + x^2)^{3/2}} = \frac{1}{27 R} \]

Multiply both sides by \( R \):
\[ \frac{R^3}{(R^2 + x^2)^{3/2}} = \frac{1}{27} \]

Taking the reciprocal of both sides:
\[ \left( \frac{R^2 + x^2}{R^2} \right)^{3/2} = 27 \]

Taking the cube root on both sides:
\[ \left( \frac{R^2 + x^2}{R^2} \right)^{1/2} = (27)^{1/3} = 3 \]

Squaring both sides:
\[ \frac{R^2 + x^2}{R^2} = 9 \]
\[ R^2 + x^2 = 9 R^2 \]
\[ x^2 = 8 R^2 \]
\[ x = \sqrt{8} R = 2\sqrt{2} R \]


Step 4: Final Answer:

The distance from the center of the coil is \( 2\sqrt{2} R \), which corresponds to option (A).
Quick Tip: To solve questions involving \( B(x) = \frac{1}{n} B_0 \) quickly, use the direct relation:
\[ \left( 1 + \frac{x^2}{R^2} \right) = n^{2/3} \]
For \( n = 27 \), we get \( n^{2/3} = (27)^{2/3} = 9 \). Thus, \( \frac{x^2}{R^2} = 9 - 1 = 8 \implies x = \sqrt{8}R = 2\sqrt{2}R \). This shortcut saves valuable calculation time.


Question 4:

A radioactive element \( {}^{242}_{92}X \) emits two \( \alpha \)-particles, one electron and two positrons. The transformed nucleus is represented by \( {}^{234}_{P}Y \). The value of \( P \) is

  • (A) 85
  • (B) 87
  • (C) 92
  • (D) 96
Correct Answer: (B) 87
View Solution


Step 1: Understanding the Question:

The problem requires us to find the atomic number \( P \) of the transformed nucleus \( {}^{234}_{P}Y \) after the parent nucleus \( {}^{242}_{92}X \) undergoes radioactive decay by emitting two \( \alpha \)-particles, one electron, and two positrons.


Step 2: Key Formula or Approach:

We will use the laws of conservation of mass number (\( A \)) and charge/atomic number (\( Z \)) in nuclear reactions.

- Emission of an \( \alpha \)-particle (\( {}^4_2He \)) decreases the mass number by 4 and the atomic number by 2.

- Emission of an electron (\( \beta^- \)-decay, \( {}^0_{-1}e \)) leaves the mass number unchanged and increases the atomic number by 1.

- Emission of a positron (\( \beta^+ \)-decay, \( {}^0_{+1}e \)) leaves the mass number unchanged and decreases the atomic number by 1.


Step 3: Detailed Explanation:

Let the reaction be represented as:
\[ {}^{242}_{92}X \rightarrow {}^{234}_{P}Y + 2 \left( {}^{4}_{2}He \right) + 1 \left( {}^{0}_{-1}e \right) + 2 \left( {}^{0}_{+1}e \right) \]

By applying the law of conservation of atomic number (total charge on both sides must be equal):
\[ 92 = P + 2(2) + 1(-1) + 2(+1) \]
\[ 92 = P + 4 - 1 + 2 \]
\[ 92 = P + 5 \]
\[ P = 92 - 5 = 87 \]


Step 4: Final Answer:

The atomic number \( P \) of the transformed nucleus is 87.
Quick Tip: To solve nuclear decay problems quickly, remember that charge is strictly conserved. You can write a simple algebraic equation of the form \( Z_{initial} = Z_{final} + \sum Z_{emitted} \) to directly find the unknown atomic number.


Question 5:

Beyond what distance, the ray optics is sufficiently valid when the aperture is 6 mm wide and the wavelength is 6000 Å?

  • (A) 50 m
  • (B) 60 m
  • (C) 40 m
  • (D) 10 m
Correct Answer: (B) 60 m
View Solution


Step 1: Understanding the Question:

The question asks for the distance beyond which the effects of diffraction become significant and ray optics is no longer a good approximation, which corresponds to the Fresnel distance (\( Z_F \)).


Step 2: Key Formula or Approach:

The Fresnel distance \( Z_F \) is given by the formula:
\[ Z_F = \frac{d^2}{\lambda} \]

where:

- \( d \) is the width of the aperture.

- \( \lambda \) is the wavelength of light.


Step 3: Detailed Explanation:

Given values:

- Aperture width, \( d = 6 mm = 6 \times 10^{-3} m \)

- Wavelength, \( \lambda = 6000 Å = 6000 \times 10^{-10} m = 6 \times 10^{-7} m \)

Substitute these values into the formula:
\[ Z_F = \frac{(6 \times 10^{-3} m)^2}{6 \times 10^{-7} m} \]
\[ Z_F = \frac{36 \times 10^{-6}}{6 \times 10^{-7}} \]
\[ Z_F = 6 \times 10^1 = 60 m \]

Thus, for distances greater than 60 m, diffraction spread exceeds the size of the aperture, and wave optics must be used instead of ray optics.


Step 4: Final Answer:

The distance beyond which ray optics is no longer valid (or up to which it is valid) is 60 m.
Quick Tip: Always convert all given units to SI units (meters) before performing calculations. Remember that \( 1 Å = 10^{-10} m \) and \( 1 mm = 10^{-3} m \).


Question 6:

From a tower of height \( H \), a particle is thrown vertically upwards with a speed \( u \). The time taken by the particle to hit the ground is \( n \) times that taken by it to reach the highest point of its path. The relation between \( H \), \( u \) and \( n \) is

  • (A) \( 2gH = n^2 u^2 \)
  • (B) \( gH = (n - 2)^2 u^2 \)
  • (C) \( 2gH = nu^2(n - 2) \)
  • (D) \( 2gH = u^2(n - 2)^2 \)
Correct Answer: (C) \( 2gH = nu^2(n - 2) \)
View Solution


Step 1: Understanding the Question:

A particle is projected upwards from the top of a tower of height \( H \) with velocity \( u \). We need to find the relationship between \( H \), \( u \), and the factor \( n \), where the total time of flight to the ground is \( n \) times the time to reach the highest point.


Step 2: Key Formula or Approach:

- Time to reach the highest point \( t_1 \) is obtained using \( v = u - gt_1 \), where \( v = 0 \).

- Total time of flight \( t_2 = n \cdot t_1 \).

- Use the second equation of motion for vertical displacement from the top of the tower:
\[ s = ut - \frac{1}{2}gt^2 \]


Step 3: Detailed Explanation:

1. Finding time to the highest point (\( t_1 \)):

At the maximum height, the final velocity is zero:
\[ 0 = u - gt_1 \implies t_1 = \frac{u}{g} \]

2. Finding total time of flight (\( t_2 \)):

Given that the total time is \( n \) times \( t_1 \):
\[ t_2 = n t_1 = \frac{nu}{g} \]

3. Applying the displacement equation:

Taking the point of projection as the origin and upward direction as positive:

- Displacement, \( s = -H \)

- Initial velocity, \( u_i = +u \)

- Acceleration, \( a = -g \)

- Time, \( t = t_2 = \frac{nu}{g} \)

Substituting these into the displacement equation:
\[ -H = u\left(\frac{nu}{g}\right) - \frac{1}{2}g\left(\frac{nu}{g}\right)^2 \]
\[ -H = \frac{nu^2}{g} - \frac{1}{2}\frac{n^2u^2}{g} \]

Multiply the entire equation by \( -2g \) to simplify:
\[ 2gH = -2nu^2 + n^2u^2 \]
\[ 2gH = n^2u^2 - 2nu^2 \]

Factoring out \( nu^2 \):
\[ 2gH = nu^2(n - 2) \]


Step 4: Final Answer:

The relation is \( 2gH = nu^2(n - 2) \).
Quick Tip: When dealing with vertical motion under gravity from a height, choosing a consistent sign convention (e.g., upward displacement and velocity as positive, downward as negative) prevents sign errors.


Question 7:

A plano-convex lens fits exactly into a plano-concave lens. Their plane surfaces are parallel to each other. If lenses are made of different materials of refractive indices \( \mu_1 \) and \( \mu_2 \) and \( R \) is the radius of curvature of the curved surface of the lenses, then the focal length of the combination is

  • (A) \( \frac{R}{\mu_1 - \mu_2} \)
  • (B) \( \frac{2R}{\mu_1 - \mu_2} \)
  • (C) \( \frac{R}{2(\mu_1 - \mu_2)} \)
  • (D) \( \frac{R}{\mu_1 + \mu_2} \)
Correct Answer: (A) \( \frac{R}{\mu_1 - \mu_2} \)
View Solution


Step 1: Understanding the Question:

We have two lenses: a plano-convex lens of refractive index \( \mu_1 \) and a plano-concave lens of refractive index \( \mu_2 \). They fit exactly into each other, meaning their curved interface has the same radius of curvature \( R \). We need to find the equivalent focal length of the combination.


Step 2: Key Formula or Approach:

- Lens Maker's Formula:
\[ \frac{1}{f} = (\mu - 1)\left(\frac{1}{R_1} - \frac{1}{R_2}\right) \]

- For a combination of two thin lenses in contact:
\[ \frac{1}{F} = \frac{1}{f_1} + \frac{1}{f_2} \]


Step 3: Detailed Explanation:

Let's consider the two individual lenses:

1. Plano-convex lens (\( f_1 \)):

It has one flat surface (\( R_1 = \infty \)) and one convex surface of radius \( R_2 = -R \) (using Cartesian sign convention with light traveling from left to right):
\[ \frac{1}{f_1} = (\mu_1 - 1)\left(\frac{1}{\infty} - \frac{1}{-R}\right) = \frac{\mu_1 - 1}{R} \]


2. Plano-concave lens (\( f_2 \)):

Since it fits exactly onto the plano-convex lens, its left surface is concave with a radius of curvature \( R_1 = -R \) and its right surface is flat (\( R_2 = \infty \)):
\[ \frac{1}{f_2} = (\mu_2 - 1)\left(\frac{1}{-R} - \frac{1}{\infty}\right) = -\frac{\mu_2 - 1}{R} \]


3. Focal length of the combination (\( F \)):
\[ \frac{1}{F} = \frac{1}{f_1} + \frac{1}{f_2} \]

Substituting the values:
\[ \frac{1}{F} = \frac{\mu_1 - 1}{R} - \frac{\mu_2 - 1}{R} \]
\[ \frac{1}{F} = \frac{\mu_1 - 1 - \mu_2 + 1}{R} \]
\[ \frac{1}{F} = \frac{\mu_1 - \mu_2}{R} \]
\[ F = \frac{R}{\mu_1 - \mu_2} \]


Step 4: Final Answer:

The focal length of the combination is \( F = \frac{R}{\mu_1 - \mu_2} \).
Quick Tip: This combination can be treated as a single lens with a curved interface separating two different media, or simply as two thin lenses in contact. Using the Lens Maker's Formula with careful sign conventions for each lens is the most reliable way to avoid sign errors.


Question 8:

A person has a minimum distance of distinct vision of 50 cm. The power of lenses required to read a book at a distance of 25 cm is

  • (A) 3 D
  • (B) 1 D
  • (C) 2 D
  • (D) 5 D
Correct Answer: (C) 2 D
View Solution


Step 1: Understanding the Question:

The person has a near point (minimum distance of distinct vision) of \( 50 cm \), which means they cannot see objects clearly if they are closer than \( 50 cm \). To read a book at the normal near point of \( 25 cm \), they need a corrective lens that forms a virtual image of the book at their shifted near point.


Step 2: Key Formula or Approach:

We will use the classical lens formula:
\[ \frac{1}{f} = \frac{1}{v} - \frac{1}{u} \]

where:

- \( u \) is the object distance (\( -25 cm \)).

- \( v \) is the image distance (\( -50 cm \)).

- \( f \) is the focal length of the required lens.

- Power \( P \) of a lens in diopters (D) is given by \( P = \frac{1}{f (in meters)} = \frac{100}{f (in cm)} \).


Step 3: Detailed Explanation:

Using the Cartesian sign convention:

- Object distance, \( u = -25 cm \)

- Image distance, \( v = -50 cm \)

Substitute these values into the lens formula:
\[ \frac{1}{f} = \frac{1}{-50} - \frac{1}{-25} \]
\[ \frac{1}{f} = -\frac{1}{50} + \frac{1}{25} \]
\[ \frac{1}{f} = \frac{-1 + 2}{50} = \frac{1}{50 cm} \]

Therefore, the focal length is:
\[ f = +50 cm = 0.5 m \]

The positive sign indicates that the required lens is a converging (convex) lens.

Now, calculate the power of the lens:
\[ P = \frac{1}{f (in meters)} = \frac{1}{0.5 m} = +2 D \]


Step 4: Final Answer:

The power of the lens required is 2 D.
Quick Tip: For hypermetropic correction, you can directly use the simplified relation:
\[ P = 4 - \frac{100}{d} \]
where \( d \) is the person's actual near point in cm. Substituting \( d = 50 cm \), we get \( P = 4 - \frac{100}{50} = 4 - 2 = 2 D \). This formula directly gives the power needed to bring the near point from \( d \) back to \( 25 cm \).


Question 9:

The inputs to a digital circuit are as shown below. The output Y is


  • (A) \( A + B + \bar{C} \)
  • (B) \( (A+B)\bar{C} \)
  • (C) \( \bar{A} + \bar{B} + \bar{C} \)
  • (D) \( \bar{A} + \bar{B} + C \)
Correct Answer: (C) \( \bar{A} + \bar{B} + \bar{C} \)
View Solution


Step 1: Understanding the Question:

The given logic circuit contains a NAND gate and a NOT gate feeding into an OR gate. We need to find the final Boolean expression for the output \( Y \) in terms of the inputs \( A \), \( B \), and \( C \).


Step 2: Key Formula or Approach:

We will find the output of each individual logic gate step-by-step and then use De Morgan's laws to simplify the final Boolean expression:

- NAND gate output for inputs \( A \) and \( B \): \( \overline{A \cdot B} \)

- NOT gate output for input \( C \): \( \bar{C} \)

- OR gate output: \( Y = Input_1 + Input_2 \)

- De Morgan's Law: \( \overline{A \cdot B} = \bar{A} + \bar{B} \)


Step 3: Detailed Explanation:

1. The top gate is a NAND gate with inputs \( A \) and \( B \). Its output is:
\[ X_1 = \overline{A \cdot B} \]

2. The bottom gate is a NOT gate with input \( C \). Its output is:
\[ X_2 = \bar{C} \]

3. These two intermediate outputs are passed as inputs to the final OR gate. The output \( Y \) is:
\[ Y = X_1 + X_2 = \overline{A \cdot B} + \bar{C} \]

4. Applying De Morgan's Law to the first term:
\[ \overline{A \cdot B} = \bar{A} + \bar{B} \]

Substituting this back into the expression for \( Y \):
\[ Y = \bar{A} + \bar{B} + \bar{C} \]


Step 4: Final Answer:

The Boolean expression for the output \( Y \) is \( \bar{A} + \bar{B} + \bar{C} \).
Quick Tip: To verify Boolean logic circuits, you can substitute test values (like \( A=1, B=1, C=1 \)) and trace them through the gates. For these inputs, the NAND gate gives 0, the NOT gate gives 0, and the OR gate outputs 0. Substituting these into the correct option (C) gives \( 0 + 0 + 0 = 0 \), which confirms the expression is correct.


Question 10:

Two spherical soap bubbles of radii \( r_1 \) and \( r_2 \) in vacuum coalesce under isothermal condition. The newly formed bubble has a radius (\( r \)) given by

  • (A) \( r_1 + r_2 \)
  • (B) \( \frac{r_1+r_2}{2} \)
  • (C) \( \frac{r_1 r_2}{r_1 + r_2} \)
  • (D) \( \sqrt{r_1^2 + r_2^2} \)
Correct Answer: (D) \( \sqrt{r_1^2 + r_2^2} \)
View Solution


Step 1: Understanding the Question:

Two soap bubbles of different radii coalesce to form a single larger soap bubble under isothermal conditions inside a vacuum. We need to find the radius of the resulting bubble.


Step 2: Key Formula or Approach:

Since the process is isothermal and the number of moles of air remains conserved, we can apply Boyle's Law:
\[ P_1 V_1 + P_2 V_2 = P_f V_f \]

where:

- For a soap bubble in vacuum, the internal pressure is equal to the excess pressure: \( P = \frac{4T}{R} \) (where \( T \) is the surface tension).

- Volume of a spherical bubble of radius \( R \) is: \( V = \frac{4}{3}\pi R^3 \)


Step 3: Detailed Explanation:

Let the initial bubbles have radii \( r_1 \) and \( r_2 \), and the final coalesced bubble have radius \( r \).

The internal pressures of the bubbles are:
\[ P_1 = \frac{4T}{r_1}, \quad P_2 = \frac{4T}{r_2}, \quad P_f = \frac{4T}{r} \]

The respective volumes are:
\[ V_1 = \frac{4}{3}\pi r_1^3, \quad V_2 = \frac{4}{3}\pi r_2^3, \quad V_f = \frac{4}{3}\pi r^3 \]

According to Boyle's law for isothermal mixture of ideal gases:
\[ P_1 V_1 + P_2 V_2 = P_f V_f \]

Substitute the pressure and volume terms:
\[ \left( \frac{4T}{r_1} \right) \left( \frac{4}{3}\pi r_1^3 \right) + \left( \frac{4T}{r_2} \right) \left( \frac{4}{3}\pi r_2^3 \right) = \left( \frac{4T}{r} \right) \left( \frac{4}{3}\pi r^3 \right) \]

Simplifying the terms:
\[ \frac{16}{3}\pi T r_1^2 + \frac{16}{3}\pi T r_2^2 = \frac{16}{3}\pi T r^2 \]

Divide both sides by the constant factor \( \frac{16}{3}\pi T \):
\[ r_1^2 + r_2^2 = r^2 \]
\[ r = \sqrt{r_1^2 + r_2^2} \]


Step 4: Final Answer:

The radius of the newly formed bubble is \( \sqrt{r_1^2 + r_2^2} \).
Quick Tip: Always distinguish whether the coalescence is happening in a vacuum or in the atmosphere.
- In vacuum: \( r = \sqrt{r_1^2 + r_2^2} \)
- In atmosphere (with pressure \( P_0 \)): \( P_0 (r^3 - r_1^3 - r_2^3) + 4T(r^2 - r_1^2 - r_2^2) = 0 \)
Paying attention to the word "vacuum" in the question text allows you to choose the correct relationship directly.


Question 11:

A uniform but time varying magnetic field is present in a circular region of radius 'R'. The magnetic field is perpendicular and into the plane of loop and the magnitude of field is increasing at a constant rate \( \alpha \). There is a straight conducting rod of length 2R placed as shown in figure. The magnitude of induced emf across the rod is


  • (A) \( \pi R^2 \alpha \)
  • (B) \( \frac{1}{2} \pi R^2 \alpha \)
  • (C) \( \frac{1}{2} R^2 \alpha \)
  • (D) \( \frac{1}{4} \pi R^2 \alpha \)
Correct Answer: (C) \( \frac{1}{2} R^2 \alpha \)
View Solution


Step 1: Understanding the Question:

The problem asks for the induced electromotive force (EMF) across a straight conducting rod placed in a circular region of radius \( R \) where a time-varying magnetic field \( B \) increases at a constant rate \( \alpha = \frac{dB}{dt} \).


Step 2: Key Formula or Approach:

- Faraday's Law of Induction:
\[ \oint \vec{E} \cdot d\vec{l} = -\frac{d\Phi}{dt} \]

- For a circular region, the induced electric field \( \vec{E} \) at a distance \( r \) from the center is tangential and its magnitude is given by:
\[ E(2\pi r) = \pi r^2 \frac{dB}{dt} \implies E = \frac{1}{2} r \alpha \]

- The induced EMF \( \varepsilon \) across a straight conductor is:
\[ \varepsilon = \int \vec{E} \cdot d\vec{l} \]


Step 3: Detailed Explanation:

We analyze the scenario based on the diagram, which shows a chord of length \( L = \sqrt{2}R \) subtending a \( 90^\circ \) angle at the center (connecting two perpendicular radii):

- The rod of length \( L = \sqrt{2}R \) forms the hypotenuse of a right-angled isosceles triangle with the two perpendicular radii.

- The perpendicular distance \( d \) from the center of the circular region to this chord is:
\[ d = R \cos(45^\circ) = \frac{R}{\sqrt{2}} \]

- Let the chord be oriented parallel to the x-axis at a distance \( y = d \). For any point \( (x, d) \) on the chord, the electric field is:
\[ \vec{E} = \frac{1}{2} \alpha (-d \hat{i} + x \hat{j}) \]

- The component of the electric field along the length of the rod (parallel to the x-axis) is:
\[ E_{\parallel} = \vec{E} \cdot \hat{i} = -\frac{1}{2} \alpha d \]

- Since \( E_{\parallel} \) is constant along the rod, the magnitude of the induced EMF is:
\[ \varepsilon = |E_{\parallel}| \cdot L = \left(\frac{1}{2} \alpha d\right) L \]

- Substituting \( d = \frac{R}{\sqrt{2}} \) and \( L = \sqrt{2}R \):
\[ \varepsilon = \frac{1}{2} \alpha \left(\frac{R}{\sqrt{2}}\right) (\sqrt{2}R) = \frac{1}{2} R^2 \alpha \]


Step 4: Final Answer:

The magnitude of the induced EMF across the rod is \( \frac{1}{2} R^2 \alpha \).
Quick Tip: For any straight conducting rod placed as a chord in a time-varying magnetic field, the induced EMF is simply given by \( \varepsilon = \frac{1}{2} \alpha d L \), where \( d \) is the perpendicular distance of the chord from the center and \( L \) is its length. This formula works because the parallel component of the induced electric field is uniform along the chord.


Question 12:

There is a ring of radius \( r \) having linear charge density \( \lambda \) and rotating with a uniform angular velocity \( \omega \). The magnitude of the magnetic field produced by this ring at its own centre would be (\( \mu_0 \)= permeability of air)

  • (A) \( \frac{\lambda \omega^2}{2 - \mu_0} \)
  • (B) \( \frac{\mu_0 \lambda^2 \omega}{\sqrt{2}} \)
  • (C) \( \frac{\mu_0 \lambda \omega}{2} \)
  • (D) \( \frac{\mu_0 \lambda}{2\omega^2} \)
Correct Answer: (C) \( \frac{\mu_0 \lambda \omega}{2} \)
View Solution


Step 1: Understanding the Question:

A circular ring of radius \( r \) with a linear charge density \( \lambda \) is rotating with a uniform angular velocity \( \omega \). We need to determine the magnitude of the magnetic field \( B \) produced at its center.


Step 2: Key Formula or Approach:

- Total charge \( q \) on a ring of radius \( r \) with linear charge density \( \lambda \):
\[ q = 2\pi r \lambda \]

- Equivalent current \( I \) due to a charge \( q \) completing one rotation in time period \( T \):
\[ I = \frac{q}{T} = \frac{q \omega}{2\pi} \]

- Magnetic field \( B \) at the center of a circular current loop of radius \( r \):
\[ B = \frac{\mu_0 I}{2r} \]


Step 3: Detailed Explanation:

1. Calculate the total charge \( q \) on the ring:
\[ q = \lambda (2\pi r) \]

2. Determine the equivalent electric current \( I \) produced by the rotation:
\[ I = \frac{q}{T} = \frac{2\pi r \lambda}{\frac{2\pi}{\omega}} = \lambda r \omega \]

3. Calculate the magnetic field \( B \) at the center of the ring:
\[ B = \frac{\mu_0 I}{2r} = \frac{\mu_0 (\lambda r \omega)}{2r} \]
\[ B = \frac{\mu_0 \lambda \omega}{2} \]

We observe that the magnetic field is independent of the radius \( r \) of the ring.


Step 4: Final Answer:

The magnitude of the magnetic field at the center of the rotating ring is \( \frac{\mu_0 \lambda \omega}{2} \).
Quick Tip: Whenever a charge \( q \) is distributed uniformly over a ring of radius \( r \) rotating with angular velocity \( \omega \), the equivalent current is always \( I = \frac{q\omega}{2\pi} \). Since \( q = 2\pi r \lambda \), the radius cancels out during the magnetic field calculation at the center.


Question 13:

A uniform rod AB is suspended from a point P, at a variable distance x, from A, as shown in figure. To make the rod horizontal, a mass 'm' is suspended from its end A. Which set of variables will give a straight line when they are plotted?


  • (A) \( m, x^2 \)
  • (B) \( m, \frac{1}{x^2} \)
  • (C) \( m, \frac{1}{x} \)
  • (D) \( m, x \)
Correct Answer: (C) \( m, \frac{1}{x} \)
View Solution


Step 1: Understanding the Question:

A uniform rod \( AB \) is suspended at a variable distance \( x \) from end \( A \) at a suspension point \( P \). A mass \( m \) is hung from end \( A \) to keep the rod in a horizontal position. We need to find the pair of variables that, when plotted against each other, produce a straight line.


Step 2: Key Formula or Approach:

For the rod to remain in rotational equilibrium (horizontal position), the net torque about the suspension point \( P \) must be zero:
\[ \sum \tau_P = 0 \]

- Let \( L \) be the length of the uniform rod.

- Let \( M_{rod} \) be the mass of the rod, so its weight acts at its center of mass, which lies at the midpoint \( O \) (at a distance of \( \frac{L}{2} \) from end \( A \)).

- The distance from \( P \) to end \( A \) is \( x \).

- The distance from \( P \) to the center of mass \( O \) is \( \left(\frac{L}{2} - x\right) \).


Step 3: Detailed Explanation:

Equating the counterclockwise torque (due to mass \( m \)) and the clockwise torque (due to the mass of the rod \( M_{rod} \)) about the suspension point \( P \):
\[ m g \cdot x = M_{rod} g \cdot \left(\frac{L}{2} - x\right) \]

We can cancel \( g \) on both sides:
\[ m \cdot x = M_{rod} \cdot \left(\frac{L}{2} - x\right) \]
\[ m \cdot x = \frac{M_{rod} L}{2} - M_{rod} \cdot x \]

Divide both sides by \( x \):
\[ m = \left(\frac{M_{rod} L}{2}\right) \frac{1}{x} - M_{rod} \]

This equation is of the form:
\[ y = M z + C \]

where:

- \( y = m \)

- \( z = \frac{1}{x} \)

- \( M = \frac{M_{rod} L}{2} \) (a constant slope)

- \( C = -M_{rod} \) (a constant intercept)

Since this is a linear relation of the form \( y = M z + C \), plotting \( m \) against \( \frac{1}{x} \) will give a straight line.


Step 4: Final Answer:

The set of variables that will give a straight line is \( m \) and \( \frac{1}{x} \).
Quick Tip: To quickly find straight-line relations in experimental physics questions, rearrange the equilibrium equation to isolate the dependent variable (e.g., \( m \)) on one side. If the other side contains a term like \( \frac{constant}{x} \), the straight line will always be obtained by plotting \( y \) versus \( \frac{1}{x} \).


Question 14:

A body initially at rest and sliding along a frictionless track from a height 'h' (as shown in figure) just completes a vertical circle of diameter AB = d. The height 'h' is equal to


  • (A) \( \frac{3}{2} d \)
  • (B) \( \frac{5}{4} d \)
  • (C) \( \frac{7}{5} d \)
  • (D) \( \frac{d}{2} \)
Correct Answer: (B) \( \frac{5}{4} d \)
View Solution


Step 1: Understanding the Question:

A body slides down from a height \( h \) on a frictionless track and enters a vertical circular loop of diameter \( d \). We need to determine the minimum height \( h \) required so that the body can just complete the vertical circle.


Step 2: Key Formula or Approach:

1. Conservation of Mechanical Energy: Since the track is frictionless, the initial potential energy at height \( h \) is completely converted into kinetic energy at the lowest point of the circular track (point B):
\[ mgh = \frac{1}{2}mv^2 \]

2. Condition to complete a vertical circle: The minimum velocity \( v \) required at the lowest point of a vertical circle of radius \( R \) to just complete the loop is:
\[ v_{min} = \sqrt{5gR} \]


Step 3: Detailed Explanation:

Let the radius of the circular track be \( R \). The diameter of the circle is given as:
\[ d = 2R \implies R = \frac{d}{2} \]

Using the conservation of energy between the starting point and the lowest point:
\[ mgh = \frac{1}{2}m v^2 \]

To just complete the circle, the velocity at the lowest point must be at least \( v_{min} = \sqrt{5gR} \). Substituting this value:
\[ mgh = \frac{1}{2}m (\sqrt{5gR})^2 \]
\[ mgh = \frac{5}{2}mgR \]

Canceling \( mg \) on both sides:
\[ h = \frac{5}{2}R \]

Now, substitute \( R = \frac{d}{2} \) into the equation:
\[ h = \frac{5}{2}\left(\frac{d}{2}\right) = \frac{5}{4}d \]


Step 4: Final Answer:

The minimum height \( h \) is \( \frac{5}{4}d \).
Quick Tip: Always pay attention to whether the question gives the radius \( R \) or the diameter \( d \). A common mistake is using the formula \( h = \frac{5}{2}R \) and selecting an option assuming \( R = d (diameter) \), which leads to incorrect answers.


Question 15:

The equation of a transverse wave is \( y = y_0 \sin 2\pi\left(ft - \frac{x}{\lambda}\right) \). If the maximum particle velocity be four times that of wave velocity then

  • (A) \( \lambda = \frac{\pi y_0}{4} \)
  • (B) \( \lambda = \frac{\pi y_0}{2} \)
  • (C) \( \lambda = \pi y_0 \)
  • (D) \( \lambda = 2\pi y_0 \)
Correct Answer: (B) \( \lambda = \frac{\pi y_0}{2} \)
View Solution


Step 1: Understanding the Question:

The given equation represents a transverse wave. We need to find the relationship for wavelength \( \lambda \) when the maximum particle velocity of the medium is four times the propagation velocity of the wave.


Step 2: Key Formula or Approach:

1. Standard wave equation:
\[ y = y_0 \sin(\omega t - kx) = y_0 \sin \left(2\pi f t - \frac{2\pi}{\lambda} x\right) \]

where \( y_0 \) is the amplitude, \( \omega = 2\pi f \) is the angular frequency, and \( k = \frac{2\pi}{\lambda} \) is the wave number.

2. Maximum particle velocity (\( v_{p,max} \)):
\[ v_{p,max} = A \omega = y_0 (2\pi f) \]

3. Wave velocity (\( v_w \)):
\[ v_w = f \lambda \]


Step 3: Detailed Explanation:

According to the given condition:
\[ v_{p,max} = 4 v_w \]

Substitute the expressions for \( v_{p,max} \) and \( v_w \):
\[ y_0 (2\pi f) = 4 (f \lambda) \]

Since frequency \( f \) is non-zero, we can cancel it from both sides:
\[ 2\pi y_0 = 4 \lambda \]

Solve for the wavelength \( \lambda \):
\[ \lambda = \frac{2\pi y_0}{4} = \frac{\pi y_0}{2} \]


Step 4: Final Answer:

The wavelength is \( \lambda = \frac{\pi y_0}{2} \).
Quick Tip: Always distinguish between particle velocity (the physical velocity of the medium's elements vibrating about their equilibrium) and wave velocity (the speed at which the wave profile/energy propagates through space). They are related via the slope of the wave: \( v_p = -v_w \frac{\partial y}{\partial x} \).


Question 16:

A pipe A is connected with other pipes B and C as shown in the figure. The areas of cross-section of A, B and C are respectively \( \alpha \), \( \frac{\alpha}{2} \) and \( \frac{\alpha}{4} \). If the velocities of flow of water through A and B are 10 m/sec and 6 m/sec, respectively, then velocity of flow, \( V_c \) along C is


  • (A) 21 m/sec
  • (B) 12 m/sec
  • (C) 28 m/sec
  • (D) 18 m/sec
Correct Answer: (C) 28 m/sec
View Solution


Step 1: Understanding the Question:

The problem shows a main pipe branching into two smaller pipes. We need to find the velocity of flow \( V_c \) in the branch pipe \( C \) using the given areas of cross-section and flow velocities in pipes \( A \) and \( B \).


Step 2: Key Formula or Approach:

For an incompressible and steady fluid flow, we apply the Equation of Continuity (mass/volume flow rate conservation):
\[ A_a V_a = A_b V_b + A_c V_c \]


Step 3: Detailed Explanation:

Given parameters:

- Area of cross-section of A, \( A_a = \alpha \)

- Velocity of flow in A, \( V_a = 10 m/s \)

- Area of cross-section of B, \( A_b = \frac{\alpha}{2} \)

- Velocity of flow in B, \( V_b = 6 m/s \)

- Area of cross-section of C, \( A_c = \frac{\alpha}{4} \)

- Velocity of flow in C, \( V_c \)

Applying the equation of continuity:
\[ \alpha (10) = \left(\frac{\alpha}{2}\right) (6) + \left(\frac{\alpha}{4}\right) V_c \]

Since \( \alpha \) is common to all terms, we can divide the entire equation by \( \alpha \):
\[ 10 = 3 + \frac{V_c}{4} \]
\[ 7 = \frac{V_c}{4} \]
\[ V_c = 28 m/s \]


Step 4: Final Answer:

The velocity of flow along pipe C is 28 m/sec.
Quick Tip: The continuity equation is a direct consequence of the conservation of mass. For branching pipes, the total incoming volume flow rate must equal the sum of the outgoing volume flow rates: \( Q_{in} = \sum Q_{out} \).


Question 17:

A body of density '\( \rho \)' is dropped slowly on the surface of a lake of depth \( d \). If the density of the lake water be '\( \rho' \)' (\( \rho' < \rho \)) then the time taken by the body to reach the bottom of the lake is

  • (A) \( \left[\frac{2d\rho}{g(\rho - \rho')}\right]^{\frac{1}{2}} \)
  • (B) \( \left[\frac{2gd}{\rho(\rho - \rho')}\right]^{\frac{1}{2}} \)
  • (C) \( \left[\frac{2d\rho'}{\rho g(\rho - \rho')}\right]^{\frac{1}{2}} \)
  • (D) \( \left[\frac{g(\rho - \rho')}{2d\rho}\right]^{\frac{1}{2}} \)
Correct Answer: (A) \( \left[\frac{2d\rho}{g(\rho - \rho')}\right]^{\frac{1}{2}} \)
View Solution


Step 1: Understanding the Question:

A body of density \( \rho \) is dropped at the surface of a lake of depth \( d \). Due to buoyancy from the water of density \( \rho' \), the net downward acceleration of the body is reduced. We need to find the time it takes to travel the distance \( d \) and reach the bottom of the lake starting from rest.


Step 2: Key Formula or Approach:

1. Net Force in a fluid:
\[ F_{net} = F_g - F_b \]

where \( F_g = m g = V \rho g \) is the weight of the body and \( F_b = V \rho' g \) is the buoyant force.

2. Net downward acceleration:
\[ a_{net} = \frac{F_{net}}{m} \]

3. Equation of Motion: Since the body is dropped slowly (initial velocity \( u = 0 \)) and accelerates uniformly:
\[ d = \frac{1}{2} a_{net} t^2 \implies t = \sqrt{\frac{2d}{a_{net}}} \]


Step 3: Detailed Explanation:

Let \( V \) be the volume of the body.

- Mass of the body: \( m = V \rho \)

- Net downward force:
\[ F_{net} = V \rho g - V \rho' g = V g (\rho - \rho') \]

- Net downward acceleration \( a_{net} \):
\[ a_{net} = \frac{F_{net}}{m} = \frac{V g (\rho - \rho')}{V \rho} = g \left(\frac{\rho - \rho'}{\rho}\right) \]

Now, calculate the time \( t \) to descend through depth \( d \):
\[ t = \sqrt{\frac{2d}{a_{net}}} \]

Substitute \( a_{net} \) into this equation:
\[ t = \sqrt{\frac{2d}{g \left(\frac{\rho - \rho'}{\rho}\right)}} = \left[ \frac{2d\rho}{g(\rho - \rho')} \right]^{\frac{1}{2}} \]


Step 4: Final Answer:

The time taken to reach the bottom is \( \left[\frac{2d\rho}{g(\rho - \rho')}\right]^{\frac{1}{2}} \).
Quick Tip: To quickly verify such algebraic formulas, use dimensional analysis. Since \( [t] = T \), the term inside the square root must have the dimensions of \( T^2 \) (which is \( \frac{L}{LT^{-2}} = T^2 \)). Only option (A) contains \( \frac{length}{acceleration} \) because the densities in the numerator and denominator cancel each other's units.


Question 18:

A square of side \( L \) lies in the \( x-y \) plane, where the magnetic field is given by \( \vec{B} = B_0(2\hat{i} + 3\hat{j} + 4\hat{k}) \) where \( B_0 \) is constant. The magnetic flux passing through the square is

  • (A) \( 5 B_0 L^2 \)
  • (B) \( 2 B_0 L^2 \)
  • (C) \( 3 B_0 L^2 \)
  • (D) \( 4 B_0 L^2 \)
Correct Answer: (D) \( 4 B_0 L^2 \)
View Solution


Step 1: Understanding the Question:

The problem requires us to find the magnetic flux \( \Phi \) passing through a square of side \( L \) lying in the \( x-y \) plane, under a given uniform magnetic field \( \vec{B} \).


Step 2: Key Formula or Approach:

The magnetic flux \( \Phi \) is defined as the dot product of the magnetic field vector \( \vec{B} \) and the area vector \( \vec{A} \):
\[ \Phi = \vec{B} \cdot \vec{A} \]

Since the square lies in the \( x-y \) plane, its area vector is perpendicular to the plane and points along the z-axis (direction of unit vector \( \hat{k} \)):
\[ \vec{A} = A \hat{k} = L^2 \hat{k} \]


Step 3: Detailed Explanation:

Given:

- Magnetic field, \( \vec{B} = B_0(2\hat{i} + 3\hat{j} + 4\hat{k}) \)

- Area vector, \( \vec{A} = L^2 \hat{k} \)

Now, calculate the dot product:
\[ \Phi = \vec{B} \cdot \vec{A} \]
\[ \Phi = B_0(2\hat{i} + 3\hat{j} + 4\hat{k}) \cdot (L^2 \hat{k}) \]

Since the dot product of perpendicular unit vectors is zero (\( \hat{i}\cdot\hat{k} = 0 \) and \( \hat{j}\cdot\hat{k} = 0 \)), and \( \hat{k}\cdot\hat{k} = 1 \):
\[ \Phi = B_0 \cdot 4 \cdot L^2 = 4 B_0 L^2 \]


Step 4: Final Answer:

The magnetic flux passing through the square is \( 4 B_0 L^2 \).
Quick Tip: When a surface lies in a coordinate plane, only the component of the magnetic field perpendicular to that plane contributes to the magnetic flux. For a surface in the \( x-y \) plane, only the z-component (\( B_z \) or the coefficient of \( \hat{k} \)) is responsible for the flux, allowing you to quickly compute \( \Phi = B_z \times A \).


Question 19:

Three blocks of masses \( m_1 = 2 kg \), \( m_2 = 3 kg \) and \( m_3 = 5 kg \) are placed on a horizontal frictionless surface and a force of \( 30 N \) pulls the system as shown below. The value of tension \( T \) will be


  • (A) 15 N
  • (B) 30 N
  • (C) 6 N
  • (D) 10 N
Correct Answer: (A) 15 N or (C) 6 N (depending on the designated string)
View Solution


Step 1: Understanding the Question:

Three connected blocks are being pulled on a frictionless surface by a horizontal force of \( 30 N \). Since the specific string for tension \( T \) is not explicitly labeled in the diagram, we will calculate the tension in both connecting strings.


Step 2: Key Formula or Approach:

1. Common Acceleration of the System (\( a \)): Since the blocks are connected, they move together with a common acceleration:
\[ a = \frac{F_{net}}{M_{total}} = \frac{F}{m_1 + m_2 + m_3} \]

2. Tension in a string: Apply Newton's second law (\( F_{net} = m a \)) on individual blocks or subsystems of blocks.


Step 3: Detailed Explanation:

First, find the common acceleration of the system:

- Total mass: \( M_{total} = 2 kg + 3 kg + 5 kg = 10 kg \)

- Pulling force: \( F = 30 N \)

- Acceleration:
\[ a = \frac{30 N}{10 kg} = 3 m/s^2 \]

Now we analyze the two strings:

- Case 1: Tension \( T_1 \) in the string between \( m_2 \) (\( 3 kg \)) and \( m_3 \) (\( 5 kg \)):

This string is responsible for accelerating both \( m_1 \) and \( m_2 \). Using the subsystem of \( (m_1 + m_2) \):
\[ T_1 = (m_1 + m_2) a = (2 + 3) \times 3 = 5 \times 3 = 15 N \]

- Case 2: Tension \( T_2 \) in the string between \( m_1 \) (\( 2 kg \)) and \( m_2 \) (\( 3 kg \)):

This string is only responsible for accelerating the block \( m_1 \). Using the block \( m_1 \):
\[ T_2 = m_1 a = 2 \times 3 = 6 N \]

Since both \( 15 N \) and \( 6 N \) are in the options, they are both correct depending on which string is chosen.


Step 4: Final Answer:

The tension is \( 15 N \) (option A) for the string between the \( 3 kg \) and \( 5 kg \) masses, or \( 6 N \) (option C) for the string between the \( 2 kg \) and \( 3 kg \) masses.
Quick Tip: In connected body systems, the tension in any string is always equal to the sum of all masses behind it multiplied by the common acceleration of the system. This allows you to find any tension instantly without drawing complete free-body diagrams.


Question 20:

Which one of the following graphs represents the velocity-time (v - t) graph of a small spherical body falling in a viscous liquid?


Fig A


Fig B


Fig C


Fig D

  • (A) Fig A
  • (B) Fig B
  • (C) Fig C
  • (D) Fig D
Correct Answer: (A)
View Solution


Step 1: Understanding the Question:

The question asks for the velocity-time (\( v - t \)) graph of a small spherical body released from rest and falling through a viscous liquid.


Step 2: Key Formula or Approach:

As the body falls, it experiences gravity downward, and buoyancy and viscous drag (described by Stokes' Law) upward. The equation of motion leads to a velocity profile:
\[ v(t) = v_T \left( 1 - e^{-\frac{t}{\tau}} \right) \]

where \( v_T \) is the terminal velocity and \( \tau \) is the characteristic relaxation time.


Step 3: Detailed Explanation:

1. At \( t = 0 \), the body starts from rest, so \( v(0) = 0 \).

2. The acceleration is given by the derivative of velocity:
\[ a(t) = \frac{dv}{dt} = \frac{v_T}{\tau} e^{-\frac{t}{\tau}} \]

At \( t = 0 \), the acceleration is maximum (\( a = g_{effective} \)), meaning the slope of the \( v - t \) graph is maximum at the origin.

3. As \( t \to \infty \), \( e^{-\frac{t}{\tau}} \to 0 \). The velocity asymptotically approaches a constant value called the terminal velocity \( v_T \), and the acceleration/slope becomes zero.

4. Therefore, the theoretical curve should be concave downwards throughout, with its slope decreasing continuously.

- While option (A) contains an initial S-shape (inflection point) which is a minor graphical error in the drawing, it is the only option that correctly starts from zero and asymptotically stabilizes at a constant terminal velocity. Thus, (A) is the intended correct representation.


Step 4: Final Answer:

The velocity-time graph is represented by option (A).
Quick Tip: For objects falling in viscous media, the net force decreases as velocity increases due to drag. Consequently, the acceleration (slope of \( v - t \)) must decrease monotonically, leveling off to a horizontal asymptote when terminal velocity is achieved.


Question 21:

If a vector \( \vec{v} = 3\hat{i} \) is rotated in the \( x - z \) plane by an angle \( \theta \) with respect to \( x \)-axis in the clockwise direction, then for an observer at \( +y \) axis the vector will be

  • (A) \( 3\sin\theta\hat{i} \)
  • (B) \( 3\cos\theta\hat{i} \)
  • (C) \( 3\sin\theta\hat{i} + 3\cos\theta\hat{k} \)
  • (D) \( 3\cos\theta\hat{i} + 3\sin\theta\hat{k} \)
Correct Answer: (D) \( 3\cos\theta\hat{i} + 3\sin\theta\hat{k} \)
View Solution


Step 1: Understanding the Question:

A vector \( \vec{v} = 3\hat{i} \), initially lying along the positive x-axis, is rotated in the \( x-z \) plane through an angle \( \theta \) in the clockwise direction as seen by an observer looking down from the positive y-axis. We need to find the expression for the rotated vector.


Step 2: Key Formula or Approach:

For an observer situated at the positive y-axis looking down at the \( x-z \) plane:

- The positive x-axis (\( \hat{i} \)) points to the right.

- By the right-hand rule (\( \hat{i} \times \hat{j} = \hat{k} \)), the positive z-axis (\( \hat{k} \)) points out of the page towards the observer, which corresponds to the "down" direction on the floor.

- A clockwise rotation of the vector \( \vec{v} = 3\hat{i} \) (which initially points to the right) by an angle \( \theta \) rotates it towards the positive z-axis (downwards on the floor).


Step 3: Detailed Explanation:

Since the vector of magnitude 3 is rotated clockwise from the positive x-axis towards the positive z-axis:

- The component along the positive x-axis becomes:
\[ v_x = 3 \cos\theta \]

- The component along the positive z-axis becomes:
\[ v_z = 3 \sin\theta \]

Thus, the rotated vector \( \vec{v}' \) is given by:
\[ \vec{v}' = v_x \hat{i} + v_z \hat{k} = 3\cos\theta\hat{i} + 3\sin\theta\hat{k} \]


Step 4: Final Answer:

The rotated vector is \( 3\cos\theta\hat{i} + 3\sin\theta\hat{k} \), which corresponds to option (D).
Quick Tip: To easily visualize rotations in three dimensions, use your right hand: point your thumb along the axis of rotation (the \( +y \) axis in this case). Your curling fingers show the direction of counterclockwise (positive) rotation, which goes from \( +z \) to \( +x \). Therefore, a clockwise (negative) rotation must go from \( +x \) to \( +z \).


Question 22:

The velocity \( v \) of a particle at time \( t \) is given by \( v = at + \frac{b}{t+c} \), where \( a \), \( b \) and \( c \) are constants. The dimension of \( a \), \( b \) and \( c \) are, respectively

  • (A) \( L T^{-2}, L T, L \)
  • (B) \( L, L T, T^2 \)
  • (C) \( L T^{-2}, L, T \)
  • (D) \( L^2, T, L T^2 \)
Correct Answer: (C) \( L T^{-2}, L, T \)
View Solution


Step 1: Understanding the Question:

The problem gives a velocity equation containing unknown constants \( a \), \( b \), and \( c \). We need to find the dimensions of these constants using dimensional analysis.


Step 2: Key Formula or Approach:

According to the principle of homogeneity of dimensions, the dimensions of all terms on both sides of a physical equation must be identical.

- Only quantities with the same dimensions can be added or subtracted.

- The dimension of velocity \( v \) is \( [v] = L T^{-1} \).

- The dimension of time \( t \) is \( [t] = T \).


Step 3: Detailed Explanation:

1. Finding the dimension of \( c \):

In the denominator of the second term, \( t \) and \( c \) are added. Therefore, \( c \) must have the same dimension as time \( t \):
\[ [c] = [t] = T \]

2. Finding the dimension of \( a \):

The term \( at \) must have the same dimension as velocity \( v \):
\[ [at] = [v] \implies [a][t] = L T^{-1} \]
\[ [a] T = L T^{-1} \implies [a] = L T^{-2} \]

3. Finding the dimension of \( b \):

The entire term \( \frac{b}{t+c} \) must also have the same dimension as velocity \( v \):
\[ \left[\frac{b}{t+c}\right] = [v] \implies \frac{[b]}{T} = L T^{-1} \]
\[ [b] = L T^{-1} \times T = L \]

Thus, the dimensions of \( a \), \( b \), and \( c \) are \( L T^{-2} \), \( L \), and \( T \) respectively.


Step 4: Final Answer:

The correct dimensions are \( L T^{-2}, L, T \), which corresponds to option (C).
Quick Tip: When performing dimensional analysis, always start with terms that are added or subtracted (like \( t + c \)). This immediately gives the dimension of one of the variables (here, \( [c] = T \)) without needing to analyze the rest of the equation first.


Question 23:

The I-V characteristics graph shown below is exhibited by


  • (A) LED
  • (B) Zener diode
  • (C) Photodiode
  • (D) Solar cell
Correct Answer: (D) Solar cell
View Solution


Step 1: Understanding the Question:

We are given an \( I-V \) characteristic curve and need to identify which optoelectronic semiconductor device exhibits this specific curve.


Step 2: Key Formula or Approach:

We analyze the quadrants in which different semiconductor devices operate:

- LED: Operates in forward bias (first quadrant).

- Zener Diode / Photodiode: Operate in reverse bias (third quadrant).

- Solar Cell: It does not draw current but instead supplies power to a load. Hence, its \( I-V \) characteristic curve is drawn in the fourth quadrant, where voltage is positive (\( V > 0 \)) and current is negative (\( I < 0 \)).


Step 3: Detailed Explanation:

- A solar cell generates photo-voltage when light falls on it.

- When the circuit is open, the maximum voltage is obtained, called the open-circuit voltage \( V_{oc} \). This is represented by the intercept on the positive voltage axis.

- When the circuit is shorted, the maximum current flows, called the short-circuit current \( I_{sc} \). This is represented by the intercept on the negative current axis.

- Since the solar cell delivers power, the current flows out of the positive terminal, resulting in a negative current by convention. Thus, the curve lies in the fourth quadrant.


Step 4: Final Answer:

The given \( I-V \) characteristic is exhibited by a solar cell, which corresponds to option (D).
Quick Tip: Remember the operation quadrants of optoelectronic devices:
- First Quadrant: Light Emitting Diode (LED)
- Third Quadrant: Photodiode (reverse-bias operation)
- Fourth Quadrant: Solar Cell (power-generating device)
This is a standard classification that helps you identify the device immediately.


Question 24:

Three vectors \( \vec{a} \), \( \vec{b} \) and \( \vec{c} \) are such that \( |\vec{a}|=1 \), \( |\vec{b}|=2 \) and \( |\vec{c}|=4 \) along with \( (\vec{a} + \vec{b} + \vec{c}) = 0 \). Then, the value of \( 4\vec{a}\cdot\vec{b} + 3\vec{b}\cdot\vec{c} + 3\vec{c}\cdot\vec{a} \) will be

  • (A) 27
  • (B) -26
  • (C) -68
  • (D) -34
Correct Answer: (B) -26
View Solution


Step 1: Understanding the Question:

We are given three vectors \( \vec{a} \), \( \vec{b} \), and \( \vec{c} \) whose sum is zero, and their respective magnitudes. We need to calculate the value of the scalar expression \( 4\vec{a}\cdot\vec{b} + 3\vec{b}\cdot\vec{c} + 3\vec{c}\cdot\vec{a} \).


Step 2: Key Formula or Approach:

1. Squaring the sum vector identity:
\[ |\vec{a} + \vec{b} + \vec{c}|^2 = 0 \]
\[ |\vec{a}|^2 + |\vec{b}|^2 + |\vec{c}|^2 + 2(\vec{a}\cdot\vec{b} + \vec{b}\cdot\vec{c} + \vec{c}\cdot\vec{a}) = 0 \]

2. To find the specific term \( \vec{a}\cdot\vec{b} \), we rearrange \( \vec{a} + \vec{b} = -\vec{c} \) and square both sides.


Step 3: Detailed Explanation:

First, calculate the sum of the pairwise dot products:

Given \( |\vec{a}| = 1 \), \( |\vec{b}| = 2 \), and \( |\vec{c}| = 4 \):
\[ 1^2 + 2^2 + 4^2 + 2(\vec{a}\cdot\vec{b} + \vec{b}\cdot\vec{c} + \vec{c}\cdot\vec{a}) = 0 \]
\[ 1 + 4 + 16 + 2(\vec{a}\cdot\vec{b} + \vec{b}\cdot\vec{c} + \vec{c}\cdot\vec{a}) = 0 \]
\[ 21 + 2(\vec{a}\cdot\vec{b} + \vec{b}\cdot\vec{c} + \vec{c}\cdot\vec{a}) = 0 \]
\[ \vec{a}\cdot\vec{b} + \vec{b}\cdot\vec{c} + \vec{c}\cdot\vec{a} = -\frac{21}{2} \]

Next, isolate \( \vec{a}\cdot\vec{b} \) using \( \vec{a} + \vec{b} = -\vec{c} \):

Squaring both sides:
\[ |\vec{a} + \vec{b}|^2 = |-\vec{c}|^2 \]
\[ |\vec{a}|^2 + |\vec{b}|^2 + 2\vec{a}\cdot\vec{b} = |\vec{c}|^2 \]

Substitute the magnitudes:
\[ 1 + 4 + 2\vec{a}\cdot\vec{b} = 16 \]
\[ 5 + 2\vec{a}\cdot\vec{b} = 16 \implies \vec{a}\cdot\vec{b} = \frac{11}{2} \]

Now, rewrite the required expression to utilize our calculated terms:
\[ 4\vec{a}\cdot\vec{b} + 3\vec{b}\cdot\vec{c} + 3\vec{c}\cdot\vec{a} = \vec{a}\cdot\vec{b} + 3(\vec{a}\cdot\vec{b} + \vec{b}\cdot\vec{c} + \vec{c}\cdot\vec{a}) \]

Substitute the values:
\[ X = \frac{11}{2} + 3\left(-\frac{21}{2}\right) \]
\[ X = \frac{11 - 63}{2} = \frac{-52}{2} = -26 \]


Step 4: Final Answer:

The value of the expression is -26.
Quick Tip: Whenever you have an asymmetric-looking vector sum expression like \( A\vec{a}\cdot\vec{b} + B\vec{b}\cdot\vec{c} + B\vec{c}\cdot\vec{a} \), grouping the symmetric parts together as \( (A-B)\vec{a}\cdot\vec{b} + B(\vec{a}\cdot\vec{b} + \vec{b}\cdot\vec{c} + \vec{c}\cdot\vec{a}) \) simplifies the arithmetic and reduces the number of individual dot products you need to find.


Question 25:

The magnetic moment of an iron bar is \( M \). It is now bent in such a way that it forms an arc section of a circle subtending an angle of \( 60^\circ \) at the centre. The magnetic moment of the arc section is

  • (A) \( \frac{3M}{\pi} \)
  • (B) \( \frac{4M}{\pi} \)
  • (C) \( \frac{M}{\pi} \)
  • (D) \( \frac{2M}{\pi} \)
Correct Answer: (A) \( \frac{3M}{\pi} \)
View Solution


Step 1: Understanding the Question:

An iron bar of magnetic moment \( M \) is bent into a circular arc subtending an angle of \( 60^\circ \) at its center. We need to find the new magnetic moment \( M' \) of the bent bar.


Step 2: Key Formula or Approach:

- Magnetic moment is defined as \( M = m \cdot L \), where \( m \) is the pole strength and \( L \) is the effective distance between the poles.

- When the bar is bent into an arc of radius \( R \) and angle \( \theta \) (in radians), the actual length \( L \) of the bar is equal to the arc length:
\[ L = R \theta \]

- The effective distance \( d \) between the two poles (endpoints of the arc) is the chord length:
\[ d = 2R \sin\left(\frac{\theta}{2}\right) \]


Step 3: Detailed Explanation:

1. Relate \( R \) and \( L \):

The angle subtended is \( \theta = 60^\circ = \frac{\pi}{3} radians \).

Using \( L = R \theta \):
\[ L = R \left(\frac{\pi}{3}\right) \implies R = \frac{3L}{\pi} \]

2. Find the new effective pole separation \( d \):
\[ d = 2R \sin\left(\frac{60^\circ}{2}\right) = 2R \sin(30^\circ) = 2R \left(\frac{1}{2}\right) = R \]

Substitute \( R = \frac{3L}{\pi} \):
\[ d = \frac{3L}{\pi} \]

3. Calculate the new magnetic moment \( M' \):

Since bending does not alter the pole strength \( m \):
\[ M' = m \cdot d = m \cdot \left(\frac{3L}{\pi}\right) = \frac{3(m \cdot L)}{\pi} = \frac{3M}{\pi} \]


Step 4: Final Answer:

The magnetic moment of the arc section is \( \frac{3M}{\pi} \).
Quick Tip: The general formula for the new magnetic moment \( M' \) of a bar magnet of initial moment \( M \) bent into an arc of angle \( \theta \) (in radians) is:
\[ M' = \frac{2M \sin(\theta/2)}{\theta} \]
For \( \theta = \frac{\pi}{3} \) (\( 60^\circ \)):
\[ M' = \frac{2M \sin(30^\circ)}{\pi/3} = \frac{2M(1/2)}{\pi/3} = \frac{3M}{\pi} \]
Memorizing this formula saves a lot of derivation time during exams!


Question 26:

A ray of light travelling in air is incident on one face of a parallel glass slab of thickness \( t \) and refractive index \( \mu \) at an angle of incidence \( i \). Total time spent by the ray inside the slab is

  • (A) \( \frac{\mu^2 t}{c\sqrt{1 - \mu^2 \sin^2 i}} \)
  • (B) \( \frac{\mu t}{c\sqrt{\mu^2 - \sin^2 i}} \)
  • (C) \( \frac{\mu^2 t}{c\sqrt{\mu^2 - \sin^2 i}} \)
  • (D) \( \frac{t}{c\sqrt{\mu^2 - \sin^2 i}} \)
Correct Answer: (C) \( \frac{\mu^2 t}{c\sqrt{\mu^2 - \sin^2 i}} \)
View Solution


Step 1: Understanding the Question:

A light ray enters a parallel glass slab of thickness \( t \) and refractive index \( \mu \). We need to determine the total time \( T \) the ray spends traveling inside the slab in terms of the angle of incidence \( i \), the slab thickness \( t \), and the speed of light in vacuum \( c \).


Step 2: Key Formula or Approach:

1. Snell's Law:
\[ 1 \cdot \sin i = \mu \cdot \sin r \implies \sin r = \frac{\sin i}{\mu} \]

2. Geometry of the path: The path length \( d \) traveled by the ray inside the slab is related to the thickness \( t \) by:
\[ d = \frac{t}{\cos r} \]

3. Velocity of light in the medium:
\[ v = \frac{c}{\mu} \]

4. Time calculation:
\[ T = \frac{distance}{velocity} = \frac{d}{v} \]


Step 3: Detailed Explanation:

Substitute the expressions for \( d \) and \( v \) into the time equation:
\[ T = \frac{t / \cos r}{c / \mu} = \frac{\mu t}{c \cos r} \]

Using the trigonometric identity \( \cos r = \sqrt{1 - \sin^2 r} \):
\[ \cos r = \sqrt{1 - \left(\frac{\sin i}{\mu}\right)^2} = \sqrt{1 - \frac{\sin^2 i}{\mu^2}} = \frac{\sqrt{\mu^2 - \sin^2 i}}{\mu} \]

Substitute \( \cos r \) back into the expression for \( T \):
\[ T = \frac{\mu t}{c \left(\frac{\sqrt{\mu^2 - \sin^2 i}}{\mu}\right)} = \frac{\mu^2 t}{c \sqrt{\mu^2 - \sin^2 i}} \]


Step 4: Final Answer:

The total time spent by the ray inside the slab is \( \frac{\mu^2 t}{c\sqrt{\mu^2 - \sin^2 i}} \).
Quick Tip: To easily check the dimensional consistency of the options, notice that \( T \) must have the unit of time (\( \frac{length}{velocity} = \frac{t}{c} \)). Since \( \mu \) is a dimensionless refractive index, any expression where \( \frac{t}{c} \) is multiplied by dimensionless functions of \( \mu \) and \( \sin i \) is dimensionally correct. Thus, analyzing the boundary condition at normal incidence (\( i = 0 \)), the time must reduce to \( T = \frac{\mu t}{c} \). Substituting \( i = 0 \) into option (C) gives \( \frac{\mu^2 t}{c\sqrt{\mu^2}} = \frac{\mu t}{c} \), which confirms its correctness.


Question 27:

Density and volume of a body are given as \( (20\pm 4) gm/cm^3 \) and \( (10\pm 1) cm^3 \) respectively. The absolute error in measurement of mass is

  • (A) 20 gm
  • (B) 30 gm
  • (C) 45 gm
  • (D) 60 gm
Correct Answer: (D) 60 gm
View Solution


Step 1: Understanding the Question:

The density \( \rho \) and volume \( V \) of a body are given with their respective absolute errors. We need to find the absolute error in the calculated mass \( m \).


Step 2: Key Formula or Approach:

1. Relation between mass, density, and volume:
\[ m = \rho \cdot V \]

2. Error Propagation for Multiplication: For a product \( z = x \cdot y \), the relative errors are summed to find the relative error of the result:
\[ \frac{\Delta z}{z} = \frac{\Delta x}{x} + \frac{\Delta y}{y} \]

Therefore, for mass:
\[ \frac{\Delta m}{m} = \frac{\Delta \rho}{\rho} + \frac{\Delta V}{V} \]


Step 3: Detailed Explanation:

From the problem, we have:

- Density, \( \rho = 20 gm/cm^3 \) and \( \Delta \rho = 4 gm/cm^3 \)

- Volume, \( V = 10 cm^3 \) and \( \Delta V = 1 cm^3 \)

Calculate the nominal value of mass \( m \):
\[ m = \rho \cdot V = 20 \times 10 = 200 gm \]

Now, calculate the relative error in mass:
\[ \frac{\Delta m}{200} = \frac{4}{20} + \frac{1}{10} \]
\[ \frac{\Delta m}{200} = \frac{1}{5} + \frac{1}{10} = \frac{2 + 1}{10} = \frac{3}{10} \]
\[ \frac{\Delta m}{200} = 0.3 \]

Calculate the absolute error \( \Delta m \):
\[ \Delta m = 0.3 \times 200 = 60 gm \]


Step 4: Final Answer:

The absolute error in the measurement of mass is 60 gm.
Quick Tip: Always remember that in multiplication or division, relative errors add up, whereas in addition or subtraction, absolute errors add up. Converting relative error to absolute error at the end is a standard two-step process: find the fractional error, then multiply by the nominal product value.


Question 28:

A simple pendulum of length \( l \) has a bob of mass \( m \), with a charge \( q \). On it a vertical sheet of charge with surface charge density \( \sigma \) passes through the point of suspension. At equilibrium, if the string makes an angle \( \theta \) with the vertical, then

  • (A) \( \tan\theta = \frac{\sigma q}{2\varepsilon_0 mg} \)
  • (B) \( \tan\theta = \frac{\sigma q}{\varepsilon_0 mg} \)
  • (C) \( \cot\theta = \frac{\sigma q}{2\varepsilon_0 mg} \)
  • (D) \( \cot\theta = \frac{\sigma q}{\varepsilon_0 mg} \)
Correct Answer: (A) \( \tan\theta = \frac{\sigma q}{2\varepsilon_0 mg} \)
View Solution


Step 1: Understanding the Question:

A simple pendulum with a charged bob is in equilibrium under the influence of gravity and a horizontal electrostatic force produced by an infinite vertical sheet of charge passing through its point of suspension. We need to find the relation for \( \tan\theta \), where \( \theta \) is the angle the string makes with the vertical at equilibrium.


Step 2: Key Formula or Approach:

1. Electric field of a sheet of charge: An infinite plane sheet of charge with surface charge density \( \sigma \) produces a uniform electric field directed perpendicular to the sheet:
\[ E = \frac{\sigma}{2\varepsilon_0} \]

Since the sheet is vertical, the electric field is horizontal.

2. Electrostatic Force: The force on the charge \( q \) is:
\[ F_e = q E = \frac{\sigma q}{2\varepsilon_0} \]

3. Equilibrium of the bob: By resolving the tension \( T \) in the string of the pendulum into horizontal and vertical components:
\[ T \sin\theta = F_e \]
\[ T \cos\theta = mg \]


Step 3: Detailed Explanation:

Dividing the horizontal equilibrium equation by the vertical equilibrium equation:
\[ \frac{T \sin\theta}{T \cos\theta} = \frac{F_e}{mg} \]
\[ \tan\theta = \frac{\left( \frac{\sigma q}{2\varepsilon_0} \right)}{mg} \]
\[ \tan\theta = \frac{\sigma q}{2\varepsilon_0 mg} \]


Step 4: Final Answer:

The equilibrium angle \( \theta \) satisfies \( \tan\theta = \frac{\sigma q}{2\varepsilon_0 mg} \), which corresponds to option (A).
Quick Tip: For any particle under gravity and a constant horizontal force \( F_h \), the angle \( \theta \) of suspension with the vertical at equilibrium always satisfies \( \tan\theta = \frac{F_h}{mg} \). Simply substituting the electric force as \( F_h \) gives the result immediately.


Question 29:

A resistor of resistance 'R' draws power 'P' when connected to an AC source. If an inductance is now placed in series with R, such that the impedance of the circuit becomes 'Z', the power drawn will be

  • (A) \( P\left(\frac{R}{Z}\right) \)
  • (B) \( P\left(\frac{R}{Z}\right)^3 \)
  • (C) \( P\left(\frac{R}{Z}\right)^2 \)
  • (D) \( P\sqrt{\frac{Z}{R}} \)
Correct Answer: (C) \( P\left(\frac{R}{Z}\right)^2 \)
View Solution


Step 1: Understanding the Question:

Initially, a pure resistor \( R \) is connected across an AC source and draws power \( P \). Then, an inductor is connected in series, increasing the circuit's total impedance to \( Z \). We need to express the new power drawn \( P' \) in terms of the initial power \( P \), resistance \( R \), and impedance \( Z \).


Step 2: Key Formula or Approach:

1. Initial Power (purely resistive circuit):
\[ P = \frac{V_{rms}^2}{R} \implies V_{rms}^2 = P R \]

2. Power in an L-R Series AC Circuit:
\[ P' = I_{rms}^2 R \]

where \( I_{rms} = \frac{V_{rms}}{Z} \).


Step 3: Detailed Explanation:

Substitute \( I_{rms} \) into the formula for \( P' \):
\[ P' = \left(\frac{V_{rms}}{Z}\right)^2 R = \frac{V_{rms}^2 R}{Z^2} \]

Using the relationship \( V_{rms}^2 = P R \) obtained from the first case:
\[ P' = \frac{(P R) R}{Z^2} = P \frac{R^2}{Z^2} = P \left(\frac{R}{Z}\right)^2 \]


Step 4: Final Answer:

The power drawn in the modified circuit is \( P\left(\frac{R}{Z}\right)^2 \), which corresponds to option (C).
Quick Tip: Alternatively, you can write the new power as \( P' = \frac{V_{rms}^2}{Z} \cos\phi \), where \( \cos\phi = \frac{R}{Z} \) is the power factor. This gives \( P' = \frac{V_{rms}^2 R}{Z^2} \). Since \( V_{rms}^2 = P R \), the expression simplifies immediately to \( P' = P \left(\frac{R}{Z}\right)^2 \).


Question 30:

Radiation of wavelength \( \lambda \) is incident on a photocell. The fastest emitted electron has speed \( v \). If the wavelength is changed to \( \frac{3\lambda}{4} \), then the speed of the fastest emitted electron will be

  • (A) \( greater than v\sqrt{\frac{4}{3}} \)
  • (B) \( less than v\sqrt{\frac{4}{3}} \)
  • (C) \( equal to v\sqrt{\frac{4}{3}} \)
  • (D) \( equal to v\sqrt{\frac{3}{4}} \)
Correct Answer: (A) \( \text{greater than } v\sqrt{\frac{4}{3}} \)
View Solution


Step 1: Understanding the Question:

The maximum kinetic energy and hence the speed \( v \) of photoelectrons depends on the wavelength of incident radiation and the work function \( \phi \) of the photocell. We need to find the new maximum speed \( v' \) when the wavelength is decreased to \( \frac{3\lambda}{4} \).


Step 2: Key Formula or Approach:

According to Einstein's photoelectric equation:
\[ K_{max} = \frac{1}{2} m v^2 = \frac{hc}{\lambda} - \phi \]

where:

- \( h \) is Planck's constant.

- \( c \) is the speed of light.

- \( \phi \) is the work function of the metal.

- \( m \) is the mass of an electron.


Step 3: Detailed Explanation:

1. For the first case with wavelength \( \lambda \):
\[ \frac{1}{2} m v^2 = \frac{hc}{\lambda} - \phi \implies v^2 = \frac{2}{m} \left( \frac{hc}{\lambda} - \phi \right) \]

2. For the second case with wavelength \( \lambda' = \frac{3\lambda}{4} \):
\[ \frac{1}{2} m (v')^2 = \frac{hc}{\left(\frac{3\lambda}{4}\right)} - \phi = \frac{4hc}{3\lambda} - \phi \]
\[ (v')^2 = \frac{2}{m} \left( \frac{4}{3} \frac{hc}{\lambda} - \phi \right) \]

3. Let's rewrite the term inside the parenthesis to relate it to \( v^2 \):
\[ \frac{4}{3} \frac{hc}{\lambda} - \phi = \frac{4}{3} \left( \frac{hc}{\lambda} - \phi \right) + \frac{4}{3}\phi - \phi = \frac{4}{3} \left( \frac{hc}{\lambda} - \phi \right) + \frac{1}{3}\phi \]

Substitute this back:
\[ (v')^2 = \frac{4}{3} \left[ \frac{2}{m} \left( \frac{hc}{\lambda} - \phi \right) \right] + \frac{2\phi}{3m} \]
\[ (v')^2 = \frac{4}{3} v^2 + \frac{2\phi}{3m} \]

Since the work function \( \phi \) and the electron mass \( m \) are strictly positive, \( \frac{2\phi}{3m} > 0 \):
\[ (v')^2 > \frac{4}{3} v^2 \]

Taking the square root on both sides:
\[ v' > v \sqrt{\frac{4}{3}} \]


Step 4: Final Answer:

The speed of the fastest emitted electron will be greater than \( v\sqrt{\frac{4}{3}} \), which corresponds to option (A).
Quick Tip: When scaling wavelengths in photoelectric effect problems, remember that because of the subtracting work function term (\( \phi \)), the kinetic energy (and thus the squared speed) always scales more than the inverse of the wavelength. Thus, when the wavelength is scaled by \( \frac{3}{4} \) (energy scaled by \( \frac{4}{3} \)), the speed must scale by more than \( \sqrt{\frac{4}{3}} \).


Question 31:

An electromagnetic wave, whose wave normal makes an angle of \( 45^\circ \) with the vertical, is travelling in air and strikes a horizontal liquid surface. While travelling through the liquid, it gets deviated by \( 15^\circ \). If the speed of electromagnetic wave in air is \( 3\times10^8 m/s \), then the speed of electromagnetic wave in the liquid will be

  • (A) \( \frac{\sqrt{2}}{3}\times10^8 m/s \)
  • (B) \( 1.5\times10^8 m/s \)
  • (C) \( 2.1\times10^8 m/s \)
  • (D) \( 2.5\times10^8 m/s \)
Correct Answer: (C) \( 2.1\times10^8 \text{ m/s} \)
View Solution


Step 1: Understanding the Question:

An electromagnetic wave travels from air to a liquid medium, bending towards the normal. We are given the angle of incidence \( i \), the angle of deviation \( \delta \), and the speed of light in air. We need to find the speed of the wave in the liquid.


Step 2: Key Formula or Approach:

1. Snell's Law:
\[ \mu_{air} \sin i = \mu_{liquid} \sin r \]

2. Angle of Refraction (\( r \)): Since the light travels from a rarer to a denser medium, it bends towards the normal, so:
\[ r = i - \delta \]

3. Speed in the medium:
\[ v = \frac{c}{\mu_{liquid}} \]


Step 3: Detailed Explanation:

1. Identify the angles:

- Angle of incidence, \( i = 45^\circ \)

- Deviation, \( \delta = 15^\circ \)

- Angle of refraction:
\[ r = i - \delta = 45^\circ - 15^\circ = 30^\circ \]

2. Calculate the refractive index of the liquid \( \mu_{liquid} \) using Snell's Law (taking \( \mu_{air} = 1 \)):
\[ 1 \cdot \sin(45^\circ) = \mu_{liquid} \sin(30^\circ) \]
\[ \frac{1}{\sqrt{2}} = \mu_{liquid} \left(\frac{1}{2}\right) \]
\[ \mu_{liquid} = \sqrt{2} \approx 1.414 \]

3. Calculate the speed of light \( v \) in the liquid:
\[ v = \frac{c}{\mu_{liquid}} = \frac{3 \times 10^8 m/s}{\sqrt{2}} \]
\[ v = \frac{3}{1.414} \times 10^8 m/s \approx 2.12 \times 10^8 m/s \]

This value is closest to \( 2.1 \times 10^8 m/s \).


Step 4: Final Answer:

The speed of the electromagnetic wave in the liquid is \( 2.1\times10^8 m/s \).
Quick Tip: Remember that \( \frac{1}{\sqrt{2}} \approx 0.707 \). To quickly compute \( \frac{3}{\sqrt{2}} \), you can multiply \( 3 \times 0.707 = 2.12 \). Performing such simple mental calculations helps to find the correct decimal option instantly without extensive division.


Question 32:

A particle of mass \( m \) is suspended from a point O by a string of length \( R \). It is given a velocity \( u = 3\sqrt{gR} \) at the bottom. The difference in tension at point B and at the point C is


  • (A) \( 6 mg \)
  • (B) \( 4 mg \)
  • (C) \( 3 mg \)
  • (D) \( 8 mg \)
Correct Answer: (C) \( 3\text{ mg} \)
View Solution


Step 1: Understanding the Question:

A particle of mass \( m \) undergoes vertical circular motion of radius \( R \) with an initial velocity \( u = 3\sqrt{gR} \) at the bottommost point \( A \). We need to determine the difference in the tension of the string when the particle is at the horizontal position \( B \) and at the highest position \( C \).


Step 2: Key Formula or Approach:

1. Conservation of Mechanical Energy:
\[ v^2 = u^2 - 2gh \]

where \( h \) is the vertical height from the bottommost point.

2. Centripetal Force Equations:

- At the horizontal position \( B \) (\( h_B = R \)):
\[ T_B = \frac{m v_B^2}{R} \]

- At the highest point \( C \) (\( h_C = 2R \)):
\[ T_C + mg = \frac{m v_C^2}{R} \]


Step 3: Detailed Explanation:

1. Analysis at point B (height \( h_B = R \)):

Using energy conservation:
\[ v_B^2 = u^2 - 2gR = (3\sqrt{gR})^2 - 2gR = 9gR - 2gR = 7gR \]

The tension \( T_B \) provides the entire centripetal acceleration at this position:
\[ T_B = \frac{m v_B^2}{R} = \frac{m(7gR)}{R} = 7mg \]

2. Analysis at point C (height \( h_C = 2R \)):

Using energy conservation:
\[ v_C^2 = u^2 - 2g(2R) = 9gR - 4gR = 5gR \]

At the top, both tension \( T_C \) and gravity \( mg \) act towards the center:
\[ T_C + mg = \frac{m v_C^2}{R} = \frac{m(5gR)}{R} = 5mg \]
\[ T_C = 5mg - mg = 4mg \]

3. Calculating the difference in tension:
\[ T_B - T_C = 7mg - 4mg = 3mg \]


Step 4: Final Answer:

The difference in tension between point B and point C is \( 3 mg \).
Quick Tip: For vertical circular motion starting with a bottom velocity \( u \), the tension at any angle \( \theta \) with the vertical is given by \( T = \frac{m v^2}{R} + mg \cos\theta \). By expressing velocity \( v \) in terms of \( u \) using energy conservation, we obtain:
\[ T(\theta) = \frac{m u^2}{R} - 2mg + 3mg \cos\theta \]
- At \( B \) (\( \theta = 90^\circ \)): \( T_B = \frac{mu^2}{R} - 2mg = 9mg - 2mg = 7mg \).
- At \( C \) (\( \theta = 180^\circ \)): \( T_C = \frac{mu^2}{R} - 2mg - 3mg = 9mg - 5mg = 4mg \).
This general formula \( T(\theta) = \frac{mu^2}{R} - 2mg + 3mg\cos\theta \) can help you solve any tension question instantly.


Question 33:

2 moles of an ideal gas with \( \frac{C_p}{C_v} = \frac{5}{3} \) are mixed with 3 moles of another ideal gas with \( \frac{C_p}{C_v} = \frac{4}{3} \). The value of \( \frac{C_p}{C_v} \) for the mixture is

  • (A) 1.5
  • (B) 1.42
  • (C) 1.48
  • (D) 1.6
Correct Answer: (B) 1.42
View Solution


Step 1: Understanding the Question:

The problem requires us to find the ratio of specific heat capacities \( \gamma_{mix} = \frac{C_{p,mix}}{C_{v,mix}} \) when 2 moles of a monoatomic-like gas (\( \gamma_1 = \frac{5}{3} \)) are mixed with 3 moles of a polyatomic-like gas (\( \gamma_2 = \frac{4}{3} \)).


Step 2: Key Formula or Approach:

1. Molar heat capacity at constant volume \( C_v \) for each gas:
\[ C_v = \frac{R}{\gamma - 1} \]

2. Molar heat capacity at constant pressure \( C_p \) for each gas:
\[ C_p = C_v + R \]

3. For a mixture of gases:
\[ C_{v,mix} = \frac{n_1 C_{v1} + n_2 C_{v2}}{n_1 + n_2} \]
\[ C_{p,mix} = \frac{n_1 C_{p1} + n_2 C_{p2}}{n_1 + n_2} \]
\[ \gamma_{mix} = \frac{C_{p,mix}}{C_{v,mix}} \]


Step 3: Detailed Explanation:

- For Gas 1: \( n_1 = 2 \), \( \gamma_1 = \frac{5}{3} \)
\[ C_{v1} = \frac{R}{\frac{5}{3} - 1} = \frac{3}{2} R \]
\[ C_{p1} = \frac{3}{2} R + R = \frac{5}{2} R \]

- For Gas 2: \( n_2 = 3 \), \( \gamma_2 = \frac{4}{3} \)
\[ C_{v2} = \frac{R}{\frac{4}{3} - 1} = 3 R \]
\[ C_{p2} = 3 R + R = 4 R \]

- For the Mixture:

Calculate \( C_{v,mix} \):
\[ C_{v,mix} = \frac{2 \left(\frac{3}{2} R\right) + 3 (3 R)}{2 + 3} = \frac{3R + 9R}{5} = \frac{12}{5} R \]

Calculate \( C_{p,mix} \):
\[ C_{p,mix} = \frac{2 \left(\frac{5}{2} R\right) + 3 (4 R)}{2 + 3} = \frac{5R + 12R}{5} = \frac{17}{5} R \]

Now, calculate \( \gamma_{mix} \):
\[ \gamma_{mix} = \frac{C_{p,mix}}{C_{v,mix}} = \frac{\frac{17}{5} R}{\frac{12}{5} R} = \frac{17}{12} \approx 1.4167 \approx 1.42 \]


Step 4: Final Answer:

The value of \( \frac{C_p}{C_v} \) for the mixture is approximately 1.42.
Quick Tip: Instead of calculating \( C_p \) and \( C_v \) separately, you can use the direct formula for the mixture ratio \( \gamma_{mix} \):
\[ \frac{n_1 + n_2}{\gamma_{mix} - 1} = \frac{n_1}{\gamma_1 - 1} + \frac{n_2}{\gamma_2 - 1} \]
Substituting the values gives:
\[ \frac{5}{\gamma_{mix} - 1} = \frac{2}{2/3} + \frac{3}{1/3} = 3 + 9 = 12 \implies \gamma_{mix} - 1 = \frac{5}{12} \implies \gamma_{mix} = \frac{17}{12} \approx 1.42 \]
This direct formula is much faster and less prone to calculation errors.


Question 34:

The de-Broglie wavelength of an electron in 4th orbit is (where \( r \) = radius of the 1st orbit)

  • (A) \( 2\pi r \)
  • (B) \( 4\pi r \)
  • (C) \( 8\pi r \)
  • (D) \( 16\pi r \)
Correct Answer: (C) \( 8\pi r \)
View Solution


Step 1: Understanding the Question:

The problem asks for the de-Broglie wavelength \( \lambda \) of an electron orbiting in the 4th Bohr orbit of a hydrogen atom, in terms of the radius \( r \) of the 1st orbit.


Step 2: Key Formula or Approach:

1. Bohr's Quantization Condition (as a standing wave):
\[ 2\pi r_n = n \lambda \implies \lambda = \frac{2\pi r_n}{n} \]

where \( r_n \) is the radius of the \( n \)-th orbit and \( n \) is the principal quantum number.

2. Radius of the \( n \)-th Bohr orbit:
\[ r_n = r_1 \cdot n^2 = r \cdot n^2 \]


Step 3: Detailed Explanation:

1. For the 4th orbit (\( n = 4 \)):

The radius \( r_4 \) is:
\[ r_4 = r \cdot 4^2 = 16 r \]

2. Substituting \( r_4 \) and \( n = 4 \) into Bohr's quantization formula:
\[ 2\pi r_4 = 4 \lambda \]
\[ 2\pi (16 r) = 4 \lambda \]
\[ \lambda = \frac{32\pi r}{4} = 8\pi r \]


Step 4: Final Answer:

The de-Broglie wavelength of the electron in the 4th orbit is \( 8\pi r \).
Quick Tip: The general formula for the de-Broglie wavelength in the \( n \)-th orbit is \( \lambda = 2\pi r n \). Since the orbit radius grows quadratically with \( n \) and the wavelength is \( \frac{2\pi r_n}{n} \), the wavelength increases linearly with \( n \) as \( \lambda_n = n \cdot \lambda_1 \). Since \( \lambda_1 = 2\pi r \), for \( n = 4 \) the wavelength is simply \( 4 \times 2\pi r = 8\pi r \).


Question 35:

The circuit has two oppositely connected ideal diodes in parallel as shown in the figure. What is the current flowing in the circuit?


  • (A) 1.33A
  • (B) 1.71A
  • (C) 2.00A
  • (D) 2.31A
Correct Answer: (C) 2.00A
View Solution


Step 1: Understanding the Question:

The circuit consists of a \( 12 V \) battery, a series resistor of \( 4\ \Omega \), and two parallel branches, each containing an ideal diode and a resistor. We need to determine the total current flowing in the circuit.


Step 2: Key Formula or Approach:

1. Ideal Diode Behavior:

- In forward bias, an ideal diode behaves as a short circuit (closed switch, \( R_D = 0 \)).

- In reverse bias, an ideal diode behaves as an open circuit (open switch, \( R_D = \infty \)).

2. Ohm's Law:
\[ I = \frac{V}{R_{eq}} \]


Step 3: Detailed Explanation:

- The positive terminal of the \( 12 V \) battery is at the top, so current tends to flow clockwise through the circuit, entering the parallel branch from the top.

- Analyzing Diode \( D_1 \): The diode \( D_1 \) is oriented with its cathode pointing upwards (anode on the bottom). Since current tries to flow from top to bottom, \( D_1 \) is reverse-biased. Thus, it acts as an open circuit, and no current flows through the \( 3\ \Omega \) branch.

- Analyzing Diode \( D_2 \): The diode \( D_2 \) is oriented with its anode pointing upwards (cathode on the bottom). Since current flows from top to bottom, \( D_2 \) is forward-biased. It acts as a short circuit, allowing current to flow freely through the \( 2\ \Omega \) branch.

- Therefore, the active path of the circuit consists only of the \( 4\ \Omega \) resistor and the \( 2\ \Omega \) resistor in series.

- Calculate the equivalent resistance of the circuit:
\[ R_{eq} = 4\ \Omega + 2\ \Omega = 6\ \Omega \]

- Calculate the total current \( I \):
\[ I = \frac{V}{R_{eq}} = \frac{12 V}{6\ \Omega} = 2.00 A \]


Step 4: Final Answer:

The current flowing in the circuit is 2.00A.
Quick Tip: To analyze diode circuits quickly, replace each ideal diode with a switch: open if the diode points against the conventional current flow (from positive to negative terminal), and closed if it points along the current flow. This simplifies the schematic into a standard resistor network instantly.


Question 36:

The displacement current flows through a capacitor when the voltage across its plates

  • (A) becomes zero
  • (B) is increasing with time
  • (C) is decreasing with time
  • (D) attains a constant value
Correct Answer: (B) is increasing with time, (C) is decreasing with time
View Solution


Step 1: Understanding the Question:

The question asks under what conditions a displacement current flows through a parallel plate capacitor, based on the behavior of the voltage across its plates.


Step 2: Key Formula or Approach:

The displacement current \( I_d \) inside a capacitor of capacitance \( C \) is related to the time-varying electric flux \( \Phi_E \), which in turn depends on the voltage \( V(t) \) across its plates:
\[ I_d = \varepsilon_0 \frac{d\Phi_E}{dt} \]

Since \( E = \frac{V}{d} \) and \( \Phi_E = E A = \frac{V A}{d} \):
\[ I_d = \varepsilon_0 \frac{A}{d} \frac{dV}{dt} = C \frac{dV}{dt} \]

Thus, the displacement current is directly proportional to the rate of change of the voltage \( \frac{dV}{dt} \).


Step 3: Detailed Explanation:

From the relation \( I_d = C \frac{dV}{dt} \):

- If the voltage \( V \) is constant with time, then \( \frac{dV}{dt} = 0 \), and the displacement current is zero.

- If the voltage \( V \) is increasing with time, then \( \frac{dV}{dt} > 0 \), resulting in a positive, non-zero displacement current flowing through the capacitor. Thus, option (B) is correct.

- If the voltage \( V \) is decreasing with time, then \( \frac{dV}{dt} < 0 \), resulting in a negative, non-zero displacement current flowing through the capacitor (current in the reverse direction). Thus, option (C) is correct.

Therefore, a displacement current flows whenever the voltage across the capacitor is changing with time, i.e., when it is either increasing or decreasing.


Step 4: Final Answer:

The displacement current flows when the voltage is increasing with time (option B) or decreasing with time (option C).
Quick Tip: Remember that displacement current behaves exactly like conduction current in terms of completing the circuit loop. Since a capacitor blocks steady DC (where voltage is constant) but allows AC (where voltage is continuously changing), displacement current only exists when the electric field (and hence the voltage) is changing with time.


Question 37:

For Boolean variables A and B, \( A \oplus B = A\bar{B} + \bar{A}B \). Then, which of the following statements is/are correct?

  • (A) \( 1 \oplus A = \bar{A} \)
  • (B) \( A \oplus A = 0 \)
  • (C) \( 0 \oplus A = 0 \)
  • (D) \( A \oplus \bar{A} = 1 \)
Correct Answer: (A) \( 1 \oplus A = \bar{A} \), (B) \( A \oplus A = 0 \), (D) \( A \oplus \bar{A} = 1 \)
View Solution


Step 1: Understanding the Question:

The problem defines the XOR (exclusive OR) operation \( \oplus \) for Boolean variables and asks us to identify the correct statements from the given algebraic identities.


Step 2: Key Formula or Approach:

We will evaluate the XOR expression \( X \oplus Y = X\bar{Y} + \bar{X}Y \) for each statement using basic Boolean algebra laws:

- Identity law: \( X \cdot 1 = X \) and \( X \cdot 0 = 0 \)

- Complementarity law: \( X \cdot \bar{X} = 0 \) and \( X + \bar{X} = 1 \)

- Involution (Double Negation): \( \overline{(\bar{X})} = X \)


Step 3: Detailed Explanation:

Let's check each statement:

- Option (A): \( 1 \oplus A \)
\[ 1 \oplus A = 1 \cdot \bar{A} + \bar{1} \cdot A \]

Since \( \bar{1} = 0 \):
\[ 1 \oplus A = \bar{A} + 0 \cdot A = \bar{A} \]

This statement is correct.

- Option (B): \( A \oplus A \)
\[ A \oplus A = A \cdot \bar{A} + \bar{A} \cdot A \]

Since \( A \cdot \bar{A} = 0 \):
\[ A \oplus A = 0 + 0 = 0 \]

This statement is correct.

- Option (C): \( 0 \oplus A \)
\[ 0 \oplus A = 0 \cdot \bar{A} + \bar{0} \cdot A \]

Since \( \bar{0} = 1 \):
\[ 0 \oplus A = 0 + 1 \cdot A = A \]

The option states \( 0 \oplus A = 0 \), which is incorrect.

- Option (D): \( A \oplus \bar{A} \)
\[ A \oplus \bar{A} = A \cdot \overline{(\bar{A})} + \bar{A} \cdot A \]

Since \( \overline{(\bar{A})} = A \):
\[ A \oplus \bar{A} = A \cdot A + 0 = A + \bar{A} = 1 \]

This statement is correct.


Step 4: Final Answer:

The correct statements are (A), (B), and (D).
Quick Tip: XOR is a "difference detector". It outputs 1 only when the two inputs are different:
- \( A \oplus A \): Inputs are identical, so output is always 0 (Statement B is correct).
- \( A \oplus \bar{A} \): Inputs are always opposite, so output is always 1 (Statement D is correct).
- \( 1 \oplus A \): Output is the invert of \( A \) (Statement A is correct).
This conceptual shortcut avoids algebraic derivations.


Question 38:

Two points of monochromatic and coherent sources of light of wavelength \( \lambda \) each, are placed as shown in figure. The initial phase difference between the sources is zero, (\( D \gg d \)). Mark the correct statement(s).


  • (A) If \( d = \frac{7\lambda}{2} \), O will be a minima
  • (B) If \( d = \lambda \), only one maxima can be observed on the screen
  • (C) If \( d = 4.8\lambda \), then total 5 minima would be there on the screen
  • (D) If \( d = \lambda \), the intensity at O would be minimum
Correct Answer: (A) If \( d = \frac{7\lambda}{2} \), O will be a minima, (B) If \( d = \lambda \), only one maxima can be observed on the screen, (C) If \( d = 4.8\lambda \), then total 5 minima would be there on the screen
View Solution


Step 1: Understanding the Question:

The diagram shows two coherent sources \( S_1 \) and \( S_2 \) aligned along the axis perpendicular to the screen. This coaxial arrangement produces circular interference fringes centered at point \( O \) on the screen. We need to evaluate the positions of constructive (maxima) and destructive (minima) interference.


Step 2: Key Formula or Approach:

1. At any point \( P \) on the screen making an angle \( \theta \) with the axis of the sources:

The path difference between the waves is:
\[ \Delta x \approx d \cos\theta \]

2. At the central point \( O \) (\( \theta = 0^\circ \)), the path difference is maximum:
\[ \Delta x(O) = d \]

3. As we move radially outwards from \( O \) on the screen, \( \theta \) increases from \( 0^\circ \), so \( \cos\theta \) decreases. Therefore, the path difference decreases from \( d \) at \( O \) to \( 0 \) at infinity:
\[ 0 < \Delta x \le d \]

4. Condition for a minimum (destructive interference):
\[ \Delta x = (m - 0.5)\lambda \quad for m = 1, 2, 3, \dots \]

5. Condition for a maximum (constructive interference):
\[ \Delta x = m\lambda \quad for m = 0, 1, 2, \dots \]


Step 3: Detailed Explanation:

Let's analyze each statement:

- Option (A): If \( d = \frac{7\lambda}{2} = 3.5\lambda \).

The path difference at \( O \) is \( \Delta x(O) = 3.5\lambda \). Since this is an odd multiple of \( \frac{\lambda}{2} \), destructive interference occurs at \( O \). Thus, \( O \) is a minimum. Statement (A) is correct.

- Option (B): If \( d = \lambda \).

The path difference on the screen lies in the range \( 0 < \Delta x \le \lambda \).

Within this range, the only constructive interference value is \( \Delta x = \lambda \), which occurs uniquely at point \( O \). (The value \( \Delta x = 0 \) is at infinity). Thus, only one maximum (at \( O \)) can be observed. Statement (B) is correct.

- Option (C): If \( d = 4.8\lambda \).

The path difference on the screen is in the range \( 0 < \Delta x \le 4.8\lambda \).

The possible values for destructive interference (minima) within this interval are:
\[ \Delta x \in \{ 0.5\lambda, 1.5\lambda, 2.5\lambda, 3.5\lambda, 4.5\lambda \} \]

Each of these 5 distinct path differences corresponds to a concentric circular minimum ring on the screen. Therefore, a total of 5 circular minima are observed. Statement (C) is correct.

- Option (D): If \( d = \lambda \).

The path difference at \( O \) is \( \Delta x(O) = d = \lambda \), which is an integer multiple of \( \lambda \). This leads to constructive interference, so the intensity at \( O \) is maximum. Statement (D) is incorrect.


Step 4: Final Answer:

The correct statements are (A), (B), and (C).
Quick Tip: For circular interference fringes produced by coaxial sources, the path difference decreases as you move away from the center. To find the number of minima, simply find the number of half-integral wavelengths that are less than or equal to the separation distance \( d \). For example, if \( d = 4.8\lambda \), the half-integers are \( 0.5, 1.5, 2.5, 3.5, 4.5 \), immediately giving 5 minima.


Question 39:

Which of the velocity-time \( (v-t) \) graph(s) can possibly represent one-dimensional motion of a particle?


Fig A


Fig B


Fig C


Fig D

  • (A) Fig A
  • (B) Fig B
  • (C) Fig C
  • (D) Fig D
Correct Answer: (A), (D)
View Solution


Step 1: Understanding the Question:

The question asks us to determine which of the given velocity-time \( (v-t) \) graphs can represent a physically possible one-dimensional motion of a particle.


Step 2: Key Formula or Approach:

For any real, physical one-dimensional motion:

- Time \( t \) is a continuously and monotonically increasing variable (it only moves forward).

- At any unique instant of time \( t \), a particle can have only one unique value of velocity. Thus, velocity must be a single-valued function of time.

- Graphically, this means the curve must pass the "vertical line test" (any vertical line drawn parallel to the velocity axis must intersect the curve at most once).


Step 3: Detailed Explanation:

Let's analyze each graph:

- Graph (A): Every vertical line intersects the curve at exactly one point. Velocity is a single-valued function of time, which is physically possible. Thus, (A) is correct.

- Graph (B): The curve loops back on itself. A vertical line can intersect the curve at more than one point, meaning the particle would possess multiple different velocities at a single instant of time. This is physically impossible. Thus, (B) is incorrect.

- Graph (C): Similarly, the curve is S-shaped/looped, failing the vertical line test. It indicates multiple velocities at the same instant of time, which is physically impossible. Thus, (C) is incorrect.

- Graph (D): Every vertical line intersects the curve at exactly one point. Velocity is single-valued and decreases smoothly over time, which is physically possible. Thus, (D) is correct.


Step 4: Final Answer:

The graphs that can represent physical one-dimensional motion are (A) and (D).
Quick Tip: To quickly test if any coordinate graph (like \( v-t \), \( s-t \), or \( a-t \)) is physically possible, draw a vertical line representing a single instant of time. If the line crosses the curve more than once, the graph is physically impossible because a particle cannot be in two states or positions at the exact same instant.


Question 40:

The moment of inertia of a thin disc about axes \( a, b, c, d \) are \( I_1, I_2, I_3 \) and \( I_4 \) respectively, as shown in figure. If the moment of inertia about an axis passing through the centre and perpendicular to the plane of the disc is I then,


  • (A) \( I = I_1 + I_2 \)
  • (B) \( I = I_3 + I_4 \)
  • (C) \( I = I_1 + I_3 \)
  • (D) \( I = I_1 + I_2 + I_3 + I_4 \)
Correct Answer: (A) \( I = I_1 + I_2 \), (B) \( I = I_3 + I_4 \), (C) \( I = I_1 + I_3 \)
View Solution


Step 1: Understanding the Question:

We are given a thin circular disc and four coplanar axes \( a, b, c, d \) passing through its center \( O \). We need to determine the relationships between their respective moments of inertia \( I_1, I_2, I_3, I_4 \) and the polar moment of inertia \( I \) (about the axis perpendicular to the disc through its center).


Step 2: Key Formula or Approach:

1. Perpendicular Axis Theorem: For a planar laminar body, the moment of inertia about an axis perpendicular to its plane (\( I_z \)) is equal to the sum of the moments of inertia about any two mutually perpendicular axes in its plane (\( I_x \) and \( I_y \)) intersecting at the same point:
\[ I_z = I_x + I_y \]

2. Symmetry of a Circular Disc: Due to the circular symmetry of the disc, the moment of inertia about any diameter is identical:
\[ I_{diameter} = \frac{1}{4} M R^2 \]


Step 3: Detailed Explanation:

Let the mass of the disc be \( M \) and its radius be \( R \).

- The moment of inertia about the perpendicular axis is:
\[ I = \frac{1}{2} M R^2 \]

- Since all four axes \( a, b, c, d \) are diametrical axes lying in the plane of the disc, by symmetry, their individual moments of inertia are equal:
\[ I_1 = I_2 = I_3 = I_4 = \frac{1}{4} M R^2 \]

Let's evaluate each option:

- Option (A): The axes \( a \) and \( b \) are mutually perpendicular in the plane of the disc. By the Perpendicular Axis Theorem:
\[ I = I_1 + I_2 \]

This is correct.

- Option (B): The axes \( c \) (horizontal) and \( d \) (vertical) are mutually perpendicular in the plane of the disc. By the Perpendicular Axis Theorem:
\[ I = I_3 + I_4 \]

This is correct.

- Option (C): Although axes \( a \) and \( c \) are not perpendicular, since \( I_1 = I_3 = \frac{1}{4} M R^2 \), their sum is:
\[ I_1 + I_3 = \frac{1}{4} M R^2 + \frac{1}{4} M R^2 = \frac{1}{2} M R^2 = I \]

Thus, numerically, \( I = I_1 + I_3 \) is also correct due to the circular symmetry of the disc.


Step 4: Final Answer:

Options (A), (B), and (C) are all correct.
Quick Tip: For highly symmetric 2D objects like a circular disc or a square plate, the moment of inertia about any diametrical axis in the plane of the object is constant. This means any pair of perpendicular (or even non-perpendicular, but symmetrically equal) coplanar diametrical axes will sum up to give the perpendicular polar moment of inertia.


Question 41:

The major products U and V in the following reaction are


Fig A


Fig B


Fig C


Fig D

  • (A) Fig A
  • (B) Fig B
  • (C) Fig C
  • (D) Fig D
Correct Answer: (C)
View Solution


Step 1: Understanding the Question:

We are given two different reaction pathways starting from phenol to form major products U and V. This tests the regioselectivity (O-alkylation vs. C-alkylation) of phenoxide ions under different solvent and counter-ion conditions.


Step 2: Key Formula or Approach:

The phenoxide ion is an ambident nucleophile that can attack electrophiles via its oxygen atom (O-alkylation) or its ortho/para carbon atoms (C-alkylation):

- Polar Aprotic Solvents (like acetone): The phenoxide oxygen is weakly solvated and highly nucleophilic. Thus, reaction with \( K_2CO_3 \) in acetone leads to rapid O-alkylation.

- Non-polar Solvents (like benzene) with coordinating cations: The alkali metal phenoxide (formed by \( KOH \)) forms tight ion-pairs in non-polar solvents. The oxygen is shielded by the metal cation, directing the electrophile to attack the nucleophilic ortho-carbon, leading to C-alkylation.


Step 3: Detailed Explanation:

1. Reaction to form U:

Phenol is treated with 1-bromo-3-methylbut-2-ene in the presence of \( K_2CO_3 \) in acetone. Since acetone is a polar aprotic solvent, the free phenoxide oxygen nucleophilically attacks the allylic halide via an \( S_{N}2 \) pathway, resulting in O-alkylation. The major product U is the corresponding ether:
\[ C_6H_5-O-CH_2-CH=C(CH_3)_2 \]

2. Reaction to form V:

Phenol is treated with \( KOH \) and allyl bromide in benzene. In a non-polar solvent like benzene, the potassium phenoxide forms tight ion pairs, shielding the oxygen atom. This promotes electrophilic attack at the ortho-carbon of the benzene ring, resulting in C-alkylation. The major product V is:
\[ o-allylphenol \quad (2-allylphenol) \]

This matches the structures shown in option (C).


Step 4: Final Answer:

The major products U and V are given in option (C).
Quick Tip: To remember this rule: "Polar Aprotic Solvents promote O-alkylation (Ether formation), while Non-polar Solvents with coordinating bases favor C-alkylation (Phenol ring substitution)." This is a classic advanced organic chemistry concept frequently tested in competitive exams.


Question 42:

Among \( N_2O \), \( ClF_2^- \), \( SO_2 \) and \( I_3^+ \), the species having the linear structures are

  • (A) \( N_2O \), \( ClF_2^- \)
  • (B) \( ClF_2^- \), \( I_3^+ \)
  • (C) \( I_3^+ \), \( SO_2 \)
  • (D) \( N_2O \), \( SO_2 \)
Correct Answer: (A) \( \text{N}_2\text{O} \), \( \text{ClF}_2^- \)
View Solution


Step 1: Understanding the Question:

The question asks us to identify the chemical species that possess a linear molecular geometry from the given list of molecules and ions.


Step 2: Key Formula or Approach:

We will use the Valence Shell Electron Pair Repulsion (VSEPR) theory to determine the hybridization and molecular geometry of each species:

- Find the steric number of the central atom:
\[ Steric Number = Number of \sigma-bonds + Number of lone pairs \]


Step 3: Detailed Explanation:

1. \( N_2O \) (Nitrous Oxide):

The central nitrogen atom forms one triple bond with another nitrogen atom and one single dative bond with an oxygen atom (represented as \( N \equiv N \rightarrow O \)). It has 2 \( \sigma \)-bonds and 0 lone pairs. Thus, the central atom is \( sp \)-hybridized, resulting in a linear structure.

2. \( ClF_2^- \):

The central chlorine atom has 7 valence electrons plus 1 additional electron from the negative charge, giving 8 valence electrons. It forms 2 \( \sigma \)-bonds with fluorine atoms, leaving 6 non-bonding electrons (3 lone pairs).

- Steric Number = \( 2 + 3 = 5 \) (\( sp^3d \) hybridization).

- To minimize repulsion, the 3 lone pairs occupy the equatorial positions, and the 2 fluorine atoms occupy the axial positions, yielding a linear geometry.

3. \( SO_2 \):

The central sulfur atom (6 valence electrons) forms 2 \( \sigma \)-bonds (via double bonds with oxygen) and has 1 lone pair.

- Steric Number = \( 2 + 1 = 3 \) (\( sp^2 \) hybridization).

- This results in a bent / V-shaped geometry.

4. \( I_3^+ \):

The central iodine atom (7 valence electrons minus 1 from the positive charge, so 6 valence electrons) forms 2 \( \sigma \)-bonds with the other iodine atoms, leaving 4 non-bonding electrons (2 lone pairs).

- Steric Number = \( 2 + 2 = 4 \) (\( sp^3 \) hybridization).

- This results in a bent / V-shaped geometry.


Step 4: Final Answer:

The linear species are \( N_2O \) and \( ClF_2^- \), which corresponds to option (A).
Quick Tip: For triatomic species, look at the steric number and lone pairs on the central atom. A steric number of 2 (with 0 lone pairs) or 5 (with 3 equatorial lone pairs) always corresponds to a linear geometry.


Question 43:

In the following sequence of reactions, what is the end product 'Z'?


Fig A


Fig B


Fig C


Fig D

  • (A) Fig A
  • (B) Fig B
  • (C) Fig C
  • (D) Fig D
Correct Answer: (C)
View Solution


Step 1: Understanding the Question:

The question presents a three-step reaction sequence starting from a methyl ketone derivative (cyclohexyl methyl ketone) to identify the final organic product Z.


Step 2: Key Formula or Approach:

We will analyze the chemical transformation at each step:

1. Reaction with \( PCl_5 \): Converts a ketone into a gem-dichloride.

2. Reaction with excess \( NaNH_2 \) followed by acidic workup: Elimination of HCl from the gem-dichloride yields a terminal alkyne.

3. Hydroboration-Oxidation of alkyne: Anti-Markovnikov addition of water across the triple bond yields an enol intermediate, which tautomerizes to form an aldehyde.


Step 3: Detailed Explanation:

1. Step 1 (\( Ketone \rightarrow X \)):

The starting methyl ketone, cyclohexyl methyl ketone (\( R-CO-CH_3 \), where \( R = cyclohexyl \)), reacts with \( PCl_5 \) at \( 0^\circC \) to yield a gem-dichloride:
\[ R-CO-CH_3 \xrightarrow{PCl_5} R-CCl_2-CH_3 \quad (X) \]

2. Step 2 (\( X \rightarrow Y \)):

Treating the gem-dichloride \( X \) with strong base \( NaNH_2 \) causes double dehydrohalogenation (loss of two \( HCl \) molecules) to form a sodium acetylide salt, which upon subsequent protonation by \( H_3O^+ \) yields a terminal alkyne:
\[ R-CCl_2-CH_3 \xrightarrow{1. NaNH_2 (excess); \ 2. H_3O^+} R-C≡CH \quad (Y) \]

3. Step 3 (\( Y \rightarrow Z \)):

Hydroboration-oxidation of the terminal alkyne \( Y \) using diborane (\( B_2H_6 \)) followed by alkaline hydrogen peroxide (\( H_2O_2/OH^- \)) proceeds with anti-Markovnikov regioselectivity to form an enol intermediate:
\[ R-C≡CH \xrightarrow{1. B_2H_6; \ 2. H_2O_2/OH^-} [ R-CH=CH-OH ] \]

The enol rapidly tautomerizes to the more stable carbonyl form, which is an aldehyde:
\[ [ R-CH=CH-OH ] \xrightarrow{tautomerism} R-CH_2-CHO \quad (Z) \]

This matches the structure shown in option (C).


Step 4: Final Answer:

The final product Z is the aldehyde shown in option (C).
Quick Tip: Remember these general conversions for terminal alkynes:
- Hydroboration-oxidation (\( 1. B_2H_6; \ 2. H_2O_2/OH^- \)) yields an aldehyde (anti-Markovnikov addition).
- Acid-catalyzed hydration (\( Hg^{2+}/H_2SO_4 \)) yields a ketone (Markovnikov addition).


Question 44:

A compound (X) when treated with \( CuSO_4 \) solution yields a brown precipitate. On adding hypo solution the precipitate turns white. The compound (X) is

  • (A) \( KBr \)
  • (B) \( K_2CrO_3 \)
  • (C) \( KI \)
  • (D) \( K_3PO_4 \)
Correct Answer: (C) \( \text{KI} \)
View Solution


Step 1: Understanding the Question:

The question describes a qualitative analysis test where an unknown compound X reacts with copper(II) sulfate to form a brown precipitate, which then decolors/turns white upon addition of sodium thiosulfate (hypo) solution. We need to identify X.


Step 2: Key Formula or Approach:

The reactions of halide ions with transition metal cations are highly characteristic:

- Copper(II) ions (\( Cu^{2+} \)) oxidize iodide ions (\( I^- \)) to elemental iodine (\( I_2 \)) while being reduced to insoluble white copper(I) iodide (\( CuI \)).

- Sodium thiosulfate (\( Na_2S_2O_3 \), hypo) is a reducing agent that reduces brown \( I_2 \) to colorless \( I^- \).


Step 3: Detailed Explanation:

1. Reaction with \( CuSO_4 \):

When \( CuSO_4 \) is mixed with potassium iodide (\( KI \)), cupric ions (\( Cu^{2+} \)) oxidize the iodide ions:
\[ 2Cu^{2+} + 4I^- \rightarrow 2CuI \downarrow (white precipitate) + I_2 (brown solution) \]

The mixture of the white \( CuI \) precipitate and the liberated brown iodine (\( I_2 \)) appears visually as a brown precipitate/suspension.

2. Reaction with Hypo:

When sodium thiosulfate (hypo) is added, it reduces the brown iodine to colorless iodide ions, forming tetrathionate ions:
\[ I_2 + 2S_2O_3^{2-} \rightarrow 2I^- + S_4O_6^{2-} (colorless) \]

Once the brown color of iodine is discharged, the insoluble white precipitate of copper(I) iodide (\( CuI \)) becomes clearly visible. This explains why the precipitate "turns white".


Step 4: Final Answer:

The compound (X) is potassium iodide, \( KI \), which corresponds to option (C).
Quick Tip: This is a standard volumetric/qualitative test for copper. Remember that \( Cu^{2+} \) does not form a stable \( CuI_2 \) because \( I^- \) is a strong reducing agent and easily reduces \( Cu^{2+} \) to \( Cu^+ \) while being oxidized to \( I_2 \).


Question 45:

Three engines A, B and C take steam at \( 130^°C \) and reject it at \( 20^°C \), \( 40^°C \) and \( 50^°C \) respectively. The most efficient engine will be

  • (A) A
  • (B) B
  • (C) C
  • (D) All the three engines will be equally efficient
Correct Answer: (A) A
View Solution


Step 1: Understanding the Question:

The problem compares the efficiency of three heat engines operating between a common source temperature and different sink temperatures. We need to find which engine is the most efficient.


Step 2: Key Formula or Approach:

The maximum theoretical efficiency (\( \eta \)) of a heat engine is given by the Carnot efficiency formula:
\[ \eta = 1 - \frac{T_C}{T_H} \]

where:

- \( T_H \) is the absolute temperature of the hot reservoir (source) in Kelvin.

- \( T_C \) is the absolute temperature of the cold reservoir (sink) in Kelvin.


Step 3: Detailed Explanation:

1. All three engines take steam at the same source temperature \( T_H \):
\[ T_H = 130^°C = 130 + 273.15 = 403.15 K \]

2. Convert the sink temperatures of the three engines to Kelvin:

- Engine A: \( T_{C,A} = 20^°C = 20 + 273.15 = 293.15 K \)

- Engine B: \( T_{C,B} = 40^°C = 40 + 273.15 = 313.15 K \)

- Engine C: \( T_{C,C} = 50^°C = 50 + 273.15 = 323.15 K \)

3. Analyze the efficiency relation:

For a constant \( T_H \), the efficiency \( \eta = 1 - \frac{T_C}{T_H} \) increases as the sink temperature \( T_C \) decreases.

- Since Engine A has the lowest sink temperature (\( T_{C,A} = 20^°C \)), the ratio \( \frac{T_C}{T_H} \) is minimized, thereby maximizing the efficiency \( \eta \).

Thus, Engine A is the most efficient engine.


Step 4: Final Answer:

The most efficient engine is A, which corresponds to option (A).
Quick Tip: For any heat engine, to maximize its efficiency, you should either increase the temperature of the source (\( T_H \)) or decrease the temperature of the sink (\( T_C \)). Therefore, the engine with the largest temperature difference (\( T_H - T_C \)) is always the most efficient.


Question 46:

In a conductance experiment, aqueous \( AgNO_3 \) solution is added to aqueous \( KCl \) solution gradually and simultaneously the molar conductivity (\( \lambda_m \)) is measured. The correct plot of \( \lambda_m \) versus volume of \( AgNO_3 \) solution is

Fig A


Fig B


Fig C


Fig D

  • (A) Fig A
  • (B) Fig B
  • (C) Fig C
  • (D) Fig D
Correct Answer: (D)
View Solution


Step 1: Understanding the Question:

The question asks for the correct conductometric titration curve representing how the molar conductivity (\( \lambda_m \)) of the solution changes as aqueous \( AgNO_3 \) is gradually added to a container containing aqueous \( KCl \).


Step 2: Key Formula or Approach:

The conductivity of an electrolyte solution depends on the concentration and individual ionic mobilities (limiting molar conductivities, \( \lambda^\circ \)) of the ions present:

- Precipitation reaction:
\[ KCl(aq) + AgNO_3(aq) \rightarrow AgCl(s) \downarrow + KNO_3(aq) \]

- Keep in mind the limiting ionic conductivities of the participating ions:
\[ \lambda^\circ(Cl^-) = 76.3 \times 10^{-4} S m^2 mol^{-1} \]
\[ \lambda^\circ(NO_3^-) = 71.4 \times 10^{-4} S m^2 mol^{-1} \]


Step 3: Detailed Explanation:

1. Before the Equivalence Point:

As \( AgNO_3 \) is added, highly mobile \( Cl^- \) ions precipitate out of the solution as insoluble \( AgCl(s) \). They are replaced in the solution by \( NO_3^- \) ions of nearly identical (but slightly lower) mobility. The concentration of \( K^+ \) remains constant. Consequently, the molar conductivity (\( \lambda_m \)) remains almost constant, exhibiting only a very slight decrease up to the equivalence point.


2. After the Equivalence Point:

Once all \( Cl^- \) ions are precipitated, any further addition of \( AgNO_3 \) introduces free, highly conducting \( Ag^+ \) and \( NO_3^- \) ions into the solution. This causes a rapid increase in the overall concentration of ions, leading to a steep, sharp increase in the molar conductivity (\( \lambda_m \)).

This behavior is correctly represented by the graph in option (D).


Step 4: Final Answer:

The correct plot of molar conductivity is shown in option (D).
Quick Tip: In precipitation titrations where a highly mobile ion (like \( Cl^- \)) is replaced by another ion of similar mobility (like \( NO_3^- \)), the conductivity curve remains nearly horizontal up to the end point, followed by a sharp rise due to the excess added titrant.


Question 47:

Indicate the major product of the following reaction:


Fig A


Fig B


Fig C


Fig D

  • (A) Fig A
  • (B) Fig B
  • (C) Fig C
  • (D) Fig D
Correct Answer: (C)
View Solution


Step 1: Understanding the Question:

The problem asks for the major product of an elimination reaction of a substituted cyclohexane ring containing a deuterium (D) and a bromine (Br) atom on adjacent carbons, in the presence of a strong base \( CH_3ONa \) in \( CH_3OH \). This is an \( E2 \) elimination reaction.


Step 2: Key Formula or Approach:

For an \( E2 \) elimination to occur in cyclohexyl systems, the leaving group (Br) and the hydrogen/deuterium atom being eliminated must be in a trans-diaxial (anti-periplanar) relationship in the chair conformation.


Step 3: Detailed Explanation:

1. In the starting material, the bromine atom (Br) and the adjacent deuterium atom (D) are in a trans relationship (one is wedged, the other is hashed). This allows them to adopt a trans-diaxial conformation upon chair flipping.

2. Conversely, the adjacent hydrogen atom (H) is cis to the bromine, meaning they cannot adopt the anti-periplanar relationship required for \( E2 \) elimination.

3. Consequently, when treated with the strong base \( CH_3ONa \), the base selectively abstracts the deuterium atom (D) instead of the hydrogen (H) because only the C-D bond is anti-coplanar to the C-Br bond.

4. The elimination of \( DBr \) results in the formation of a double bond between C-1 and C-2, leaving the carbon skeleton intact with the methyl group in its original position and the deuterium completely removed. This corresponds to the product shown in option (C).


Step 4: Final Answer:

The major product of the reaction is given in option (C).
Quick Tip: For \( E2 \) elimination in cyclohexanes, stereochemical control (anti-periplanar requirement) completely overrides thermodynamic control (Zaitsev's rule). Always draw the substituents in a chair conformation to verify which H (or D) is trans-diaxial to the leaving group.


Question 48:

The van’t Hoff Factor (i) for a dilute aqueous solution of \( Na_2SO_4 \) is

  • (A) \( 1 - \alpha \)
  • (B) \( 1 - 2\alpha \)
  • (C) \( 1 + \alpha \)
  • (D) \( 1 + 2\alpha \)
Correct Answer: (D) \( 1 + 2\alpha \)
View Solution


Step 1: Understanding the Question:

We need to determine the expression for the van't Hoff factor (\( i \)) of a dilute sodium sulfate (\( Na_2SO_4 \)) solution in terms of its degree of dissociation (\( \alpha \)).


Step 2: Key Formula or Approach:

The relation between the van't Hoff factor (\( i \)) and the degree of dissociation (\( \alpha \)) for an electrolyte that dissociates into \( n \) ions is:
\[ i = 1 + (n - 1)\alpha \]


Step 3: Detailed Explanation:

1. Sodium sulfate dissociates in aqueous solution according to the equation:
\[ Na_2SO_4(aq) \rightleftharpoons 2Na^+(aq) + SO_4^{2-}(aq) \]

2. Here, one formula unit of \( Na_2SO_4 \) dissociates to produce a total of \( n = 2 + 1 = 3 \) ions.

3. Substituting \( n = 3 \) into the relation:
\[ i = 1 + (3 - 1)\alpha \]
\[ i = 1 + 2\alpha \]


Step 4: Final Answer:

The van’t Hoff Factor (\( i \)) is \( 1 + 2\alpha \), which corresponds to option (D).
Quick Tip: To verify the formula, consider complete dissociation (\( \alpha = 1 \)). For \( Na_2SO_4 \), complete dissociation yields 3 ions, so \( i \) should equal 3. Substituting \( \alpha = 1 \) into the correct option (D) gives \( i = 1 + 2(1) = 3 \), confirming the formula.


Question 49:

Which of the following is the structure of pyrosulphuric acid?

  • (A) \( HOO-S(=O)_2-OH \)
  • (B) \( HO-S(=O)_2-O-O-S(=O)_2-OH \)
  • (C) \( O^--S(=O)_2-OH \)
  • (D) \( HO-S(=O)_2-O-S(=O)_2-OH \)
Correct Answer: (D)
View Solution


Step 1: Understanding the Question:

The question asks to identify the correct chemical structure of pyrosulfuric acid (also known as disulfuric acid or oleum).


Step 2: Key Formula or Approach:

Pyrosulfuric acid has the chemical formula \( H_2S_2O_7 \). It consists of two sulfonic acid groups (\( -SO_3H \)) linked via a central oxygen atom forming an \( S-O-S \) bridge.


Step 3: Detailed Explanation:

Let's analyze the structures given in the options:

- Option (A): Represents peroxymonosulfuric acid (\( H_2SO_5 \), Caro's acid), which contains a peroxo (\( -O-O- \)) group.

- Option (B): Represents peroxodisulfuric acid (\( H_2S_2O_8 \), Marshall's acid), which has an \( S-O-O-S \) peroxide linkage.

- Option (C): Represents a bisulfate ion-like structure.

- Option (D): Shows two \( -SO_2OH \) groups sharing a central bridging oxygen atom (\( S-O-S \) linkage). This matches the formula \( H_2S_2O_7 \) and represents pyrosulfuric acid.


Step 4: Final Answer:

The correct structure of pyrosulfuric acid is shown in option (D).
Quick Tip: The prefix "pyro-" in inorganic acids indicates the loss of one water molecule from two molecules of the parent ortho-acid.
\[ 2H_2SO_4 \xrightarrow{-H_2O} H_2S_2O_7 (Pyrosulfuric acid) \]
This dehydration creates the characteristic \( S-O-S \) anhydride bridge.


Question 50:

Peroxide ion is

  • (A) Paramagnetic
  • (B) Ferromagnetic
  • (C) Diamagnetic
  • (D) Antiferromagnetic
Correct Answer: (C) Diamagnetic
View Solution


Step 1: Understanding the Question:

We need to determine the magnetic behavior (paramagnetic or diamagnetic) of the peroxide ion (\( O_2^{2-} \)).


Step 2: Key Formula or Approach:

We will apply Molecular Orbital (MO) Theory to find the electronic configuration of the diatomic species \( O_2^{2-} \) and count the number of unpaired electrons.


Step 3: Detailed Explanation:

1. The peroxide ion is \( O_2^{2-} \).

2. Total number of electrons = \( 2 \times 8 (from O atoms) + 2 (negative charge) = 18 electrons \).

3. The molecular orbital electronic configuration for an 18-electron diatomic species is:
\[ \sigma_{1s}^2 \ \sigma_{1s}^{*2} \ \sigma_{2s}^2 \ \sigma_{2s}^{*2} \ \sigma_{2p_z}^2 \ \pi_{2p_x}^2 \ \pi_{2p_y}^2 \ \pi_{2p_x}^{*2} \ \pi_{2p_y}^{*2} \]

4. Since all the molecular orbitals (including the anti-bonding \( \pi^* \) orbitals) are completely filled with paired electrons, there are no unpaired electrons present in the peroxide ion.

5. A species with zero unpaired electrons is diamagnetic.


Step 4: Final Answer:

The peroxide ion is diamagnetic, which corresponds to option (C).
Quick Tip: Diatomic species with an even total number of electrons are usually diamagnetic, with the famous exceptions of \( B_2 \) (10 electrons) and \( O_2 \) (16 electrons), which are paramagnetic due to Hund's rule filling of degenerate orbitals. Since \( O_2^{2-} \) has 18 electrons, it is strictly diamagnetic.


Question 51:

How many isomers can a compound with molecular formula \( C_3H_5Br \) have?

  • (A) 2
  • (B) 3
  • (C) 4
  • (D) 5
Correct Answer: (D) 5
View Solution


Step 1: Understanding the Question:

The question asks for the total number of isomers (including both structural and stereoisomers) for the molecular formula \( C_3H_5Br \).


Step 2: Key Formula or Approach:

1. Calculate the Degree of Unsaturation (DU) to determine the structural features (double bonds or rings):
\[ DU = C + 1 - \frac{H + X}{2} \]

where \( C = 3 \), \( H = 5 \), and \( X = 1 (for Br) \).
\[ DU = 3 + 1 - \frac{5 + 1}{2} = 4 - 3 = 1 \]

A DU of 1 indicates either one double bond (acyclic alkene) or one ring (cyclic cyclopropane).


Step 3: Detailed Explanation:

Let's systematically draw all possible isomers:


1. Acyclic structures (Alkenes with one double bond):

The carbon skeleton is a 3-carbon chain: \( C=C-C \).

- Case A: Bromine on C-1 (\( CH(Br)=CH-CH_3 \), 1-bromoprop-1-ene). This compound exhibits geometrical isomerism:

- \textit{Isomer 1: cis-1-bromoprop-1-ene

- \textit{Isomer 2: trans-1-bromoprop-1-ene

- Case B: Bromine on C-2 (\( CH_2=C(Br)-CH_3 \), 2-bromoprop-1-ene). This has no stereoisomers:

- \textit{Isomer 3: 2-bromoprop-1-ene

- Case C: Bromine on C-3 (\( CH_2=CH-CH_2Br \), 3-bromoprop-1-ene / allyl bromide). This has no stereoisomers:

- \textit{Isomer 4: 3-bromoprop-1-ene


2. Cyclic structures (one 3-membered ring):

- The only ring with 3 carbons is a cyclopropane ring. Replacing one H with Br gives:

- \textit{Isomer 5: Bromocyclopropane


Thus, the compound can have a total of 5 isomers.


Step 4: Final Answer:

The total number of isomers is 5, which corresponds to option (D).
Quick Tip: When counting isomers in competitive exams like WBJEE, unless specifically stated as "structural isomers", always include geometrical and optical stereoisomers. Failing to consider the cis/trans isomers of 1-bromoprop-1-ene is a very common source of error.


Question 52:

Which one of the following cations gives a chocolate brown precipitate upon addition of aqueous solution of \(K_4[Fe(CN)_6]\)?

  • (A) \(Fe^{3+}\)
  • (B) \(Cu^{2+}\)
  • (C) \(Zn^{2+}\)
  • (D) \(Ca^{2+}\)
Correct Answer: (B) \(\text{Cu}^{2+}\)
View Solution


Step 1: Understanding the Question:

The question asks us to identify the metal cation that forms a characteristic chocolate brown precipitate when it reacts with an aqueous solution of potassium ferrocyanide, \(K_4[Fe(CN)_6]\).


Step 2: Detailed Explanation:

When copper(II) ions (\(Cu^{2+}\)) react with potassium ferrocyanide, a characteristic chocolate-brown precipitate of copper ferrocyanide is formed.

The chemical equation for this reaction is given by:
\[ 2Cu^{2+}(aq) + [Fe(CN)_6]^{4-}(aq) \rightarrow Cu_2[Fe(CN)_6]\downarrow (Chocolate brown precipitate) \]

Let us look at the other cations for comparison:

- \(Fe^{3+}\) reacts with ferrocyanide to form a deep blue precipitate (Prussian blue), \(Fe_4[Fe(CN)_6]_3\).

- \(Zn^{2+}\) reacts to form a white or grayish-white precipitate of zinc ferrocyanide, \(Zn_2[Fe(CN)_6]\).

- \(Ca^{2+}\) does not form a chocolate brown precipitate with this reagent.

Thus, \(Cu^{2+}\) is the correct cation.


Step 3: Final Answer:

The correct option is (B).
Quick Tip: Potassium ferrocyanide is a classic analytical reagent used to identify transition metal ions:
- \(Cu^{2+}\) gives a chocolate brown precipitate.
- \(Fe^{3+}\) gives a Prussian blue precipitate.
- \(Zn^{2+}\) gives a white precipitate.
Remembering these distinct colors is highly beneficial for qualitative analysis questions.


Question 53:

A compound contains two types of atoms \(A\) and \(B\). Its crystal structure is a cubic lattice with '\(A\)' atoms at the corner of the unit cells and '\(B\)' atoms at the body centres. The simplest formula of the compound will be

  • (A) \(A_2B\)
  • (B) \(AB\)
  • (C) \(AB_2\)
  • (D) \(AB_3\)
Correct Answer: (B) \(AB\)
View Solution


Step 1: Understanding the Question:

We need to find the simplest formula of a crystalline solid compound containing atoms of elements \(A\) and \(B\) arranged in a cubic lattice.


Step 2: Key Formula or Approach:

The contribution of an atom to a unit cell depends on its position in the lattice:

- An atom at a corner of a cubic unit cell is shared by 8 adjacent unit cells, so its contribution to one unit cell is \(\frac{1}{8}\).

- An atom at the body center of a unit cell is not shared by any other unit cell, so its contribution is \(1\).


Step 3: Detailed Explanation:

Let us calculate the number of atoms of \(A\) and \(B\) per unit cell:

- Number of '\(A\)' atoms at the corners = \(8\).

- Effective number of '\(A\)' atoms per unit cell = \(8 \times \frac{1}{8} = 1\).

- Number of '\(B\)' atoms at the body center = \(1\).

- Effective number of '\(B\)' atoms per unit cell = \(1 \times 1 = 1\).

The ratio of atoms of \(A\) to \(B\) in the unit cell is:
\[ A : B = 1 : 1 \]

Therefore, the simplest empirical formula of the compound is \(AB\).


Step 4: Final Answer:

The correct option is (B).
Quick Tip: Always remember the contribution of lattice positions in a cubic unit cell:
- Corner = \(\frac{1}{8}\)
- Face center = \(\frac{1}{2}\)
- Edge center = \(\frac{1}{4}\)
- Body center = \(1\)
Multiplying the number of positions by their contribution directly yields the empirical formula.


Question 54:

The plot of radial probability density (\(4\pi r^2 R^2\)) against \(r\) for an electron in \(np\) orbital of a many electron atom is given below. The value of \(n\) is


  • (A) 2
  • (B) 3
  • (C) 4
  • (D) 5
Correct Answer: (B) 3
View Solution


Step 1: Understanding the Question:

We need to determine the principal quantum number \(n\) for an \(np\) orbital from the given radial probability density curve.


Step 2: Key Formula or Approach:

The number of radial nodes for any given orbital is given by the formula:
\[ Radial Nodes = n - l - 1 \]

Where:

- \(n\) is the principal quantum number.

- \(l\) is the azimuthal quantum number. For a \(p\) orbital, \(l = 1\).


Step 3: Detailed Explanation:

From the given plot of radial probability density (\(4\pi r^2 R^2\)) against \(r\), we count the number of times the curve touches the zero line (excluding \(r = 0\) and \(r \rightarrow \infty\)).

The graph shows exactly one point between the two peaks where the probability density drops to zero.

This means the number of radial nodes is equal to \(1\).

Applying the formula for radial nodes:
\[ Radial Nodes = n - l - 1 = 1 \]

For a \(p\) orbital, \(l = 1\):
\[ n - 1 - 1 = 1 \]
\[ n - 2 = 1 \]
\[ n = 3 \]

Thus, the orbital is \(3p\), and the value of \(n\) is 3.


Step 4: Final Answer:

The correct option is (B).
Quick Tip: On a radial probability distribution plot (\(4\pi r^2 R^2\) vs \(r\)):
- The number of peaks is equal to \(n - l\).
- The number of radial nodes (troughs touching the baseline, excluding the origin) is \(n - l - 1\).
For this plot, there are 2 peaks, so \(n - l = 2\). For a \(p\) orbital (\(l = 1\)), this immediately gives \(n = 3\).


Question 55:

A buffer solution contains 100ml of 0.01(M) \(CH_3COOH\) and 200ml of 0.02(M) \(CH_3COONa\). 700ml of water is added subsequently to the buffer solution. The pH before and after dilution are [given, \(pK_a = 4.74\); \(\log 2 = 0.301\)]

  • (A) 5.04, 5.04
  • (B) 5.04, 0.504
  • (C) 5.04, 1.54
  • (D) 5.34, 5.34
Correct Answer: (D) 5.34, 5.34
View Solution


Step 1: Understanding the Question:

We need to calculate the pH of an acidic buffer solution containing acetic acid and sodium acetate both before and after dilution with water.


Step 2: Key Formula or Approach:

For an acidic buffer, the Henderson-Hasselbalch equation is:
\[ pH = pK_a + \log\left(\frac{[Salt]}{[Acid]}\right) \]

Since both components are in the same volume, the ratio of molar concentrations is equal to the ratio of their millimoles:
\[ pH = pK_a + \log\left(\frac{n_{salt}}{n_{acid}}\right) \]


Step 3: Detailed Explanation:

Let us calculate the millimoles of acetic acid (\(CH_3COOH\)) and sodium acetate (\(CH_3COONa\)):

- Millimoles of weak acid, \(n_{acid} = 100 ml \times 0.01 M = 1.0 mmol\).

- Millimoles of conjugate base (salt), \(n_{salt} = 200 ml \times 0.02 M = 4.0 mmol\).

Now, calculate the pH before dilution using the Henderson-Hasselbalch equation:
\[ pH_{before} = pK_a + \log\left(\frac{4.0}{1.0}\right) \]
\[ pH_{before} = 4.74 + \log(4) \]
\[ pH_{before} = 4.74 + 2\log(2) \]
\[ pH_{before} = 4.74 + 2(0.301) = 4.74 + 0.602 = 5.342 \approx 5.34 \]

Next, let us consider the effect of adding 700 ml of water (dilution):

- Dilution changes the total volume of the solution, but the number of millimoles of the weak acid (\(1.0 mmol\)) and its conjugate base (\(4.0 mmol\)) remains unchanged.

- Since both concentrations are divided by the same new volume (\(1000 ml\)), the ratio \(\frac{[Salt]}{[Acid]}\) remains exactly the same.

- Hence, the pH of a buffer solution remains practically unchanged upon dilution.
\[ pH_{after} = 5.34 \]

Thus, the pH before and after dilution are 5.34 and 5.34 respectively.


Step 4: Final Answer:

The correct option is (D).
Quick Tip: The pH of a buffer solution is determined by the ratio of the conjugate base to the weak acid. Since dilution affects both concentrations equally, the ratio does not change, and the pH remains constant. This is a primary feature of a buffer system.


Question 56:

The correct order of conductivity of 0.001 (M) separate aqueous solutions of \([Pt(NH_3)_6]Cl_4\) (i); \([Cr(NH_3)_6]Cl_3\) (ii); \([Co(NH_3)_4Cl_2]Cl\) (iii)
and \(K_2PtCl_6\) (iv)
each containing octahedral complex species is

  • (A) (i) \(<\) (ii) \(<\) (iii) \(<\) (iv)
  • (B) (i) \(<\) (ii) \(<\) (iv) \(<\) (iii)
  • (C) (i) \(<\) (iv) \(<\) (iii) \(<\) (ii)
  • (D) (iii) \(<\) (iv) \(<\) (ii) \(<\) (i)
Correct Answer: (D) (iii) \(<\) (iv) \(<\) (ii) \(<\) (i)
View Solution


Step 1: Understanding the Question:

The molar conductivity of an electrolyte solution depends on the total number of ions produced per formula unit upon dissociation in water.


Step 2: Key Formula or Approach:

Greater number of ions in solution leads to higher electrical conductivity of the solution at a given concentration.

Let us determine the dissociation of each coordination compound in water.


Step 3: Detailed Explanation:

Let us write down the ionization reactions for each complex:

- (i) \([Pt(NH_3)_6]Cl_4 \rightarrow [Pt(NH_3)_6]^{4+} + 4Cl^-\)

Total number of ions produced = \(1 + 4 = 5\) ions.

- (ii) \([Cr(NH_3)_6]Cl_3 \rightarrow [Cr(NH_3)_6]^{3+} + 3Cl^-\)

Total number of ions produced = \(1 + 3 = 4\) ions.

- (iii) \([Co(NH_3)_4Cl_2]Cl \rightarrow [Co(NH_3)_4Cl_2]^+ + Cl^-\)

Total number of ions produced = \(1 + 1 = 2\) ions.

- (iv) \(K_2PtCl_6 \rightarrow 2K^+ + [PtCl_6]^{2-}\)

Total number of ions produced = \(2 + 1 = 3\) ions.

Now, comparing the number of ions produced by each compound:

- (iii) produces 2 ions.

- (iv) produces 3 ions.

- (ii) produces 4 ions.

- (i) produces 5 ions.

Since conductivity is directly proportional to the number of ions, the order of conductivity is:
\[ (iii) < (iv) < (ii) < (i) \]


Step 4: Final Answer:

The correct option is (D).
Quick Tip: In coordination chemistry, the electrical conductivity of aqueous solutions is a direct measure of the number of charges/ions. Count the species outside the coordination sphere plus the complex sphere itself to determine the total ion count.


Question 57:

Borazole is prepared by heating the product isolated by reacting

  • (A) boron with dinitrogen.
  • (B) diborane with ammonium nitrate.
  • (C) diborane with ammonia.
  • (D) boron with ammonia.
Correct Answer: (C) diborane with ammonia.
View Solution


Step 1: Understanding the Question:

The question asks for the reactants required to prepare borazole (also known as inorganic benzene, \(B_3N_3H_6\)).


Step 2: Detailed Explanation:

Borazole (\(B_3N_3H_6\)) can be prepared by reacting diborane (\(B_2H_6\)) with ammonia (\(NH_3\)) in a \(1:2\) molar ratio at low temperatures to form an addition product (diammoniate of diborane), which on heating to higher temperatures (about \(200^°C\)) decomposes to give borazole:
\[ 3B_2H_6 + 6NH_3 \rightarrow 3[BH_2(NH_3)_2]^+[BH_4]^- \xrightarrow{\Delta, 200^°C} 2B_3N_3H_6 + 12H_2 \]

Alternatively, heating a mixture of diborane and ammonia directly at higher temperatures yields borazole.

Therefore, the reactant pair is diborane with ammonia.


Step 3: Final Answer:

The correct option is (C).
Quick Tip: Borazole (\(B_3N_3H_6\)) is structural and isoelectronic with benzene (\(C_6H_6\)). It is synthesized by the reaction of diborane (\(B_2H_6\)) with ammonia (\(NH_3\)). Another common laboratory synthesis involves reacting \(BCl_3\) with \(NH_4Cl\).


Question 58:

The increasing order of basicity of the following compounds is


  • (A) I \(<\) III \(<\) II
  • (B) III \(<\) I \(<\) II
  • (C) II \(<\) I \(<\) III
  • (D) II \(<\) III \(<\) I
Correct Answer: (A) I \(<\) III \(<\) II
View Solution


Step 1: Understanding the Question:

We need to compare the basicity of the three given nitrogen-containing bicyclic compounds (I, II, and III).


Step 2: Detailed Explanation:

Let us evaluate the availability of the nitrogen lone pair for protonation and the stability of the resulting conjugate acid:

- In compound I: The lone pair of nitrogen is highly conjugated with the adjacent diene system inside the ring. In fact, if we look at the pyrrole-like/cyclopentadiene-like fusion, the nitrogen lone pair is involved in a highly conjugated system, which significantly reduces its availability for protonation, making it the least basic.

- In compound III: There is one double bond conjugated with the amine group (enamine system). The lone pair is partially delocalized, but less so than in the diene conjugated system of I. Therefore, III is more basic than I.

- In compound II: The structure allows for exceptional resonance stabilization of the conjugate acid (protonated form). When protonation occurs on the ring carbon at the terminal end of the conjugated diene system, the positive charge is stabilized through a long-range resonance involving the nitrogen lone pair, which produces a highly stable iminium ion. Alternatively, if we consider direct protonation, the nitrogen's lone pair is coupled with the cyclopentadiene ring in a way that makes the system highly basic (similar to highly basic guanidines or vinylogous systems). This makes II exceptionally basic.

Therefore, the correct increasing order of basicity is:
\[ I < III < II \]


Step 3: Final Answer:

The correct option is (A).
Quick Tip: Basicity of nitrogenous bases is directly proportional to:
1. Availability of the lone pair on the nitrogen atom.
2. Stability of the conjugate acid formed after protonation.
Extended conjugation of the lone pair with double bonds generally decreases direct basicity unless it creates a highly stabilized, symmetric iminium system upon protonation.


Question 59:

The products X and Y in the following reaction sequence are


Fig A

Fig B

Fig C

Fig D

  • (A) Fig A
  • (B) Fig B
  • (C) Fig C
  • (D) Fig D
Correct Answer: (A)
View Solution


Step 1: Understanding the Question:

The reaction sequence involves two steps: first, the Birch reduction of anisole (methoxybenzene) to form product X, followed by a carbene addition reaction with \(CHBr_3\) and \(EtONa\) to form product Y.


Step 2: Detailed Explanation:

In the first step, methoxybenzene (anisole) undergoes Birch reduction using sodium in liquid ammonia (\(Na, liq. NH_3\)) in the presence of ethanol (\(EtOH\)).

Since the methoxy group (\(-OCH_3\)) is an electron-donating group (via resonance, \(+M\) effect), it directs the reduction to the 2,5-positions of the ring, keeping the carbon attached to the \(-OCH_3\) group unreduced.

This yields 1-methoxycyclohexa-1,4-diene as the product X.

In the second step, product X is treated with bromoform (\(CHBr_3\)) and sodium ethoxide (\(EtONa\)).

This reagent combination generates dibromocarbene (\(:CBr_2\)) in situ via \(\alpha\)-elimination.

Dibromocarbene is an electrophilic carbene and selectively adds to the more electron-rich double bond of 1-methoxycyclohexa-1,4-diene.

The double bond bearing the methoxy group (\(-OCH_3\)) is significantly more electron-rich than the other isolated double bond due to the strong \(+M\) effect of the methoxy oxygen.

Therefore, the addition of the carbene occurs exclusively at the \(C=C\) double bond containing the \(-OCH_3\) group to form a fused dibromocyclopropane ring.

This yields the bicyclic product Y, which is 1,1-dibromo-2-methoxybicyclo[4.1.0]hept-3-ene.

Comparing with the options, option (A) correctly represents the structures of X and Y.


Step 3: Final Answer:

The correct option is (A).
Quick Tip: 1. Birch reduction of benzene rings with electron-donating groups (like \(-OCH_3\), \(-CH_3\)) gives non-conjugated 1,4-dienes with the substituent on the double bond.
2. Carbenes are highly electrophilic and always show a strong preference for adding to the more substituted or electron-rich double bond in a molecule.


Question 60:

The van der Waal's equation : \(\left(P + \frac{a}{4V^2}\right)\left(V - \frac{b}{2}\right) = \frac{RT}{2}\) is valid for

  • (A) 1 mole of an ideal gas.
  • (B) 2 moles of a real gas.
  • (C) \(\frac{1}{2}\) mole of an ideal gas.
  • (D) \(\frac{1}{2}\) mole of a real gas.
Correct Answer: (D) \(\frac{1}{2}\) mole of a real gas.
View Solution


Step 1: Understanding the Question:

We need to determine the number of moles (\(n\)) and the type of gas for which the given modified van der Waals equation is valid.


Step 2: Key Formula or Approach:

The standard van der Waals equation for \(n\) moles of a real gas is:
\[ \left(P + \frac{n^2 a}{V^2}\right)(V - nb) = nRT \]

We can compare the coefficients of the given equation to this standard form to solve for \(n\).


Step 3: Detailed Explanation:

The given equation is:
\[ \left(P + \frac{a}{4V^2}\right)\left(V - \frac{b}{2}\right) = \frac{RT}{2} \]

Let us compare each term with the standard equation:

1. Comparing the pressure correction term:
\[ \frac{n^2 a}{V^2} = \frac{a}{4V^2} \implies n^2 = \frac{1}{4} \implies n = \frac{1}{2} \]

2. Comparing the volume correction term:
\[ nb = \frac{b}{2} \implies n = \frac{1}{2} \]

3. Comparing the term on the right-hand side:
\[ nRT = \frac{RT}{2} \implies n = \frac{1}{2} \]

Since all comparisons consistently yield \(n = \frac{1}{2}\), and the van der Waals equation is uniquely formulated for real (non-ideal) gases, this equation is valid for \(\frac{1}{2}\) mole of a real gas.


Step 4: Final Answer:

The correct option is (D).
Quick Tip: To quickly solve such problems, always compare the coefficients of the constant terms on the right-hand side (\(nRT\)) and the volume correction term (\(nb\)). Here, comparing \(nRT = \frac{RT}{2}\) immediately gives \(n = \frac{1}{2}\) without any tedious calculations.


Question 61:

Which one of the following does not lose water even in conc. \(H_2SO_4\)?


  • (A) 1
  • (B) 2
  • (C) 3
  • (D) 4
Correct Answer: (B) 2
View Solution


Step 1: Understanding the Question:

The question asks us to identify which of the given cyclic alcohols does not undergo dehydration (loss of water) when treated with concentrated sulfuric acid (\(H_2SO_4\)).


Step 2: Detailed Explanation:

Dehydration of alcohols under acidic conditions typically proceeds via a carbocation intermediate (E1 mechanism) to form a stable alkene. Let us analyze each compound:

- Compound 1: Cyclopentanol can easily lose a molecule of water to form cyclopentene, which is a highly stable, non-strained cyclic alkene.

- Compound 3: Cycloheptatrienol (tropyl alcohol) loses water extremely easily under acidic conditions because the resulting carbocation is the tropylium cation. This carbocation is planar, fully conjugated, contains \(6\pi\) electrons, and is exceptionally stable due to its aromatic character.

- Compound 4: Cyclohexa-1,3-dien-5-ol (or a similar cyclohexadienol isomer) undergoes dehydration very rapidly because the loss of water generates a highly stable, aromatic benzene ring.

- Compound 2: This is a cyclobutenol derivative. If this compound were to undergo dehydration, it would require the elimination of water to form cyclobutadiene. Cyclobutadiene is a planar cyclic conjugated system with \(4\pi\) electrons, making it highly antiaromatic and extremely unstable. Due to the high energy barrier associated with forming an antiaromatic product, this compound does not undergo dehydration even under harsh acidic conditions.

Therefore, compound 2 does not lose water.


Step 3: Final Answer:

The correct option is (B).
Quick Tip: Dehydration reactions that lead to antiaromatic products (like cyclobutadiene, which has \(4\pi\) electrons) are thermodynamically and kinetically highly unfavorable. Conversely, those leading to aromatic products (like the tropylium cation or benzene) occur with remarkable ease.


Question 62:

The major product in the following reaction is


  • (A) A
  • (B) B
  • (C) C
  • (D) D
Correct Answer: (C) C
View Solution


Step 1: Understanding the Question:

We need to determine the major product when 1,3-dichloro-2,5-dinitrobenzene is treated with methoxide ion (\(MeO^-\)) in methanol (\(MeOH\)) under heating.


Step 2: Key Formula or Approach:

This reaction is a nucleophilic aromatic substitution (\(S_NAr\)) reaction. In \(S_NAr\), chlorine atoms act as excellent leaving groups if they are activated by strong electron-withdrawing groups (like \(-NO_2\)) located at ortho or para positions relative to them.


Step 3: Detailed Explanation:

Let us analyze the structure of the starting material:

- The compound has two chlorine atoms at positions 1 and 3.

- It has two nitro groups (\(-NO_2\)) at positions 2 and 5.

- Looking at each chlorine atom, they are both ortho to the nitro group at position 2 and para to the nitro group at position 5.

- The strongly electron-withdrawing \(-NO_2\) groups significantly decrease the electron density of the benzene ring, especially at the carbons bearing the chlorine atoms.

- This activation allows the methoxide nucleophile (\(MeO^-\)) to attack the chlorine-bearing carbons, forming highly stable anionic Meisenheimer intermediates where the negative charge is delocalized onto the electronegative oxygen atoms of the nitro groups.

- Since both chlorine atoms are equally and highly activated, and the reaction is carried out under heating with excess methoxide, both chlorine atoms undergo substitution.

- This results in the replacement of both chlorine atoms by methoxy groups (\(-OMe\)), yielding the diether product shown in structure C.


Step 4: Final Answer:

The correct option is (C).
Quick Tip: For nucleophilic aromatic substitution (\(S_NAr\)):
1. The rate of substitution increases with the number of electron-withdrawing groups (especially \(-NO_2\)) located ortho and para to the leaving group (halide).
2. Under heating with excess nucleophile, all sufficiently activated leaving groups will be replaced.


Question 63:

Rank the following anions in order of decreasing nucleophilicity in a polar protic solvent (most \(\rightarrow\) least nucleophilic).


  • (A) 3 \(>\) 2 \(>\) 1
  • (B) 2 \(>\) 3 \(>\) 1
  • (C) 1 \(>\) 3 \(>\) 2
  • (D) 2 \(>\) 1 \(>\) 3
Correct Answer: (D) 2 \(>\) 1 \(>\) 3
View Solution


Step 1: Understanding the Question:

We need to arrange three given anions in order of decreasing nucleophilicity in a polar protic solvent.

The anions are:

1. \(CH_3CH_2CH_2-O^-\) (propoxide ion, an alkoxide)

2. \(CH_3CH_2CH_2-S^-\) (propanethiolate ion, a thiolate)

3. \(CH_3CH_2-C(=O)-O^-\) (propanoate ion, a carboxylate)


Step 2: Detailed Explanation:

Nucleophilicity in polar protic solvents is influenced by several factors:

- Solvation effects: Polar protic solvents can form strong hydrogen bonds with small, highly electronegative anions.

Oxygen (\(O^-\)) is smaller and more electronegative than sulfur (\(S^-\)), making it heavily solvated (shielded by a cage of solvent molecules).

On the other hand, sulfur (\(S^-\)) is larger, less electronegative, and much less solvated because it forms very weak hydrogen bonds.

Thus, the less-solvated thiolate ion (2) is a much stronger nucleophile than the alkoxide ion (1) in polar protic solvents (\(2 > 1\)).

- Resonance and charge localization:

In the alkoxide ion (1), the negative charge is localized on a single oxygen atom, making it strongly basic and a strong nucleophile.

In the carboxylate ion (3), the negative charge on the oxygen is delocalized over two oxygen atoms via resonance, which makes it highly stable, weakly basic, and consequently a very poor nucleophile (\(1 > 3\)).

- Combining these factors gives the overall decreasing order of nucleophilicity in a polar protic solvent:
\[ 2 > 1 > 3 \]


Step 3: Final Answer:

The correct option is (D).
Quick Tip: In polar protic solvents (like water or alcohols):
- Down a group, nucleophilicity increases because larger atoms are less solvated (\(S^- > O^-\)).
- Among similar nucleophilic atoms, localized charges are much more nucleophilic than resonance-stabilized (delocalized) charges (\(R-O^- > R-COO^-\)).


Question 64:

In which of the following species, \(sp^3d^2\) hybridisation is not associated?

  • (A) \(XeF_6\)
  • (B) \(BrF_5^+\)
  • (C) \(IF_5\)
  • (D) \(XeF_4\)
Correct Answer: (A) \(\text{XeF}_6\)
View Solution


Step 1: Understanding the Question:

We need to determine which of the given chemical species does not have a central atom with \(sp^3d^2\) hybridization.


Step 2: Key Formula or Approach:

The steric number (\(S.N.\)) of the central atom is calculated using the formula:
\[ S.N. = \frac{1}{2} [V + M - C + A] \]

Where:

- \(V = number of valence electrons of the central atom\)

- \(M = number of monovalent atoms surrounding it\)

- \(C = cationic charge\)

- \(A = anionic charge\)


Step 3: Detailed Explanation:

Let us calculate the steric number and hybridization for each given species:

- (A) \(XeF_6\):

Central atom is Xenon (\(Xe\)), which has 8 valence electrons (\(V = 8\)).

Number of monovalent fluorine atoms = 6 (\(M = 6\)).

\[ S.N. = \frac{1}{2} [8 + 6] = 7 \]

A steric number of 7 corresponds to \(sp^3d^3\) hybridization (distorted octahedral geometry).

- (B) \(BrF_5^+\):

Central atom is Bromine (\(Br\)), which has 7 valence electrons (\(V = 7\)).

Monovalent fluorine atoms = 5 (\(M = 5\)).

Cationic charge = +1 (\(C = 1\)).

\[ S.N. = \frac{1}{2} [7 + 5 - 1] = 6 \]

A steric number of 6 corresponds to \(sp^3d^2\) hybridization.

- (C) \(IF_5\):

Central atom is Iodine (\(I\)), which has 7 valence electrons (\(V = 7\)).

Monovalent fluorine atoms = 5 (\(M = 5\)).

\[ S.N. = \frac{1}{2} [7 + 5] = 6 \]

A steric number of 6 corresponds to \(sp^3d^2\) hybridization.

- (D) \(XeF_4\):

Central atom is Xenon (\(Xe\)), which has 8 valence electrons (\(V = 8\)).

Monovalent fluorine atoms = 4 (\(M = 4\)).

\[ S.N. = \frac{1}{2} [8 + 4] = 6 \]

A steric number of 6 corresponds to \(sp^3d^2\) hybridization.

Thus, \(sp^3d^2\) hybridization is not associated with \(XeF_6\).


Step 4: Final Answer:

The correct option is (A).
Quick Tip: To quickly determine hybridization, count the number of lone pairs and sigma bonds on the central atom:
- \(XeF_6\) has 6 sigma bonds and 1 lone pair, total = 7 \(\rightarrow sp^3d^3\).
- \(XeF_4\) has 4 sigma bonds and 2 lone pairs, total = 6 \(\rightarrow sp^3d^2\).
- \(IF_5\) has 5 sigma bonds and 1 lone pair, total = 6 \(\rightarrow sp^3d^2\).


Question 65:

For the reaction \(A \rightleftharpoons B\), variation of concentration is plotted against time as shown below.


  • (A) Region (1) indicates equilibrium
  • (B) Region (2) indicates equilibrium
  • (C) Region (3) indicates equilibrium
  • (D) Both the Regions (2) and (3) indicate equilibrium
Correct Answer: (C) Region (3) indicates equilibrium
View Solution


Step 1: Understanding the Question:

The question asks us to identify which region in the concentration-versus-time graph represents the state of chemical equilibrium for the reversible reaction \(A \rightleftharpoons B\).


Step 2: Detailed Explanation:

Dynamic chemical equilibrium is defined as the state in a reversible chemical reaction where the rates of the forward and backward reactions become equal.

As a direct consequence, the concentrations of both reactants (A) and products (B) become constant over time.

Let us analyze the three regions indicated on the plot:

- In Region (1): The concentration of A is rapidly decreasing, and the concentration of B is rapidly increasing. The concentrations are changing, which shows that the reaction is far from equilibrium.

- In Region (2): The rates of change are slowing down, but the concentrations of both A and B are still changing over time.

- In Region (3): Both curves become completely flat and horizontal (parallel to the time axis). This means that the concentrations of A and B have become completely constant with respect to time, which is the hallmark of a system at equilibrium.

Therefore, Region (3) represents the state of chemical equilibrium.


Step 3: Final Answer:

The correct option is (C).
Quick Tip: On a concentration-time graph for any chemical system, equilibrium is reached at the exact point where the concentration curves of all reactants and products become horizontal straight lines parallel to the time axis.


Question 66:

In a first order reaction, the concentration of reactant decreases from \(400 moles lit^{-1}\) to \(50 moles lit^{-1}\) in \(7.5 \times 10^3 s\). The rate constant of the reaction is (approximately)

  • (A) \(1 \times 10^{-2} s^{-1}\)
  • (B) \(2.5 \times 10^{-3} s^{-1}\)
  • (C) \(1 \times 10^{-5} s^{-1}\)
  • (D) \(2.77 \times 10^{-4} s^{-1}\)
Correct Answer: (D) \(2.77 \times 10^{-4}\text{ s}^{-1}\)
View Solution


Step 1: Understanding the Question:

We need to calculate the rate constant (\(k\)) for a first-order reaction where the reactant concentration falls from an initial concentration of \(400 M\) to \(50 M\) in a given time interval of \(7.5 \times 10^3 s\).


Step 2: Key Formula or Approach:

We can use the half-life concept for a first-order reaction to solve this quickly:

A concentration decrease of a first-order reactant over successive half-lives (\(t_{1/2}\)) follows:
\[ [A]_0 \xrightarrow{t_{1/2}} \frac{[A]_0}{2} \xrightarrow{t_{1/2}} \frac{[A]_0}{4} \xrightarrow{t_{1/2}} \frac{[A]_0}{8} \]

Once the half-life is found, the rate constant is given by:
\[ k = \frac{\ln 2}{t_{1/2}} = \frac{0.693}{t_{1/2}} \]


Step 3: Detailed Explanation:

Let us observe the concentration reduction:

- Initial concentration, \([A]_0 = 400 mol L^{-1}\)

- Final concentration, \([A]_t = 50 mol L^{-1}\)

Let us determine the number of half-lives (\(N\)) required for this change:
\[ 400 \xrightarrow{1st t_{1/2}} 200 \xrightarrow{2nd t_{1/2}} 100 \xrightarrow{3rd t_{1/2}} 50 \]

This means exactly \(3\) half-lives have passed in the given time interval:
\[ 3 \times t_{1/2} = 7.5 \times 10^3 s \]
\[ t_{1/2} = 2.5 \times 10^3 s \]

Now, let us calculate the rate constant (\(k\)):
\[ k = \frac{0.693}{t_{1/2}} = \frac{0.693}{2.5 \times 10^3 s} \]
\[ k = 0.2772 \times 10^{-3} s^{-1} = 2.772 \times 10^{-4} s^{-1} \]

This matches option (D).


Step 4: Final Answer:

The correct option is (D).
Quick Tip: For first-order reactions, instead of using the log formula, check if the concentration ratio \(\frac{[A]_0}{[A]_t}\) is a power of 2 (\(2^N\)). If yes, then the elapsed time is simply \(N \times t_{1/2}\), which allows you to find \(t_{1/2}\) and \(k\) within seconds!


Question 67:

In the following reaction sequence, the product Y is


Fig A

Fig B

Fig C

Fig D

  • (A) Fig A
  • (B) Fig B
  • (C) Fig C
  • (D) Fig D
Correct Answer: (B)
View Solution


Step 1: Understanding the Question:

We need to determine the final product Y obtained from a two-step reaction starting with \(Br(CH_2)_{12}-C \equiv CH\).


Step 2: Detailed Explanation:

Let us analyze each step of the reaction:

- Step 1: Reaction of \(Br(CH_2)_{12}-C \equiv CH\) with sodium amide (\(NaNH_2\)):
\(NaNH_2\) is an extremely strong base which selectively deprotonates the acidic terminal alkyne hydrogen to generate a highly reactive acetylide anion:
\[ Br(CH_2)_{12}-C \equiv C^- \]

Since the molecule contains an alkyl bromide group at the other end of the chain, this nucleophilic carbanion undergoes an intramolecular nucleophilic substitution (\(S_N2\)) reaction.

The carbanion attacks the carbon bonded to the bromine atom, displacing the bromide ion and forming a cyclic alkyne.

Let us count the ring size:

The chain contains \(12\) methylene carbons and \(2\) alkyne carbons, making a total of \(14\) carbons in the cyclic ring.

Thus, the product X is cyclotetradecyne (a 14-membered cyclic alkyne).

- Step 2: Reaction of X with \(H_2\) in the presence of Lindlar's catalyst:

Lindlar's catalyst (\(Pd/CaCO_3/quinoline\)) selectively reduces alkynes to alkenes.

Because the hydrogenation occurs via syn-addition on the metal surface, it selectively yields the cis-alkene isomer.

Therefore, the 14-membered cyclic alkyne X is reduced to cis-cyclotetradecene (Y).

Comparing with the options, option (B) represents the cis-alkene structure where both hydrogen atoms are on the same side of the double bond.


Step 3: Final Answer:

The correct option is (B).
Quick Tip: - \(NaNH_2\) deprotonates terminal alkynes, and when an alkyl halide is present in the same molecule, it readily undergoes intramolecular cyclization to form a ring.
- Lindlar's catalyst always performs selective syn-addition of hydrogen to convert alkynes into cis-alkenes.


Question 68:

The mass of an electron is \(9.1 \times 10^{-31} kg\). If its K.E. is \(3.0 \times 10^{-25} J\), its wavelength is (approximately)

  • (A) \(250 nm\)
  • (B) \(990 nm\)
  • (C) \(400 nm\)
  • (D) \(850 nm\)
Correct Answer: (D) \(850\text{ nm}\)
View Solution


Step 1: Understanding the Question:

We need to calculate the de Broglie wavelength (\(\lambda\)) of an electron given its mass (\(m\)) and kinetic energy (\(K.E.\)).


Step 2: Key Formula or Approach:

The de Broglie wavelength formula in terms of kinetic energy is:
\[ \lambda = \frac{h}{p} = \frac{h}{\sqrt{2m(K.E.)}} \]

Where:

- \(h\) is Planck's constant \(\approx 6.626 \times 10^{-34} J s\) (or \(kg m^2 s^{-1}\))

- \(m = 9.1 \times 10^{-31} kg\)

- \(K.E. = 3.0 \times 10^{-25} J\)


Step 3: Detailed Explanation:

Let us calculate the term inside the square root first:
\[ 2m(K.E.) = 2 \times (9.1 \times 10^{-31} kg) \times (3.0 \times 10^{-25} J) \]
\[ 2m(K.E.) = 54.6 \times 10^{-56} kg^2 m^2 s^{-2} \]

Now, take the square root of this value:
\[ \sqrt{2m(K.E.)} = \sqrt{54.6} \times 10^{-28} kg m s^{-1} \]

Since \(\sqrt{54.6} \approx 7.39\):
\[ \sqrt{2m(K.E.)} \approx 7.39 \times 10^{-28} kg m s^{-1} \]

Now, let us calculate the de Broglie wavelength (\(\lambda\)):
\[ \lambda = \frac{6.626 \times 10^{-34}}{7.39 \times 10^{-28}} \]
\[ \lambda \approx 0.897 \times 10^{-6} m = 897 nm \approx 850 nm \]


Step 4: Final Answer:

The correct option is (D).
Quick Tip: When performing rapid calculations in competitive exams, simplify the power of ten first:
Here, the denominator power of ten is \(\sqrt{10^{-56}} = 10^{-28}\).
Dividing \(10^{-34}\) by \(10^{-28}\) gives \(10^{-6} m\) (which is in the range of hundreds of nanometers). This instantly helps narrow down the choices.


Question 69:

The calculated magnetic moment for low spin \([Ru(EDTA)]^-\) is


  • (A) \(2.73 BM\)
  • (B) \(1.73 BM\)
  • (C) \(3.23 BM\)
  • (D) \(0.00 BM\)
Correct Answer: (B) \(1.73\text{ BM}\)
View Solution


Step 1: Understanding the Question:

We need to calculate the spin-only magnetic moment (\(\mu\)) for the low-spin complex \([Ru(EDTA)]^-\).


Step 2: Key Formula or Approach:

1. Find the oxidation state and \(d\)-electron configuration of the central metal ion (Ruthenium).

2. Determine the number of unpaired electrons (\(n\)) under low-spin octahedral conditions.

3. Use the spin-only magnetic moment formula:
\[ \mu = \sqrt{n(n + 2)} BM \]


Step 3: Detailed Explanation:

Let us find the oxidation state of Ruthenium (\(Ru\)) in \([Ru(EDTA)]^-\):

- EDTA is a hexadentate ligand with a charge of \(-4\) (\(EDTA^{4-}\)).

- Let \(x\) be the oxidation state of \(Ru\):
\[ x + (-4) = -1 \implies x = +3 \]

Thus, Ruthenium is in the \(+3\) oxidation state (\(Ru^{3+}\)).

Next, let us write the electronic configuration of \(Ru^{3+}\):

- Ruthenium (\(Ru\), atomic number 44) is located directly below Iron (\(Fe\)) in the second transition series (\(4d\) series).

- The configuration of neutral \(Ru\) is \([Kr] 4d^7 5s^1\) (total of 8 valence electrons).

- For \(Ru^{3+}\), we remove 3 electrons, leaving a \(4d^5\) configuration.

Since \(Ru\) is a \(4d\) transition metal, the crystal field splitting energy (\(\Delta_o\)) is very large. Consequently, all \(4d\) complexes are invariably low-spin.

In a low-spin octahedral field, the five \(d\)-electrons populate the lower energy \(t_{2g}\) orbitals:
\[ t_{2g}^5 e_g^0 \]

The pairing scheme in the \(t_{2g}\) orbitals is:
\[ \uparrow\downarrow \ \ \uparrow\downarrow \ \ \uparrow \]

This configuration contains exactly \(n = 1\) unpaired electron.

Now, let us calculate the spin-only magnetic moment (\(\mu\)):
\[ \mu = \sqrt{1(1 + 2)} = \sqrt{3} BM \approx 1.73 BM \]


Step 4: Final Answer:

The correct option is (B).
Quick Tip: For second and third-row transition metals (\(4d\) and \(5d\) series like \(Ru\), \(Rh\), \(Pt\)), the crystal field splitting (\(\Delta_o\)) is exceptionally large. As a result, these complexes are always low-spin, regardless of whether the ligand is traditionally classified as weak-field or strong-field.


Question 70:

Glucose is added to 1 litre of water to such an extent that \(\Delta T_f / K_f\) equals to \(\frac{1}{1000}\). The weight of glucose added is

  • (A) \(180 gm\)
  • (B) \(18 gm\)
  • (C) \(1.8 gm\)
  • (D) \(0.18 gm\)
Correct Answer: (D) \(0.18\text{ gm}\)
View Solution


Step 1: Understanding the Question:

We need to determine the mass of glucose (\(C_6H_{12}O_6\)) added to 1 litre of water given the ratio of freezing point depression to the cryoscopic constant (\(\Delta T_f / K_f\)).


Step 2: Key Formula or Approach:

The depression in freezing point (\(\Delta T_f\)) is given by:
\[ \Delta T_f = K_f \cdot m \]

Where:

- \(K_f\) is the molal depression constant (cryoscopic constant).

- \(m\) is the molality of the solution.

This can be rearranged as:
\[ m = \frac{\Delta T_f}{K_f} \]


Step 3: Detailed Explanation:

Given that:
\[ \frac{\Delta T_f}{K_f} = \frac{1}{1000} \]

Therefore, the molality of the glucose solution is:
\[ m = 0.001 mol kg^{-1} \]

Molality is defined as:
\[ m = \frac{moles of solute}{mass of solvent (in kg)} \]

For 1 litre of water (the solvent):

- Since the density of water is \(\approx 1 g mL^{-1}\), the mass of 1 litre of water is \(1000 g = 1 kg\).

Thus, the moles of glucose added are:
\[ moles of glucose = m \times mass of solvent in kg = 0.001 mol kg^{-1} \times 1 kg = 0.001 mol \]

The molar mass of glucose (\(C_6H_{12}O_6\)) is \(180 g mol^{-1}\).

Now, calculate the mass (\(w\)) of glucose added:
\[ w = moles \times molar mass = 0.001 mol \times 180 g mol^{-1} = 0.18 g \]


Step 4: Final Answer:

The correct option is (D).
Quick Tip: Always assume the density of pure water to be \(1 g mL^{-1}\) (or \(1 kg L^{-1}\)) unless stated otherwise. This simplifies concentration conversions because the volume of water in litres directly equals its mass in kilograms.


Question 71:

A \(5.0 cm^3\) solution of \(H_2O_2\) liberates \(1.27 g\) of iodine from an acidified \(KI\) solution. The percentage strength of \(H_2O_2\) is close to

  • (A) \(11.2\)
  • (B) \(5.8\)
  • (C) \(1.9\)
  • (D) \(3.4\)
Correct Answer: (D) \(3.4\)
View Solution


Step 1: Understanding the Question:

We need to find the percentage strength (weight/volume, \(% w/v\)) of a \(5.0 cm^3\) (which is \(5.0 mL\)) \(H_2O_2\) solution that reacts completely with acidified potassium iodide (\(KI\)) to liberate \(1.27 g\) of iodine (\(I_2\)).


Step 2: Key Formula or Approach:

1. Write the balanced redox equation between \(H_2O_2\) and \(I^-\) in acidic medium.

2. Calculate the moles of \(I_2\) liberated to find the moles of \(H_2O_2\) reacted.

3. Determine the mass of \(H_2O_2\) and express it as a percentage of the solution volume (\(% w/v\)).


Step 3: Detailed Explanation:

The balanced chemical equation for the oxidation of iodide by hydrogen peroxide in an acidic medium is:
\[ H_2O_2 + 2I^- + 2H^+ \rightarrow I_2 + 2H_2O \]

From the stoichiometry of the reaction:
\[ 1 mole of H_2O_2 produces 1 mole of I_2 \]

Let us calculate the moles of iodine liberated:

- Molar mass of \(I_2 = 2 \times 127 g mol^{-1} = 254 g mol^{-1}\).

- Moles of \(I_2 = \frac{1.27 g}{254 g mol^{-1}} = 0.005 mol\).

Since the mole ratio of \(H_2O_2\) to \(I_2\) is \(1:1\):

- Moles of \(H_2O_2\) in \(5.0 mL\) of solution = \(0.005 mol\).

Now, let us calculate the mass of \(H_2O_2\):

- Molar mass of \(H_2O_2 = 34 g mol^{-1}\).

- Mass of \(H_2O_2 = 0.005 mol \times 34 g mol^{-1} = 0.17 g\).

The percentage strength (\(% w/v\)) is:
\[ % strength = \frac{mass of solute (g)}{volume of solution (mL)} \times 100 \]
\[ % strength = \frac{0.17 g}{5.0 mL} \times 100 = 3.4% \]


Step 4: Final Answer:

The correct option is (D).
Quick Tip: Remember the stoichiometric equivalence for hydrogen peroxide reactions:
- \(1 mol of H_2O_2 \equiv 1 mol of I_2\)
Calculating moles first avoids any confusion with normality or equivalent weights, which can sometimes lead to minor errors.


Question 72:

An organic compound undergoes first order decomposition. The time taken for its decomposition to \(\frac{1}{8}th\) and \(\frac{1}{10}th\) of its initial concentration are \(t_{1/8}\) and \(t_{1/10}\) respectively. The value of \(\left[ \frac{t_{1/8}}{t_{1/10}} \right]\) is [Given \(\log_{10} 2 = 0.3\)]

  • (A) \(0.9\)
  • (B) \(0.6\)
  • (C) \(0.3\)
  • (D) \(0.5\)
Correct Answer: (A) \(0.9\)
View Solution


Step 1: Understanding the Question:

The question asks for the ratio of time intervals (\(t_{1/8}/t_{1/10}\)) for a first-order reaction to decompose to \(1/8th\) and \(1/10th\) of its initial concentration respectively.


Step 2: Key Formula or Approach:

The integrated rate equation for a first-order reaction is:
\[ t = \frac{2.303}{k} \log_{10}\left(\frac{[A]_0}{[A]_t}\right) \]

Where:

- \([A]_0\) is the initial concentration.

- \([A]_t\) is the concentration remaining at time \(t\).


Step 3: Detailed Explanation:

Let us find the expression for \(t_{1/8}\):

- At \(t = t_{1/8}\), the concentration remaining is \([A]_t = \frac{1}{8}[A]_0\).
\[ t_{1/8} = \frac{2.303}{k} \log_{10}\left(\frac{[A]_0}{\frac{1}{8}[A]_0}\right) = \frac{2.303}{k} \log_{10}(8) \]

Since \(8 = 2^3\), we can write:
\[ t_{1/8} = \frac{2.303}{k} \times 3\log_{10}(2) \]

Now, let us find the expression for \(t_{1/10}\):

- At \(t = t_{1/10}\), the concentration remaining is \([A]_t = \frac{1}{10}[A]_0\).
\[ t_{1/10} = \frac{2.303}{k} \log_{10}\left(\frac{[A]_0}{\frac{1}{10}[A]_0}\right) = \frac{2.303}{k} \log_{10}(10) \]

Since \(\log_{10}(10) = 1\):
\[ t_{1/10} = \frac{2.303}{k} \times 1 \]

Taking the ratio of the two times:
\[ \frac{t_{1/8}}{t_{1/10}} = \frac{\frac{2.303}{k} \times 3\log_{10}(2)}{\frac{2.303}{k} \times 1} = 3\log_{10}(2) \]

Using the given value \(\log_{10}(2) = 0.3\):
\[ \frac{t_{1/8}}{t_{1/10}} = 3 \times 0.3 = 0.9 \]


Step 4: Final Answer:

The correct option is (A).
Quick Tip: For first-order reactions, notice that the rate constant \(k\) and the constant factor \(2.303\) cancel out when taking ratios. Thus, the ratio of times is simply equal to the ratio of the log of concentration ratios:
\[ \frac{t_1}{t_2} = \frac{\log(R_1)}{\log(R_2)} \]


Question 73:

For the metal complex \([Co(NH_3)_5SO_4]Br\), coordination number, oxidation number, number of \(d\)-electrons and number of unpaired \(d\)-electrons are respectively

  • (A) \(6, 3, 6, 0\)
  • (B) \(7, 2, 6, 2\)
  • (C) \(6, 2, 6, 0\)
  • (D) \(6, 2, 7, 0\)
Correct Answer: (A) \(6, 3, 6, 0\)
View Solution


Step 1: Understanding the Question:

We need to find the coordination number, oxidation state, total number of \(d\)-electrons, and the number of unpaired \(d\)-electrons for the central metal ion in the coordination complex \([Co(NH_3)_5SO_4]Br\).


Step 2: Detailed Explanation:

Let us analyze each property systematically:

1. Coordination Number:

- Inside the coordination sphere, there are five ammine (\(NH_3\)) ligands and one sulfato (\(SO_4^{2-}\)) ligand.

- Both are monodentate ligands, so they form a total of \(5 + 1 = 6\) coordinate bonds with the central cobalt ion.

- Therefore, the coordination number is \(6\).

2. Oxidation Number:

- Let \(x\) be the oxidation state of Cobalt (\(Co\)).

- Ammine (\(NH_3\)) is a neutral ligand (charge = 0).

- Sulfato (\(SO_4^{2-}\)) has a charge of \(-2\).

- Bromide (\(Br^-\)) as a counterion has a charge of \(-1\).
\[ x + 5(0) + (-2) + (-1) = 0 \implies x = +3 \]

- Therefore, Cobalt is in the \(+3\) oxidation state (\(Co^{3+}\)).

3. Number of \(d\)-electrons:

- Neutral Cobalt (\(Co\), atomic number 27) has the configuration: \([Ar] 3d^7 4s^2\).

- For \(Co^{3+}\), we remove 3 electrons (2 from \(4s\) and 1 from \(3d\)), giving the configuration: \([Ar] 3d^6\).

- Thus, the number of \(d\)-electrons is \(6\).

4. Number of unpaired \(d\)-electrons:

- \(Co^{3+}\) (\(d^6\)) in an octahedral complex with strong-field ammine (\(NH_3\)) ligands forms a low-spin complex.

- All 6 \(d\)-electrons pair up in the lower energy \(t_{2g}\) orbitals:
\[ t_{2g}^6 e_g^0 \]

- Hence, the number of unpaired \(d\)-electrons is \(0\).

Comparing these values with the options: \(6\), \(3\), \(6\), \(0\) corresponds to option (A).


Step 3: Final Answer:

The correct option is (A).
Quick Tip: Cobalt(III) (\(d^6\)) octahedral complexes are almost always low-spin (except with exceptionally weak-field ligands like \(F^-\) or \([CoF_6]^{3-}\)). In low-spin \(d^6\) systems, all electrons are paired up in the \(t_{2g}\) level, meaning the number of unpaired electrons is always \(0\).


Question 74:

\(RO-CH_2-C \equiv CH \xrightarrow{X} \xrightarrow{Y} RO-CH_2-C \equiv C-CH_2CH_2-Br\)

To carry out the above conversion X and Y are respectively

  • (A) \(NaNH_2\), \(Br-CH_2-CH_2-Cl\)
  • (B) \(NaNH_2\), \(I-CH_2-CH_2-Br\)
  • (C) \(NaNH_2\), \(F-CH_2-CH_2-Br\)
  • (D) \(NaNH_2\), \(CH_2=CH-Br\)
Correct Answer: (B) \(\text{NaNH}_2\), \(\text{I}-\text{CH}_2-\text{CH}_2-\text{Br}\)
View Solution


Step 1: Understanding the Question:

The starting material is a terminal alkyne, \(RO-CH_2-C \equiv CH\). We need to identify reagents X and Y to convert it into the chain-extended terminal bromide product, \(RO-CH_2-C \equiv C-CH_2CH_2-Br\).


Step 2: Detailed Explanation:

Let us break down the chemical transformation step-by-step:

1. Deprotonation of the terminal alkyne (Reagent X):

- The terminal hydrogen of an alkyne is weakly acidic.

- A strong base like sodium amide (\(NaNH_2\)) is used to deprotonate the terminal alkyne to form a highly nucleophilic acetylide carbanion:
\[ RO-CH_2-C \equiv CH \xrightarrow{NaNH_2} RO-CH_2-C \equiv C^- Na^+ \]

2. Nucleophilic Alkylation (Reagent Y):

- The nucleophilic acetylide anion must react with a dihaloalkane to introduce the \(-CH_2CH_2-Br\) group.

- Crucially, the final product must retain the bromine atom (\(-Br\)) at the terminal end.

- To ensure that the nucleophile attacks selectively at one end and leaves the bromine intact on the other, the leaving group at the site of attack must be significantly better than bromine.

- The leaving group ability order is: \(I^- > Br^- > Cl^- > F^-\).

- When \(I-CH_2-CH_2-Br\) (option B) is used:

Iodide (\(I^-\)) is a much better leaving group than bromide (\(Br^-\)). Thus, the acetylide nucleophile attacks the carbon containing the iodine atom, selectively displacing iodide via an \(S_N2\) mechanism:
\[ RO-CH_2-C \equiv C^- + I-CH_2CH_2-Br \rightarrow RO-CH_2-C \equiv C-CH_2CH_2-Br + I^- \]

- If \(Br-CH_2-CH_2-Cl\) (option A) were used, bromine (being a better leaving group than chlorine) would be displaced, leaving the chlorine atom at the terminal position, which is not the desired product.

Thus, \(I-CH_2-CH_2-Br\) is the ideal reagent Y.


Step 3: Final Answer:

The correct option is (B).
Quick Tip: For selective nucleophilic substitution on unsymmetrical dihalides:
- The nucleophile will always attack the carbon attached to the better leaving group (\(I^- > Br^- > Cl^-\)).
- To retain a \(-Br\) group in your product, the reacting end of the dihalide must have a superior leaving group like \(-I\).


Question 75:

The IUPAC name of the given compound is


  • (A) 1-Chloro-2-nitro-4-methylbenzene
  • (B) 1-Chloro-4-methyl-2-nitrobenzene
  • (C) 2-Chloro-1-nitro-5-methylbenzene
  • (D) m-Nitro-p-chlorotoluene
Correct Answer: (B) 1-Chloro-4-methyl-2-nitrobenzene
View Solution


Step 1: Understanding the Question:

We need to determine the correct IUPAC name of the given trisubstituted benzene derivative.

The substituents present on the benzene ring are:

- A chlorine atom (\(-Cl\), chloro group)

- A nitro group (\(-NO_2\), nitro group)

- A methyl group (\(-CH_3\), methyl group)


Step 2: Key Formula or Approach:

According to IUPAC nomenclature rules for trisubstituted benzenes:

1. The substituents must be numbered according to the lowest locant rule.

2. The substituents are then listed alphabetically in the final IUPAC name.


Step 3: Detailed Explanation:

Let us evaluate different numbering schemes to find the lowest locant set:

- Scheme 1: Numbering starting from carbon with \(-Cl\) as C1, going clockwise:

- Chlorine is at position 1.

- Nitro is at position 2.

- Methyl is at position 4.

- This gives the locant set: \((1, 2, 4)\).

- Scheme 2: Numbering starting from carbon with \(-CH_3\) as C1, going counter-clockwise:

- Methyl is at position 1.

- Nitro is at position 3.

- Chlorine is at position 4.

- This gives the locant set: \((1, 3, 4)\).

- Scheme 3: Numbering starting from carbon with \(-NO_2\) as C1:

- Nitro is at position 1.

- Chlorine is at position 2.

- Methyl is at position 5.

- This gives the locant set: \((1, 2, 5)\).

Comparing the locant sets \((1, 2, 4)\), \((1, 3, 4)\), and \((1, 2, 5)\), the lowest set of locants is \((1, 2, 4)\) because 2 is smaller than 3 at the second position of comparison.

Thus, the correct numbering is:

- 1-chloro

- 2-nitro

- 4-methyl

Next, we arrange these substituents alphabetically in the name:

- Alphabetical order: Chloro (C) \(<\) Methyl (M) \(<\) Nitro (N).

Combining these coordinates alphabetically gives:

1-Chloro-4-methyl-2-nitrobenzene.


Step 4: Final Answer:

The correct option is (B).
Quick Tip: Always apply the lowest locant rule first to determine the numerical positions of all substituents on a ring. Once the position numbers are fixed, arrange the substituent prefixes alphabetically in the final name regardless of their numbers.


Question 76:

Which of the following statement(s) is/are correct about the given compound?


  • (A) It exhibits ring-chain tautomerism.
  • (B) It forms osazone with phenylhydrazine.
  • (C) It gives eight (8) stereoisomers.
  • (D) It responds to Tollen's reagent.
Correct Answer:
View Solution


Step 1: Understanding the Question:

The given compound is D-glucose (an aldohexose). We need to analyze its chemical properties and stereochemistry to determine which of the statements are correct.


Step 2: Detailed Explanation:

Let us evaluate each statement carefully:

- Statement (A): Glucose exhibits ring-chain tautomerism because in aqueous solution, it exists in dynamic equilibrium between its open-chain form and cyclic hemiacetal forms (\(\alpha\)-D-glucopyranose and \(\beta\)-D-glucopyranose). Thus, statement (A) is correct.

- Statement (B): Glucose has an aldehyde group on C1 and a secondary alcohol group on C2. It reacts with three equivalents of phenylhydrazine to form a crystalline phenylosazone (glucosazone). Thus, statement (B) is correct.

- Statement (C): The open-chain form of glucose has 4 asymmetric (chiral) carbon centers (C2, C3, C4, and C5).

The total number of stereoisomers is given by:
\[ 2^n = 2^4 = 16 stereoisomers \]

This consists of 8 D-isomers and 8 L-isomers. Therefore, statement (C) is incorrect.

- Statement (D): Glucose is a reducing sugar because its open-chain form contains a free, oxidizable aldehyde group (\(-CHO\)). It readily reduces ammoniacal silver nitrate (Tollen's reagent) to form a shiny silver mirror. Thus, statement (D) is correct.


Step 3: Final Answer:

The correct statements are (A), (B), and (D).
Quick Tip: Remember that all aldohexoses like glucose, galactose, and mannose have 4 chiral carbons, yielding 16 stereoisomers in total. Since they are reducing sugars, they all give positive Tollen's, Fehling's, and Benedict's tests, and undergo osazone formation.


Question 77:

1 mole of an ideal gas undergoes the following processes:

Process A \(\rightarrow\) Isothermal expansion at \(400K\) from volume \(V_1\) to volume \(V_2\), such that \(V_2 = 4V_1\).

Process B \(\rightarrow\) Adiabatic expansion from volume \(V_1\) to volume \(V_2\), such that \(V_2 = 4V_1\).

Consider the following statements and select the correct one/s.

  • (A) Work done by gas in Process A is greater than in Process B.
  • (B) Final temperature in Process B is less than 400K.
  • (C) Change in internal energy is 0 in Process A but non-zero in Process B.
  • (D) Heat absorbed by the gas is positive in Process A but zero in Process B.
Correct Answer:
View Solution


Step 1: Understanding the Question:

We need to compare the thermodynamic parameters (work, temperature, internal energy, and heat) for an isothermal expansion (Process A) and an adiabatic expansion (Process B) of 1 mole of an ideal gas starting from the same initial state (\(V_1\), \(400K\)) to the same final volume (\(V_2 = 4V_1\)).


Step 2: Detailed Explanation:

Let us analyze each statement individually:

- Statement (A): On a \(P-V\) diagram, the slope of an adiabatic process is steeper than that of an isothermal process (\(|(\frac{dP}{dV})_{adi}| = \gamma |(\frac{dP}{dV})_{iso}|\) where \(\gamma > 1\)).

During expansion from \(V_1\) to \(V_2\), the pressure drops faster in the adiabatic process. Therefore, the isothermal curve lies entirely above the adiabatic curve on a \(P-V\) indicator diagram.

Since the area under the curve represents the work done by the gas (\(W = \int P \, dV\)), the work done in the isothermal expansion (Process A) is greater than in the adiabatic expansion (Process B):
\[ W_{iso} > W_{adi} \]

Thus, statement (A) is correct.

- Statement (B): In an adiabatic expansion (Process B), no heat is exchanged with the surroundings (\(q = 0\)).

According to the first law of thermodynamics:
\[ \Delta U = q + W = 0 - P\Delta V < 0 \]

Since work is done by the gas during expansion (\(W_{by gas} > 0\)), the internal energy of the system decreases (\(\Delta U < 0\)).

For an ideal gas, internal energy is directly proportional to temperature, so a decrease in internal energy leads to a drop in temperature:
\[ T_{final} < T_{initial} = 400K \]

Thus, statement (B) is correct.

- Statement (C): For an ideal gas, the internal energy (\(U\)) depends only on temperature (\(T\)).

In Process A (isothermal), temperature is constant (\(\Delta T = 0\)), so the change in internal energy is zero (\(\Delta U_A = 0\)).

In Process B (adiabatic), the temperature decreases (\(\Delta T \neq 0\)), so the change in internal energy is non-zero (\(\Delta U_B \neq 0\)).

Thus, statement (C) is correct.

- Statement (D):

In Process A (isothermal): \(\Delta U = 0 \implies q = W_{by gas} > 0\). Thus, heat is absorbed by the gas (\(q_A > 0\), positive).

In Process B (adiabatic): by definition, no heat exchange occurs, so \(q_B = 0\).

Thus, statement (D) is correct.


Step 3: Final Answer:

All statements (A), (B), (C), and (D) are correct.
Quick Tip: For any expansion starting from the same initial state to the same final volume:
- Isothermal expansion always does more work and ends at a higher temperature than adiabatic expansion.
- Always remember that the internal energy of an ideal gas is purely a temperature-dependent state function.


Question 78:

Which of the following statement(s) is/are correct?

  • (A) Starch is composed of repeating \(\alpha\)-D-glucose units.
  • (B) Nylon-6 is an addition polymer whereas nylon-6,6 is a condensation polymer.
  • (C) Isoprene is the monomer unit of natural rubber.
  • (D) Bakelite is obtained from reaction between phenol and acetaldehyde.
Correct Answer:
View Solution


Step 1: Understanding the Question:

We need to evaluate the chemical composition and monomeric units of various natural and synthetic polymers mentioned in the options.


Step 2: Detailed Explanation:

Let us evaluate each statement:

- Statement (A): Starch is a natural polysaccharide polymer composed entirely of repeating \(\alpha\)-D-glucose units. It consists of two structural fractions: amylose (linear, \(\alpha-1,4\)-glycosidic bonds) and amylopectin (branched, \(\alpha-1,4\) and \(\alpha-1,6\)-glycosidic bonds). Thus, statement (A) is correct.

- Statement (B): Nylon-6 is synthesized by ring-opening polymerization of caprolactam, and Nylon-6,6 is synthesized by condensation polymerization of adipic acid and hexamethylenediamine. Both are classified as condensation (step-growth) polymers because they contain amide linkages in their backbone. Thus, statement (B) is incorrect.

- Statement (C): Natural rubber is a linear polymer of 2-methylbuta-1,3-diene, commonly known as isoprene. Specifically, it is cis-1,4-polyisoprene. Thus, statement (C) is correct.

- Statement (D): Bakelite is a cross-linked thermosetting polymer obtained from the condensation reaction of phenol with formaldehyde (\(HCHO\)), not acetaldehyde (\(CH_3CHO\)). Thus, statement (D) is incorrect.


Step 3: Final Answer:

The correct statements are (A) and (C).
Quick Tip: Keep a handy summary of polymer classifications:
- Starch \(\rightarrow\) polymer of \(\alpha\)-D-glucose.
- Cellulose \(\rightarrow\) polymer of \(\beta\)-D-glucose.
- Natural rubber \(\rightarrow\) cis-1,4-polyisoprene.
- Bakelite \(\rightarrow\) Phenol + Formaldehyde (\(HCHO\)).


Question 79:

Which of the following have tetrahedral structures?

  • (A) \([Ni(CN)_4]^{2-}\)
  • (B) \([Ni(CO)_4]\)
  • (C) \([NiCl_4]^{2-}\)
  • (D) \(CrO_4^{2-}\)
Correct Answer:
View Solution


Step 1: Understanding the Question:

We need to determine which of the given coordination complexes and molecular ions possess a tetrahedral spatial geometry.


Step 2: Detailed Explanation:

Let us analyze the geometry and hybridization of each species:

- (A) \([Ni(CN)_4]^{2-}\):

Nickel is in the \(+2\) oxidation state (\(Ni^{2+}\), \(3d^8\) configuration).

Cyanide (\(CN^-\)) is a strong-field ligand, which forces the pairing of \(3d\) electrons.

This frees up one \(3d\) orbital, leading to \(dsp^2\) hybridization and a square planar geometry. (Not tetrahedral)

- (B) \([Ni(CO)_4]\):

Nickel is in the \(0\) oxidation state (\(Ni^0\), \(3d^8 4s^2\) configuration).

Carbon monoxide (\(CO\)) is an exceptionally strong-field ligand, causing the relocation of the two \(4s\) electrons into the \(3d\) subshell.

This results in a filled \(3d^{10}\) configuration, leaving the \(4s\) and \(4p\) orbitals vacant for \(sp^3\) hybridization, producing a tetrahedral structure. (Tetrahedral)

- (C) \([NiCl_4]^{2-}\):

Nickel is in the \(+2\) oxidation state (\(Ni^{2+}\), \(3d^8\) configuration).

Chloride (\(Cl^-\)) is a weak-field ligand and cannot cause electron pairing.

The empty \(4s\) and \(4p\) orbitals undergo \(sp^3\) hybridization, resulting in a tetrahedral geometry. (Tetrahedral)

- (D) \(CrO_4^{2-}\) (chromate ion):

Chromium is in the \(+6\) oxidation state (\(Cr^{6+}\), \(3d^0 4s^0\) configuration).

It undergoes \(d^3s\) (or \(sp^3\)) hybridization utilizing empty \(d\)-orbitals, forming four equivalent \(\sigma\) bonds with oxygen atoms in a highly symmetric tetrahedral shape. (Tetrahedral)

Thus, (B), (C), and (D) have tetrahedral structures.


Step 3: Final Answer:

The correct options are (B), (C), and (D).
Quick Tip: For \(d^8\) configuration of central metal ions like \(Ni^{2+}\):
- Strong-field ligands (e.g., \(CN^-\)) result in square planar geometry (\(dsp^2\)).
- Weak-field ligands (e.g., \(Cl^-\)) result in tetrahedral geometry (\(sp^3\)).


Question 80:

Which of the following plot(s) is/are correct representation(s) of Boyle's Law?


  • (A) A
  • (B) B
  • (C) C
  • (D) D
Correct Answer:
View Solution


Step 1: Understanding the Question:

We need to determine which of the given plots correctly represent Boyle's Law mathematically.


Step 2: Key Formula or Approach:

Boyle's Law states that for a fixed amount of gas at constant temperature, the pressure (\(P\)) is inversely proportional to its volume (\(V\)):
\[ P \propto \frac{1}{V} \implies P = \frac{k}{V} \implies PV = k (where k is a constant) \]


Step 3: Detailed Explanation:

Let us evaluate each of the plots shown in the options:

- Plot (A): \(P\) vs \(\frac{1}{V}\):

Since \(P = k \left(\frac{1}{V}\right)\), this is of the linear form \(y = mx\) where \(y = P\) and \(x = \frac{1}{V}\) with a positive slope \(m = k\).

This plot is a straight line passing through the origin. Thus, Plot (A) is correct.

- Plot (B): \(\log P\) vs \(\log V\):

Taking the logarithm of both sides of \(PV = k\):

\[ \log(PV) = \log k \implies \log P + \log V = \log k \]

\[ \log P = -\log V + \log k \]

This is of the linear form \(y = mx + c\) with slope \(m = -1\) and a positive intercept \(c = \log k\).

This plot is a straight line with a negative slope. Thus, Plot (B) is correct.

- Plot (C): \(P\) vs \(V\):

Since \(P\) and \(V\) are inversely proportional, as volume increases, pressure decreases non-linearly.

This plot is a rectangular hyperbola. Thus, Plot (C) is correct.

- Plot (D): \(P\) vs \(V\) showing a straight line with a negative slope:

This represents a linear relationship \(P = -mV + c\), which is mathematically incorrect for Boyle's law. Thus, Plot (D) is incorrect.


Step 4: Final Answer:

The correct options are (A), (B), and (C).
Quick Tip: Always formulate the explicit mathematical equation for each axis variable before verifying the graph shape:
- \(y \propto x \rightarrow\) straight line through origin.
- \(y \propto \frac{1}{x} \rightarrow\) rectangular hyperbola.
- \(\log y = - \log x + c \rightarrow\) straight line with slope \(-1\).

WBJEE Exam Pattern 2026

Aspect Details
Exam Name West Bengal Joint Entrance Examination (WBJEE) 2026
Conducting Body West Bengal Joint Entrance Examinations Board (WBJEEB)
Exam Level State-Level Entrance Exam
Mode of Exam Offline (OMR-Based)
Papers Paper I – Mathematics
Paper II – Physics & Chemistry (Combined)
Eligibility for Courses Both Papers: Engineering, Technology, Architecture, Pharmacy
Only Paper II: Pharmacy (except Jadavpur University)
Only Paper I: Not eligible for admission
Total Marks 200 Marks
Question Type Multiple Choice Questions (MCQs)
Marking Scheme Category 1: 1 mark/question, -0.25 for wrong
Category 2: 2 marks/question, -0.5 for wrong
Category 3: 2 marks/question, one or more correct, no negative marking
Total Duration 4 Hours (2 Hours per Paper)
Exam Timing Paper I (Mathematics): 11:00 AM – 1:00 PM
Paper II (Physics & Chemistry): 2:00 PM – 4:00 PM
Medium of Exam English & Bengali

WBJEE 2026 Physics and Chemistry Paper Analysis and Solution