




The handwritten notes for Class 6 Vocational Education Kaushal Bodh Chapter 3 Maker Skills bring together every simple machine, tool list and build step that the project file and the class test actually ask about. Six working models, the full bicycle parts table and the exhibition plan are written out by hand, activity by activity, in the 2026-27 Kaushal Bodh order.
- Length: 28 handwritten pages covering Activity 1 to Activity 8 in the book's own order.
- Must-learn part: the four simple machines used here, lever, propeller, wheel and axle, and pulley.
- Also on this page: a quick recall table, a five point mistake list and links to the other chapter resources.
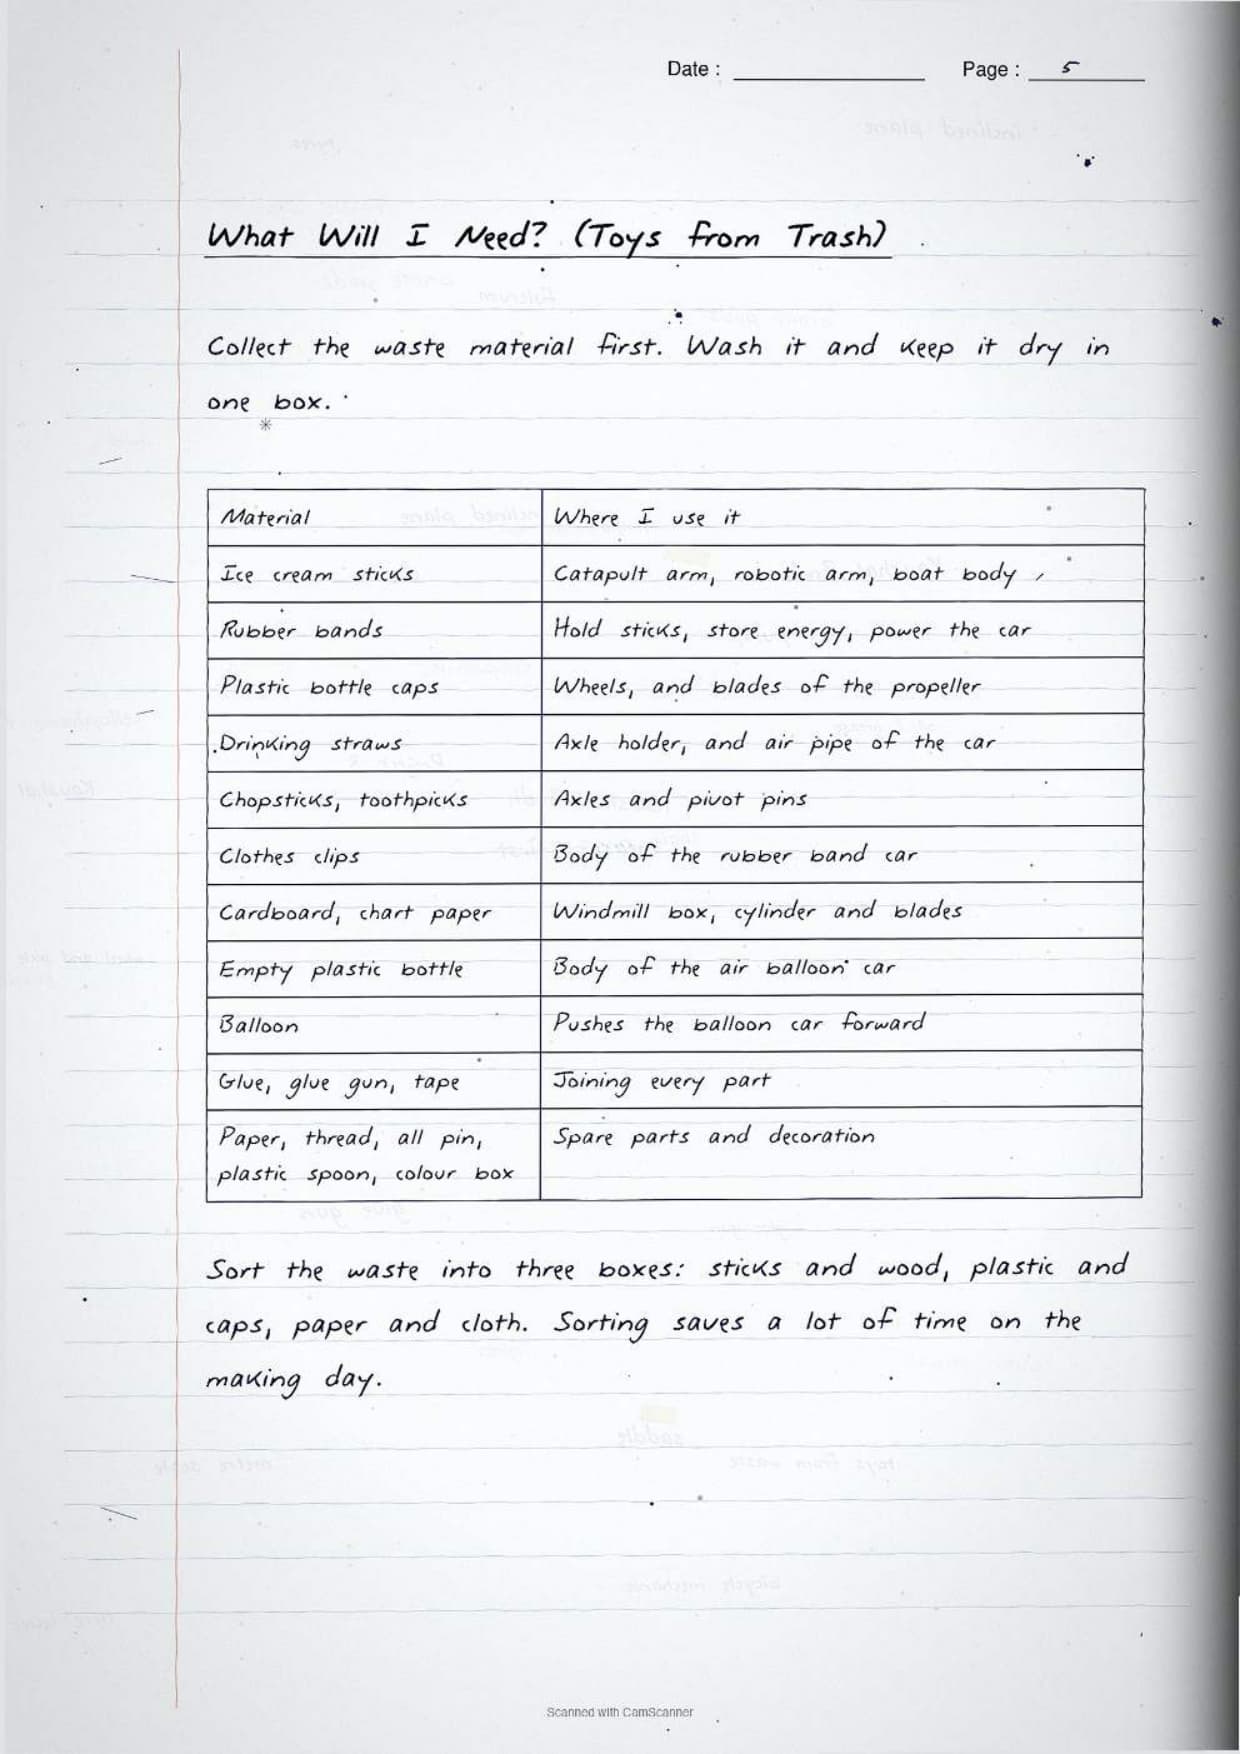
Every page of these Maker Skills notes is written by hand, checked against the 2026-27 Kaushal Bodh print, and matched to the way a Class 6 project file and class test ask about simple machines, the six working models and bicycle maintenance.
Student Feedback: In a Collegedunia survey of 13,420 Class 6 students who finished the Maker Skills project, 68% of students said naming the simple machine inside each toy was the hardest part. Toppers reported one fix that worked. Learn the machine first, then the toy that uses it.
Source: 2026-27 Class 6 Vocational Education student survey. Sample of 13,420 students from schools across 17 states.
What the Maker Skills Project Asks Every Class 6 Student to Do
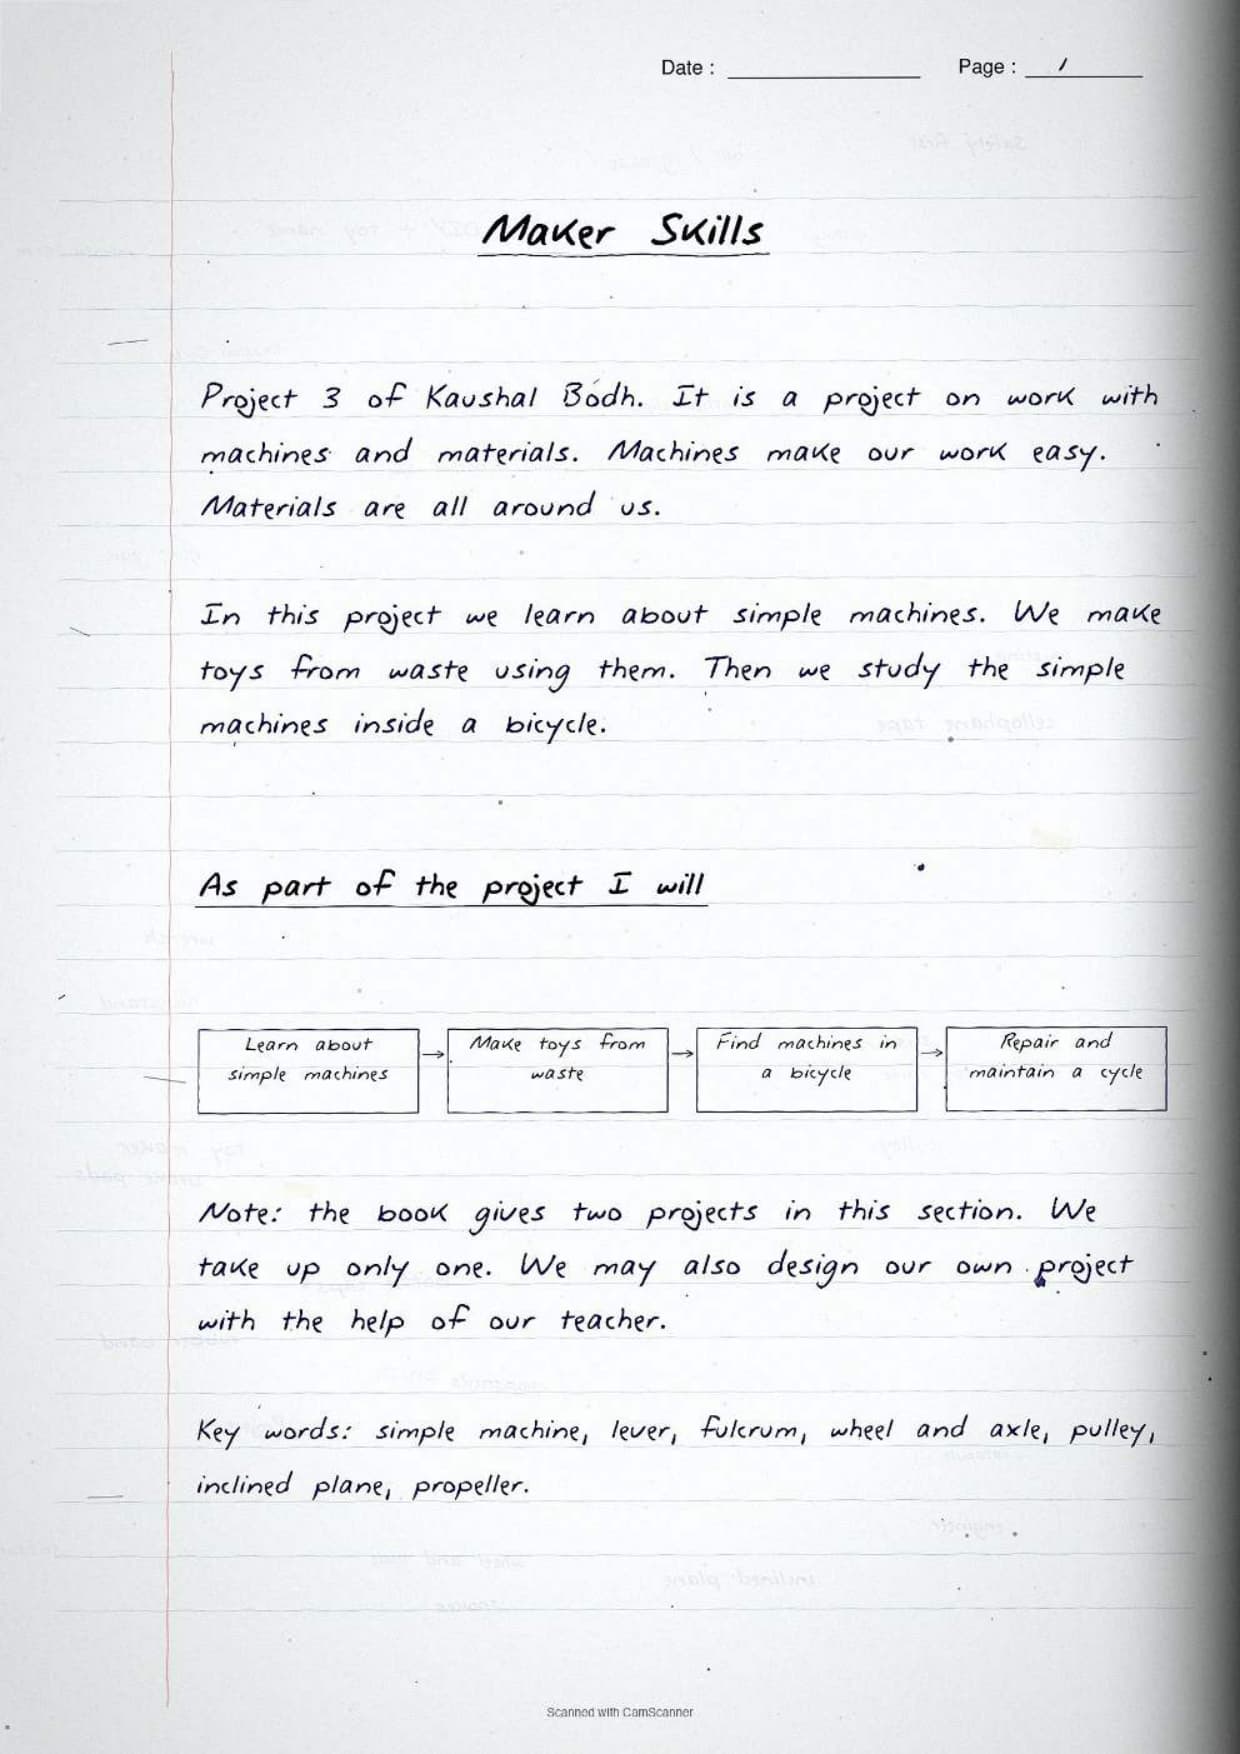
Maker Skills is Project 3 of the Kaushal Bodh book, and it sits inside the section called Work with Machines and Materials. The project has two halves. First you build toys from waste using simple machines. Then you find those same simple machines inside a bicycle and learn to keep it running.
The book states four outcomes for the project. These four lines are the safest answer to "what did you learn in this project", so copy them exactly.
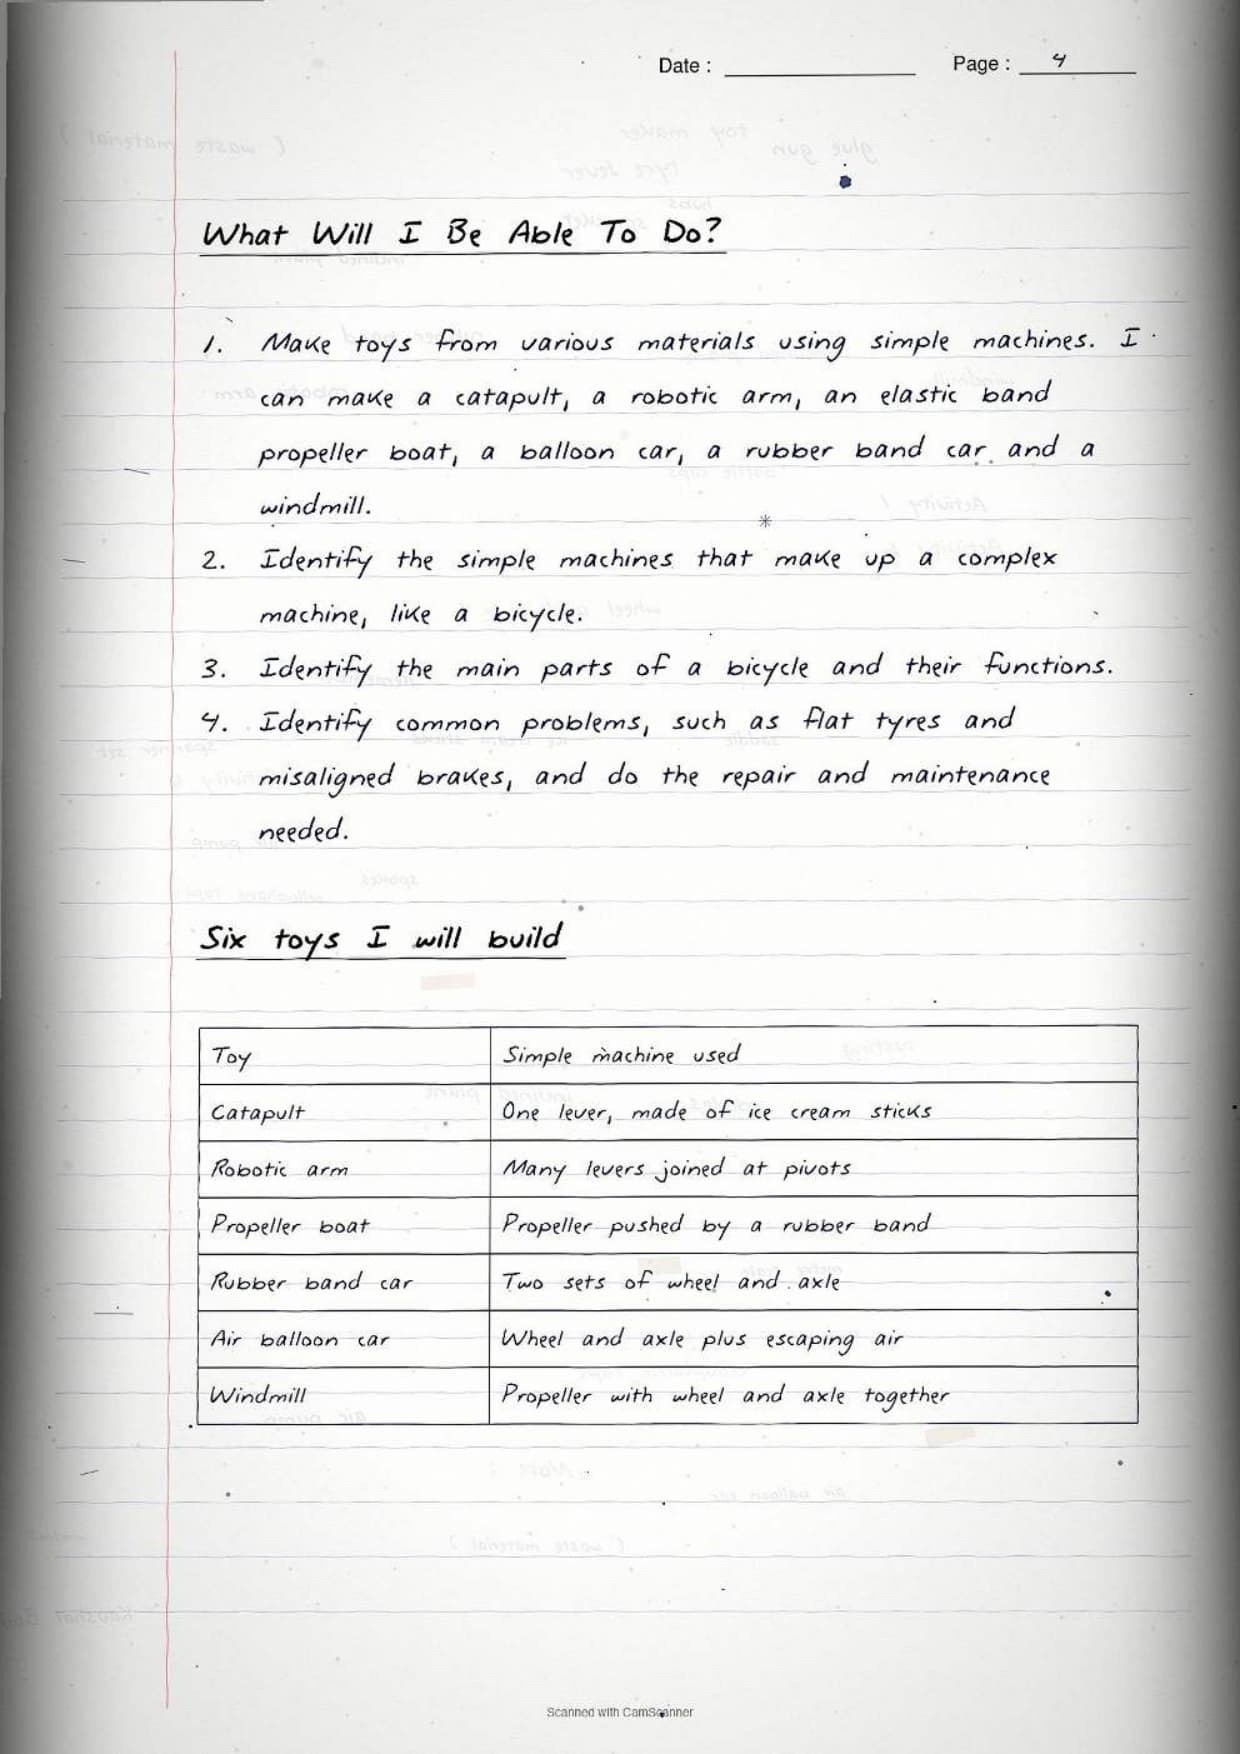
- Make toys from various materials using simple machines. You can make a catapult, a robotic arm, an elastic band propeller boat, a balloon car, a rubber band car and a windmill.
- Identify the various simple machines that make up a complex machine, like a bicycle.
- Identify the main parts of a bicycle and their functions.
- Identify common problems with bicycles, such as flat tyres and misaligned brakes, and do the repair and maintenance needed.
The book also says you must take up only one project from this section. You can pick Maker Skills, or you can design a project of your own with the help of your teacher.
Maker Skills Project Explained by NCERT
Source: NCERT OFFICIAL on YouTube
Simple Machines Around Us and Why They Make Work Easier
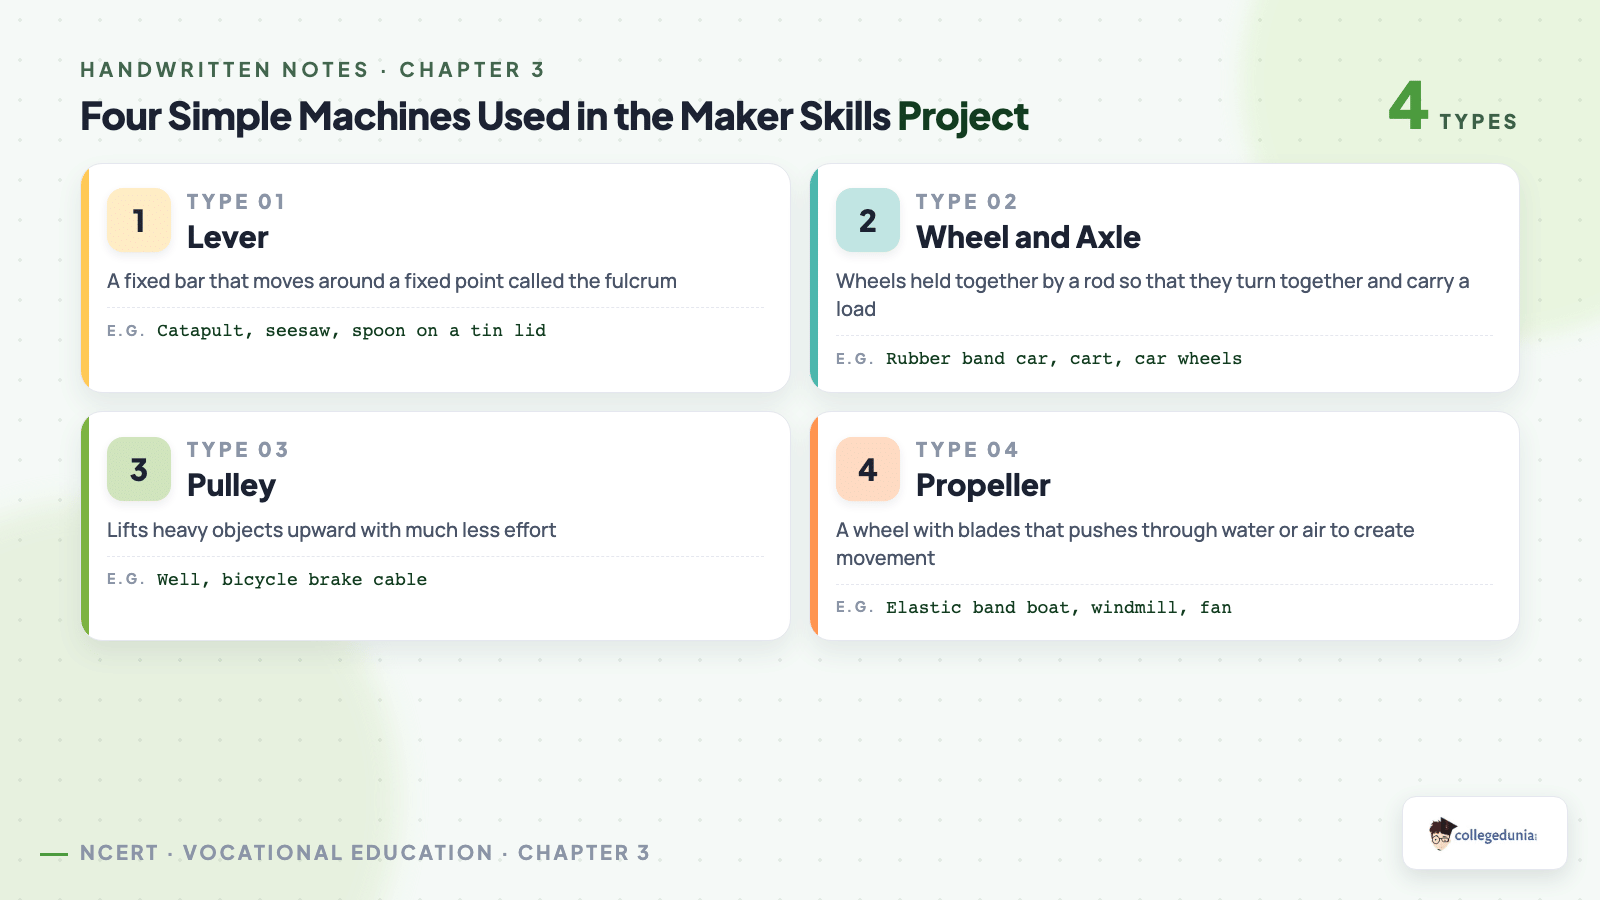
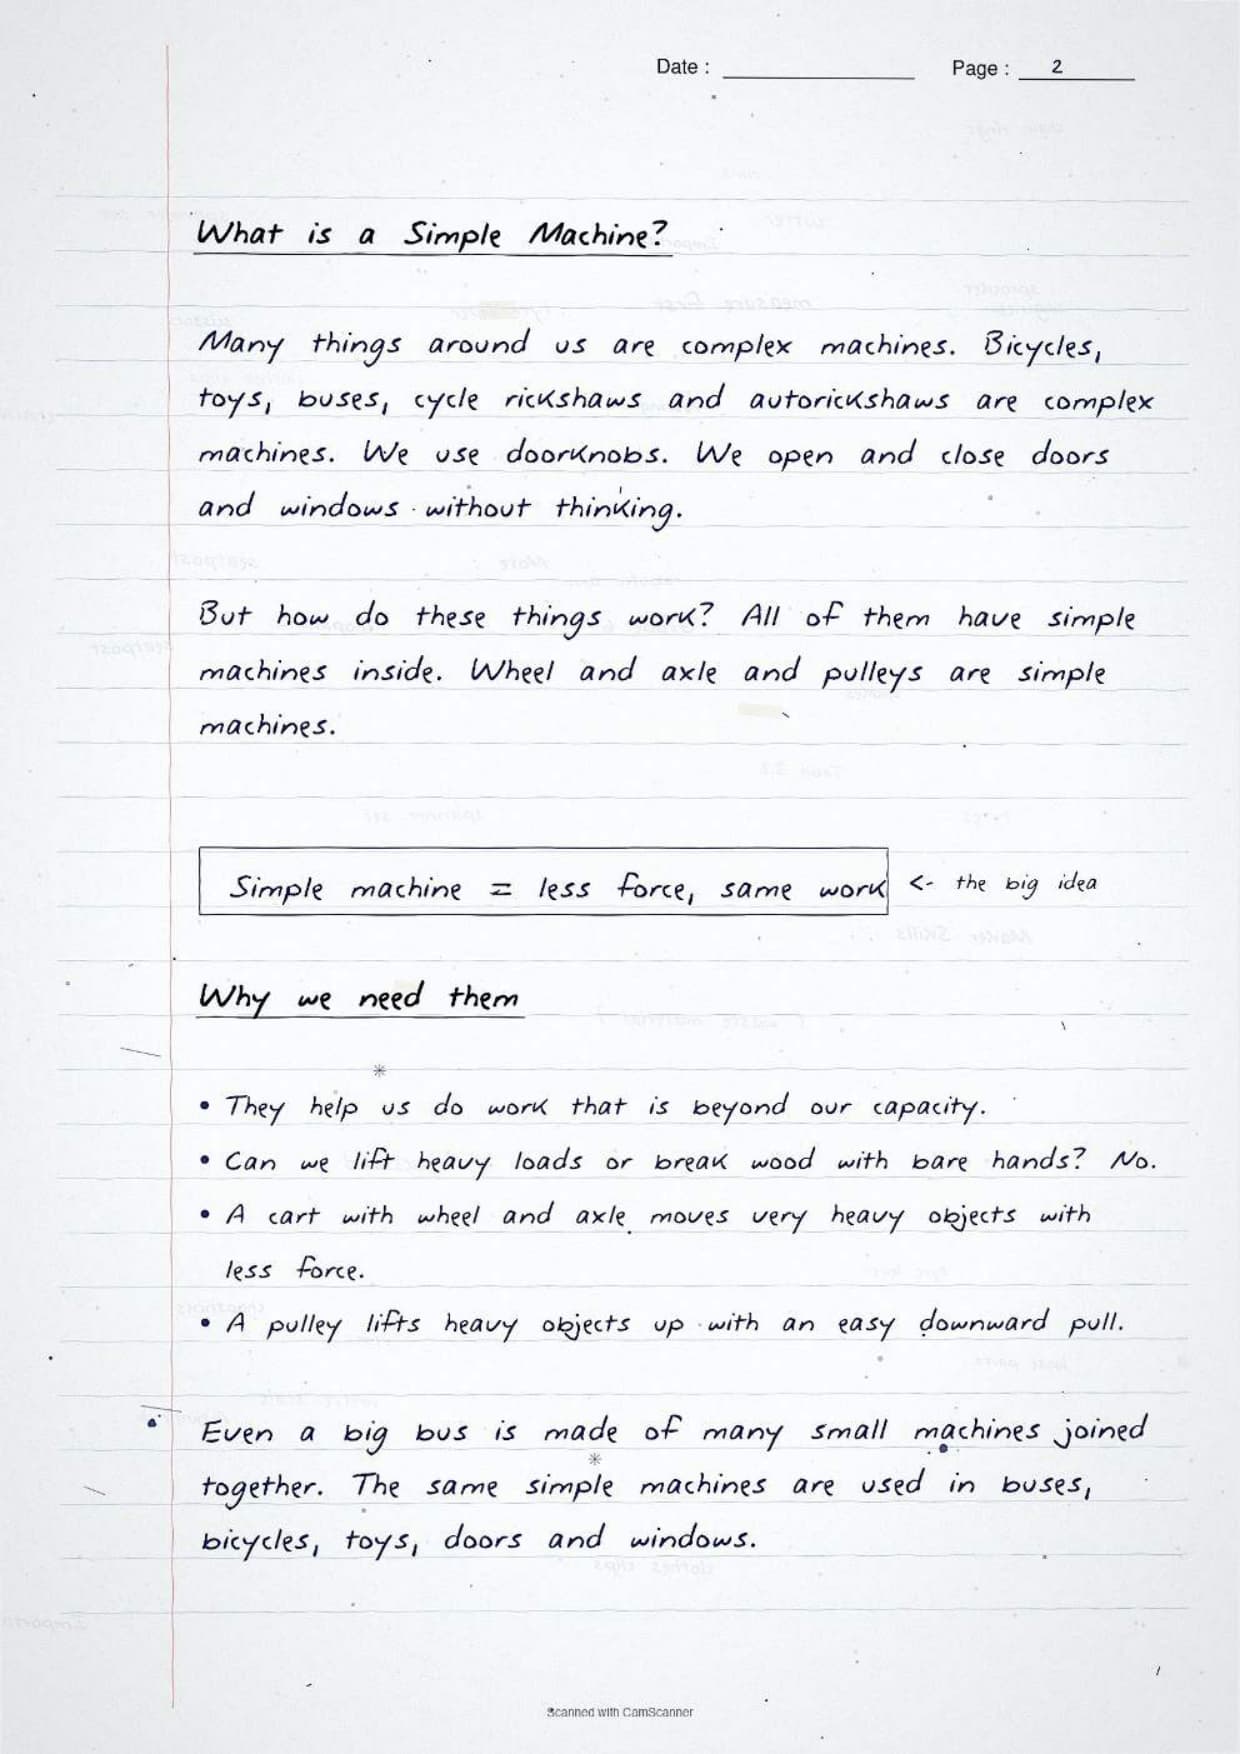
A simple machine is a basic device that makes work easier. A complex machine is built by joining several simple machines together. Bicycles, toys, buses, cycle rickshaws and autorickshaws are all complex machines.
The book explains the point with a question. Can you lift a heavy load or break wood with your bare hands? A cart with a wheel and axle moves very heavy objects with less force, and a pulley lifts heavy objects. That is the whole idea of a simple machine.
| Simple machine | What the book says it does | Where you meet it |
|---|---|---|
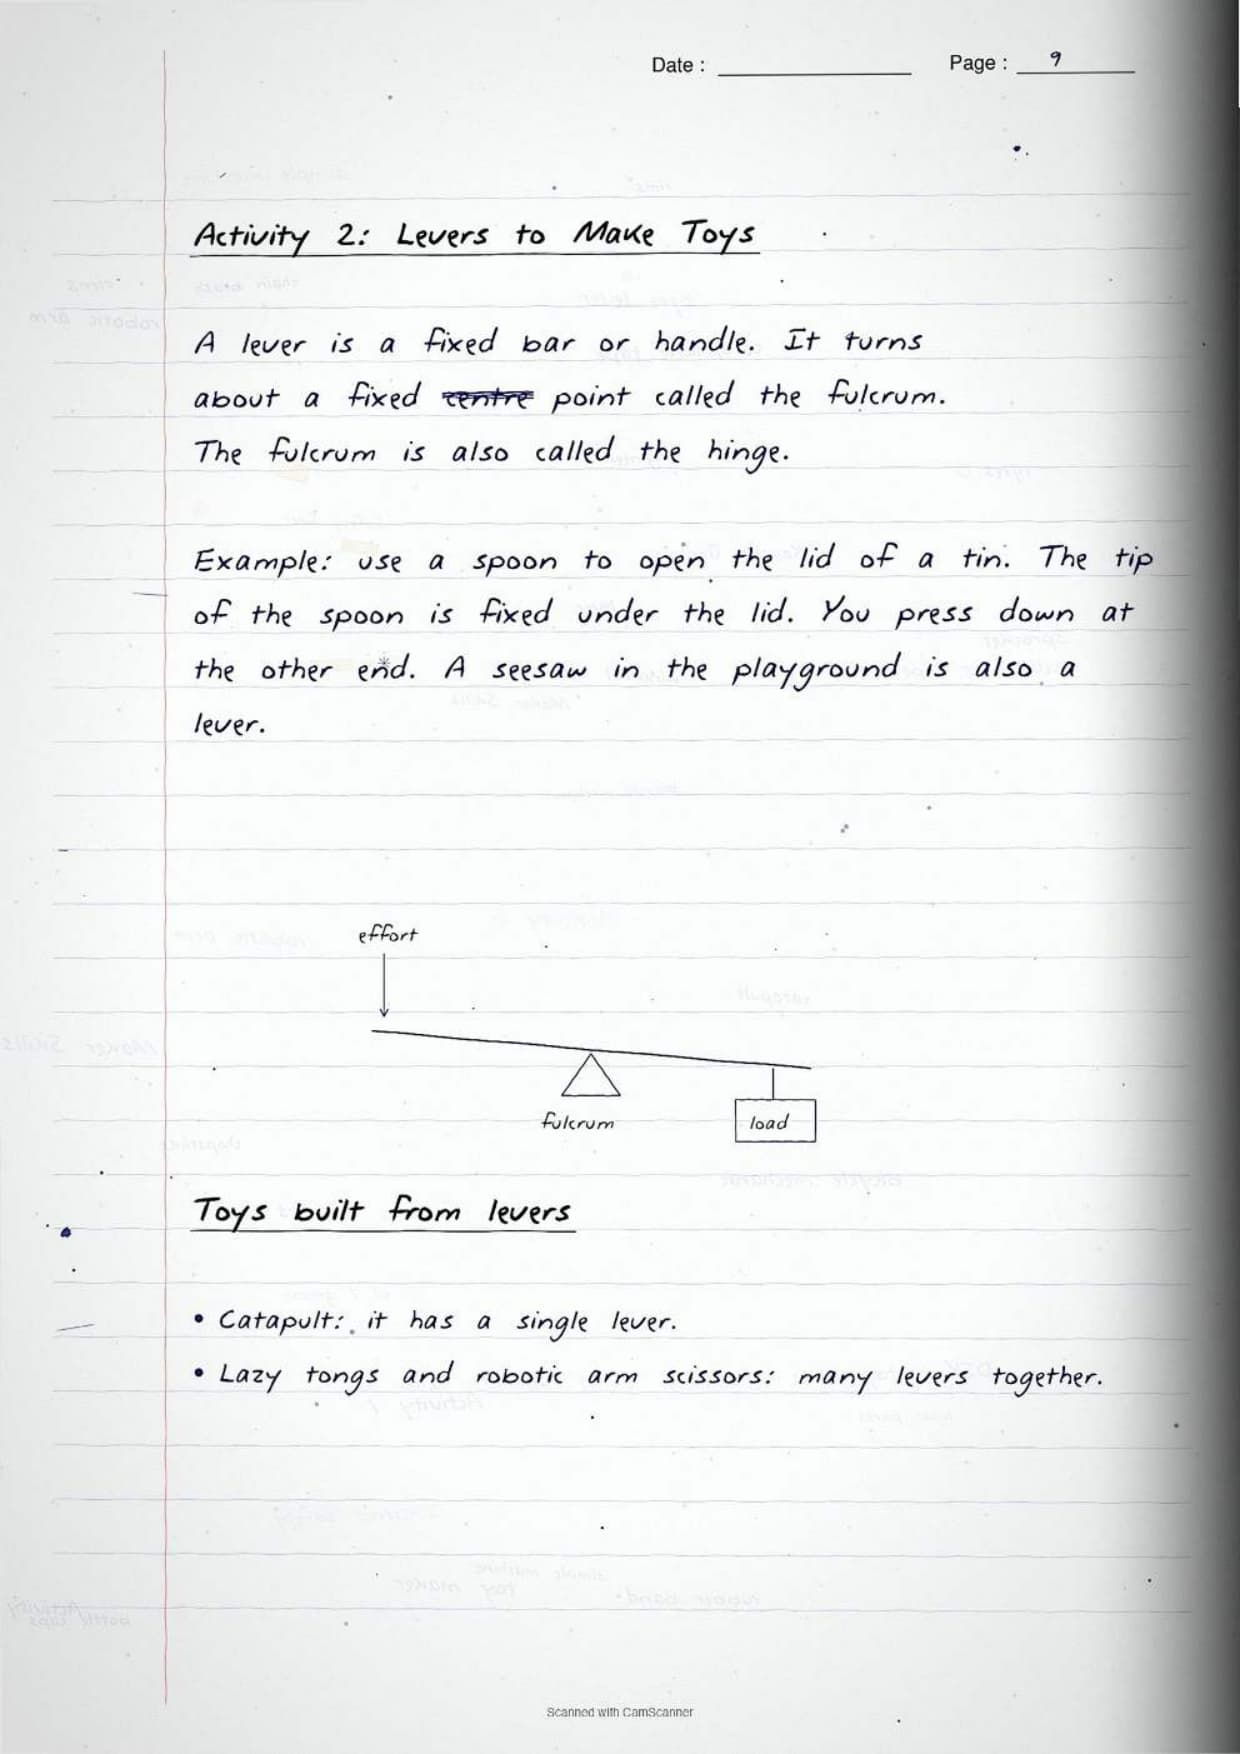
| Lever | A fixed bar or handle that moves around a fixed point called the hinge or fulcrum | Spoon opening a tin lid, seesaw, catapult |
| Wheel and axle | Wheels held together by a rod so that they turn together and carry a load | Car wheels, cart, rubber band car |
| Pulley | Lifts heavy objects with less effort | Well, brake cable of a bicycle |
| Propeller | A wheel with blades that pushes through water or air to create movement | Boat, fan, windmill |
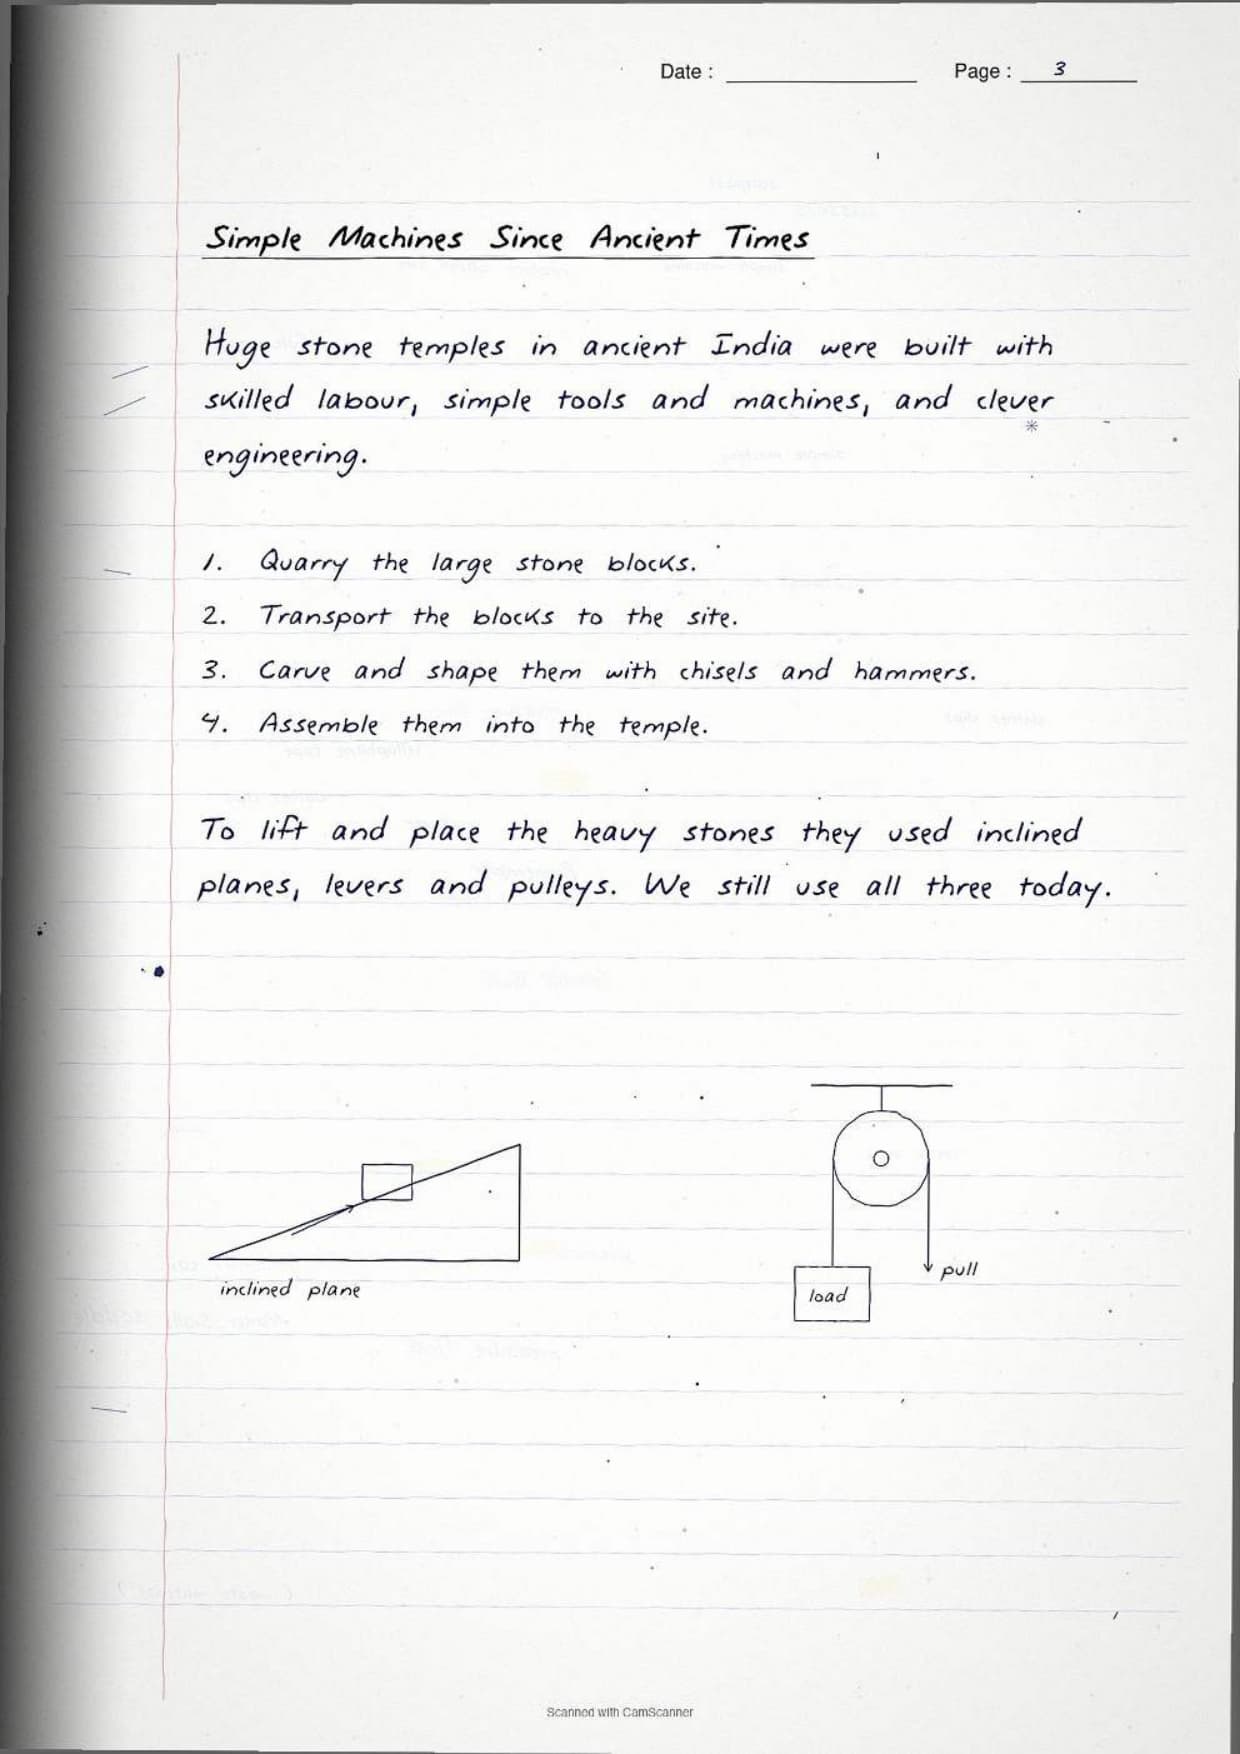
| Inclined plane | A slope used to move heavy loads upward | Ramp, ancient temple building sites |
Tip: the box on ancient architecture is a favourite question. Huge stone temples in ancient India were built with skilled labour, simple tools and clever engineering. Workers used chisels and hammers to carve stone, and inclined planes, levers and pulleys to lift and place heavy blocks. All three are simple machines we still use today.
Materials and Tools You Need for the Maker Skills Project
The book splits the requirement list into two parts, one for the toys and one for the bicycle work. Both lists are short questions in the class test, so learn which item belongs to which half.
For making toys from trash using simple machines:
- Materials: cardboard, plastic pipe, empty plastic bottles, plastic spoon, drinking straws, plastic bottle caps, paper, ice cream sticks, thread, rubber bands, glue, tape, glue gun, cellophane tape, clothes clips, all pin, balloon, colour box and chopsticks of wood, plastic or metal.
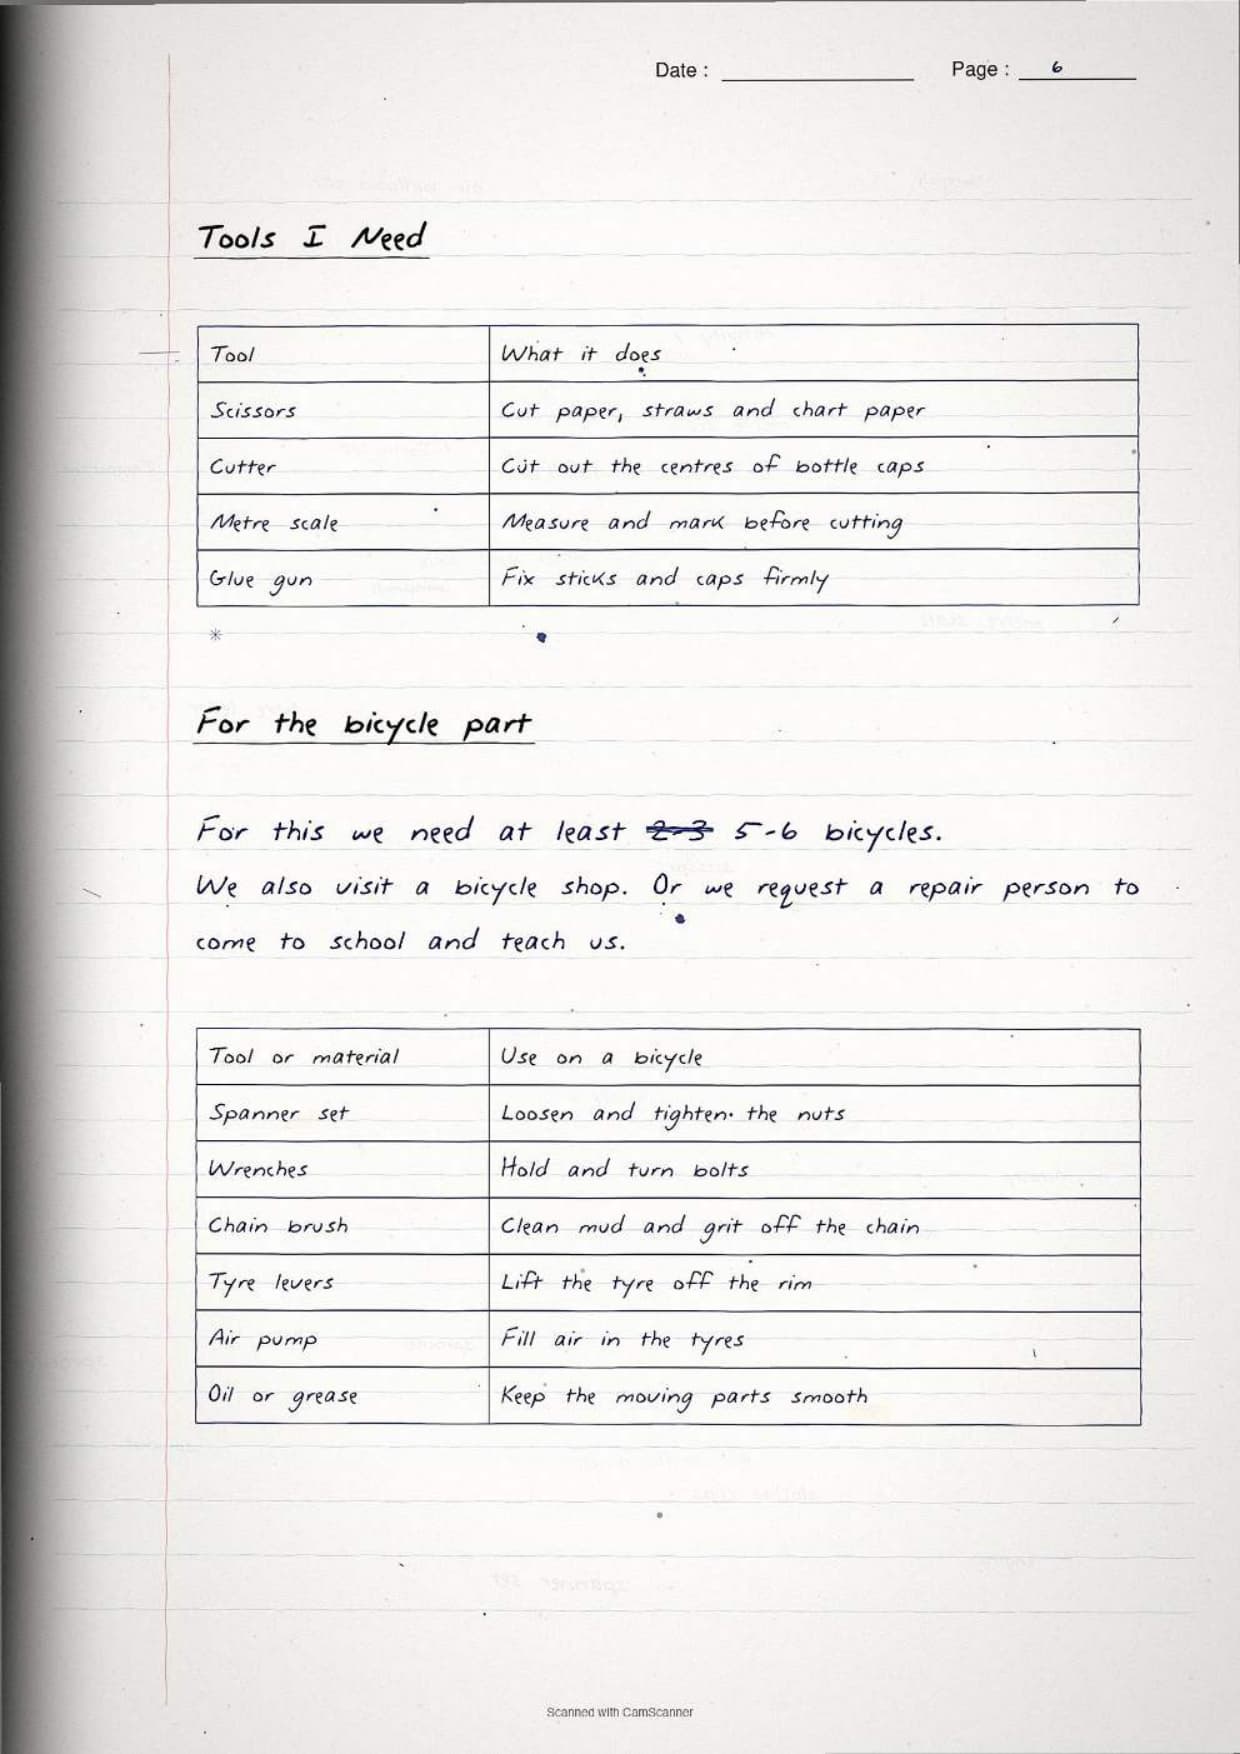
- Tools: scissors, metre scale and cutter. Only three.
For learning about simple machines in a bicycle:
- You will need at least 5 to 6 bicycles for the class.
- Materials: oil or grease.
- Tools: spanner set, wrenches, chain brush, tyre levers and air pump.
- You must also visit a bicycle shop, or ask someone who repairs bicycles to come to the school and teach you.
Safety Rules for the Cutting Tools, the Toys and the Work Area
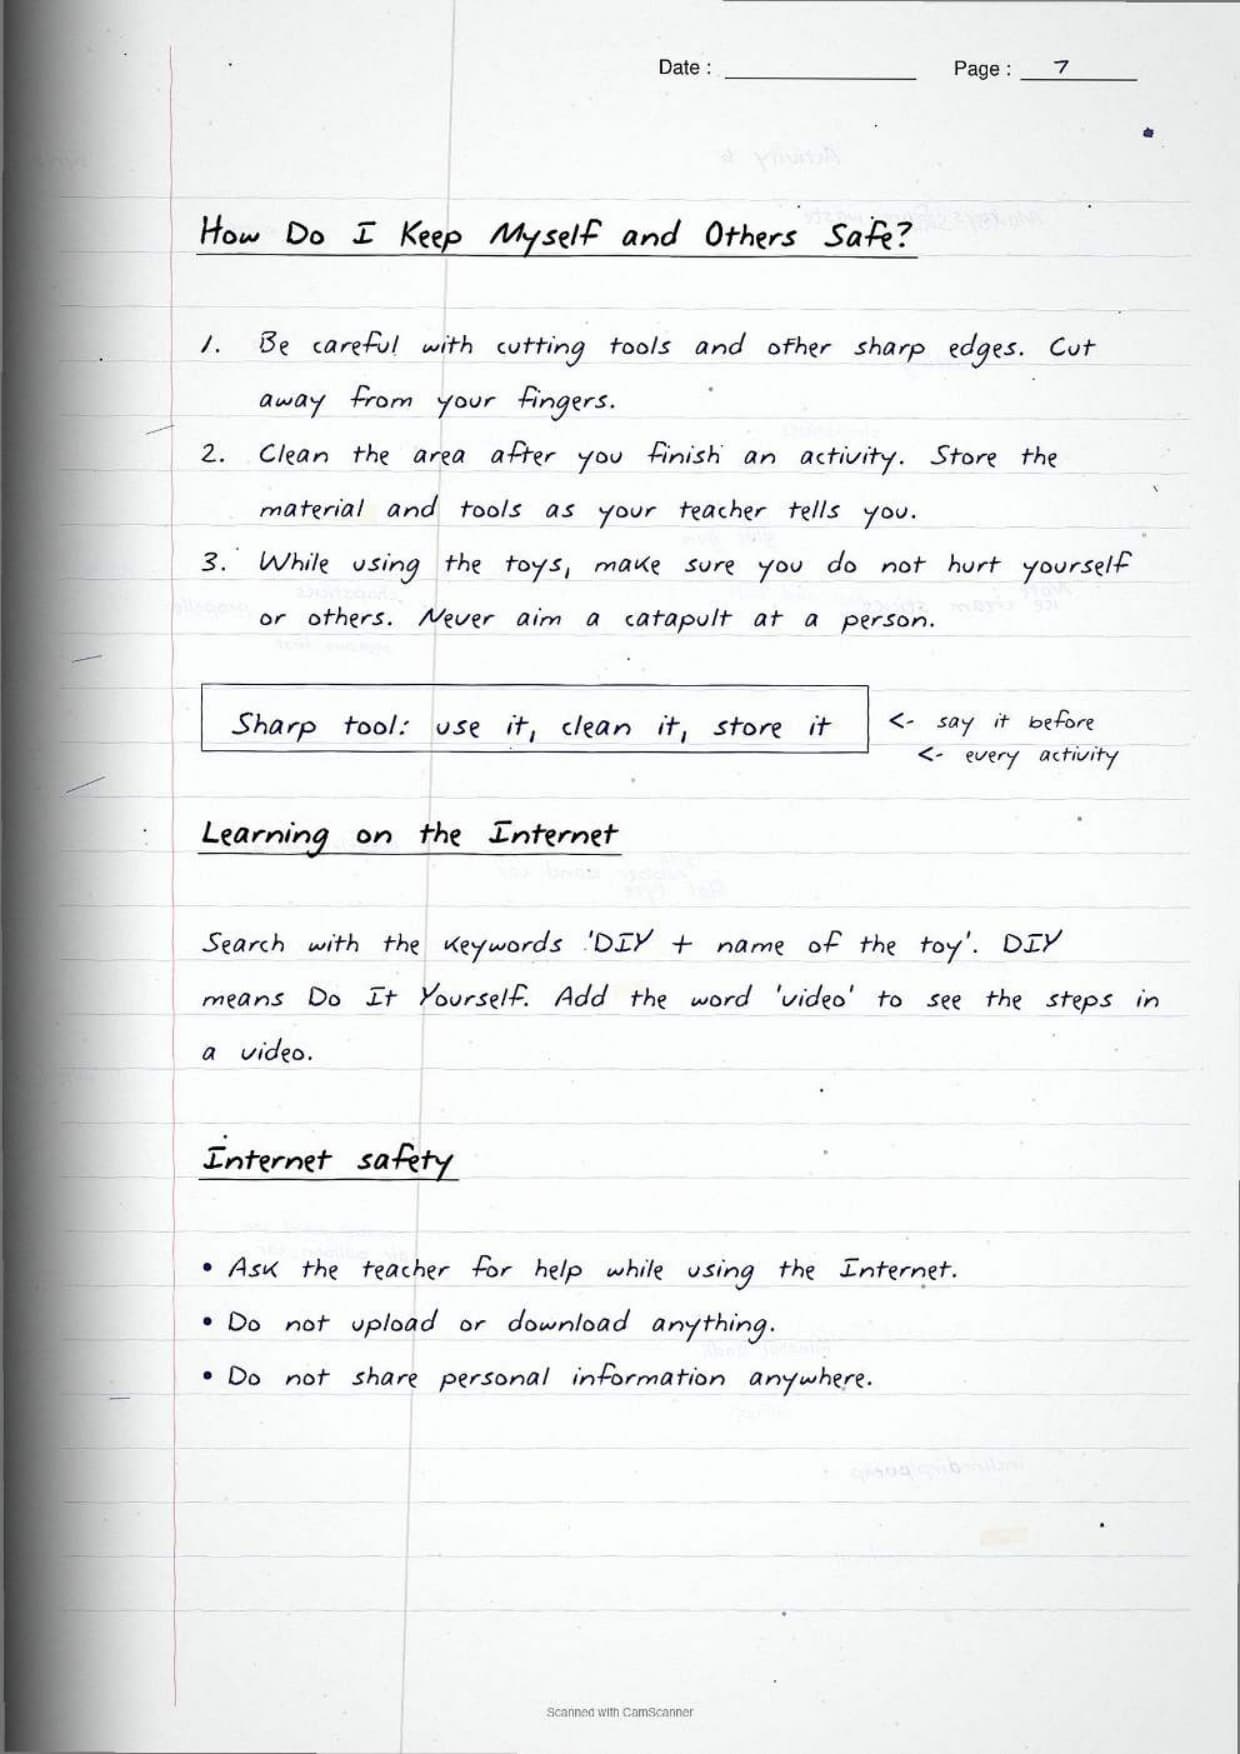
Only three safety rules are given for Maker Skills, plus a separate note on using the internet. Short lists like this are easy marks, so write all of them.
- Be careful with cutting tools and other sharp edges.
- Clean the area after you finish an activity, and store materials and tools as your teacher instructs.
- While using the toys, make sure you do not hurt yourself or others.
The chapter also tells you how to look up build steps online. Search using the keywords DIY plus the name of the toy, where DIY means Do It Yourself. Add the word video to the keywords if you want to watch the steps instead of reading them.
The internet safety note has three parts. Ask your teacher for help while using the internet, be careful not to upload or download anything, and never share personal information anywhere.
Activity 1 and Table 3.1: Spotting Simple Machines in Your Surroundings
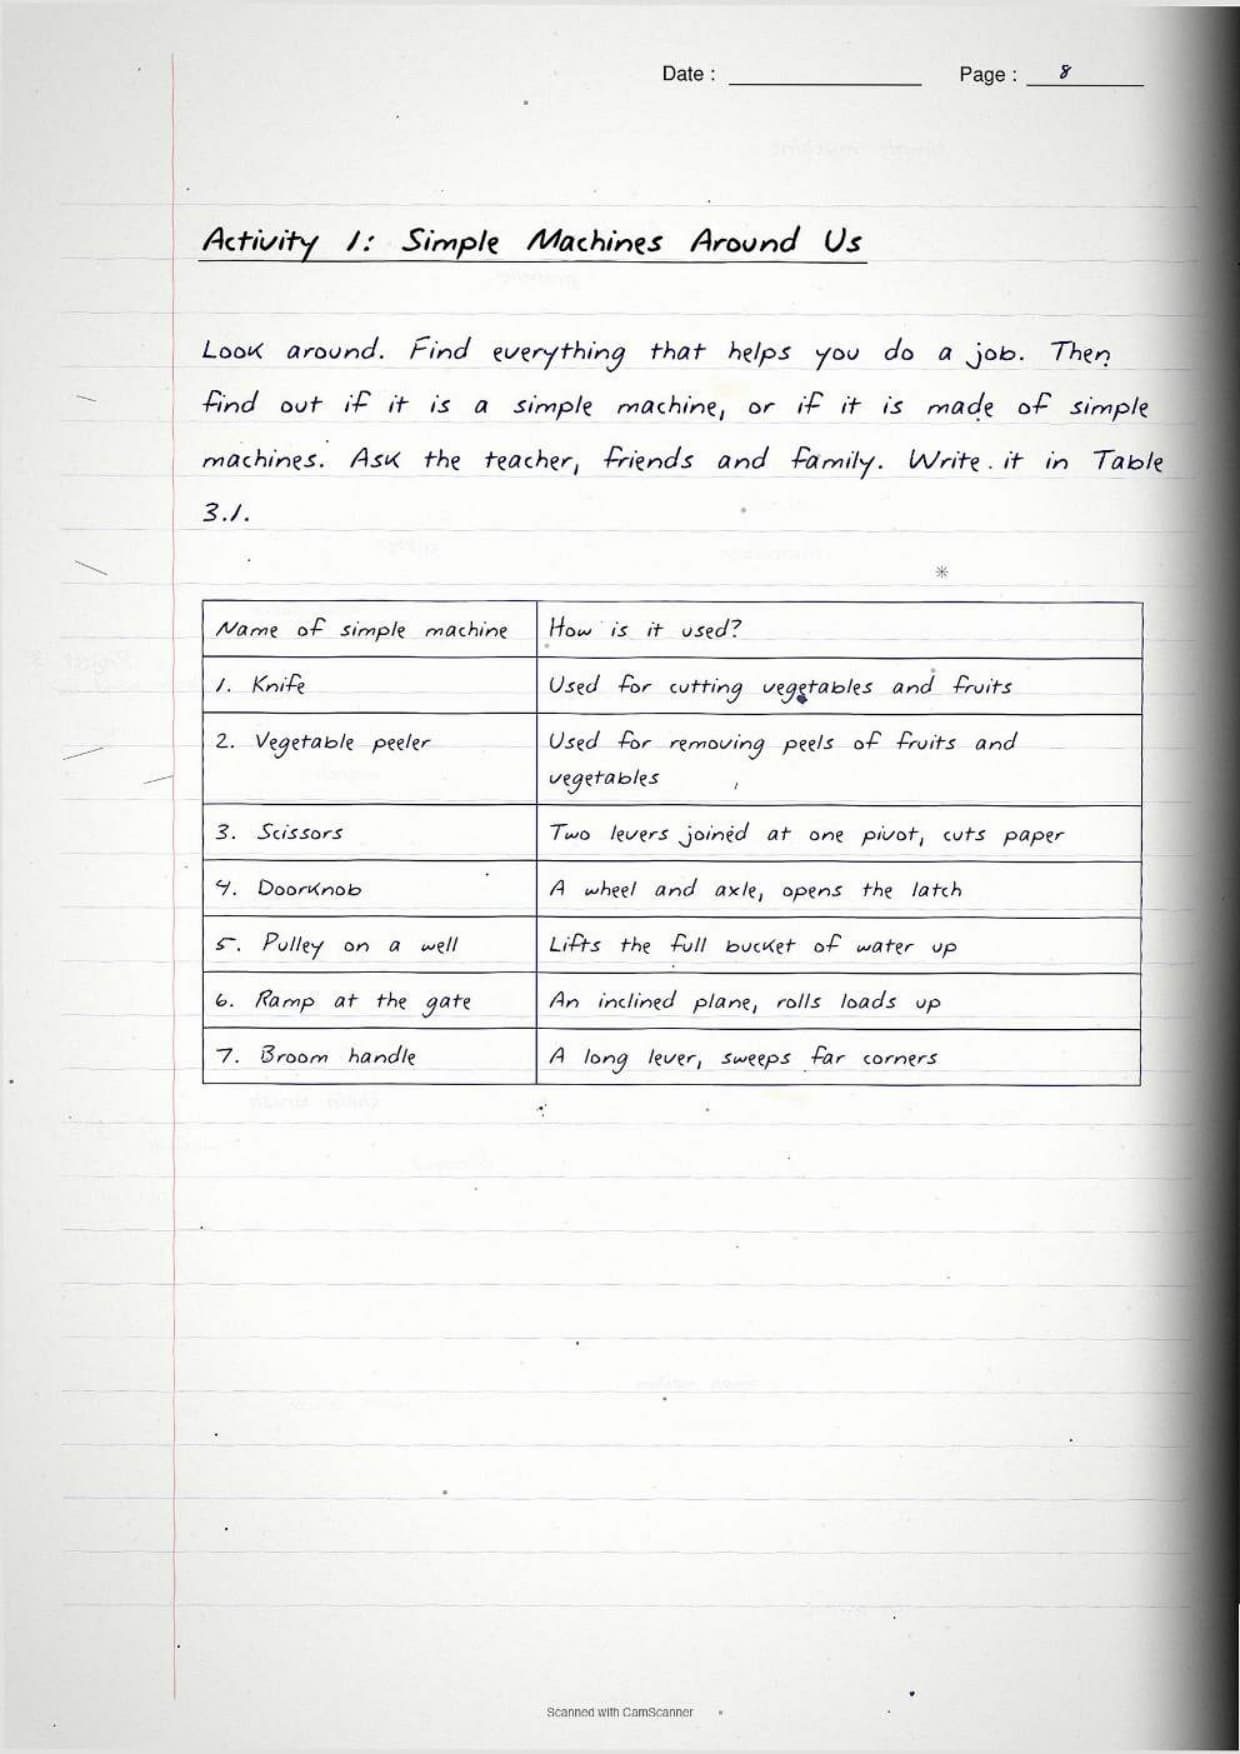
Activity 1 is the warm up. You look around your home, classroom and street, and note down everything that helps you do a task. Then you decide whether it is a simple machine, or a thing built out of simple machines.
Table 3.1 has three columns and six rows. Two rows are already filled in as worked examples, and the other four are yours.
| S.No. | Name of simple machine | How is it used? |
|---|---|---|
| 1 | Knife | Used for cutting vegetables and fruits |
| 2 | Vegetable peeler | Used for removing peels of fruits and vegetables |
| 3 to 6 | Your own entries | Scissors, doorknob, bottle opener, tap handle, stapler and broom all work well |
You can ask your teacher, your friends or your family for help while filling this table. The book says the point of Activity 1 is simply to notice that simple machines are already everywhere around you.
Levers Explained with the Catapult and Robotic Arm Builds
Activity 2 introduces the lever. A lever is a fixed bar or handle that moves around a fixed point, called the hinge or fulcrum. When you push a spoon tip under a tin lid and press the other end, you are using a lever. A seesaw in the playground is the same machine.
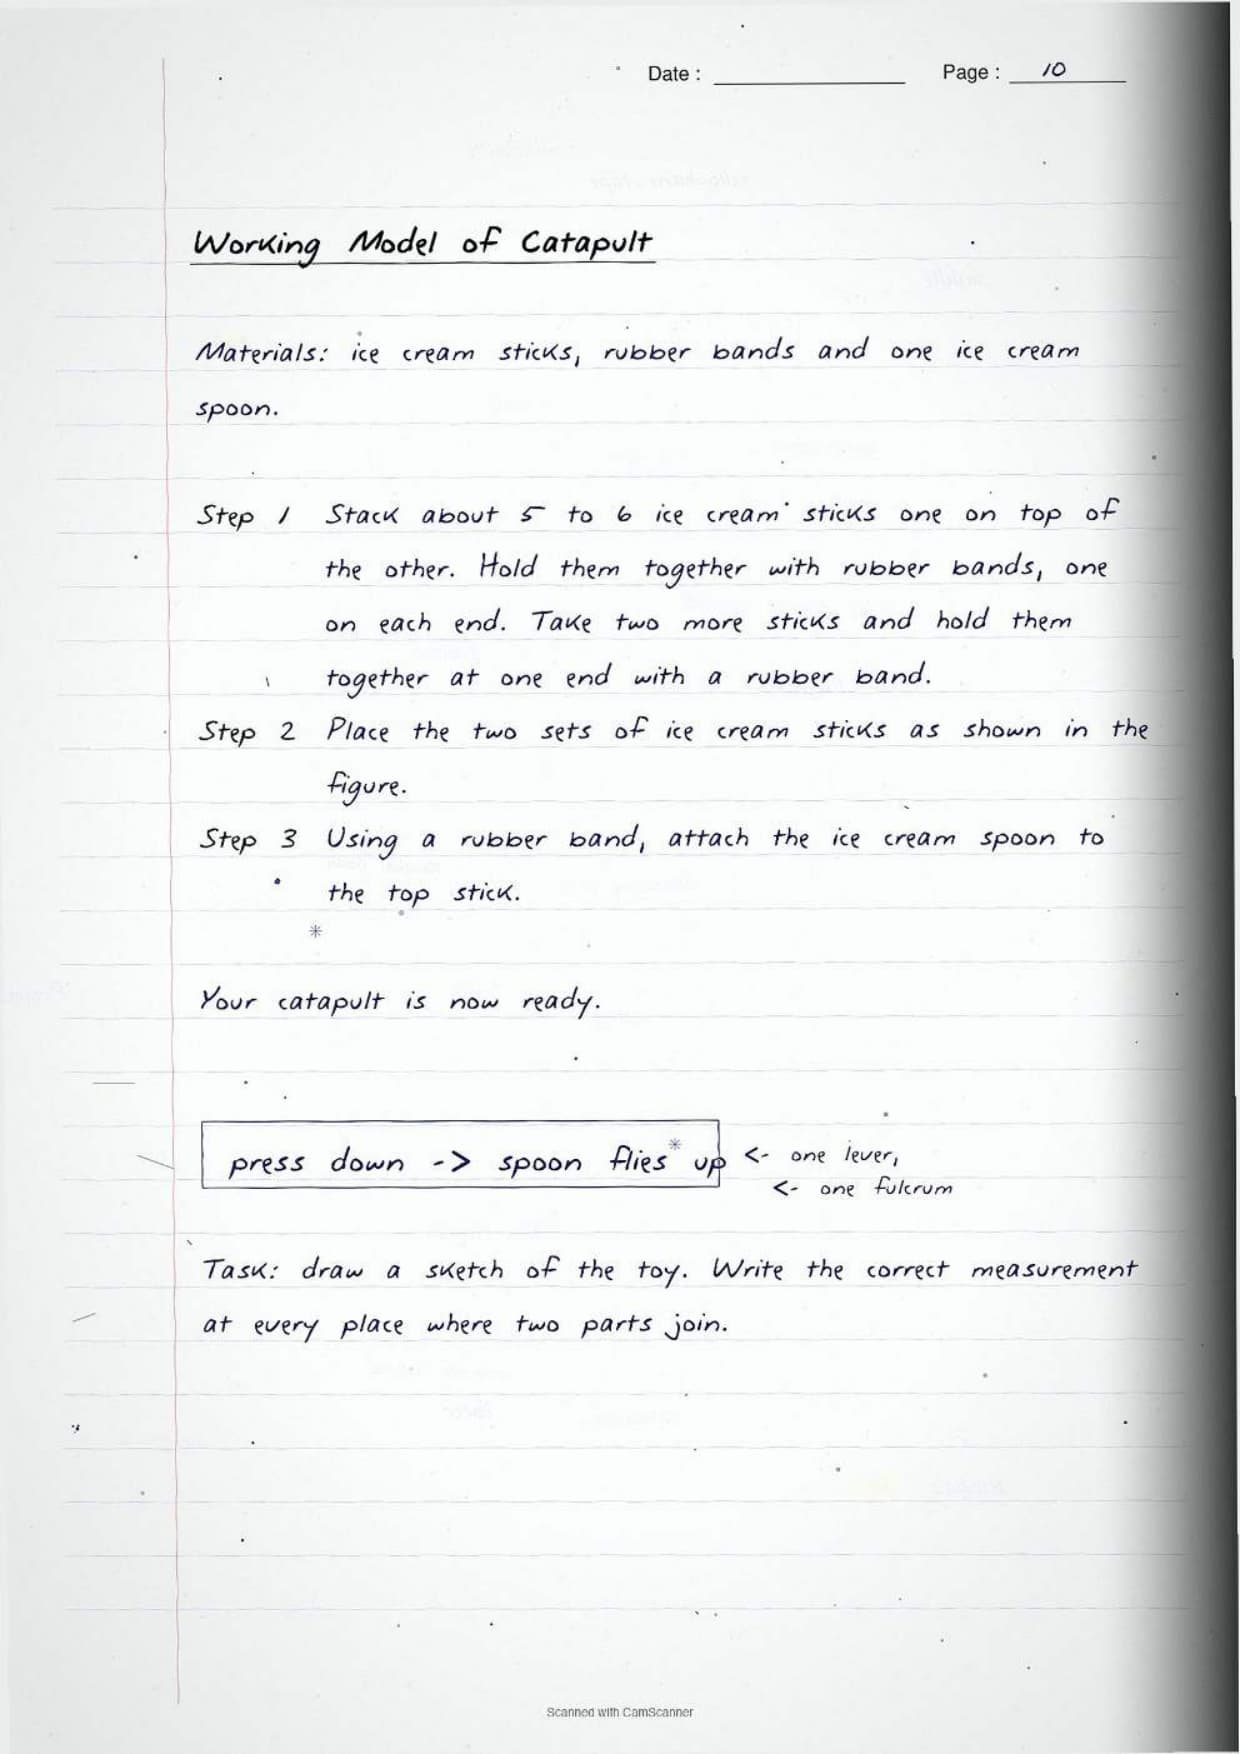
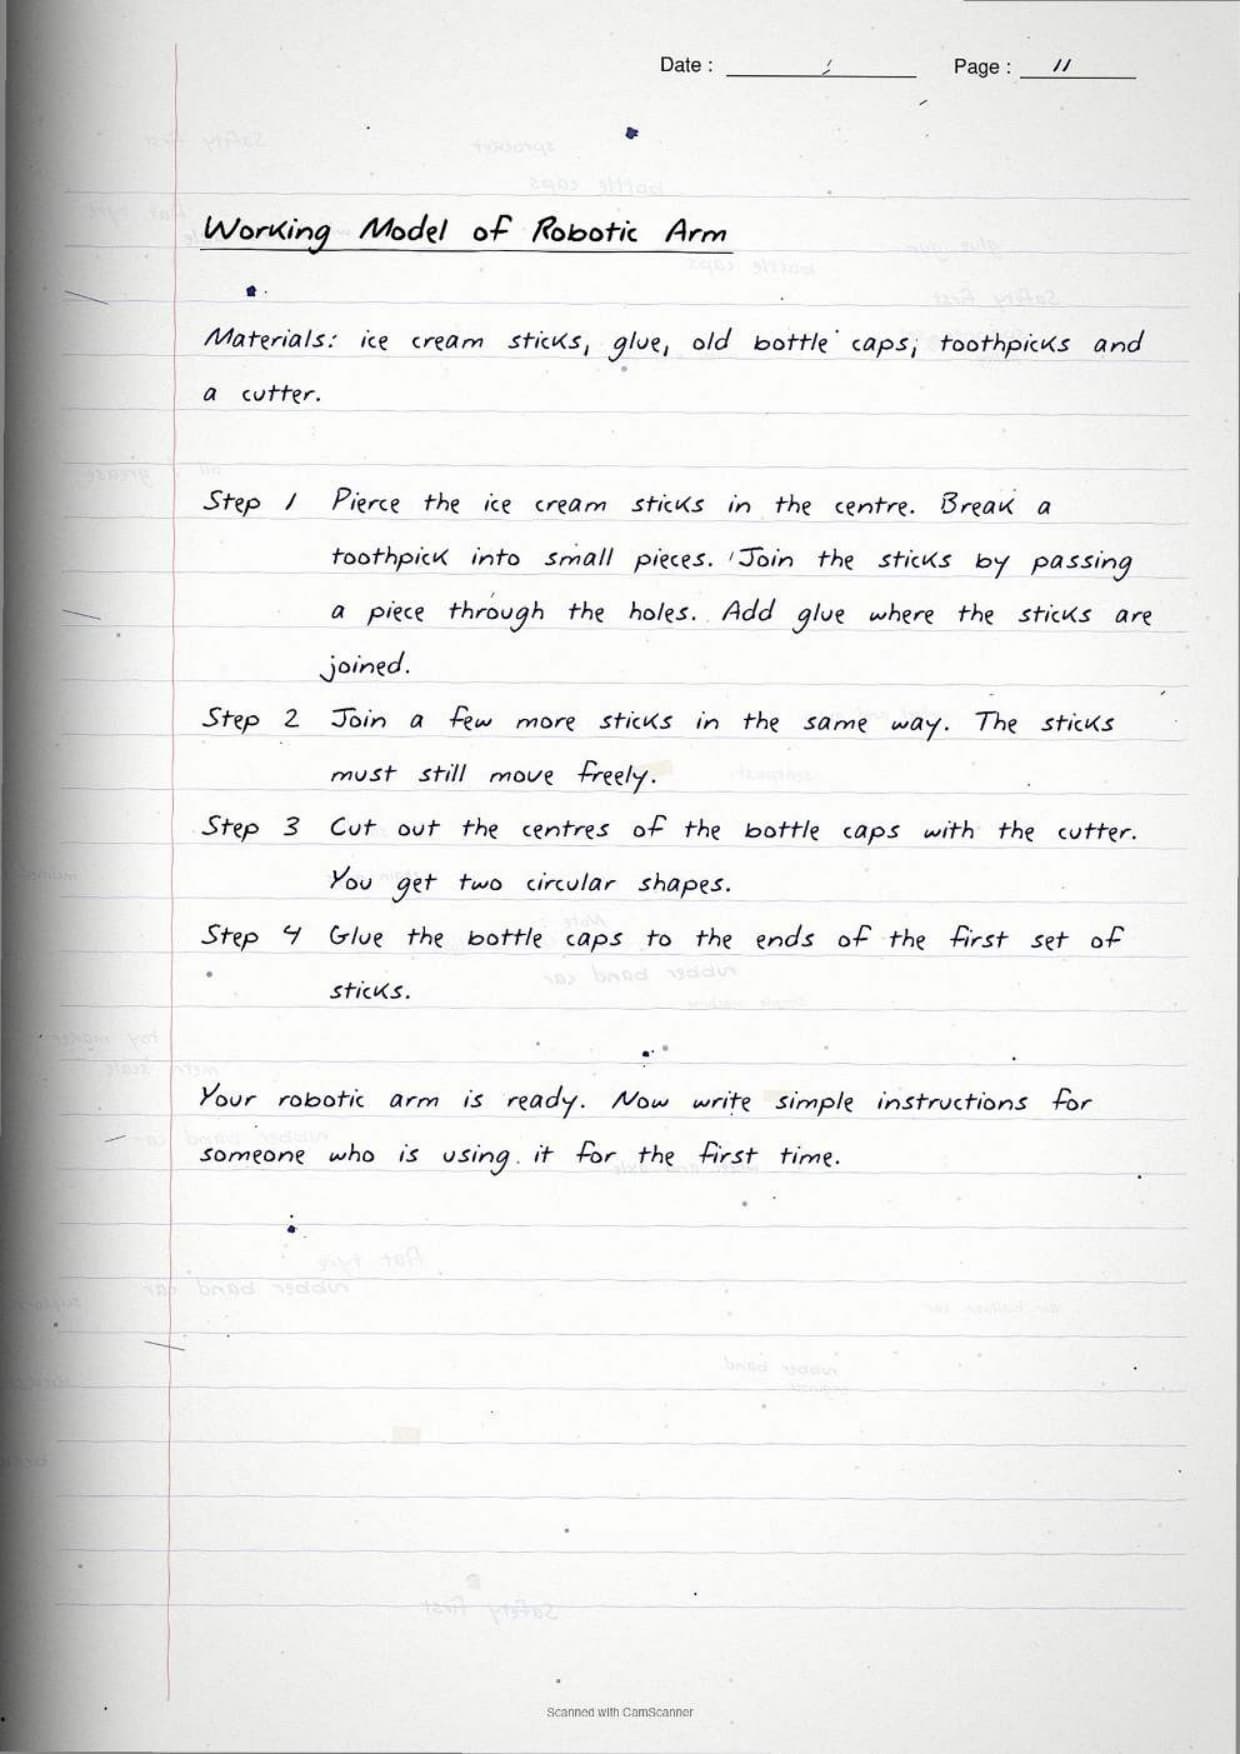
Three toys are named for this activity. The simple catapult has a single lever. The lazy tongs and the robotic arm have multiple levers. That one line is the most asked question from Activity 2.
| Working model | Materials from the book | Key step to remember |
|---|---|---|
| Catapult (Figure 3.4) | Ice cream sticks, rubber bands, one ice cream spoon | Stack 5 to 6 sticks and band them at both ends. Band two more sticks at one end, place the two sets together, then band the spoon on |
| Robotic arm (Figure 3.5) | Ice cream sticks, glue, old bottle caps, toothpicks, a cutter | Pierce the sticks at the centre, join them with broken toothpick pieces and glue, keep the joints free to move, then glue cut bottle cap rings to the ends |
Tip: after each build the book asks you to draw a sketch with accurate measurements at every joint, and to write instructions for a first time user. Write those instructions in simple steps, one action per line.
Propellers and the Elastic Band Propeller Boat Build
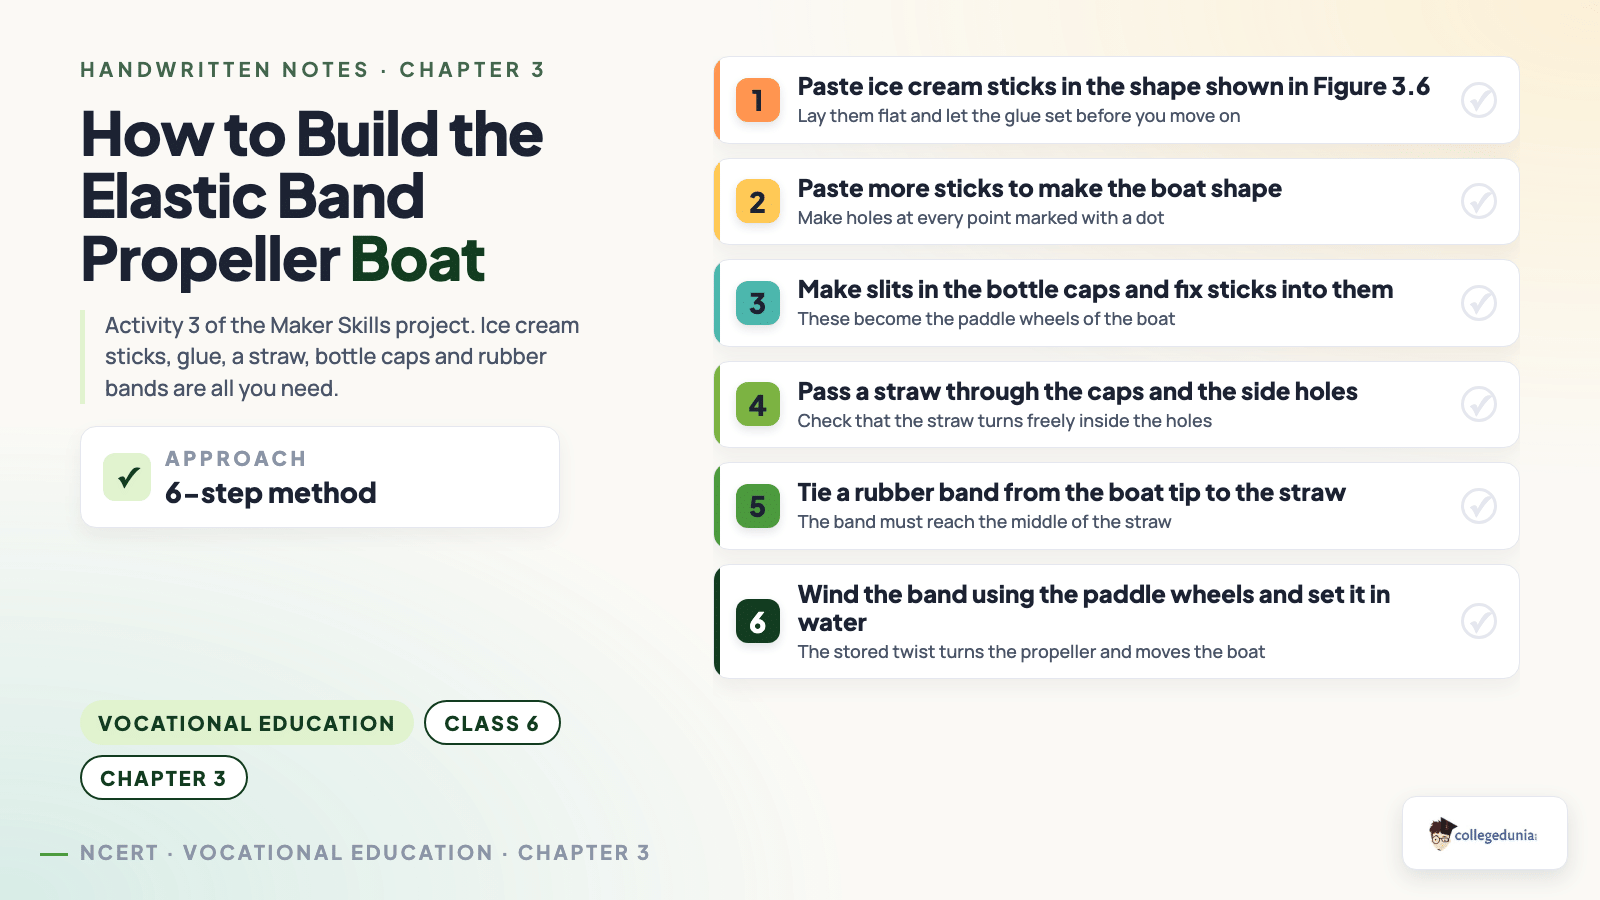
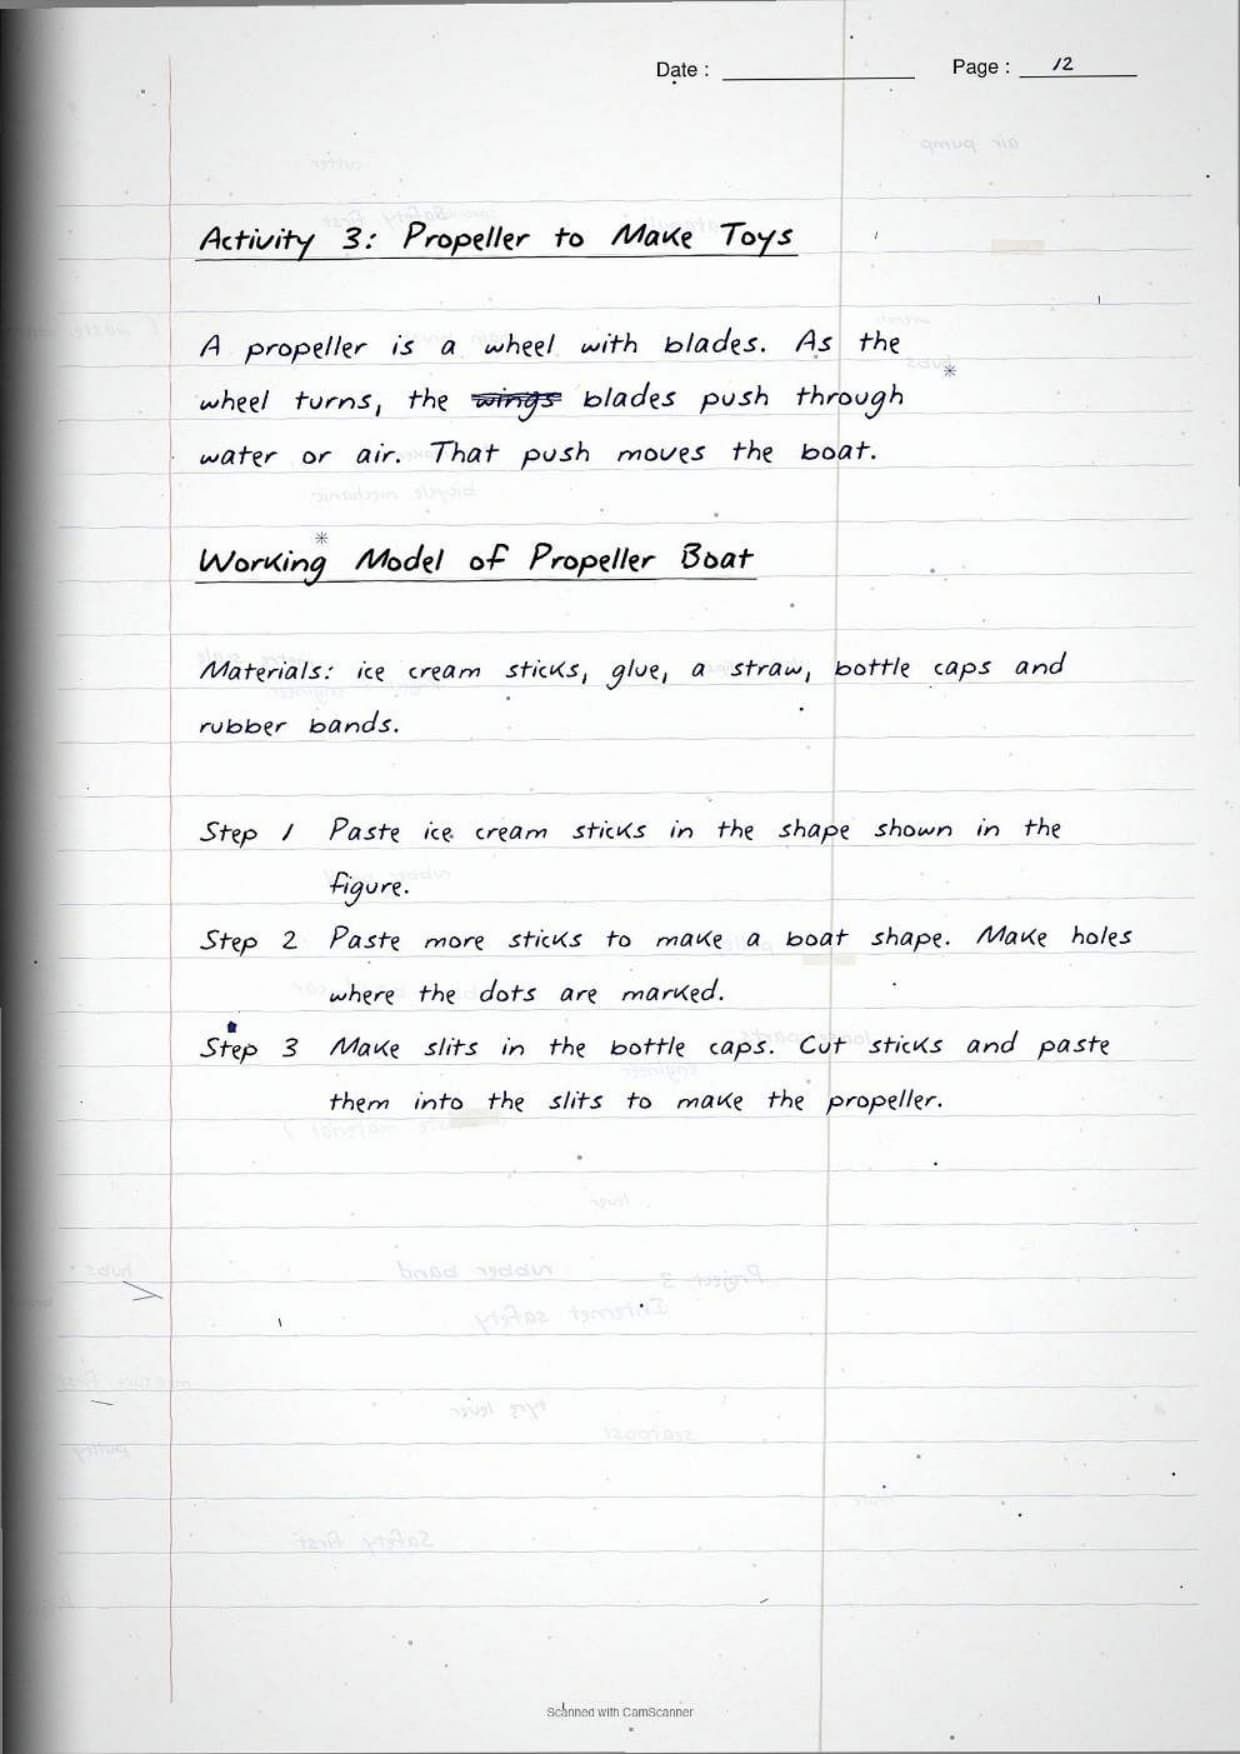
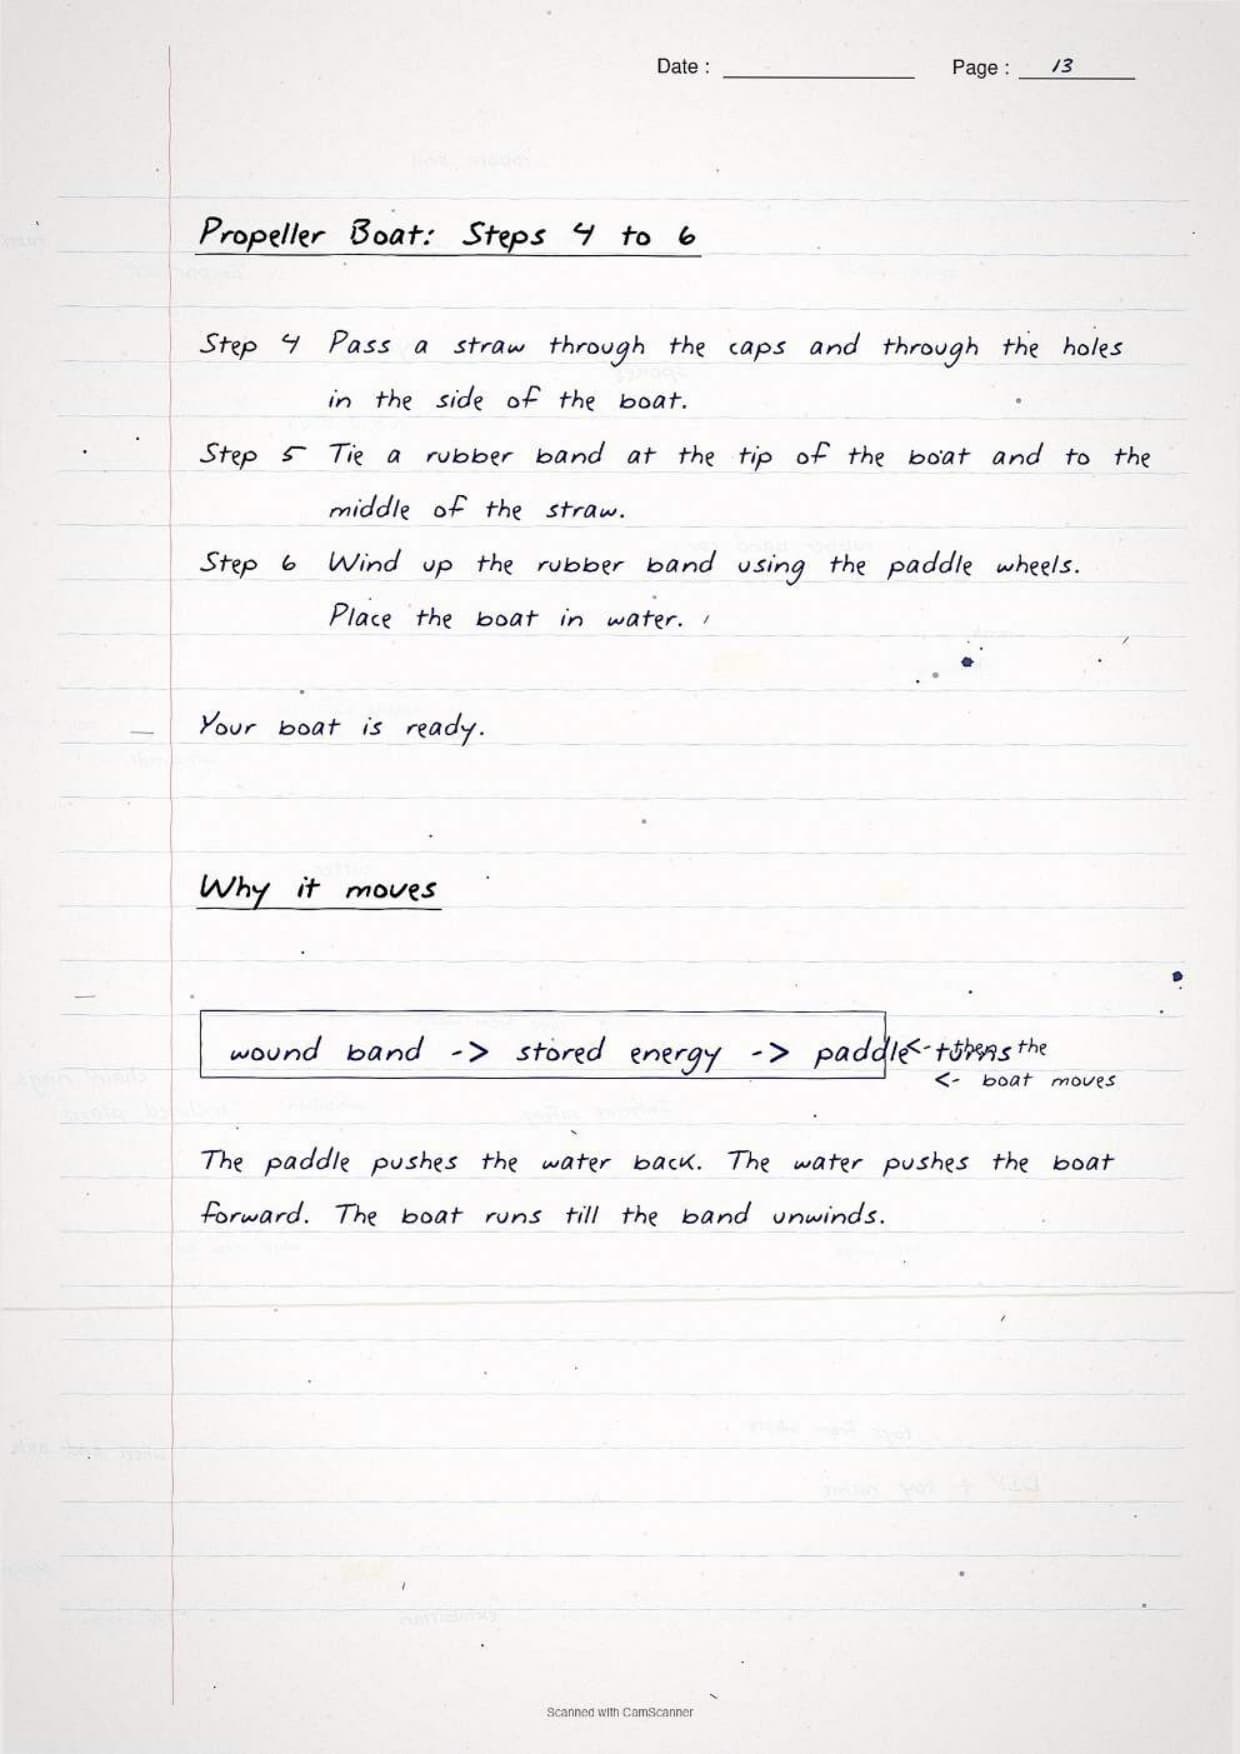
Activity 3 introduces the propeller. A propeller is a wheel with blades. As the wheel turns, the blades push through water or air and create movement. The toy for this activity is the elastic band propeller boat shown in Figure 3.6.
Materials are ice cream sticks, glue, a straw, bottle caps and rubber bands. The build runs in six steps.
- Paste ice cream sticks in the shape shown in the figure.
- Paste more sticks to make a boat shape, and make holes where the dots are marked.
- Make slits in the bottle caps, then cut and paste sticks into the sides to form the paddle wheels.
- Pass a straw through the caps and through the holes in the sides of the boat.
- Tie a rubber band from the tip of the boat to the middle of the straw.
- Wind up the rubber band using the paddle wheels and place the boat in water.
The stored twist in the rubber band is what turns the propeller, and the propeller pushes against the water to move the boat. Write that sentence in your project file, because it explains the science behind the toy.
Wheel and Axle Builds: The Rubber Band Car and the Air Balloon Car
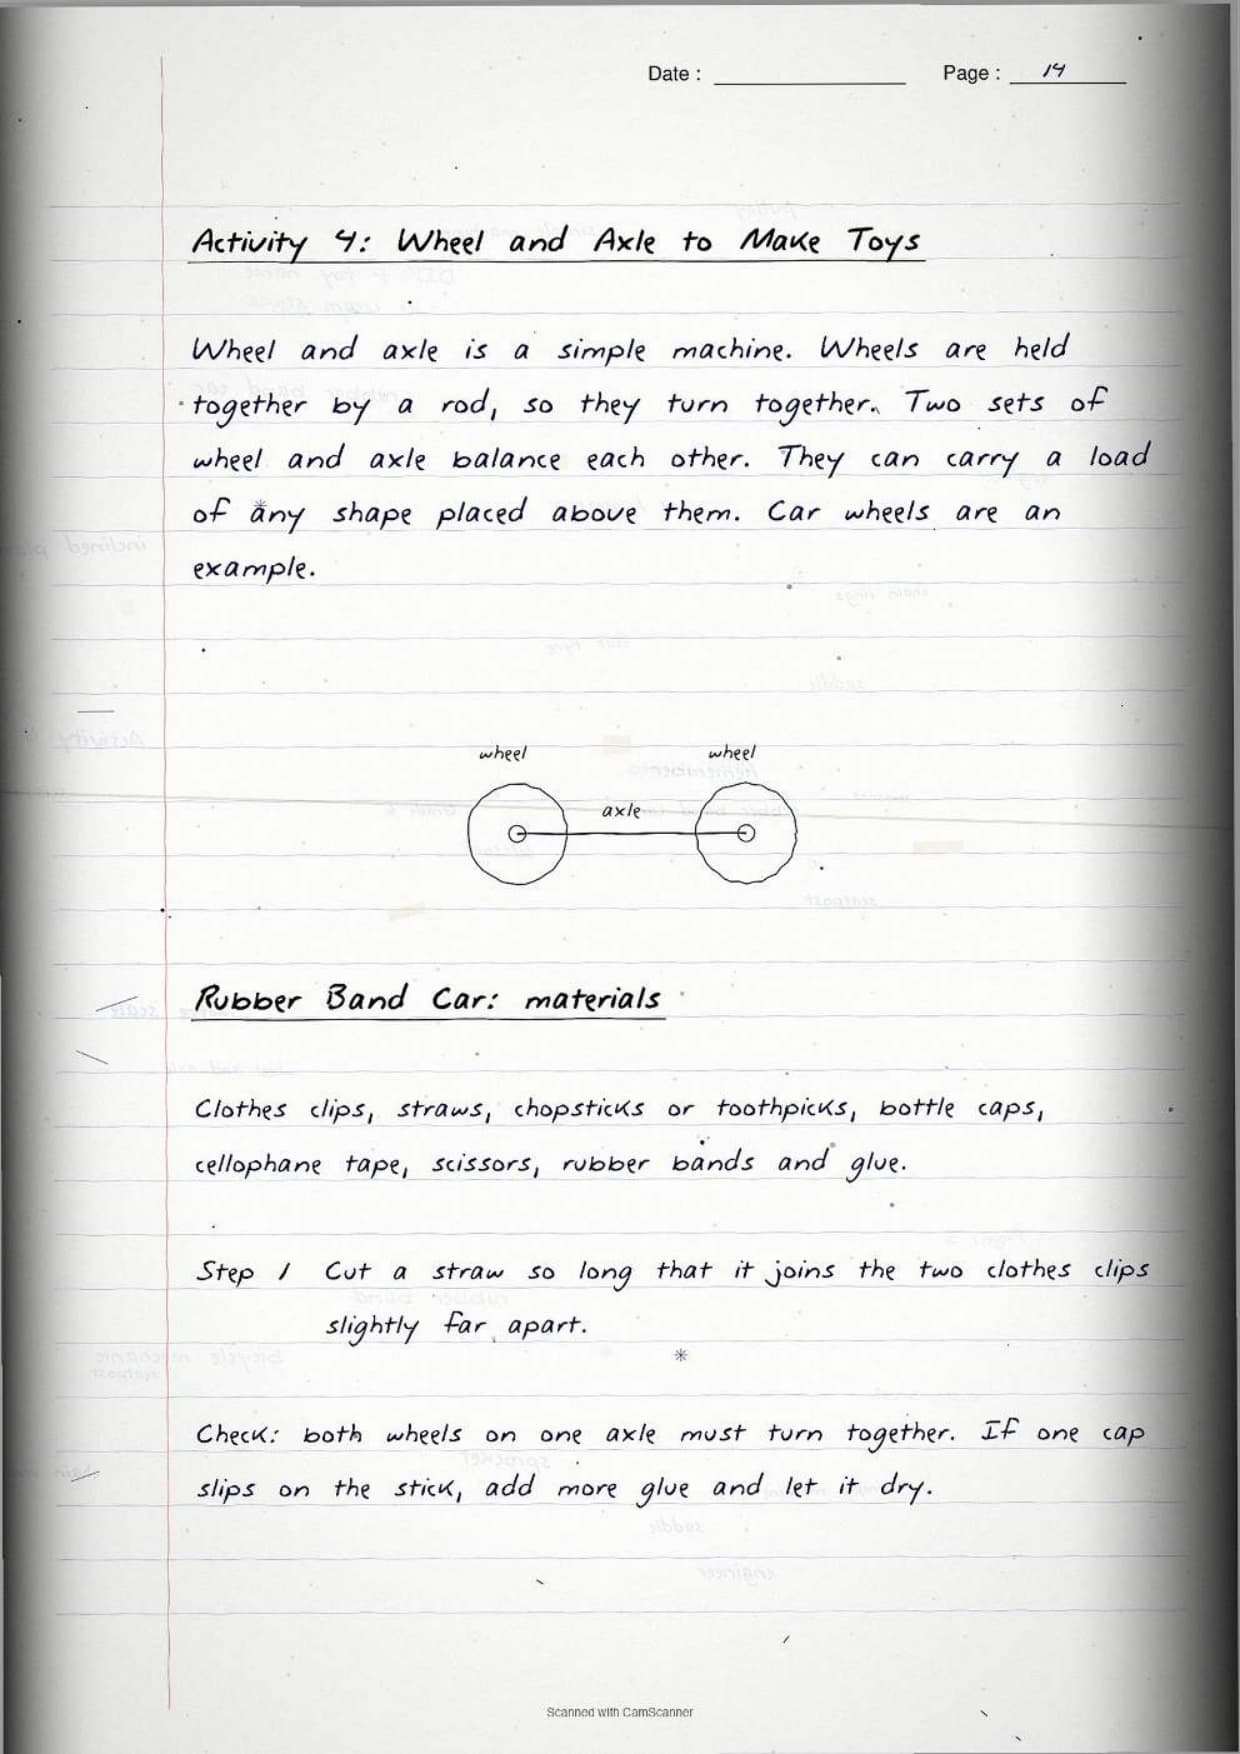
Activity 4 covers the wheel and axle. It is made of wheels held together by a rod so that they turn together. With two sets of wheel and axle, the sets balance each other and can carry a load of almost any shape placed above them. Car wheels are the everyday example.
Two toys use two sets of wheel and axle.
| Working model | Materials from the book | What makes it move |
|---|---|---|
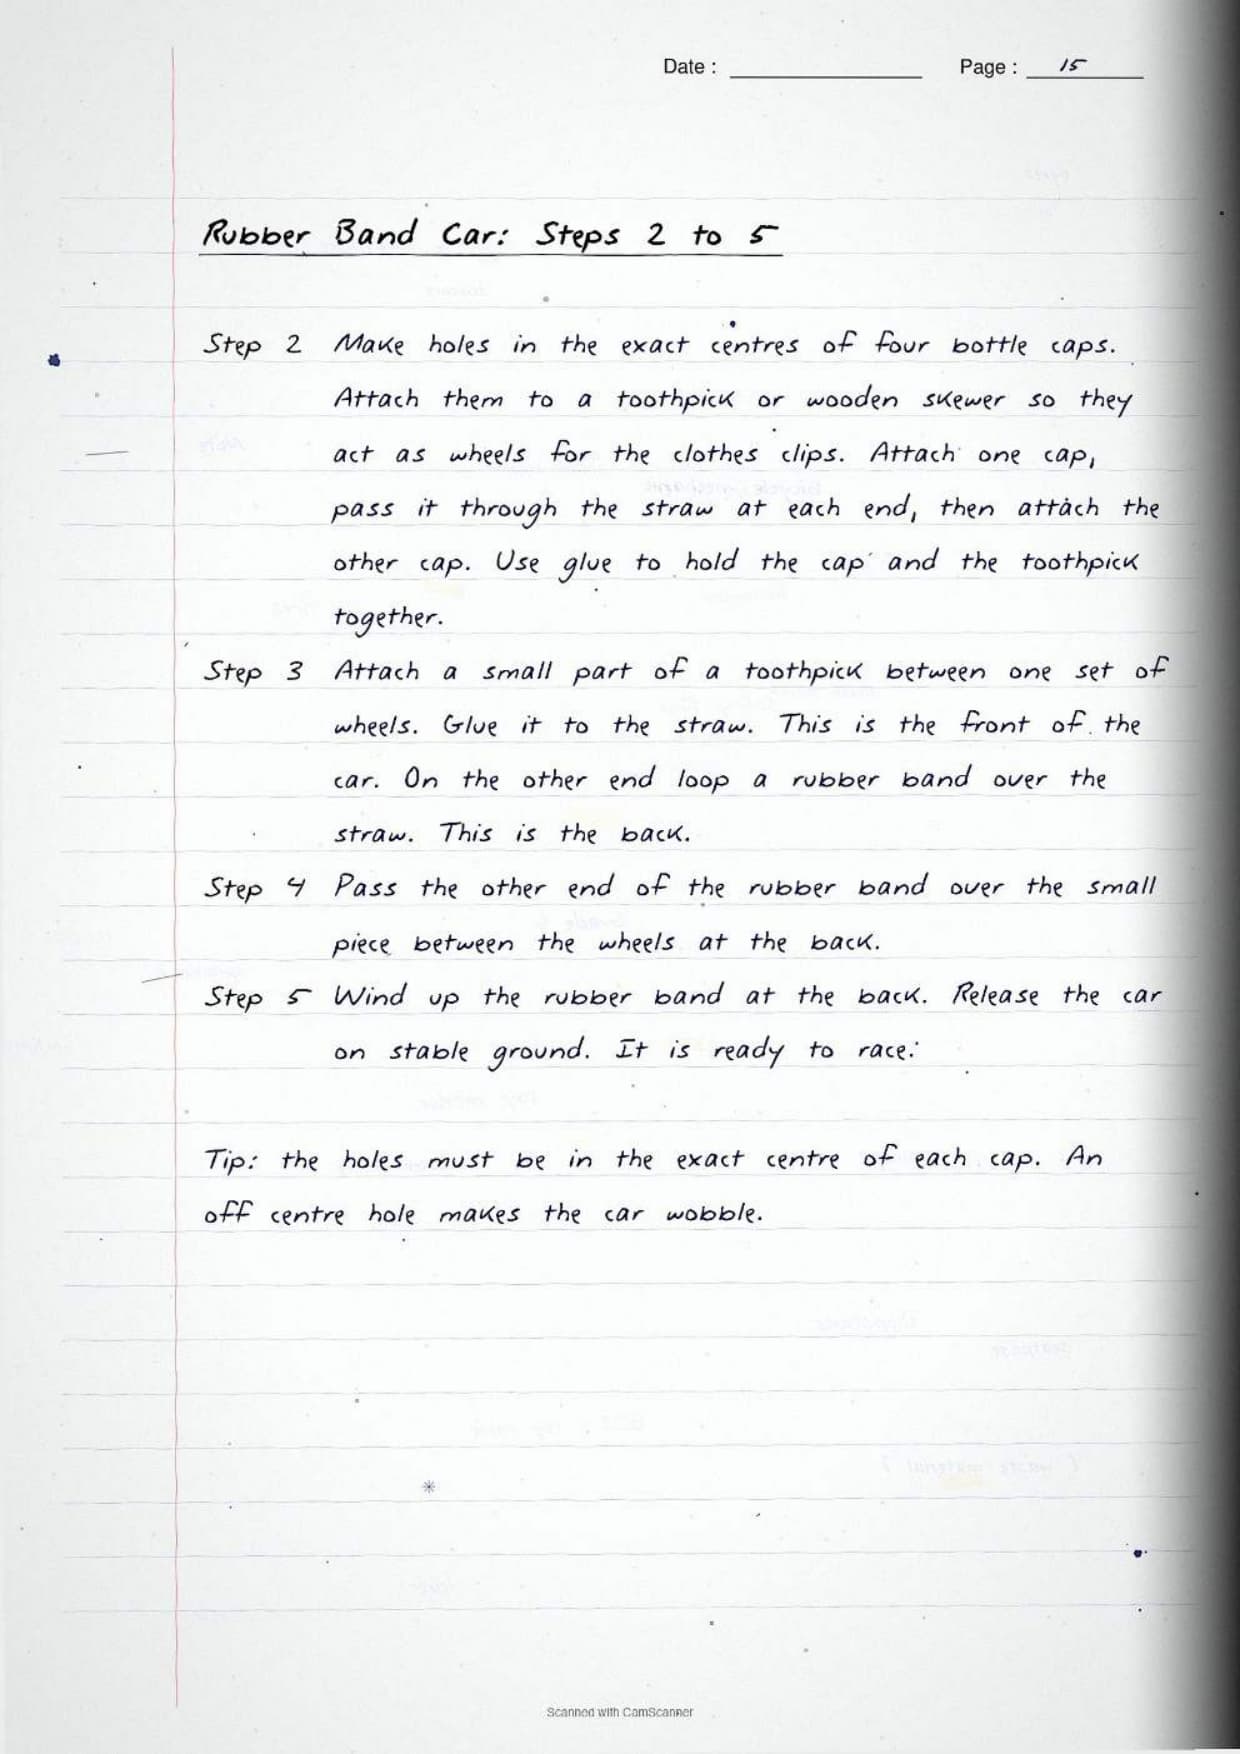
| Rubber band car (Figure 3.7) | Clothes clips, straws, chopsticks or toothpick, bottle caps, cellophane tape, scissors, rubber bands, glue | Wind the rubber band at the back, place the car on stable ground and release it |
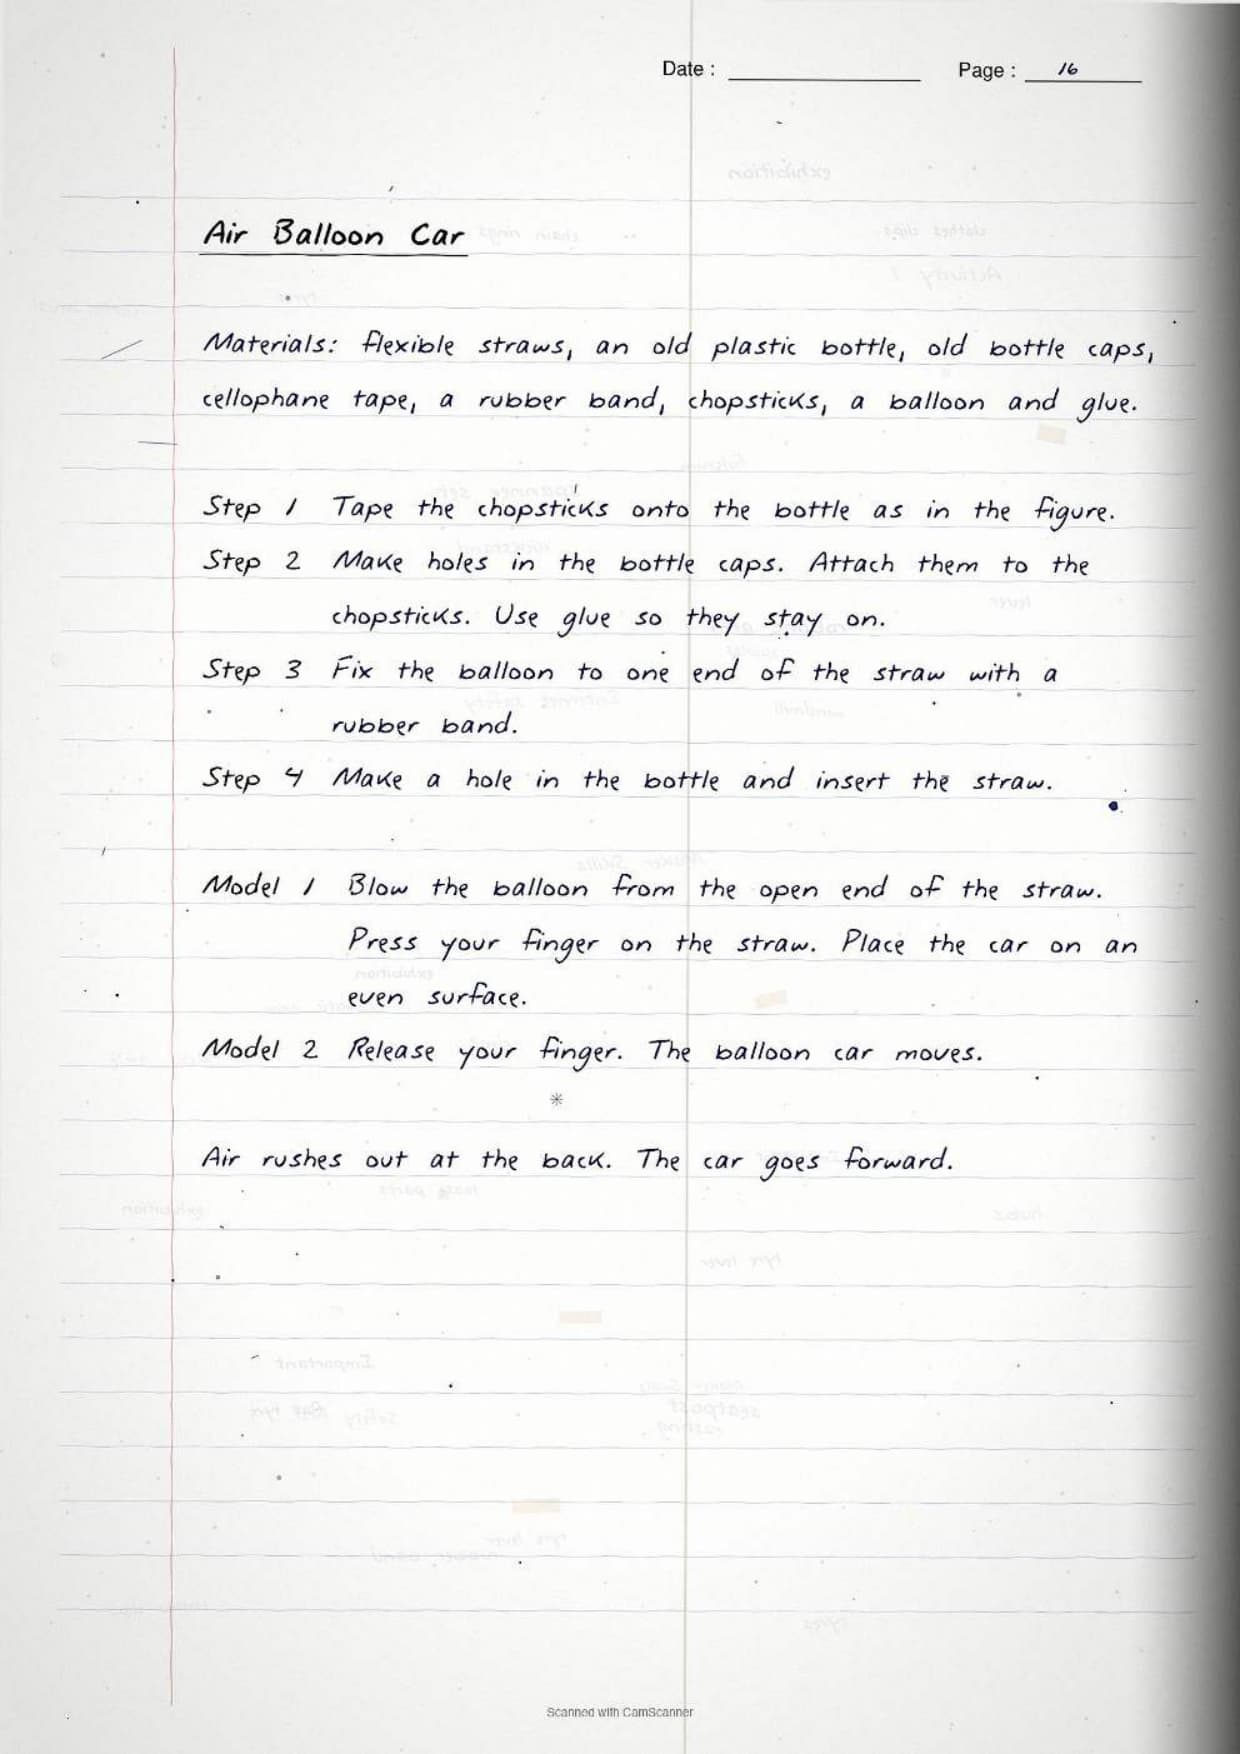
| Air balloon car (Figure 3.8) | Flexible straws, an old plastic bottle, old bottle caps, cellophane tape, a rubber band, chopsticks, balloon, glue | Blow the balloon through the open end of the straw, pinch the straw, place the car on an even surface and let go |
For the rubber band car, cut the straw long enough to join the two clothes clips a little apart. Make holes in the exact centres of four bottle caps, which become the wheels, and glue each cap to the toothpick so it does not slip. The front set is glued to the straw, and the rubber band loops over the straw at the back.
Combining Simple Machines to Build a Working Windmill
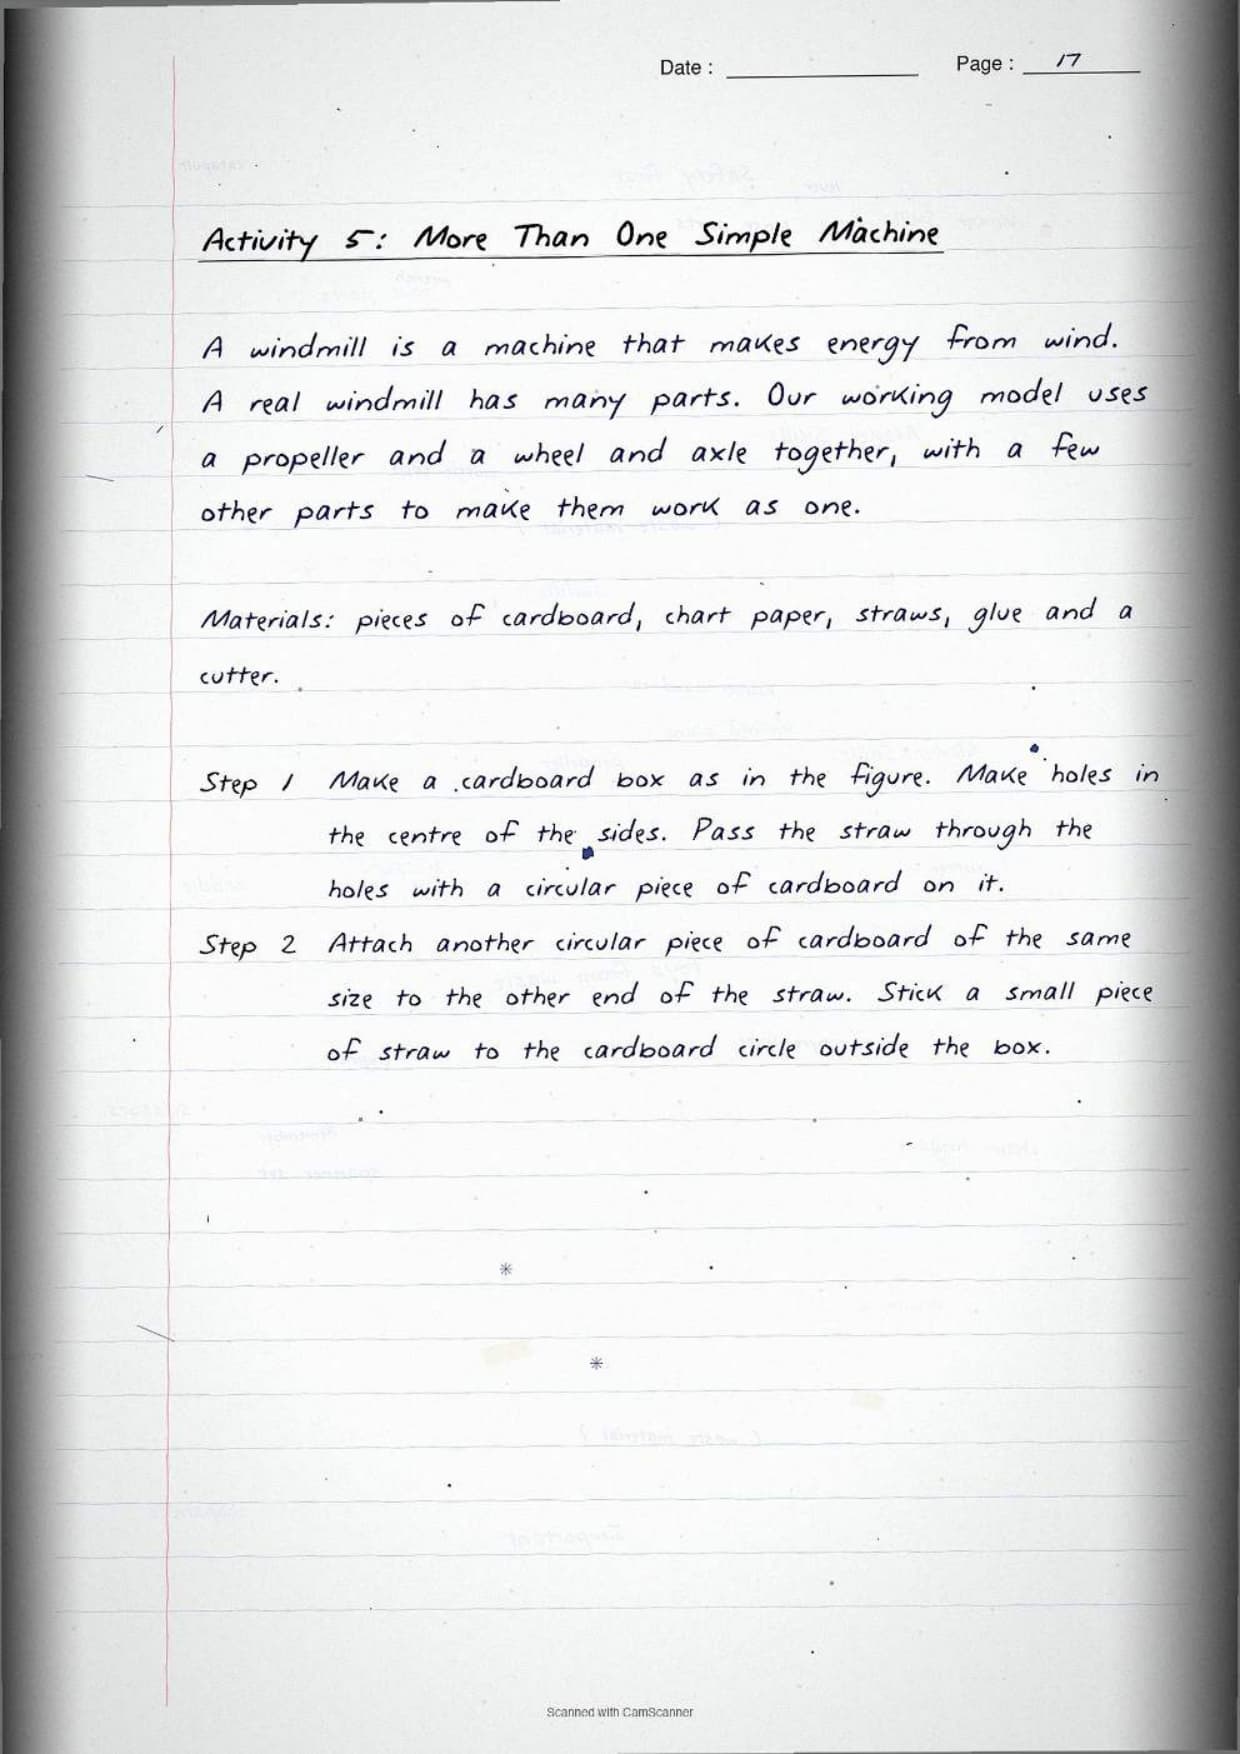
Activity 5 is the one build that uses more than one simple machine. A windmill is a machine that generates energy from wind. Your working model joins a propeller with a wheel and axle, plus other parts that let the two work together.
Materials are pieces of cardboard, chart paper, straws, glue and a cutter. Figure 3.9 gives five steps.
- Make a cardboard box. Make holes in the centre of the sides and pass a straw through, with a circular piece of cardboard on it.
- Attach another circular cardboard piece of the same size to the other end of the straw, and stick a short straw piece to the circle outside the box.
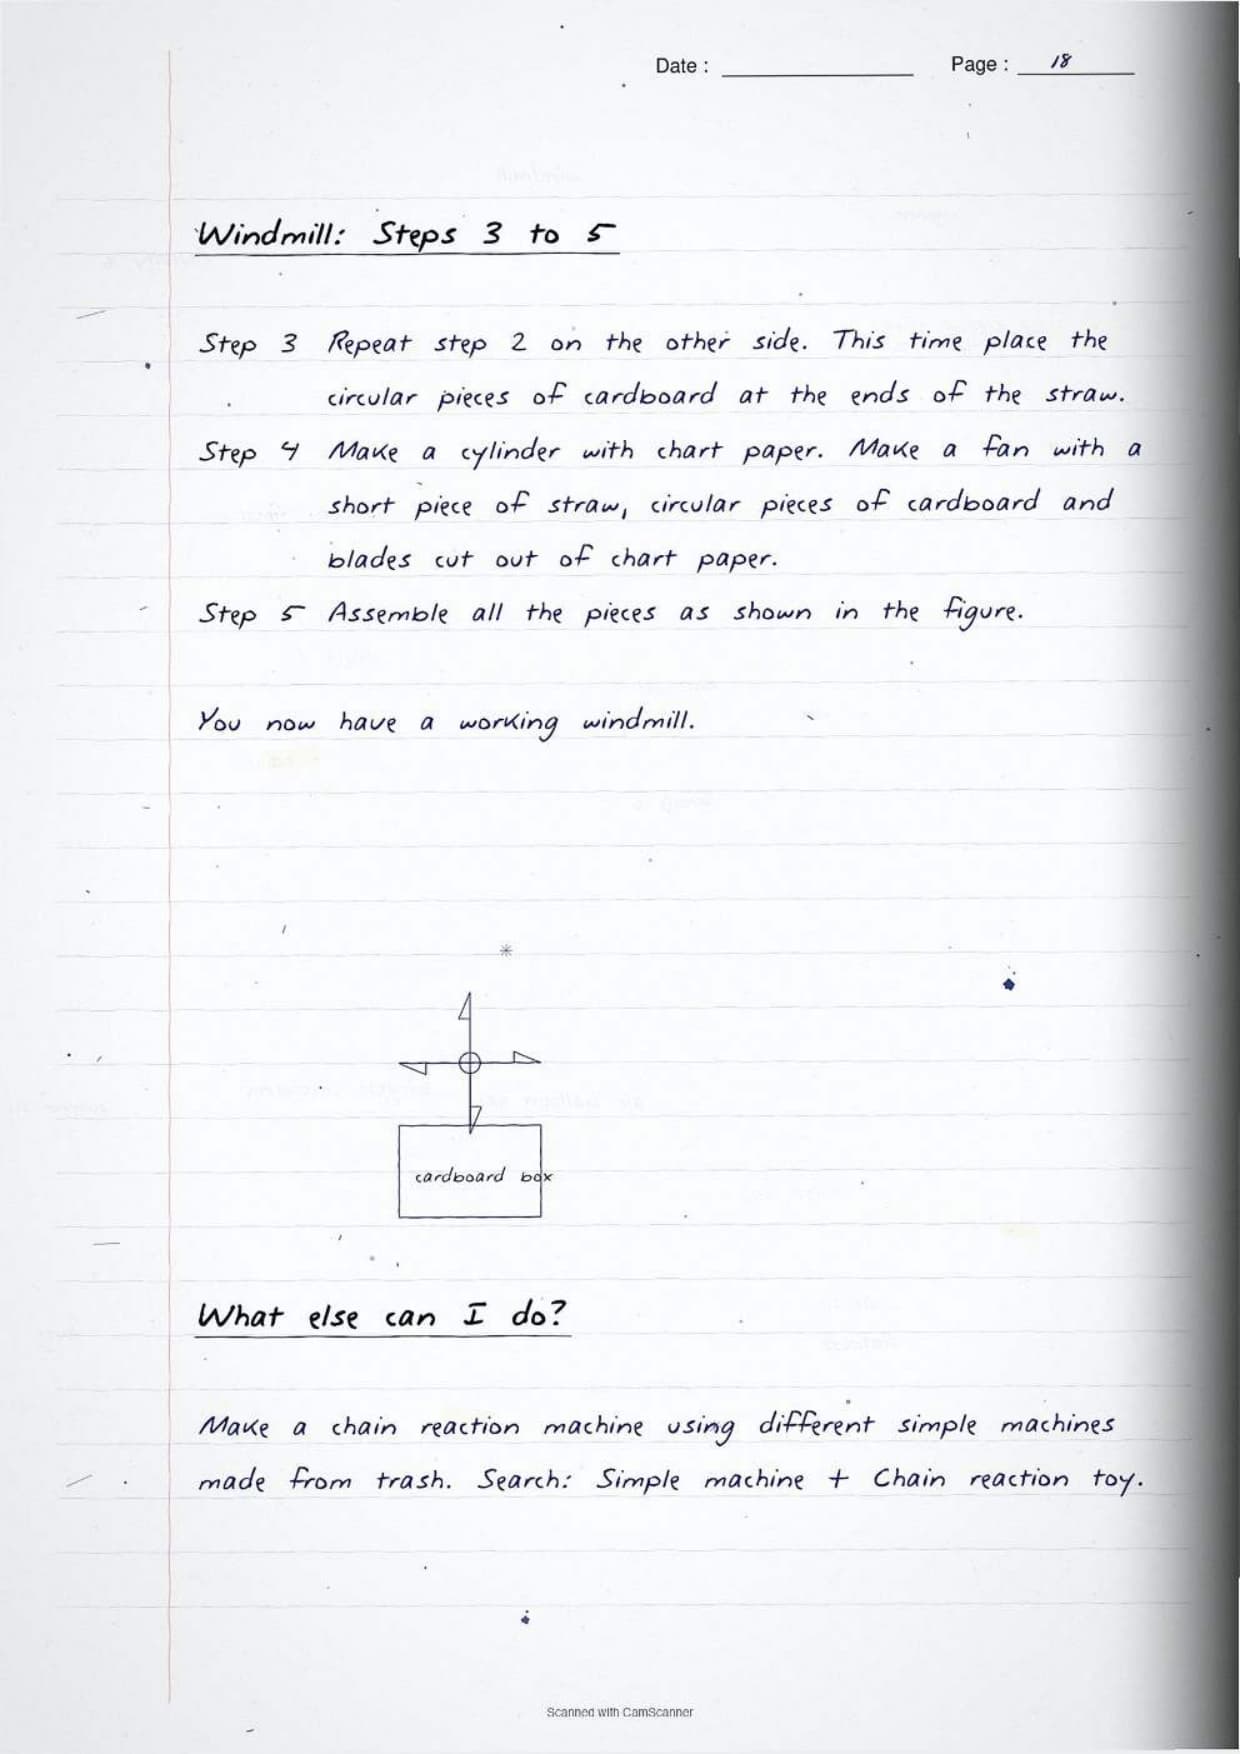
- Repeat step 2 on the other side, but place the circular pieces at the ends of the straw.
- Make a cylinder from chart paper. Make the fan from a short straw piece, circular cardboard and blades cut from chart paper.
- Assemble all the pieces as shown, and the windmill is ready to turn.
The book adds a small idea box here. ChatGPT is described as an AI chatbot, a smart intelligent assistant that uses information from the internet to answer questions. You may ask it for ideas on making fun things from waste material.
Simple Machines Inside a Bicycle and the Table 3.2 Parts List
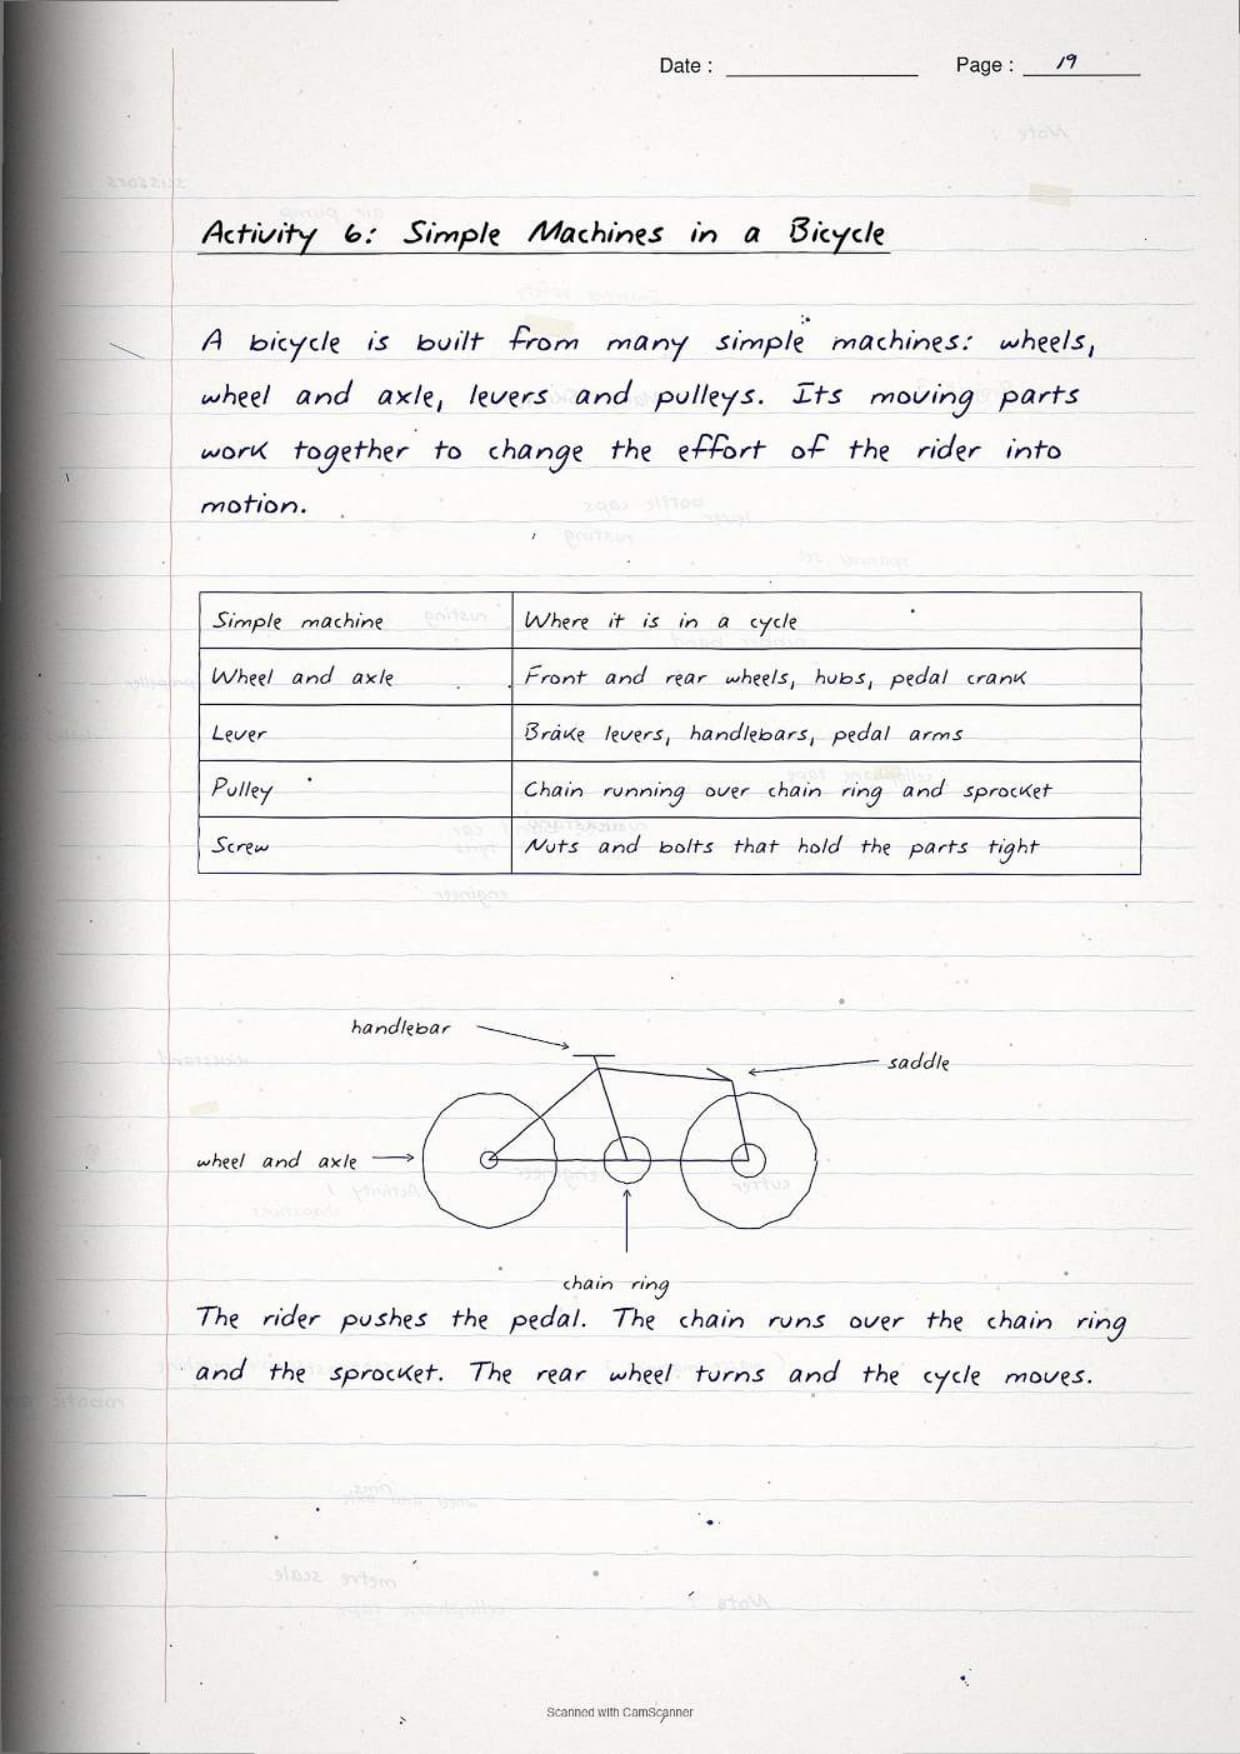
Activity 6 turns the project around. Instead of building a small machine, you take apart a big one in your head. A bicycle is made using wheels, wheel and axle, levers and pulleys, and all its moving parts work together to turn the effort of the rider into motion.
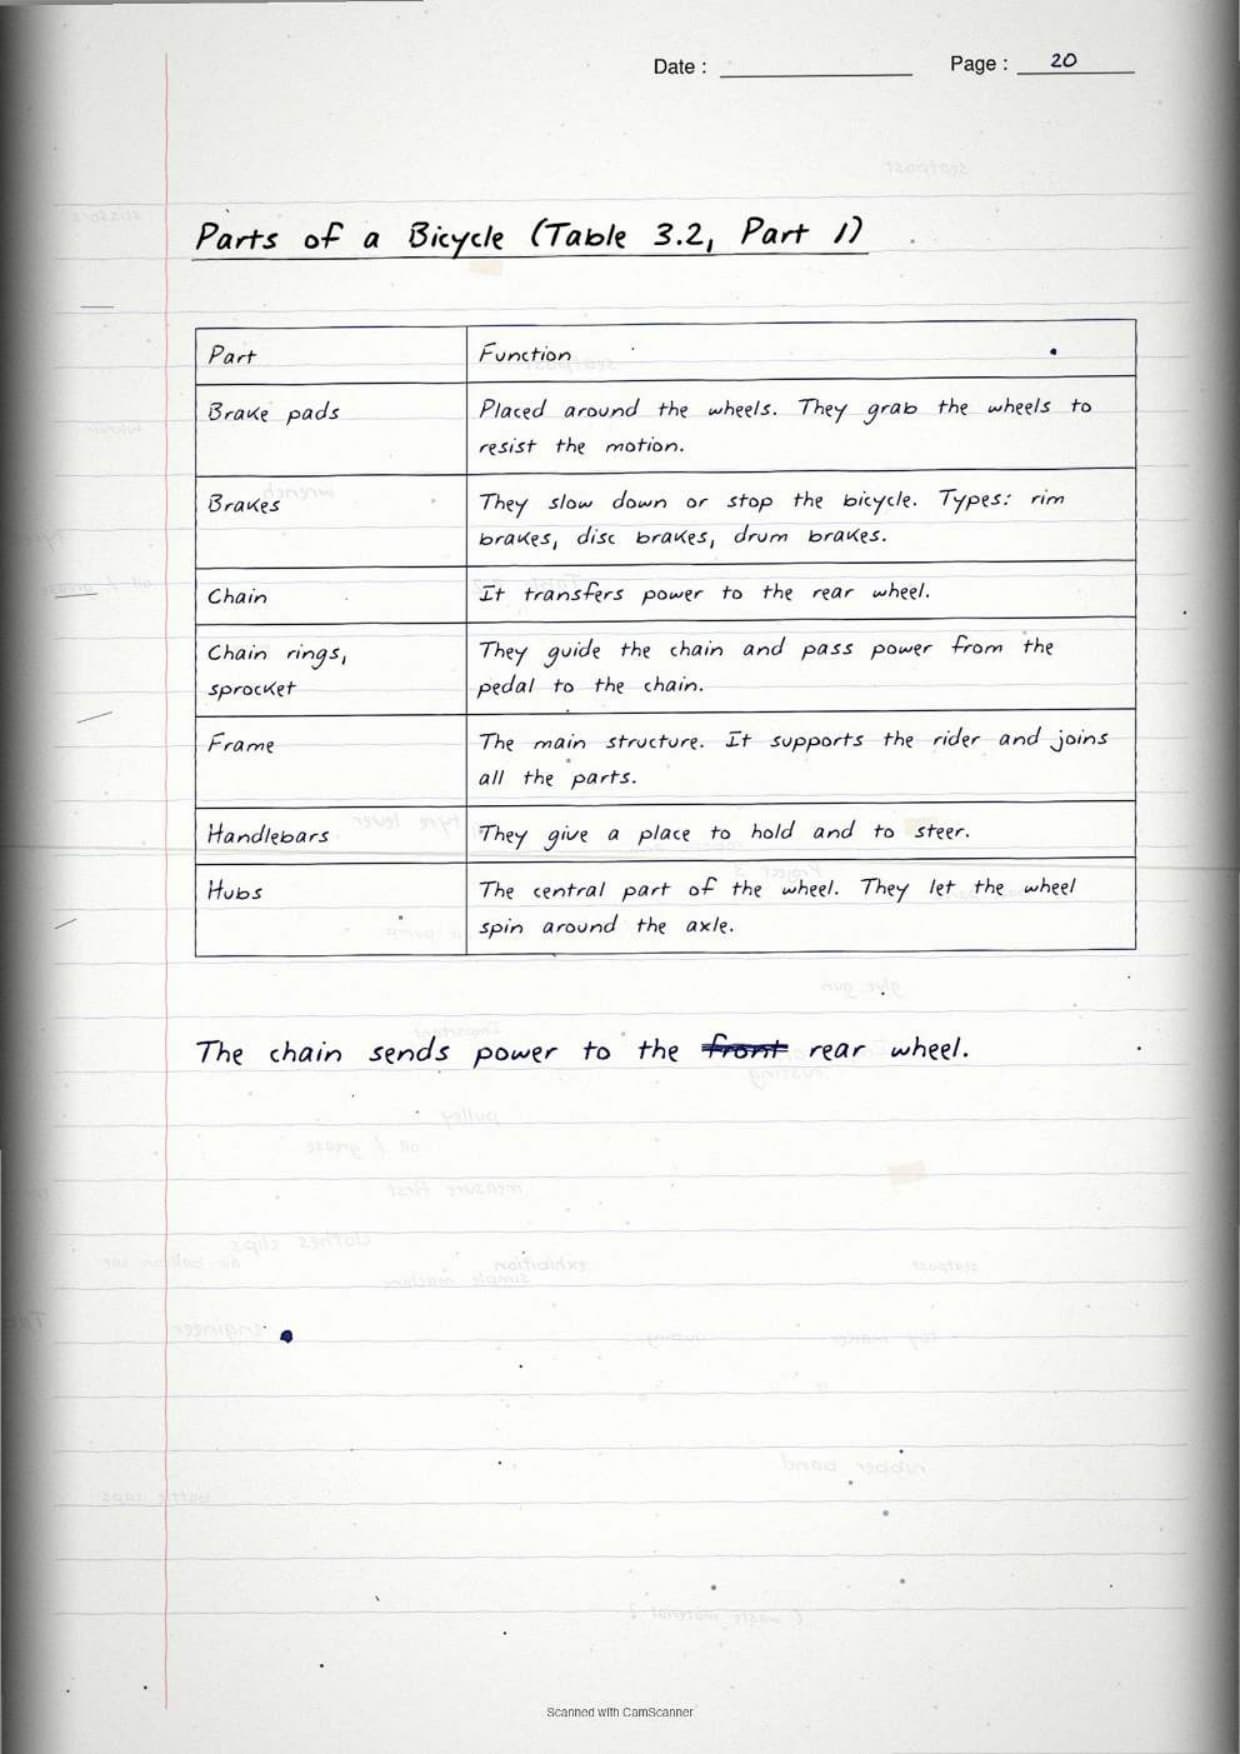
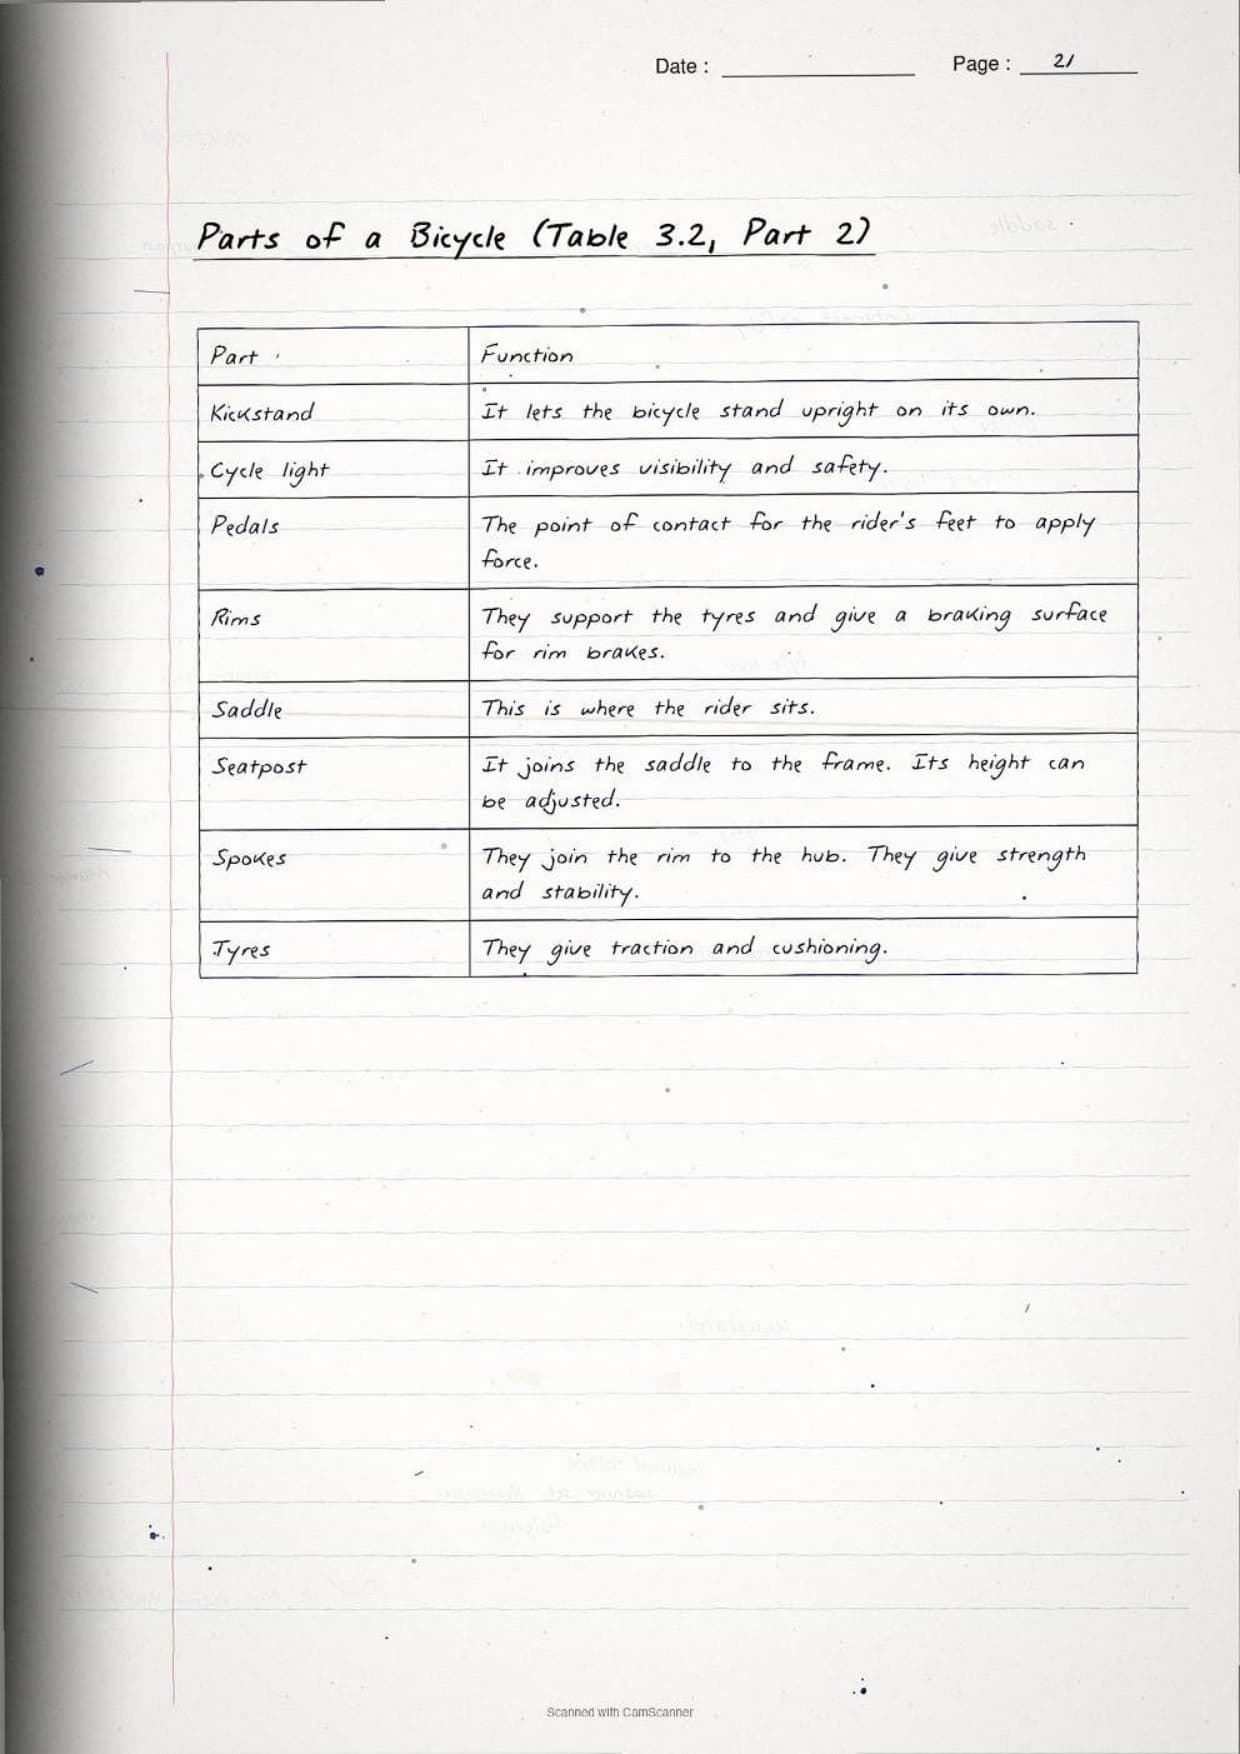
Table 3.2 lists fourteen parts with their functions. This is the longest table in the chapter and the most likely match the following question.
| Part | Function |
|---|---|
| Brake pads | Placed around the wheels and grab them to resist their motion |
| Brakes | Slow down or stop the bicycle. The types are rim brakes, disc brakes and drum brakes |
| Chain | Transfers power to the rear wheel |
| Chain rings and sprocket | Guide the chain and transmit power from pedal to chain |
| Frame | The main structure that supports the rider and connects all the parts |
| Handlebars | Provide a place to hold and steer the bicycle |
| Hubs | The central part of the wheel, letting the wheel spin around the axle |
| Kickstand | Lets the bicycle stand upright |
| Cycle light | Improves visibility and safety |
| Pedals | The point of contact for the rider's feet to apply force |
| Rims | Support the tyres and provide the braking surface for rim brakes |
| Saddle | Where the rider sits |
| Seatpost | Connects the saddle to the frame, usually of adjustable height |
| Spokes | Connect the rim to the hub and give strength and stability |
| Tyres | Provide traction and cushioning |
Tip: brake pads and brakes are separate rows in the book, and so are rims and tyres. Students merge them and lose a mark. Keep every row separate exactly as the book prints it.
Common Bicycle Problems, Their Fixes and the Table 3.3 Check
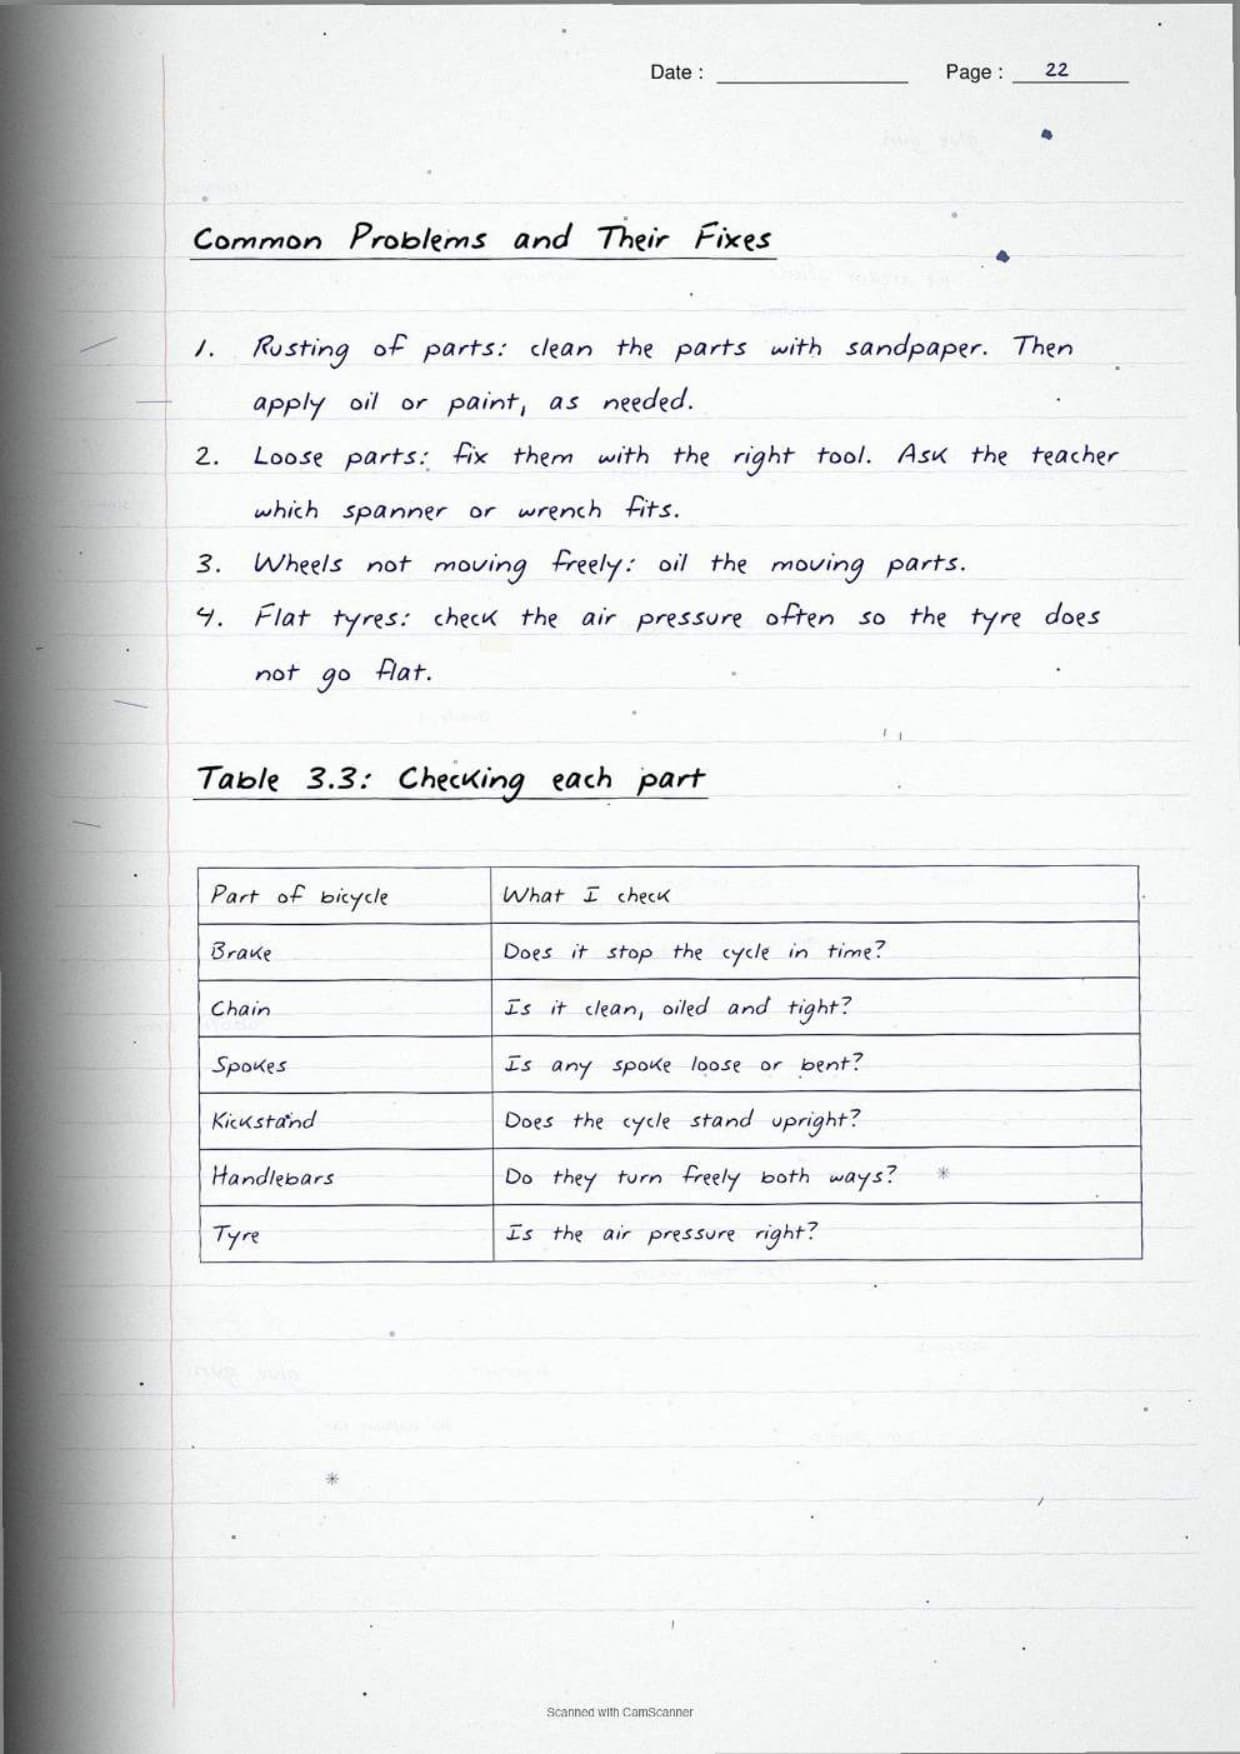
The book names four common bicycle problems with a fix for each. Learn them as problem and solution pairs, because the question is usually given as one half of the pair.
| Problem | What the book says you should do |
|---|---|
| Rusting of parts | Clean the parts with sandpaper, then apply oil or paint as needed |
| Loose parts | Fix them using the right tools. Ask your teacher which tool suits which part and write it down |
| Wheels not moving freely | Oil the moving parts |
| Flat tyres | Check air pressure in the tyres regularly so the problem does not start |
After that comes Table 3.3, the maintenance check. It has four columns and six named parts. You write the function of the part, whether it is working well, and whether you did anything to fix it.
- The six parts are brake, chain, spokes, kickstand, handlebars and tyre.
- The two answer columns are simple Yes or No entries.
- If a part needs more than a clean or an oiling, the book says you may seek help from experts at the bicycle repair shop.
Visiting a Bicycle Repair Shop and the Eight Questions to Ask the Mechanic
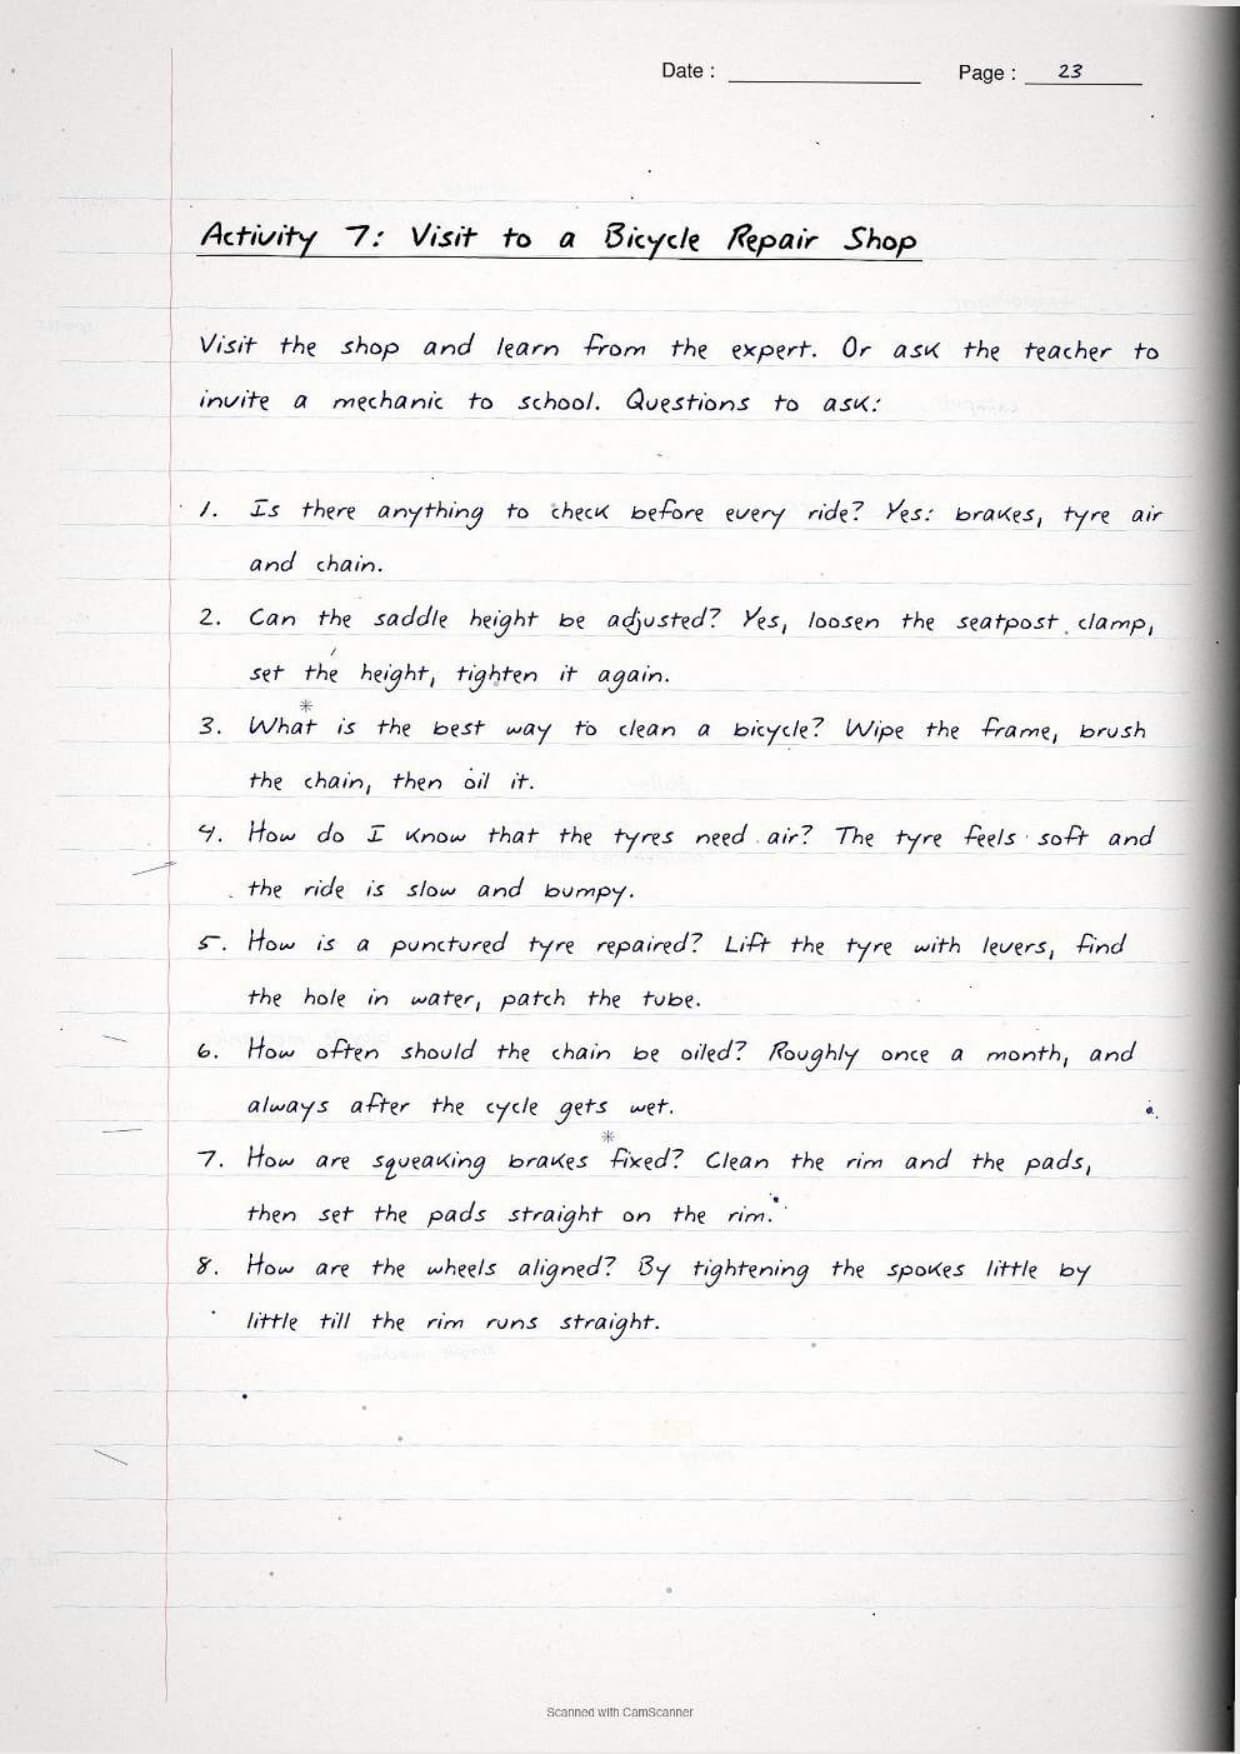
Activity 7 sends you to a bicycle repair shop, or brings a mechanic into the school. The book prints eight questions for you to ask, and these double as short answer questions in the class test.
- Is there anything that should be checked regularly before riding?
- Can the saddle height be adjusted, and how?
- What is the best way to clean a bicycle?
- How do you know that the tyres need to be inflated?
- How is a punctured tyre repaired?
- How often should the bicycle chain be oiled?
- How can squeaking brakes be fixed?
- How are the wheels of a bicycle aligned?
Write the mechanic's answer in his own words, not in textbook language. The project file is meant to show what you learnt from a real expert, and teachers give credit for that detail.
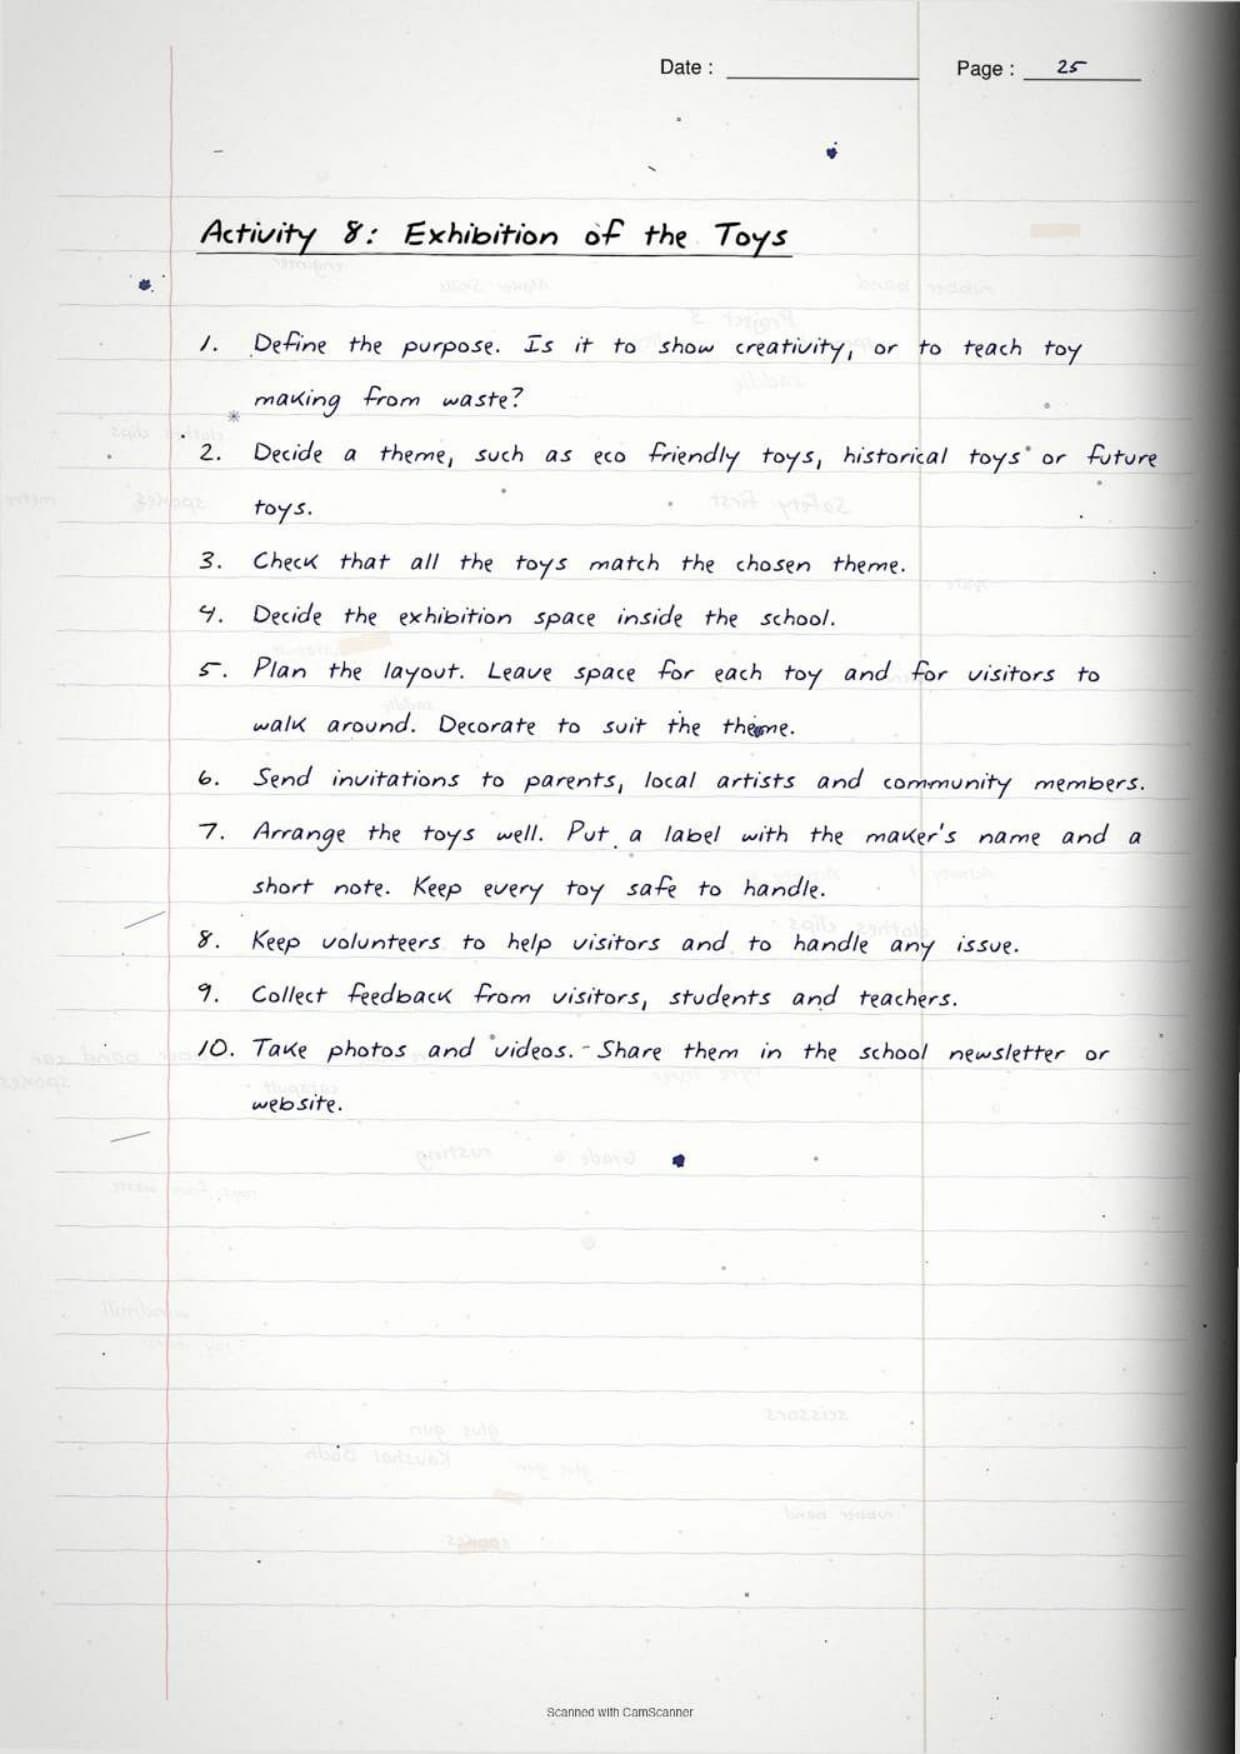
Organising the Toy Exhibition in Ten Steps
Activity 8 closes the project with an exhibition of the toys made by you and your peers. Ten planning steps are given in the book, and they group neatly into three stages.
Plan the event
- Define the purpose. It may be to raise awareness about the toys, to showcase creativity, or to teach how to make toys from waste.
- Decide a theme, such as eco-friendly toys, historical toys or futuristic toys.
- Make sure every toy on display matches the chosen theme.
Set up the space
- Choose the exhibition space inside the school.
- Plan the layout with room for each toy and for visitors to move around, and decorate to suit the theme.
- Send invitations to parents, local artists and community members.
- Arrange the toys attractively. Each one needs a label with the maker's name and a short description, and every toy must be safe to handle.
Run and close the event
- Have volunteers supervise, help visitors and manage any problem.
- Collect feedback from visitors, students and teachers.
- Take photos and videos, and share the highlights through the school newsletter or website.
Common Mistakes Students Make in the Maker Skills Chapter
Five slips that cost easy marks in the Class 6 project file and class test:
- Calling a bicycle a simple machine. A bicycle is a complex machine built from simple machines such as levers, pulleys and wheel and axle.
- Mixing up the catapult and the robotic arm. The catapult uses a single lever. The lazy tongs and the robotic arm use multiple levers.
- Forgetting that the windmill uses two machines. It combines a propeller with a wheel and axle, so naming only one loses the mark.
- Writing brake and brake pad as the same part. Brake pads grab the wheel to resist motion. Brakes are the whole system that slows or stops the bicycle.
- Skipping the sketch. After every build the book asks for a labelled sketch with measurements at each joint, even if you paste a photograph.
Tick each slip off only after you have written the correct answer once. Students who did this said the simple machine question stopped costing them marks after two attempts.
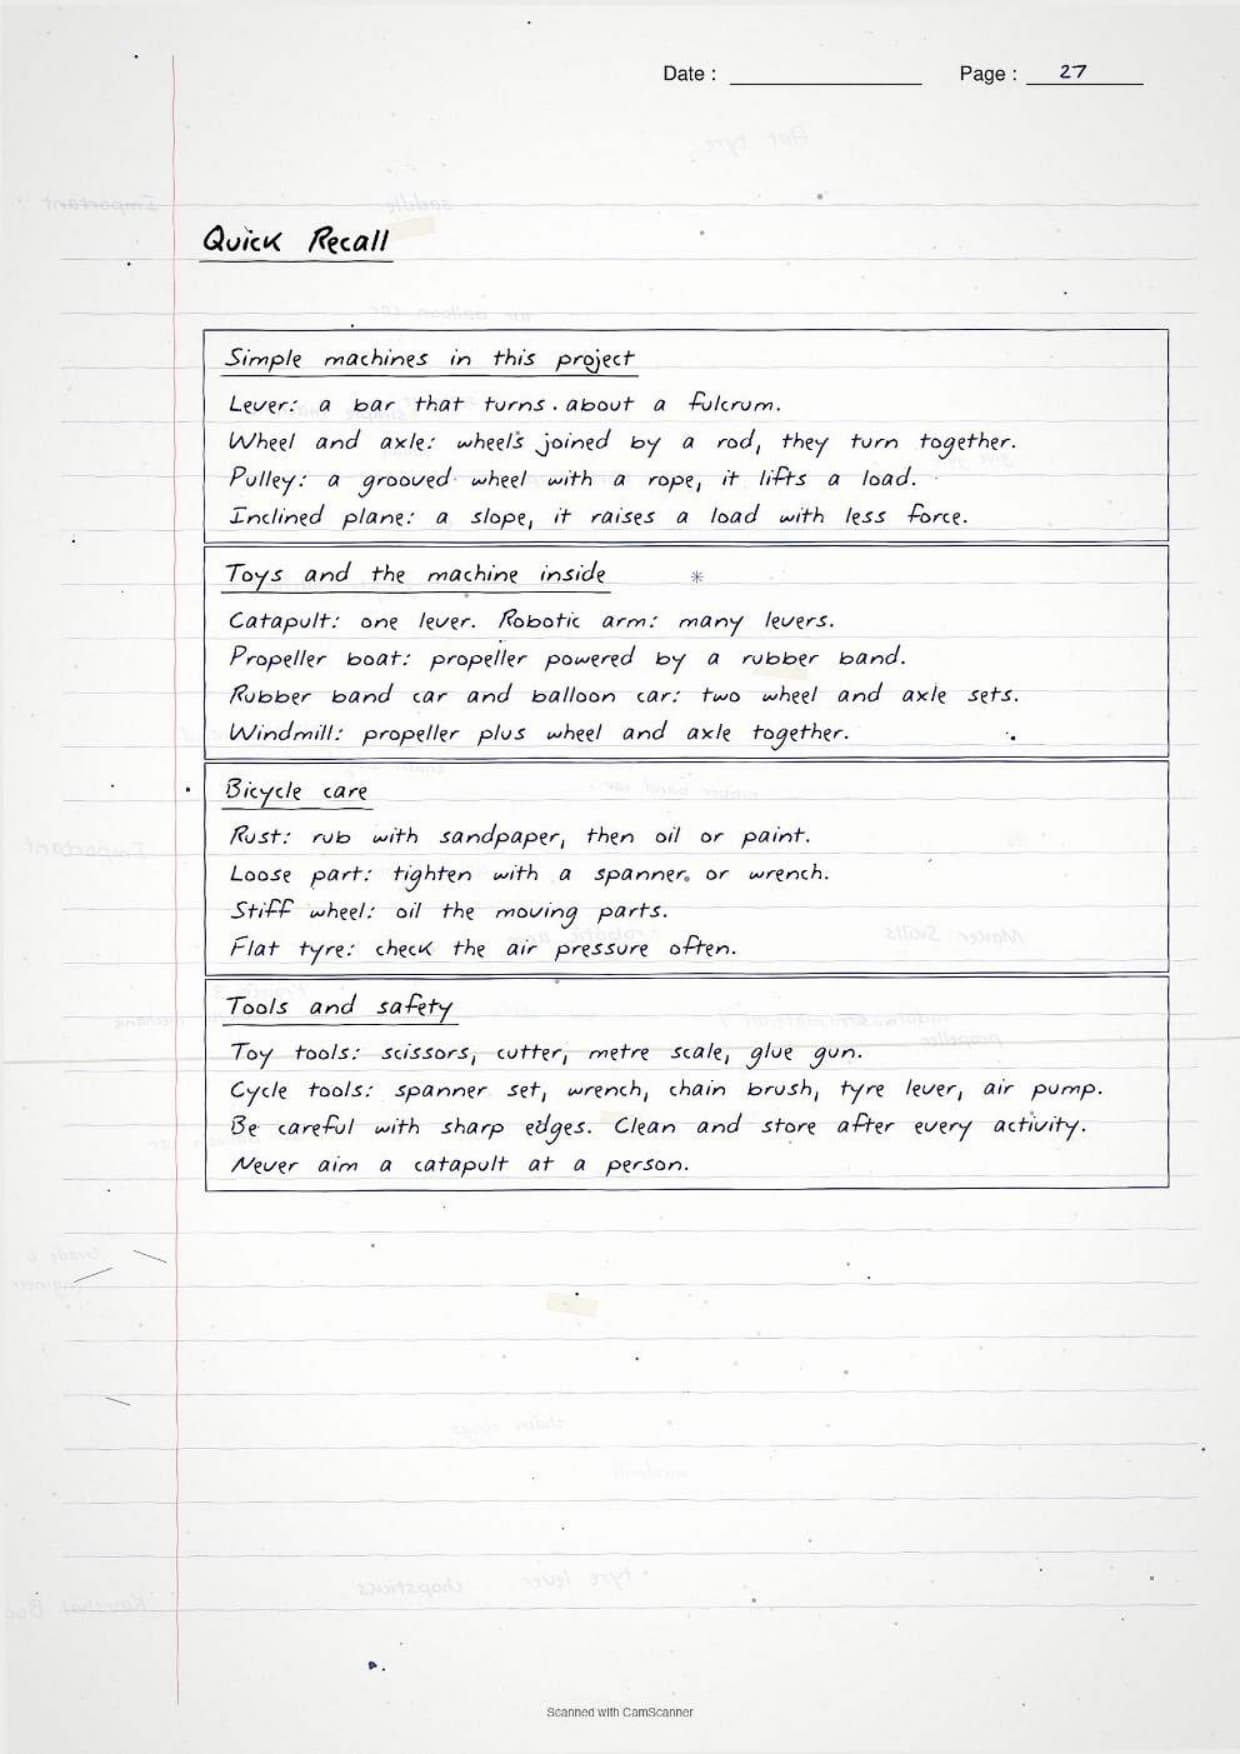
Quick Recall Sheet: Every Term from the Maker Skills Chapter
This is the page to read the night before the class test and once again in the morning. Everything the chapter can ask sits in one place.
| Term | One-line meaning |
|---|---|
| Simple machine | A basic device that makes work easier and lets us do what our hands alone cannot |
| Complex machine | A machine built by joining many simple machines, such as a bicycle or a bus |
| Lever | A fixed bar or handle that moves around a fixed point |
| Fulcrum | The fixed point or hinge that a lever turns around |
| Wheel and axle | Wheels held together by a rod so that they turn together and carry a load |
| Pulley | A simple machine used to lift heavy objects |
| Propeller | A wheel with blades that pushes through water or air to cause movement |
| Inclined plane | A slope used since ancient times to move heavy stone upward |
| Windmill | A machine that generates energy from wind |
| Chain rings and sprocket | Guide the chain and pass power from the pedal to the chain |
| Hub | The centre of the wheel, letting it spin around the axle |
| Spokes | Connect the rim to the hub and give the wheel strength |
| DIY | Do It Yourself, the search keyword the book tells you to use |
| Chain reaction machine | The extra build suggested at the end, made from several simple machines out of trash |
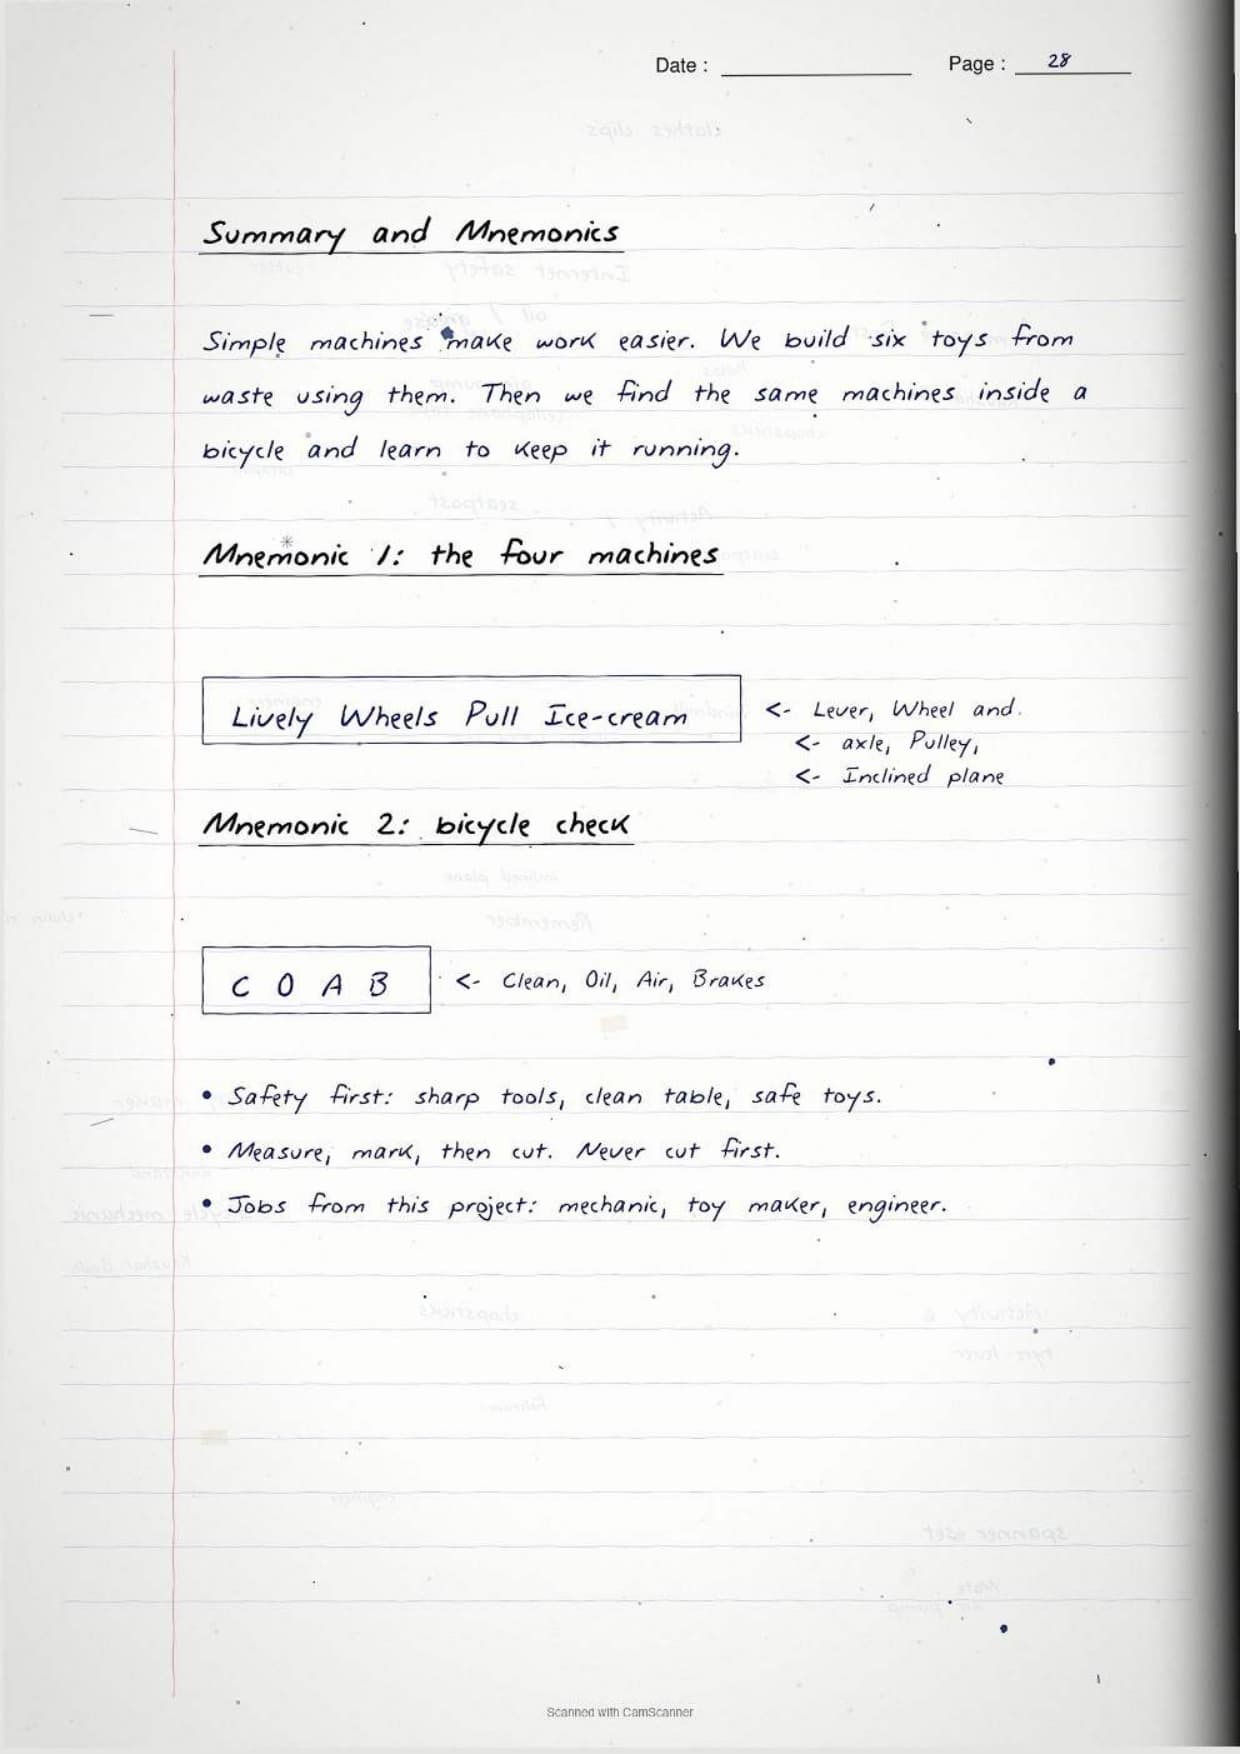
The notebook also carries a short memory line for the order of work: Look, Lever, Propel, Roll, Ride.
What the Maker Skills Class 6 Handwritten Notes PDF Contains
The file is a handwritten notebook, with sub-headings in colour and the bicycle tables boxed by hand. Nothing is typed, so it reads like a classmate's own notes.
- Pages 1 to 5: cover page, what the project covers, the four outcomes, and simple machines versus complex machines.
- Pages 6 to 10: the ancient architecture box, the full materials and tools lists, the safety rules and Table 3.1.
- Pages 11 to 17: levers with the catapult and robotic arm steps, the propeller boat steps, and the two wheel and axle cars.
- Pages 18 to 22: the windmill build, Table 3.2 with all fourteen bicycle parts, and the four common bicycle problems.
- Pages 23 to 28: Table 3.3, the eight mechanic questions, the ten exhibition steps, the mistake list and a one-page summary.
How to Use the Maker Skills Handwritten Notes Most Effectively
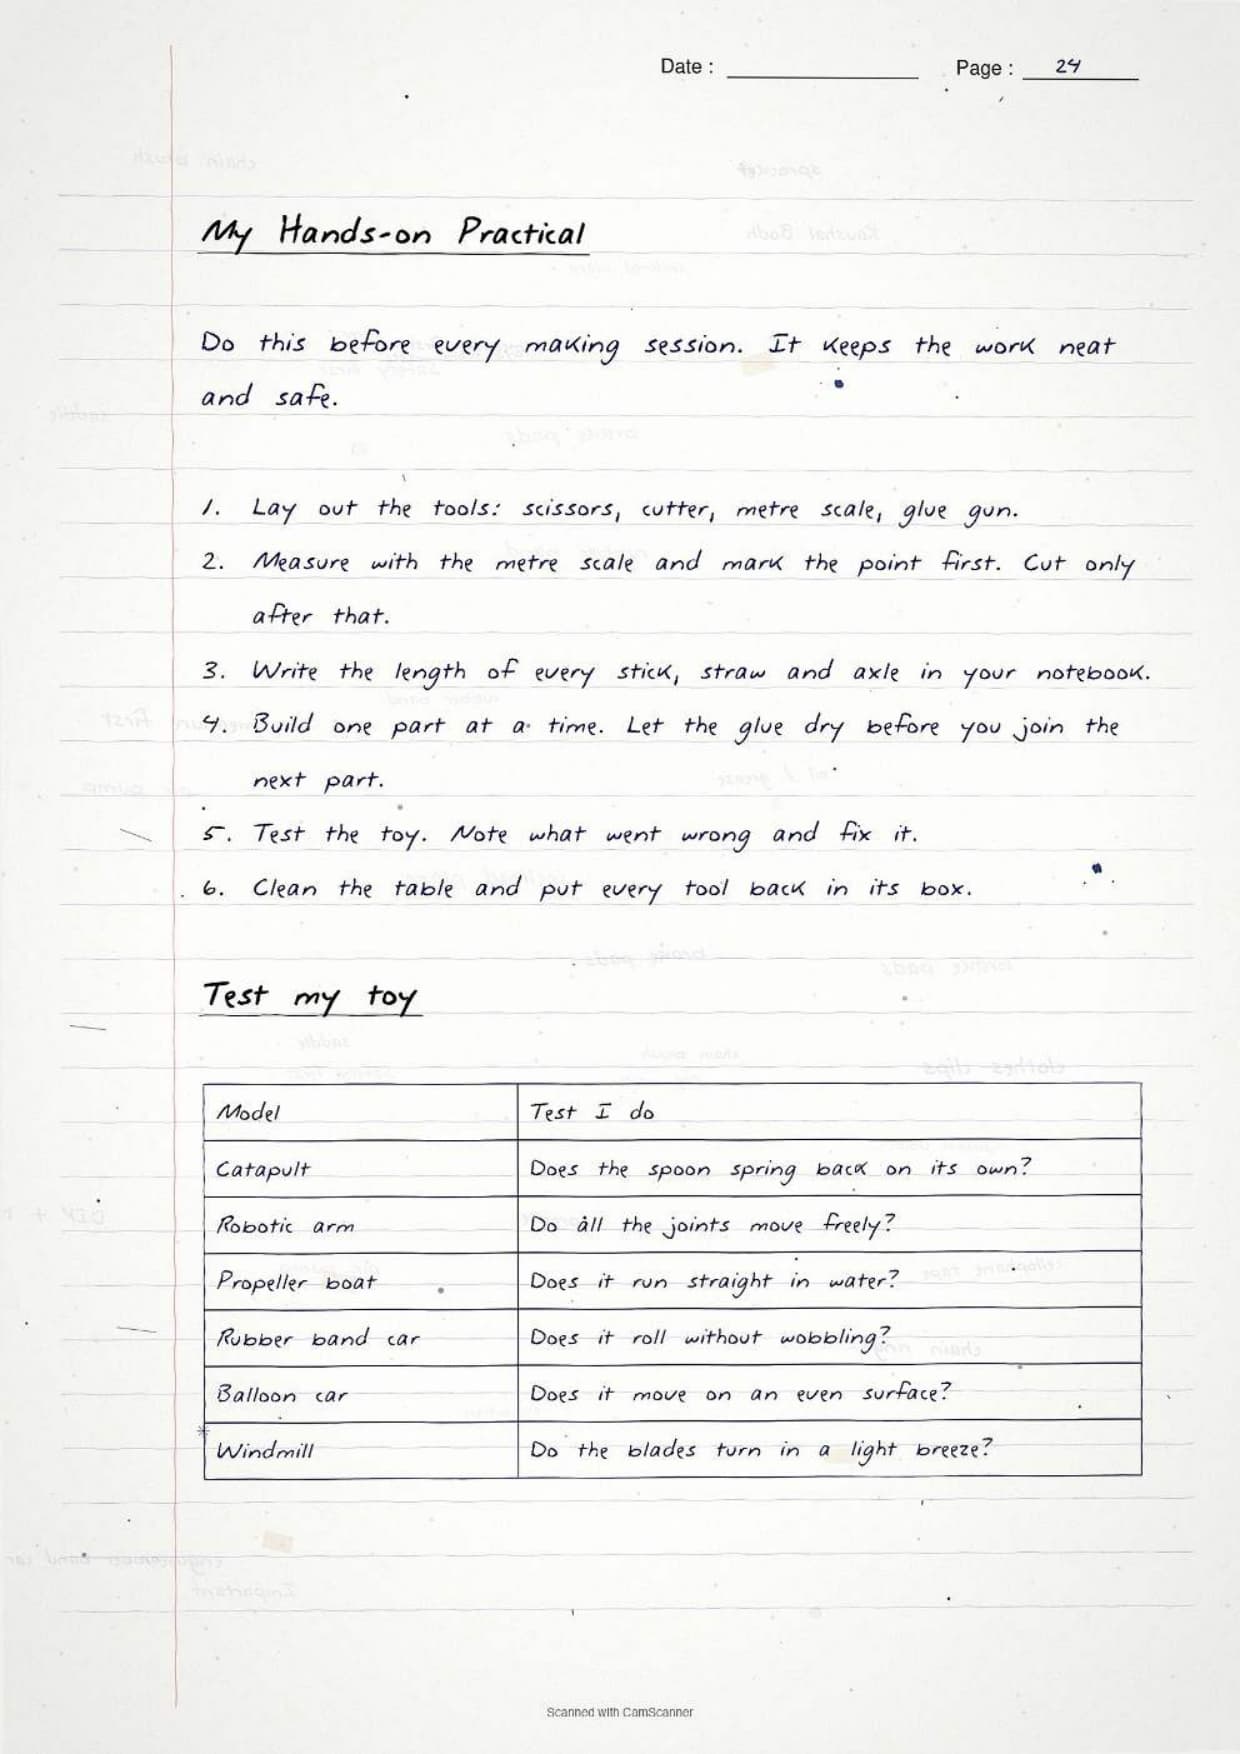
This chapter is a hands-on project, so reading alone is not enough. Split it into three short blocks and keep the notebook open beside your work table while you build.
- Block 1, 30 minutes. Read the four outcomes, the simple machine table and the ancient architecture box. Then name five simple machines you can see at home.
- Block 2, 40 minutes. Learn the lever, propeller and wheel and axle definitions. Build one toy and sketch it with measurements.
- Block 3, 35 minutes. Copy Table 3.2 once from memory, then fill Table 3.3 with a real bicycle in front of you.
- Night before, 10 minutes. Quick recall table, the four bicycle problems and the five common mistakes, nothing else.
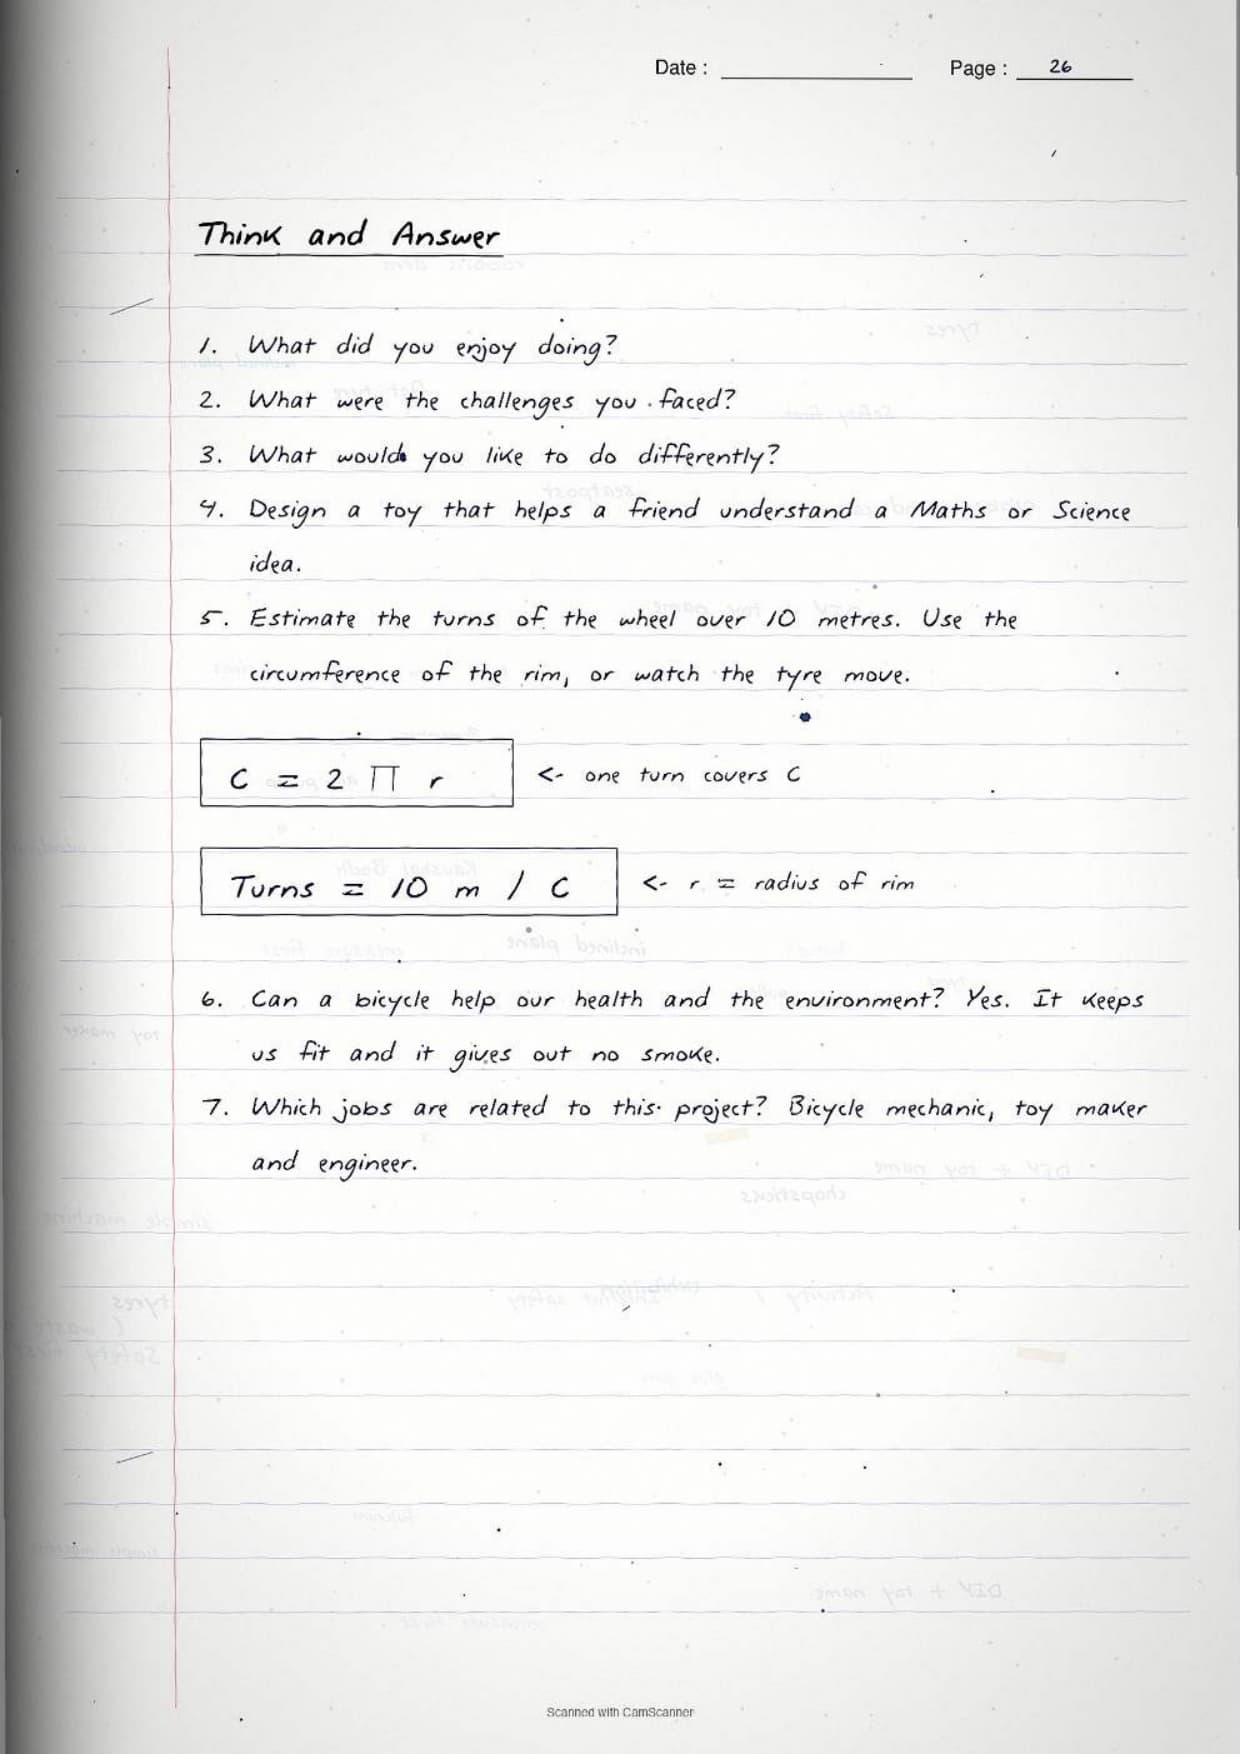
The chapter ends with Think and Answer. It asks what you enjoyed, what was hard, and what you would do differently. It also asks you to estimate how many times a wheel turns over 10 metres using the circumference of the rim, and to say how cycling helps your health and the environment. The jobs it names are bicycle mechanic, toy maker and engineer.
How These Handwritten Notes Pair with the Chapter Notes and the Kaushal Bodh Book PDF
Also Check: the same chapter is being built in other formats on Collegedunia. Read the book chapter first, keep the typed notes for detail, and use the handwritten pages for the last revision round.
| Resource | Best used for | Open it |
|---|---|---|
| Revision Notes | Typed chapter notes with every activity and both bicycle tables explained in full | Maker Skills Class 6 Notes (coming soon) |
| NCERT Book PDF | The official Kaushal Bodh chapter with all the build figures and original tables | Maker Skills Class 6 Book PDF (coming soon) |
| Previous chapter | The project on recording the plants and animals around your school | Biodiversity Register Class 6 Handwritten Notes |
| Next chapter | The project on making your own animations and simple games | Animation and Games Class 6 Handwritten Notes |
NCERT Handwritten Notes for Class 6 Vocational Education Kaushal Bodh: All Chapters
Related Links: handwritten revision notes for every chapter of the Class 6 Kaushal Bodh textbook, written to the 2026-27 syllabus.
| Chapter | Class 6 Vocational Education Kaushal Bodh Handwritten Notes |
|---|---|
| Chapter 1 | School Kitchen Garden Class 6 Handwritten Notes |
| Chapter 2 | Biodiversity Register Class 6 Handwritten Notes |
| Chapter 3 | Maker Skills Class 6 Handwritten Notes (this page) |
| Chapter 4 | Animation and Games Class 6 Handwritten Notes |
| Chapter 5 | School Museum Class 6 Handwritten Notes |
| Chapter 6 | Cooking without Fire Class 6 Handwritten Notes (coming soon) |
Maker Skills Class 6 Handwritten Notes FAQs
Questions Students Ask About the Maker Skills Notes
Ques. What is a simple machine in Class 6 Vocational Education Chapter 3?
Ans. A simple machine is a basic device that makes work easier. It helps us do things beyond our capacity, which are difficult or simply not possible by hand. A cart with a wheel and axle moves very heavy objects with less force, and a pulley lifts heavy objects. The book names levers, wheel and axle, pulleys, propellers and inclined planes.
Ques. What is the difference between a simple machine and a complex machine?
Ans. A simple machine is one basic device, such as a lever or a pulley. A complex machine is built by joining many simple machines so that they work together. Bicycles, toys, buses, cycle rickshaws and autorickshaws are complex machines. Even a big bus is made up of many interconnected small machines.
Ques. Which toys can be made in the Maker Skills project?
Ans. The book lists six working models. They are the catapult, the robotic arm, the elastic band propeller boat, the balloon car, the rubber band car and the windmill. Lazy tongs are also named as a lever toy. All of them are built from waste material such as ice cream sticks, bottle caps, straws, cardboard and rubber bands.
Ques. What is a lever and which toys use it?
Ans. A lever is a fixed bar or handle that moves around a fixed point called the hinge or fulcrum. A spoon used to open a tin lid and a seesaw are everyday examples. The simple catapult uses a single lever, while the lazy tongs and the robotic arm use multiple levers.
Ques. What is a propeller and how does the elastic band boat work?
Ans. A propeller is a wheel with blades. As the wheel moves, the blades help movement by pushing through water or air. In the boat you make slits in bottle caps and fix ice cream sticks into them to form paddle wheels, pass a straw through, then tie a rubber band from the tip of the boat to the middle of the straw. Winding the rubber band and placing the boat in water makes it move.
Ques. What is a wheel and axle in Chapter 3 Maker Skills?
Ans. A wheel and axle is a simple machine made of wheels held together by a rod so that they move together. With two sets of wheel and axle, the sets balance each other and can carry loads of any shape placed above them. Car wheels are the common example, and both the rubber band car and the air balloon car use two sets.
Ques. Which simple machines are combined to make the working model of a windmill?
Ans. A windmill is a machine that generates energy from wind. The working model in the book combines a propeller with a wheel and axle, along with other parts that let these machines work together. It is built from cardboard, chart paper, straws, glue and a cutter, and Figure 3.9 shows the five assembly steps.
Ques. Which simple machines are found in a bicycle?
Ans. A bicycle is made using wheels, wheel and axle, levers and pulleys. All its moving parts, including wheels, gears and pedals, work together to turn the effort of the rider into motion. That is why the book uses the bicycle as its example of a complex machine built from simple machines.
Ques. What are the main parts of a bicycle and their functions?
Ans. Table 3.2 lists them. Brake pads grab the wheels to resist motion, brakes slow or stop the bicycle, the chain transfers power to the rear wheel, and chain rings with the sprocket guide the chain from the pedal. The frame supports the rider, handlebars steer, hubs let the wheel spin around the axle, and spokes join rim to hub. Pedals, rims, tyres, saddle, seatpost, kickstand and cycle light complete the list.
Ques. What are the common bicycle problems and how are they fixed?
Ans. The book names four. Rusting of parts is fixed by cleaning with sandpaper and applying oil or paint. Loose parts are fixed with the right tools. Wheels that do not move freely need the moving parts oiled. Flat tyres are avoided by checking air pressure regularly.
Ques. What tools and materials are needed for the Maker Skills project?
Ans. For the toys you need scissors, a metre scale and a cutter, plus cardboard, plastic bottles and caps, straws, ice cream sticks, thread, rubber bands, glue, tape, clothes clips, balloons and chopsticks. For the bicycle work you need at least 5 to 6 bicycles, oil or grease, a spanner set, wrenches, a chain brush, tyre levers and an air pump.
Ques. Which jobs are related to the Maker Skills project?
Ans. The book names bicycle mechanic, toy maker and engineer. The project also suggests visiting a bicycle repair shop or inviting a mechanic to school, so a repair shop owner is another useful answer for your project file.
Ques. Where can I download the Class 6 Vocational Education Chapter 3 handwritten notes PDF?
Ans. Use the download option at the top of this page. The file is free and printable, runs to 28 handwritten pages, and follows the 2026-27 Kaushal Bodh chapter order, so it can sit open beside the textbook and your project file while you build each working model.



Comments